
Building Hasegawa's 1/48 P-47
By Larry Hornya
History Without a doubt one of the most exceptional aircraft of the Second World War was Republic’s monster single seat P-47 Thunderbolt. Perhaps the greatest testament to this aircraft’s power and reliability are the countless documented accounts of it bringing it’s pilots home despite severe damage to airframe or engine or sometimes both! Tracing it’s lineage back to the Seversky P-35, the P-47 was perhaps the epitome of the stable heavy gun platform on a fighter for it’s time. Hasegawa’s recent release of the bubble top version has finally been followed up with a "90's" tooling of the razorback. Many of us grew up with Monogram’s nicely done effort, but Hasegawa’s new kit is really a jewel and well worth the new tooling. The Kit According to the kit instructions, this kit will build a P-47D-10 through -21. As far as I researched the topic, Hasegawa has Painting and decals I prefer acrylic paints and used Polly Scale’s olive drab and neutral grey. I wanted to build one of Hub Zemke’s airplanes since I am a big fan of his, but I decided to choose one of the simplest schemes I could find. This particular aircraft had the white tail ID bands over-painted Conclusion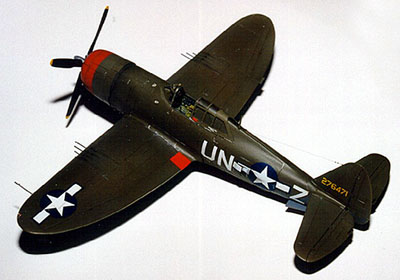
 done their homework. Molded in light grey plastic (Hasegawa’s standard) with a two piece canopy, the kit also comes with the standard options that would be associated with the above variants. Two propeller options are included, the Curtiss Electric narrow 12'2'’ and the wider blade Curtiss Electric for the later sub-variants. Although there are now a few after-market interior sets for this kit, the kit interior is adequate. I chose to put in a resin seat from True Details but was happy enough for the rest of the interior. I also built this kit for a special theme contest that our local IPMS chapter held that was specifically for this kit, so time was a constraint and I didn’t go hog wild with aftermarket stuff. Since many modelers in our local club built this kit at the same time, many of us exchanged feedback on the kits high and low points. I have always found that for some reason, Hasegawa has had a bit of a problem with wing root fit. Many of my fellow club members had the same problem with their P-47's but for some reason, I did not. In fact I found on my kit that the wings had a gap at the wing root
 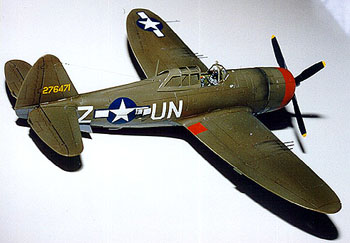 only because the dihedral was wrong! By using tape to hold the wings at the proper angle, I glued the wings and had no gaps at the root. The only gap problem I found with the entire kit was at the leading edge of the wing section under the fuselage. Here I needed 10 thousandth sheet to shim the gap and that was it. The rest of the major component assembly went smoothly. Using the new Detail and Scale reference on the Thunderbolt, I found that the kit’s engine was somewhat incorrect. It would appear that Hasegawa cut one little corner by using what appears to be the same engine from their Hellcat kit. The Pratt and Whitney used in the Thunderbolt was a slightly different variant of the R-2800 than that of the Hellcat. The differences are very minor but I went ahead and made the changes. All that was needed was to make the front of the gear reduction housing a bit more "bullet" shaped and to move the propeller governor back so that it sits right between the magnetos, not in front of them. The only other little detail I really wanted to add was in the form of an aftermarket gunsight and the auxiliary ring and bead site that was mounted just to the left of the reflector site.
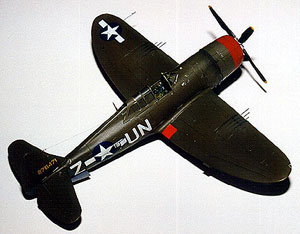
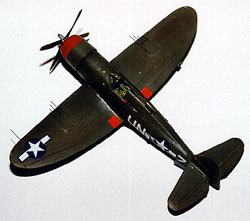 and sported a simple red cowl. Since I don’t like solid colors on models because I think it makes them look too much like toys, I first painted the entire model in neutral gray, followed by the upper olive drab. I then "cut" both colors almost in half with white and hit the "high" spots on the corresponding colors. The technique is somewhat similar in appearance to "forced" panel lines, but the end result is not so "mechanical". This is for all intent and purposes, a figure painting technique, which creates a faded appearance to the color and also gives the subject some depth. After a generous coat of Future floor wax, the decals were applied. I used all aftermarket decals for three reasons. First and most obvious, the choice of markings. Three Guys Replicas made the serial numbers and squadron codes. Second, I didn’t like the color of the kit’s national insignias. Third and foremost for the national insignia, the kit’s underside stars and bars were not the correct size for my purposes. The particular aircraft I wanted to do used the 55" star and bar and Hasegawa’s were way to small. After the decals were dry, an oil wash of burnt umber was used on the panel lines, followed by Polly Scale flat. Exhaust and cordite stains for the guns were done in
 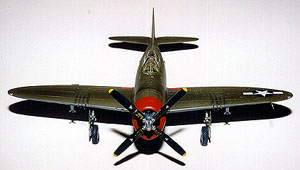 pastels and any chipped paint (mostly on the gun bay doors and engine cowling) was done with an artist acrylic pencil. If you have not tried this technique for chipping the edges of panel lines and other areas of wear, I highly recommend it over using silver paint. Give it a try, I don’t think you’ll be disappointed. The color used on the cowling was Polly Scale signal red. Much to my surprise and jubilation, the kit canopy sits very well in the OPEN position! Yeah Hasegawa! This has been one of my biggest gripes with Hasegawa but on this one they came through.
All of the little details went on without a hitch. The landing gear fit nicely but I did use True Details weighted tires. They actually look a bit too flat but mine is sitting on a grass field base so it’s not so obvious. Besides, a little exaggeration can be good on a model, right? I put about 20 to 25 hours (I really don’t care much for counting time that way!) into my "jug" and really enjoyed the experience of building the kit, which in my mind makes it a very good kit. I highly recommend building this little piece of Americana.