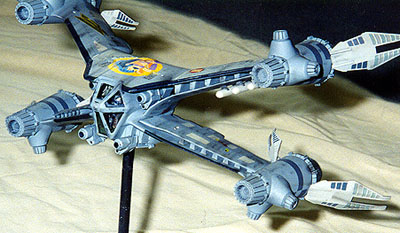
Building and Detailing the R/M Babylon 5 Starfury Mk.I
By John Lester
 |

|
 Century. Sales surprised everyone - especially the manufacturer. It soon became almost impossible to find as store after store sold out. R/M was so impressed with sales they not only started up the production line again, they decided to put out another version of the kit, with different decals and better instructions (to be released in November '98). Despite its popularity, there are a lot of complaints about this model. It does not fall together right out of the box. With time, patience, and a little effort, however, you can build up an impressive replica. Here's how:
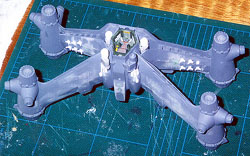 Assembly is straightforward, and you can even follow the sequence outlined in the instructions without going far wrong. However, it's easier to rearrange the steps. Assemble the fuselage and the upper/lower "wings" separately, then mate them. Paint and detail the cockpit, then drop it in. Fix the guns and place them where they belong then mask the canopy and slip into place. Paint the "ion stream suppression tines" (those eight vanes on the back of the thrusters) but leave them off until the very end. Simple enough in theory right?
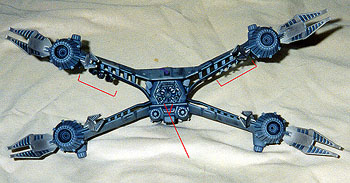 pieces together and spread putty on the gaps around the edges. Carefully sand smooth - I've found that I've had to putty, spray on some primer to reveal any flaws, fill and sand again to get these areas looking right.
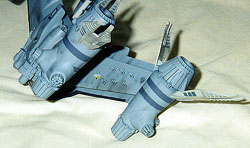 Thankfully, the maneuvering and main thruster nozzles fit without trouble. The instructions are muddy on the exact placement of the aft nozzles (four parts numbered 19). Make sure the large "tabs" to which the ion suppression tines will attach are parallel with the wings - one of them should rest along the inside edge of the upper and lower wings (parts 3 and 4).
 The instructions for painting the cockpit and pilot are wrong. The pilot's pressure suit is a dark metallic grey, with black elbow and kneepads, and a black "sash". Paint his visor glossy black and forget the little face decal. The actual set used for filming pilots in the cockpit is painted a green close to SAC Bomber Green (FS 34159). The acceleration couch is a medium grey with brown leatherette cushions and an almost black headrest. The best reference for this area can be found here, which has photos of the cockpit sets. You can replicate the red glow of the usual cockpit lighting by spraying Tamiya Clear Red over everything after you've painted the cockpit (but before you glue on the instrument display).
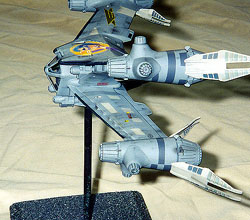 look like two cylinders, one inside the other, and not a stack of pancakes. Cut four pieces of 1/4" diameter tube 1/4" long, and four more pieces of 3/16th-inch diameter tube 5/16 inches long. (Evergreen tubes #226 and #228 work well for this). Bevel one end of each piece to a 45-degree angle. Now place the 1/4" diameter bits where you cut of the kit pieces, then slip the 3/16" pieces inside them. After this has dried, fill in the gaping holes on the backside of the guns. I use a block of styrene and putty over the top to smooth it out, as the amount of putty needed to fill in these holes ends up melting the plastic.
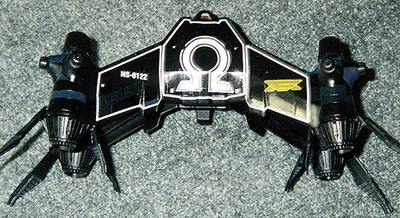 are wrong, consisting of two bits sanded flat instead of one long strip. Ah, well - live and learn). Mounting shackles can be made from the same 3/16" diameter tube used for the guns. Cut slices as thin as you can (mine are 1/16th inch sanded down to 1/32nd inch thickness). Then cut three equal arcs from each slice. There are four shackles per launch rail - one just back from either end, and two closer to the center. Missiles can be cut from 1/8th inch diameter rod approximately 1 1/8th inch long, with the forward edge sanded into a blunt, ogive shape. The exhaust nozzles I made from the tips of a set of cheap mechanical pencils cut to a length of just over 1/8th of an inch and sanded smooth. Leave the missiles off until after painting and weathering is complete.
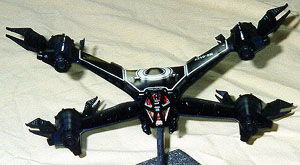
 model with the main coat of Sea Grey. For the Black Omega ship, I used a base coat of Flat Black, with various panels of Black Chrome, Flat Aircraft Interior Black, Gloss Black and Black Pearl. (This one doesn't photograph well, but looks pretty impressive nonetheless). The insets in the ion suppression tines get painted different shades of the base coat as well.
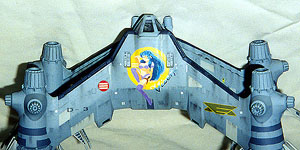 on clear decal film, and used decals left over from other projects to round out the scheme (never, ever throw decals out!).
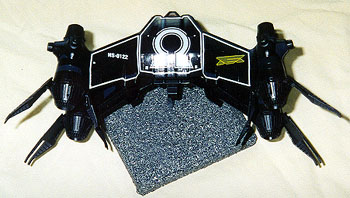 add a wash of grungy grey around the cannons and inside the thruster nozzles. I also drybrush steel. After this, I grind up pastels (dark grays and blacks) and or pencil leads until I have a nice pile of dust. Then I apply them with an old, stiff bristle brush. I lay a business card down along a panel line and streak the brush back over it. This makes a stain tailing back over the model with a sharply defined forward edge. I apply these streaks rather heavily, since I always seal them under another light coat of flat finish (which tends to tone down the weathering rather strongly). Lastly, pull the masking off the canopy and affix the ion suppression tines.