


 Italeri
1/48 F-22 Raptor
Italeri
1/48 F-22 Raptor
By Michael Benolkin
Background
In the early 1980s, the United States Air Force decided to look for a replacement air superiority fighter for the aging F-15 Eagle, with an expected in-service date of 1994. The Advanced Tactical Fighter (ATF) program was launched and two major teams emerged in the competition. The F-22 Team consisted of Lockheed, Boeing and General Dynamics. The F-23 Team included Northrop and McDonnell Douglas.
After an extensive fly-off between the two teams, the F-22 was selected in 1991. In addition, the Pratt & Whitney F119 engine was selected over the General Electric F120. With the introduction of the AIM-120 AMRAAM and other innovative avionics technologies, the F-22 moved from air superiority to air dominance. The P&W F119 engines feature thrust vectoring that, when coupled with the fly-by-wire flight control system, can produce maneuverability that will ruin any F-16 pilot's day.
 In
order to keep the aircraft 'stealthy', the F-22 team designed internal
storage bays to house the compliment of AIM-9 Sidewinder and AIM-120 AMRAAM
missiles. The aircraft was not originally going to have external storage
capabilities (external pylons and weapons defeat the stealthy features
of the aircraft), but provisions for four underwing pylons have been made.
The aircraft has undergone weapons separation tests from the internal
weapons bays as well as from the wing pylons.
In
order to keep the aircraft 'stealthy', the F-22 team designed internal
storage bays to house the compliment of AIM-9 Sidewinder and AIM-120 AMRAAM
missiles. The aircraft was not originally going to have external storage
capabilities (external pylons and weapons defeat the stealthy features
of the aircraft), but provisions for four underwing pylons have been made.
The aircraft has undergone weapons separation tests from the internal
weapons bays as well as from the wing pylons.

Somewhere along the line, the Air Force decided that Lockheed's tentative name for the F-22 ñ Lighting II – while not inappropriate, was not favored in some circles. While its P-38 namesake brought a fine legacy of air superiority for Lockheed and the USAF (much like the A-10 gained its legacy from its older Republic brother, the P-47), the Pentagon decided to consider other names. No doubt influenced by the two Jurassic Park movies of the day, the name Raptor was selected to represent a deadly hunter whose talons literally shred its opponents. Too bad it is also an extinct dinosaur that couldn't fly, but that's not important!
 There
were a number of teething problems with the F-22 program following the
award. One software glitch resulted in the loss of one of the two YF-22
prototypes in 1992. The F119 engine was also having some developmental
problems as well. As a result, the Air Force missed their intended 1994
service date. Additional delays may have been in part due to the assimilation
of many of the aerospace companies in the program. Lockheed and Martin
Marietta merged, then bought out F-22 teammate General Dynamics. Boeing
bought McDonnell Douglas (amongst others). In addition , budget cuts and
other fiscal follies will delay the F-22s entry into service for several
more years.
There
were a number of teething problems with the F-22 program following the
award. One software glitch resulted in the loss of one of the two YF-22
prototypes in 1992. The F119 engine was also having some developmental
problems as well. As a result, the Air Force missed their intended 1994
service date. Additional delays may have been in part due to the assimilation
of many of the aerospace companies in the program. Lockheed and Martin
Marietta merged, then bought out F-22 teammate General Dynamics. Boeing
bought McDonnell Douglas (amongst others). In addition , budget cuts and
other fiscal follies will delay the F-22s entry into service for several
more years.
The Kit
While there have been 1/72 and 1/32 YF-22s, those of us who build quarter scale have been without this significant part of modern aviation. Not any longer - Italeri has released the very first F-22 kit in 1/48! What's more, this kit represents the production version of the F-22, not the YF-22!
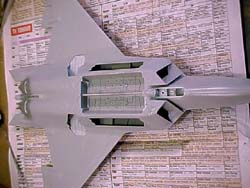 The
kit features positionable weapons bay doors to reveal the AIM-9 and AIM-120
missile bays, positionable landing gear, positionable trailing edge flaps,
positionable canopy, and four optional wing pylons, two of which can carry
the two JSOWs. The missile bays have detailed hinge mechanisms, trapeze
launchers and two AIM-9L/M and three AIM-120C included.
The
kit features positionable weapons bay doors to reveal the AIM-9 and AIM-120
missile bays, positionable landing gear, positionable trailing edge flaps,
positionable canopy, and four optional wing pylons, two of which can carry
the two JSOWs. The missile bays have detailed hinge mechanisms, trapeze
launchers and two AIM-9L/M and three AIM-120C included.

Assembly is standard – start with the cockpit. The four-piece ACES II ejection seat includes molded-on shoulder harness detail, but no lap belts. While you might consider an aftermarket ACES II seat for your Raptor, the kit seat is not bad out of the box. The instrument panel is represented by decal. The cockpit tub features a side-stick controller, but no throttle. While the cockpit is rather spartan, the lack of detailed information (at present) of the front office precludes much more detail at this stage.
 Next,
the cockpit tub is installed in the upper nose half. After studying the
instructions, I decided to deviate a little and glue the upper nose half
to the upper wing half to get the tightest bond across that visible seamline.
The result was quite successful. The plastic that Italeri uses is relatively
soft, and responds well to Tenax. A generous portion of Tenax was applied
to the seam, the pieces pressured together to get that characteristic
oozing of soft plastic out of the seam. After drying, a quick pass with
a wet/dry sanding stick did away with the seam.
Next,
the cockpit tub is installed in the upper nose half. After studying the
instructions, I decided to deviate a little and glue the upper nose half
to the upper wing half to get the tightest bond across that visible seamline.
The result was quite successful. The plastic that Italeri uses is relatively
soft, and responds well to Tenax. A generous portion of Tenax was applied
to the seam, the pieces pressured together to get that characteristic
oozing of soft plastic out of the seam. After drying, a quick pass with
a wet/dry sanding stick did away with the seam.

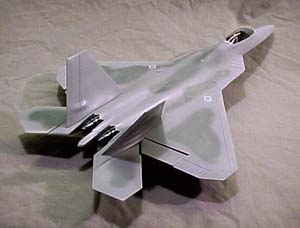
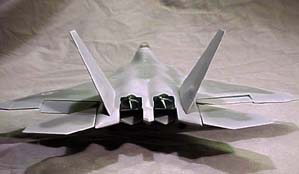
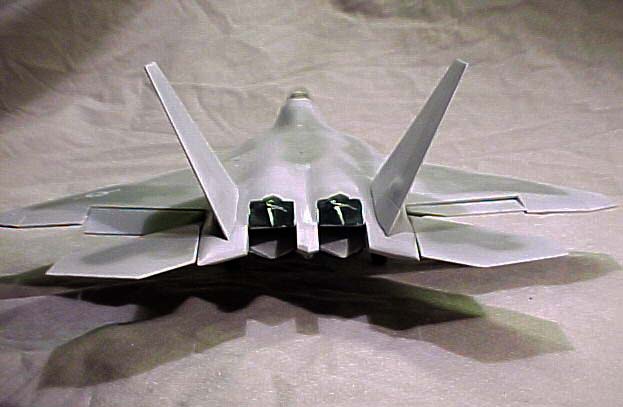
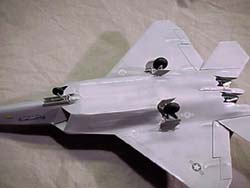
I chose to build the aircraft with all of the weapons bays closed,
canopy closed, and with the pylons not installed ñ much like you'd find
the aircraft in current Edwards AFB shots. The F119 engine nozzles were
installed per the instructions, but you'll want to note that the horizontal
petals are intended to mount flat inside the fuselage halves, though you'll
be tempted to glue the tips of the petals to the edges of the nozzle fairing
on the fuselage halves. Don't worry about the gap between the fairing
 and
the nozzle petals. This is normal (see the photo of the engines on the
YF-22 at the Air Force Museum).
and
the nozzle petals. This is normal (see the photo of the engines on the
YF-22 at the Air Force Museum).
Once the nozzles are in place, the various internal bays are installed, etc., it is time to mate the top and bottom nose halves. Again, use the Tenax to bond the halves. Don't forget to install the lower half of the intake extensions (parts 31 & 32. They will be difficult to install after the lower wing half is installed.
The wing flaps are positionable and are supposed to be trapped between
the upper and lower wing halves. I opted to not install the flaps at this
point 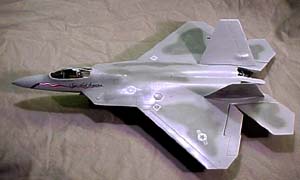 so
I could have access to the trailing edge of the wing halves to apply Tenax.
The lower wing half was mated to the upper wing half/nose assembly, again
using a liberal application of Tenax. Set the fuselage aside to dry. Once
the Tenax and plastic have hardened up, the seams are easily removed with
a multi-grit sanding stick. There were only a couple of minor gaps after
this assembly ñ the starboard wing root/LERX, and the two underside extensions
where the horizontal stabilators attach. A small dose of gap-filling cyano
and the sanding sticks took care of this as well.
so
I could have access to the trailing edge of the wing halves to apply Tenax.
The lower wing half was mated to the upper wing half/nose assembly, again
using a liberal application of Tenax. Set the fuselage aside to dry. Once
the Tenax and plastic have hardened up, the seams are easily removed with
a multi-grit sanding stick. There were only a couple of minor gaps after
this assembly ñ the starboard wing root/LERX, and the two underside extensions
where the horizontal stabilators attach. A small dose of gap-filling cyano
and the sanding sticks took care of this as well.

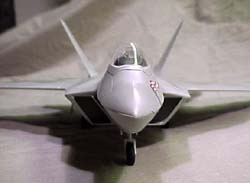
 The
biggest challenge in this kit is installing the intakes to the airframe
assembly. The fit on my example was not so hot, and there is a curl in
the plastic where it is supposed to blend into the wing/fuselage joint
fairing. The curl doesn't reach that joint. Nonetheless, this turned out
to be a minor annoyance as well. Align the bottom of the intakes to the
bottom of the fuselage and fuselage sides. Apply Tenax liberally and set
aside to dry. Next, take a paintbrush handle and push the curl up to meet
the wing/fuselage joint fairing. Apply a bead of cyano and then spray
on some Zip cyano accelerator. Go around the entire seam of the intake-fuselage
joint with the cyano and Zip it as well. Now carefully sand away the excess
cyano and you now have a seamless intake-to-fuselage joint. By the way,
this whole workaround took about 10 minutes. Again, not a big deal.
The
biggest challenge in this kit is installing the intakes to the airframe
assembly. The fit on my example was not so hot, and there is a curl in
the plastic where it is supposed to blend into the wing/fuselage joint
fairing. The curl doesn't reach that joint. Nonetheless, this turned out
to be a minor annoyance as well. Align the bottom of the intakes to the
bottom of the fuselage and fuselage sides. Apply Tenax liberally and set
aside to dry. Next, take a paintbrush handle and push the curl up to meet
the wing/fuselage joint fairing. Apply a bead of cyano and then spray
on some Zip cyano accelerator. Go around the entire seam of the intake-fuselage
joint with the cyano and Zip it as well. Now carefully sand away the excess
cyano and you now have a seamless intake-to-fuselage joint. By the way,
this whole workaround took about 10 minutes. Again, not a big deal.
 I
was faced with an equally daunting challenge when I followed the instructions
to build the aircraft with the bay doors closed. The model was definitely
set up to be displayed with all of the doors open. If you want the smooth
way out, leave the doors open. Otherwise, be prepared for some fitting,
filing and filling. By the way, there are a few errors in the instructions.
In this case, the AIM-9 bay doors (parts 40 & 41) are shown on the left
side of the aircraft. You might not notice this error if you do build
with the
I
was faced with an equally daunting challenge when I followed the instructions
to build the aircraft with the bay doors closed. The model was definitely
set up to be displayed with all of the doors open. If you want the smooth
way out, leave the doors open. Otherwise, be prepared for some fitting,
filing and filling. By the way, there are a few errors in the instructions.
In this case, the AIM-9 bay doors (parts 40 & 41) are shown on the left
side of the aircraft. You might not notice this error if you do build
with the 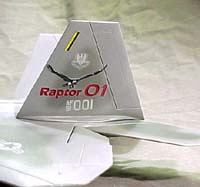 doors
open, but it will become very obvious with the doors closed. These two
doors go on the right side and parts 38 & 39 go on the left.
doors
open, but it will become very obvious with the doors closed. These two
doors go on the right side and parts 38 & 39 go on the left.
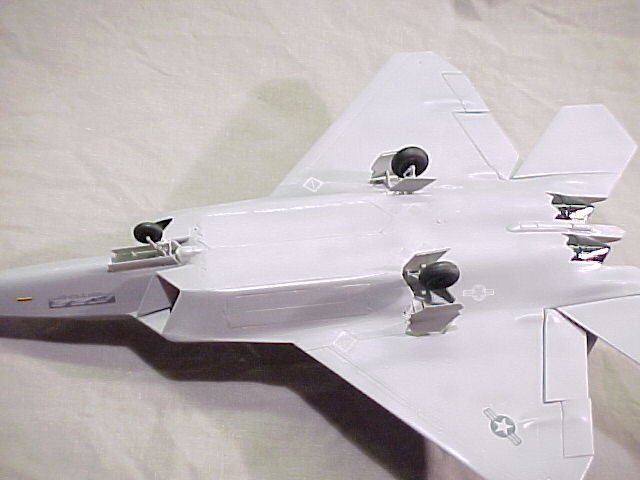

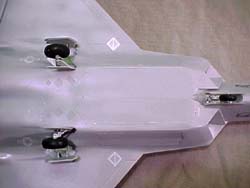
Next, I installed all of the bay doors, air refueling door, gun bay door, etc., all closed. I installed the wing flaps, horizontal and vertical stabs and canopy frame (leave the canopy off for now). I also chose to leave the landing gear and gear doors off for now.
When installing the horizontal stabs, you'll discover the other error – the instructions would have you mate halves 86 & 87 together on one side, and 84 & 85 on the other. You'll find that the correct combinations are 85 & 86 on one side, and 84 & 87 on the other.
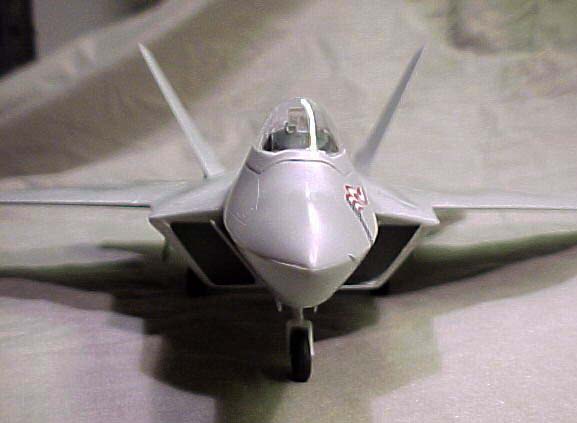
Painting
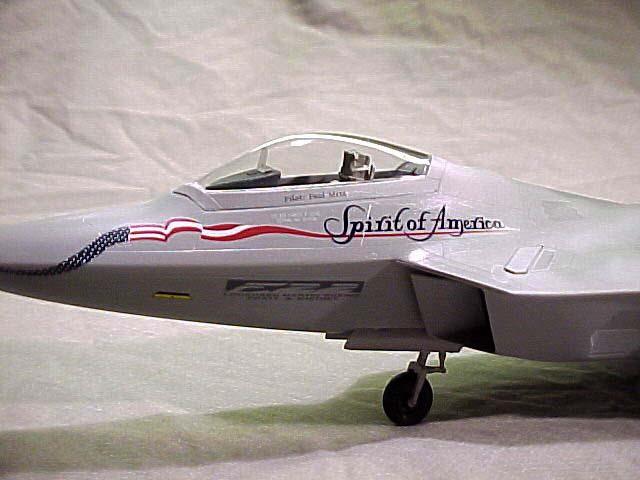
First, I masked off the cockpit tub and wheel wells. I applied a base coat of Testors Light Ghost Grey over the entire aircraft. When that coat had dried, I rubbed down the aircraft with an old t-shirt to minimize the harsh texture of the flat paint. Next I airbrushed Testors Dark Gull Grey freehand to the upper side of the aircraft, as illustrated in the instructions. When that coat had dried, I rubbed that area down as well. I finally masked off the engine exhaust shrouds and painted them Gun Metal.
I applied Future, thinned 50-50 with Isopropyl Alcohol to the entire aircraft. Between the buffed paint and the Future, the decals have a smooth surface to adhere to.
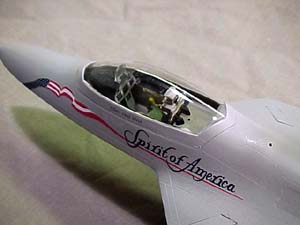
Decals
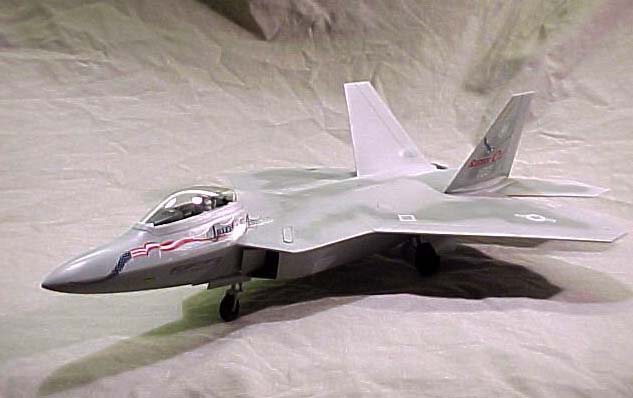
I applied the markings for Raptor 01 per the instructions. The decals set nicely. When all of the decals were in place, I shot the entire aircraft with Gunze Sangyo Clear Flat. Now it is time to add the final details.
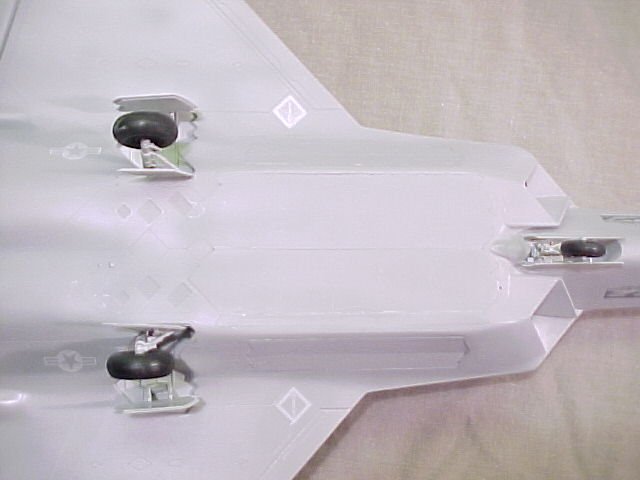
 The
canopy was installed with white glue, and the landing gear with cyano.
This canopy is absolutely the clearest piece of canopy I have ever seen.
It comes protected in its own sealed bag too! Major points here for Italeri!
The
canopy was installed with white glue, and the landing gear with cyano.
This canopy is absolutely the clearest piece of canopy I have ever seen.
It comes protected in its own sealed bag too! Major points here for Italeri!
The entire project took very little time to accomplish and this is one of Italeri's nicer offerings. This is the first kit I have seen that offers JSOWs for your armament lineup. With the addition of an aftermarket cockpit tub and perhaps some AIM-9s and AIM-120s from the Hasegawa weapons sets, this Raptor will look great parked next to your Hasegawa F-15 and Tamiya F-117! Overall, I'd suggest this kit to builders with at least intermediate level skills and a nice set of files and sanding sticks. The effort is worth it!
My sincere thanks to Testor's for this review sample!


Previous: Contents

