
"BEWARE THE IDES OF MARCH HUN"
By Caz Dalton
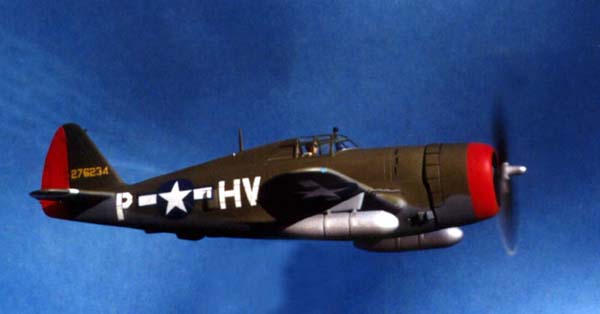
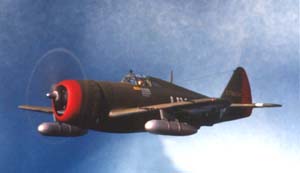
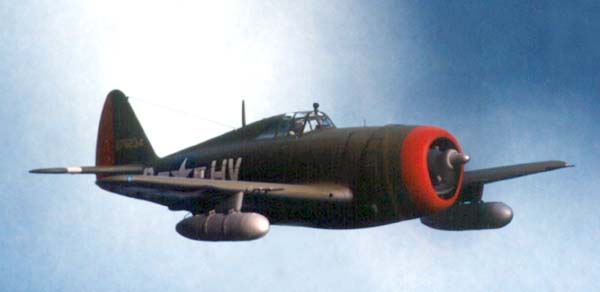
REPUBLIC P-47D-15-RE "THUNDERBOLT" CAPTAIN ROBERT S. JOHNSON
61ST FS, 56TH FG, USAAF
BOXTED, ENGLAND -
MARCH 15, 1944
History of the aircraft modeled:
Continuing the line of fighters begun in 1935 with the Seversky P-35, Alexander Kartveli and his design team began work in 1939 on a straight development of the P-43 designed to use the new Pratt & Whitney R-2800 radial engine. Due to the air war being fought in Europe Kartveli offered a redesign of the XP-47 at almost twice the gross weight, with an eight-gun armament, and a turbo-supercharged Pratt & Whitney XR-2800 Double Wasp engine.
In September 1940 Republic received contracts for one XP-47A and 773 production P-47Bs and Cs. The new aircraft was the largest single-engine fighter then designed, with a 2,000 hp R-2800-21 radial and eight .50 inch machine guns in the wings, which still retained the semi-elliptical planform favored by Kartveli. First flown on May 6, 1941, the XP-47B had a top speed of 412 mph and despite some doubts about the aircraft's handling qualities, particularly at low altitudes, the Thunderbolt became top priority for the USAAF.
 By the end of 1942, two fighter groups were equipped with the P-47B. Moving to Europe in 1943, they joined the Eighth Air Force in its assault on Occupied Europe, going into action on April 8, 1943. Early operations revealed some drawbacks, in particularly, the range was inadequate for bomber escort duties and maneuverability was poor. These factors were somewhat improved with the introduction of the P-47C, which carried provision for an external fuel tank under the belly and a lengthened fuselage that slightly improved maneuverability. This model was operating in Europe by mid-1943 and in the Mediterranean theater by November. P-47Cs became operational in the Southwest Pacific in June 1943 and China in April 1944.

Early model P-47Ds, powered by an improved R-2800-59 engine rated at 2300 hp, were similar to the P-47C in most respects. Strengthening of the wing permitted the carriage of fuel tanks or bombs and the D model began to demonstrate its outstanding characteristics as a fighter-bomber as well as bomber escort towards the end of 1943. Additional production lines for the Thunderbolt were laid down by Republic in Evansville, Indiana and by Curtiss in Buffalo, New York. Production of versions up to the P-47D-22 totaled 3962 at Farmingdale, Long Island, and 1461 at Evansville, while Curtiss built 354 similar P-47Gs. Production then switched to the P-47D-25 and later versions, with a bubble canopy and cut-down rear fuselage for improved vision and more internal fuel. Farmingdale produced 2547 D-25s and Evansville 4632.
 The P-47M incorporated a 2800 hp R-2800 -57 engine, a lightweight wing and reduced armament in a standard P-47D airframe. The 130 built were assigned to England primarily to combat the V-1 flying-bomb. A purely experimental version of the P-47M, coded P-47J, utilizing the same engine with fan-assisted cooling, achieved 504 mph in official tests. This was the highest speed ever reached by a piston-engined aircraft in level flight during World War II.
The last version to leave the Republic assembly plants was the P-47N, the heaviest of all Thunderbolts, at 20,450 pounds. It had the R-2800-57 engine and a larger, stronger wing that could carry four drop tanks. Added to the internal fuel tanks, these gave an endurance of more than nine hours. The 1000 mile radius of action of the P-47N was intended for bomber-escort duties in the Pacific and 1667 were delivered from Farmingdale plus 149 from Evansville.
The grand total of 15,660 Thunderbolts was the largest number of any single fighter type ever acquired by the USAAF. Approximately two-thirds of these found their way into action with the USAAF. The combat loss of less than one percent was exceptionally low, reflecting the Thunderbolt's rugged construction, which allowed it to survive battle damage that other fighter aircraft of the period would not handle. The "Jug" was a beloved aircraft by the pilots that flew it and served with distinction in the Air National Guard, as well as the air forces of France, Italy, Nationalist China, and South American countries, after being replaced by jet-fighters following the end of World War II.
SPECIFICATIONS: P-47D
Wingspan: 40 feet 9 inches
Length: 36 feet 1 inches
Height: 14 feet 2 inches
Empty weight: 10,700 pounds
Loaded weight: 19,400 pounds
Engine: one Pratt & Whitney R-2800-59 two-row radial developing 2300 hp
Armament: eight .50 inch Colt-Browning machine guns, external stores on each wing for fuel tanks, bombs or rockets up to 2500 pounds
Performance: Maximum speed 428 mph, Service ceiling 42,000 feet.
Range: (with external fuel) 1900 miles, Rate of climb 2800 ft/min
ABOUT THE AIRCRAFT MODELED:
 Captain Robert S. Johnson was second to Colonel Francis Gabreski as the top scoring American ace in the European Theater of Operations with 28 confirmed victories. His first victory came on his eleventh mission on June 13, 1943 and his final victories were attained on May 8, 1944, his 91st combat mission. All of his victories came while flying a razorback 'Jug' with the 61st Fighter Squadron of the 56th Fighter Group. He completed his final mission in a new P-47D-25-RE 'bubble top' and is still telling wonderful stories about his missions in the 'Jug'.
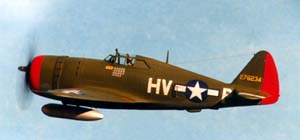
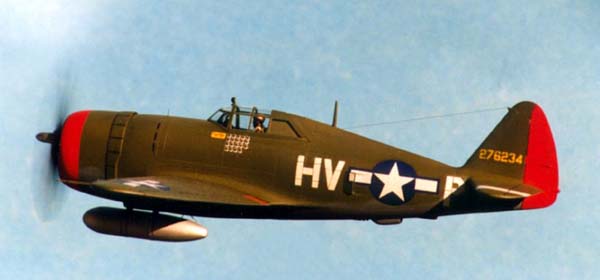
I had the pleasure and privilege of meeting Captain Johnson in March 1992 at a model contest in Charlotte, North Carolina. Upon further correspondence with this fine gentleman, I decided to model his last razorback 'Jug' as it appeared on March 15, 1944, a day in which Captain Johnson scored three combat kills (two Focke Wulf Fw190s and one Messerschmitt Bf109) over Brunswick (Braunschweig in Germany) on an escort mission to Berlin. He had nineteen victories prior to these kills.
I used Hasegawa's kit of the P-47D Razorback in 1/72nd scale, kit number 507. Decals came from a Special Edition reissue of Airfix's P-47D, kit number 02084.
NOTES ON THE ASSEMBLY OF "BEWARE THE IDES OF MARCH HUN"
Cockpit:
 The cockpit to this kit is rather spartan by even Hasegawa's standards, consisting of a seat molded into the cockpit floor and an instrument panel placard. I first extended the cockpit floor with sheet plastic and added a control stick constructed from 18 gauge wire.
I then constructed rudder pedals from 26 gauge wire and sheet plastic and cemented these to the rear of the instrument panel placard. I then turned my attention to the sidewalls and constructed ribbing from evergreen styrene strips.
A throttle control was scratch-built out of a Waldron-punched disk that I cut in half and added two small pieces of 26 gauge wire, which were dipped into epoxy for the knob ends. This assembly was then cemented to the port sidewall. I also constructed radio boxes and trim tab controls from sheet plastic and attached these units to the starboard and port walls respectively.
The gunsight was scratch-built using a Waldron-punched disk attached to a like-sized square of sheet plastic and this in turn attached to the instrument panel shroud after the fuselage halves were joined and sanded. The clear reflector was cut from .01 clear styrene and attached after painting the gunsight and panel shroud.
The pilot, though well molded, had a huge sinkhole in his belly that had to be filled and resculptured. I also added a parachute pack, constructed of sheet styrene and epoxy, to his back as per photocopies I received from Captain Johnson and constructed a parachute harness from small strips of masking tape. Two radio earphone covers were constructed from Waldron-punched disks and cemented to the pilot's leather headpiece. The goggle's strap was simulated with a small strip of masking tape. Lastly I added a shoulder harness from masking tape after the pilot figure was painted and cemented to his seat. Buckles were cut from a used Waldron photoetched sheet that I had on hand and glued to the harness.
Fuselage and Wings:
 I added a wiring harness made out of 18 gauge wire to the back of the engine gear reduction housing. I also constructed two magnetos out of Waldron-punched disks and a propeller governor out of sheet styrene. Fuel and oil lines were duplicated from small gauge wire stock.

A one inch section of 3/32nds inch brass tubing was attached to the center hole in the engine assembly to accommodate a one inch section of 1/16th inch tubing that was attached to the propeller. This allowed me to hold off attaching the propeller until final assembly. The propeller will also spin in the slightest breeze.
The antenna that was molded into the port fuselage half was cut away and saved for reattachment during the final assembly. This allowed me to clean up the joint seam without having to work around it.
I opened up the exhaust wastegates on each side of the fuselage just behind the engine cowling and attached a section of 20 gauge hypodermic needle to each opening. I also attached a small section of 26 gauge hypodermic needle into a predrilled hole behind the antenna and slightly starboard for the aerial lead-in.
 The rear wheel door cover was left as is and cemented into the wheel housing using a shim on the front to align it to the fuselage. I then scribed the split with a #11 X-Acto blade and dentist's scraping probe. (This was much easier than cutting the piece into and having to cement both halves into the housing.)
The forward gunsight bead was made out of .005 stainless steel wire and super glued into a predrilled hole. The aerial attachment on the vertical tail was constructed from 34 gauge wire that had been tightly wrapped around a #80 drill bit and attached into a predrilled hole. The aerial was made from smoke-colored invisible thread and attached after painting and decaling.
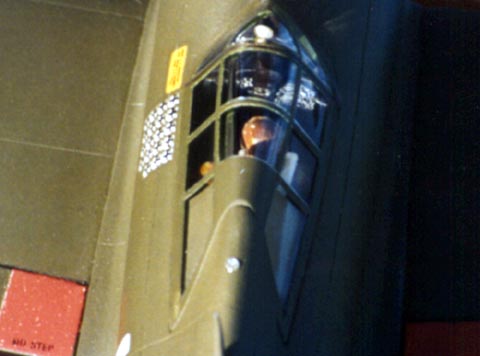
The canopy was masked with Bare-metal foil and attached with white glue. I also attached a small amount of super glue at strategic points, so that the canopy would not pull off when I removed the masking. Captain Johnson's plane had the Spitfire rear-view mirror that was field rigged to many Thunderbolts. I duplicated this with a Waldron-punched disk and a drop of epoxy for the curvature. This was attached to the canopy after painting and decaling.
 All wing machine guns were cut off and replaced with sections of 23 gauge hypodermic needle cut with a Dremel fiber-cutting wheel into the various lengths required and super glued into predrilled holes where the molded guns were. The pitot tube was likewise cut away (This also aided in sanding the wing joints) and replaced with an insulin hypodermic needle cemented into a 25 gauge hypodermic needle and then cemented into a predrilled hole after the joints were sanded.

Wing navigation lights were filed away and replaced with epoxy after final painting. The small antenna under the port wing was made from .005 stainless steel wire and super glued into a predrilled hole. I constructed the landing light under the port wing from a Waldron-punched disk of Bare-metal foil that was coated with epoxy; this was attached after final painting.
Fuel tank/bomb shackles were cut from 22 gauge wire and attached to the hardpoints already molded into the wings. The fuel tank feed lines were constructed from 28 gauge wire and cemented into predrilled holes. The main landing gear doors were cut and attached in the retracted position using shims to align them to the underside of the wing.
Painting and Decaling:
The interior was painted Model Master Acrylic Zinc Chromate Green, with radio boxes, trims control boxes, and throttle control being hand painted flat black. All ribbing was given a light black wash.
The instrument panel placard was painted gloss black and the kit decal applied. After the decal had dried I coated the placard with clear flat acrylic and then applied Johnson's FUTURE to the gauges after the flat coat had dried.
 The instrument panel shroud was painted flat black and the area in back of the cockpit that was covered by the canopy was painted olive drab. The headrest was hand brushed with Tamiya Red Brown.
The pilot was first primed with neutral gray and then hand painted using Tamiya and Model Master acrylics. After painting I added the parachute and harnesses and gave the figure a dark gray wash.
The engine assemblies were first painted neutral gray also. I then hand painted the engine cylinders Polly-S Flat Aluminum Acrylic and the pushrods in gloss black. The magnetos and the propeller governor were also painted gloss black, after which I gave all engine cylinders a black wash. The back of the rear bank of cylinders was hand painted flat black in between the cylinders, as was the inside of the engine cowling cover.
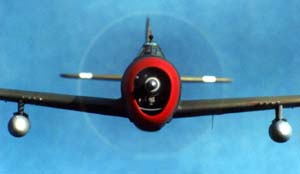
The propeller tips were painted insignia yellow, after which they were masked and airbrushed semi-gloss black. The blades were then masked and the spinner was airbrushed with Model Masters Buffing Aluminum and buffed lightly.
External fuel tanks were airbrushed with Polly-S Flat Aluminum Acrylic and given a black wash around their retaining straps. The hypodermic needle machine guns were left unpainted, but given a coat of clear flat in the final painting.
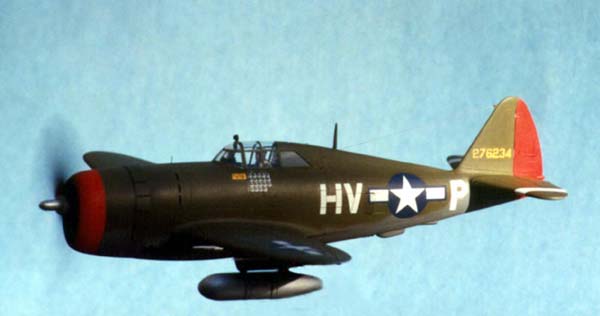
The cowling opening was covered with a styrene mask and the entire aircraft was airbrushed with Model Master Dark Gull Gray that I had mixed to match FS 36173. This was the correct color for the underside of the aircraft and served as a primer for the entire model.
After the primer had dried I lightly sanded any imperfections and reprimed. A day later I masked the lower surfaces and airbrushed the upper surfaces with Model Master Olive Drab.
The cowling and rudder were masked after this had dried and airbrushed Testors Flat White. A day later this was airbrushed with Model Masters Insignia Red. (If the white isn't applied first, you will get too dark of a red color.)
I allowed this to dry for four days and then dry sanded the entire model with well used 3600 grit sandpaper. The model was then washed with a mild solution of dishwashing detergent followed by a washing of plain water. This technique glossed the flat paint and allowed me to decal the model without having to spray a gloss overcoat.
Decals from the aforementioned Airfix kit were applied using the Microscale system. I found that Micro-Sol would not work on the Airfix decals and used Micro-Set only. The decals were very thin and had to be forced into the small recessed panel lines by pressing with a dampened paper towel after they had set, but before they had dried completely. The white stripes on the horizontal tailplanes were cut from SuperScale's White Trim sheet and applied using the Microsystem.
After the decals had dried, I picked out the cowl flaps, ailerons, elevators, rudder, trim tabs, machine guns shell ejector ports, and other openings with a 5-0 technical pen. Wastegate exhaust stains were dry brushed with powered black pastel chalk. The entire model was then airbrushed with Polly-S Clear Flat Acrylic.
The wing navigation light cutouts were painted Model Masters Chrome Silver, filled with epoxy, and painted clear red on the port wing and clear green on the starboard wing. The navigation light on the rudder was painted chrome silver and given a drop of epoxy. The formation light on top of the fuselage was duplicated with a Waldron-punched disk of Bare-metal foil followed by a drop of epoxy. The rear-view mirror was brush painted flat black and the front of the mirror was painted chrome silver and given a coating of Johnson's FUTURE.
Base and Mount:
The base was cut from pine stock and routed. It was then stained with two coats of MinWax Special Walnut and treated to two coats of MinWax Polyurethane.
The mount was constructed from modified hobby magnifier pieces. I cut the ball pivot from one of the magnifier's base pivots and attached it to model's underside after filing and sanding it to conform. All pieces were primed in neutral gray and airbrushed Tamiya Flat Brown. They were then assembled and attached to the base.
The plaque was first done on a WordPerfect processor. I then had a local trophy shop copy the master onto a plaque.
References:
-
Bodie, Warren M., WINGS Special Edition No. 1, THE DESIGN AND COMBAT HISTORY OF REPUBLIC'S LEGENDARY WORLD WAR TWO FIGHTER-THE P-47 "JUG", Sentry Books Inc., 10718 White Oak Ave., Granada Hills, CA 91344, 1981.
-
COMBAT AIRCRAFT OF THE WORLD, George Rainbird Ltd., Marble Arch House, 44 Edgeware Rd., London, W2, United Kingdom, 1969.
-
Gunston, Bill, The Encyclopedia of the World's COMBAT AIRCRAFT, Salamander Books Ltd., 52 James St., London, W1, United Kingdom, 1976.