
Building the new Tamiya 1/700 Musashi
By Simon Wolff
History
Musashi was the second of two Japanese Yamato class battleships to be launched. The third was converted to an aircraft carrier and the fourth cancelled. These were the ultimate battleships with the greatest displacement (69,990t full load) and guns (9 X 18.1 inch main guns).
She was built by Mitsubishi Heavy Industries in Nagasaki and launched in November 1940. The ship's compliment was 2,500. To keep her existence a secret, the Japanese went to great lengths including a giant camouflage net and a large compliment of military police.
Because of the severe blast effects from the 18.1 inch guns secondary and all anti-aircraft guns were enclosed in light shielding, which is why the ships boats and aircraft were also enclosed within the hull.
 Neither she nor her sister ship got a chance to really justify the huge logistics taken up with building these vessels as both were sunk by USN aircraft. But it took much work to destroy this huge ship, some ten to nineteen torpedos and seventeen bombs at the Battle of Sinbuyan sea during the Leyte Gulf operation (this of course depends on which reference you choose to refer to as the three references I have seem to vary about Musashi/Yamato details!).

Construction
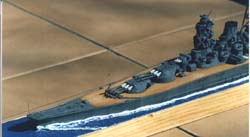
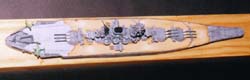
The first thing that strikes the modeller on opening this kit is the high level of detail (with some very minor exceptions) of the kit parts. Everything is in there the sweep of the majestic bow, detailed stern 'flight deck' for the seaplanes and the distinctive 'Pagoda' like bridge structure rising high into the air. If she was big in real-life then even as a 1/700 kit she is bloody awesome. As Bob Pearson mentioned in his quick look review there are over 400 parts, although quite a few do not get used but can be kept for the spares box.
 Interestingly Tamiya have broken this kit down as though there is a kit within a kit with the bridge structure being built separately. The 'base' (part A15) being the lower section of the bridge structure with the pagoda, range finders, funnel, mast, secondary turrets being attached to this (independent) section. So you could in fact have two assemblies going at once, the hull and assemblies and then the aforementioned bridge section.

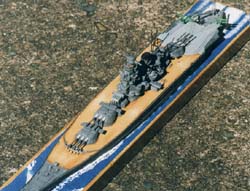
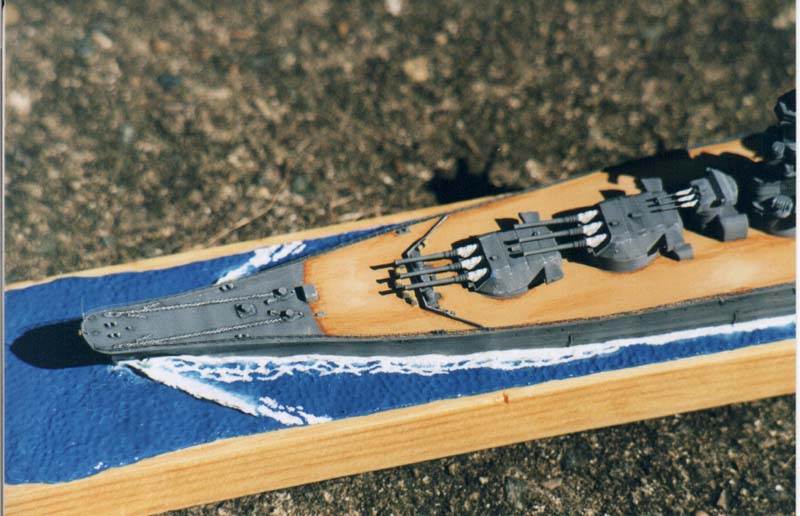
If you love turrets then you will just love building this or the Yamato. This vessel is just brimming with various calibre of weaponry. Twenty one turrets all told. The three 18.1" turrets are excellent. The level of detail is marvellous. The blast bags on the 18.1" are well sculptured and have a realistic look to them. Unlike the old Musashi kit the elevation of the guns is fixed. Here you need to be careful in making sure the gun alignment is correct.
 Construction commenced with the hull. This consists of a red plastic water-line base for the major hull assembly to be attached to, easy. Within this is incorporated two metal weights which are held in place securely by plastic parts. Is it just me but I can't see the sodding point of these weights. It is not like the kit is going to roll over is it? Whoops! Gee I threw it in the air lets see where it lands duh! Anyway I attached these as per instructions. Here I have to point out that the kit hull was badly warped although not enough to affect assembly. The warped hull was reduced by putting some heavy reading material (including a Beaufighter false horizon) on top of the hull when it was being glued to the red plastic base. This can be a fiddly business so time and patience are of theessence here. Preferably use a slow drying glue to give you time to line the two parts up and save any extra work.

The way the manufacturer chose to attach the 18.1" and 6.1" turrets is to have 'Poly caps' for the turret 'pinsi' to attach to. A very nice touch much easing the difficulty normally associated in gluing 'doughnut' shaped parts to the turret locating pin as to stop the turrets doing a 'Bismarck' on turning the kit upside down. The Poly caps are held in place by other plastic parts glued over them.
 One of the few criticisms of this kit comes early on. There is the bow deck section of the hull (part B15) which is around the area of the chains/cables. When attached this part leaves a quite noticeable gap extending the length of its bow hull attachment. This is not a major problem merely an irritant. It just meant some time needed to be spent filling this unsightly gap. As a filler I chose to use Milliput.

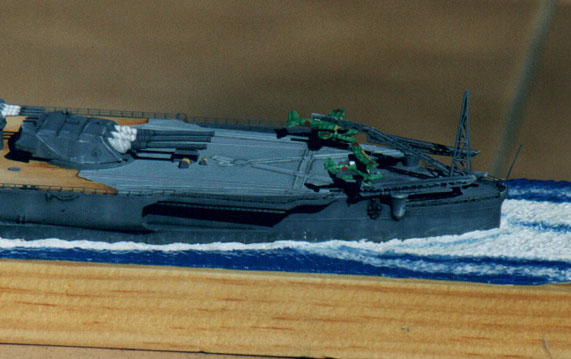
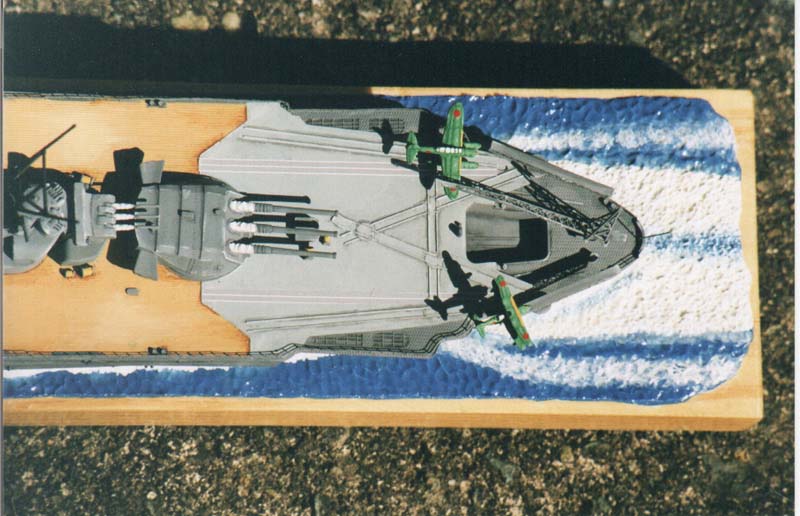
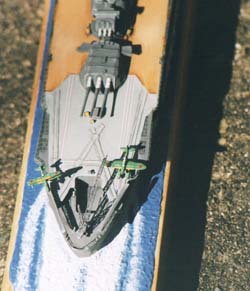
Other parts of note on assembling the hull area are the stern boat housings and rear flight deck section located around the hanger 'lift shaft'. Actually am not sure if the hole in the hull stern is a 'lift shaft' at all. Further fixtures are the catapults and crane for the seaplanes. Sadly the level of detail on these is more in keeping with the original kit of thirty years ago. Naturally Tamiya in dealing with these parts would have been limited by the level of technology available to recreate these difficult parts in 1/700. As they are quite noticeable, they sadly detract from the completed look of the kit. Here the kit parts were replaced by photo-etched catapults and crane from Tom's Modelworks (the IJN cruiser set).
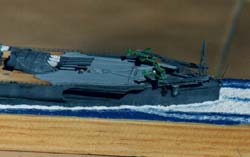 The ships boats were stored internally, through sections towards the stern. This area is quite well displayed and is simple enough to build.
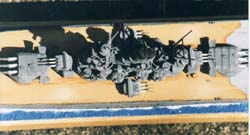
The number of parts for the bridge and surrounding area are quite incredible. Thirty four parts for a 1/700 ship model main bridge structure. This is where a good set of tweezers come in handy. The parts are so damned small, this is where good eyesight and hearing come in handy. The hearing so you can listen for the sound of the parts landing a mile away in the carpet. Seriously these parts are very fiddly and require patience and perseverance when attaching them.
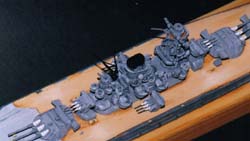 Assembly of the main bridge (A4 & A5) presented no major problems, the instructions were quite clear about part locations. Basically you have two main split bridge parts, which came together with very little sign of a join. All minor parts, apart from main range finder and upper bridge section, fit to these two parts.

Next came the shielded guns, range finders and searchlights located on the lower bridge structure. The kit gives you the option to display the guns at an elevated angle or just horizontal. This is done by supplying the guns separate from the turrets, moulding them in a way that they can be fitted at either angle.
Six 12.7 anti-aircraft turrets are provided and these are located three on each side as though surrounding the waist 6.1 inch guns. The base for these have to be glued to the main bridge section. Generally I found these had some gaps around them once attached as did the shields for the search-lights and eight light anti aircraft turrets.
 Now here is where I goofed big time. The instructions show the two 'waist' 6.1"s fixed in place before the attachment of the main bridge sub-section. They do this for a very good reason. That is, you can't easily fit these two turrets after the gluing the main bridge section to the hull deck! Well you can.. with a lot of force, squeezing and twisting the turret around. Also found that, incredibly the waist 6.1"s can only face backwards. I tried fitting the turrets facing forwards but they would not go. The instructions show the turrets facing forward but for some reason (on this kit) they would not.
The reason not to fit the turrets beforehand was so they could be painted without the restriction of them being fixed to the hull. Another problem is that these waist 6.1" turrets do not rotate 180°. There movement is highly limited. For some reason the kit turrets will not fully rotate like the originals, which seems quite bizarre.
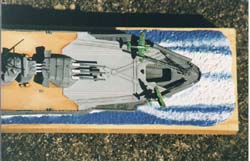 A number of floatplanes are provided. I chose to display an example of a 'Pete' and a 'Jake'. The Jake to be shown on a trolley prior to being lifted on to the catapult and the Pete sitting on its catapult waiting to launch. Trolleys are supplied for both types to be displayed either way. The planes themselves are exquisite, the Pete alone comes in five parts.
Included in the kit are numerous decals. 'Meatballs' for the planes, flags for flag poles and decals for the 'flight deck'. Sadly this kit had the national flags missing. But what decals I had seem absolutely fine, aircraft 'meatballs' and two decals for the flight deck.
Lastly I chose to add ship rails using 'two-bar' rails from Tom's Modelworks range. Previously the only photo-etched rails I have used were those from the Gold Medal Models range which were first class. Tom's I found much thinner, still excellent quality, and subsequently much more fragile when handling. But once you get used to their fragility I found them really very good to use and can highly recommend them, as I do for G.M.M. I really do recommend that if you are building a ship, that you look seriously at adding rails to them, it really enhances your subject and gives greater reality to the model.
Painting
 After much careful investigation and research I painted the hull and major super-structure Humbrol HP4 (which I think is Luftwaffe RLM74?). Actually it was just one of many greys in the draw and heck seemed a good idea at the time. Truth be told a fellow modeller onSMML recommended a Humbrol grey, that I did not have, but HP4 seemed to match his recommendation so I went with that. The deck was painted with Floquil Marine Colours deck tan, which was bought many years ago and has now justified its purchase.

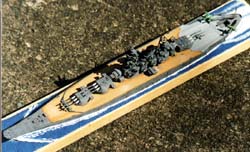
The style of painting was experimental. I put to use some of the experience I have had in shading figure models. The aim was to give this excellent kit the best look of reality possible. As such I did a bit of experimenting till I came up with something giving this model the look of reality. There is so much more to a ship model than painting it a straight grey colour, this sort of detailed model cries out for realism. Hopefully the accompanying photos will show what I am trying to describe.
Accuracy
Having no detailed reference available for her so I cannot be absolutely certain of the kit's accuracy. However there do seem to be some minor quibbles around the bow, detail lacking, questions of the number and location of port holes, positions of bollards and other minor items. Comparing overall the finished model, to what little assorted reference is at hand, it looks very accurate.
Conclusion
 Wonderful kit to build. Couple of idiosyncrasies to look out for (as mentioned earlier). And a minor contradiction in the colour instructions. Extraordinary high level of details and number of parts. Let down in the catapult and crane detail, I strongly recommend that if you plan to build this kit replace the kit items with photo-etch. The instructions are generally very clear, although I suggest dry fitting parts beforehand. Don't try to duplicate the colours shown on the colour illustration, they are grossly inaccurate, refer to the Tamiya paints numbered. For example the blast bags are shown tan when they are in fact white (although elsewhere in Tamiya's instructions they say they are grey!) and the deck is shown as brown when it was buff!

Addenda - Comparison with the vintage Musashi kit:
Comparing the two Musashi's from Tamiya is like chalk and cheese. The 1970's Musashi is highly recommended ONLY if the newer Musashi kit is unavailable. One thing not as good as the original Musashi kit is the amount of information found on the ship in the kit instructions. You could still build a good representation of the Musashi but the overall detail is just not a patch on the new kit, well except the price of the older kit! (850 as opposed to 2400 yen)
Reference
-
Conways all the Worlds Battleships Salamander
-
All the Worlds Warships
-
'Ships of the World' 1988
-
Tamiya's Random Japanese Warship Details volume one and two
-
Anatomy of a Ship - Yamato