


 Italeri
1/48 C-130H Hercules
Italeri
1/48 C-130H Hercules

by Juho Ala-Jaaski
History
The Hercules was developed during the Vietnam war for troop and cargo transport duties, and has since been modified for close support gunship, flying hospital, electronic warfare, paradrop, disaster relief, and "Rivet Raider" electronic communication roles.
More than 1,800 units have been manufactured for 68 nations, and surely the mighty Hercules will serve well into the 21st. century. The C-130 has excellent STOL capabilities, and it can also operate from rough, unpaved surfaces such as fields and roughly prepared sand strips. An example of this is the fact that the Hercs often dropped M-551 Sheridan tanks during the Vietnam war from around 10feet high, not having to land. They also often landed on rough sand roads to deliver supplies, troops, etc..
The Herc has been under constant upgrading, and the newest version the "J" has improved engines and electronics and radar. The "H" is the second newest variant and the Hercules II is already under development. It will have jet engines and an airframe similar to the C-130.
The Hercules is the most widely used transport aircraft in the world. It is currently used by the US, Canada, Italy, France, England and Sweden and many other countries. The most recent action it has seen is the Yugoslavian incident where it carried troops and cargo into the region.
The Kit
 The
kit consists of 7 sprues with about 130 parts moulded in light grey plastic,
and one clear sprue with the cockpit glazing, cargo compartment windows
and the four windows below the cockpit "glass" glazing. It's a reissue
of the Testors kit, only marketed under the Italeri label. The breakdown
of the kit would allow you to build either the troop, cargo, or gunship
versions, but parts are provided only for the cargo version. separate
gunship kit is available, but I haven't seen a troop kit yet with the
jump seats on the walls and the middle of the cargo floor. This kind of
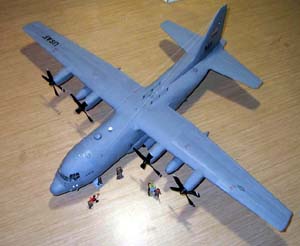
a big kit is very hard to display (it measures around 64cm long (25 inches)
and has a wingspan of about 83,5cm (32 inches). I will build a custom
display base for it with an airfield scene with working lights. I might
just write a short article on that once it's finished but it will be at
least 2-3 months before I can finish it!
The
kit consists of 7 sprues with about 130 parts moulded in light grey plastic,
and one clear sprue with the cockpit glazing, cargo compartment windows
and the four windows below the cockpit "glass" glazing. It's a reissue
of the Testors kit, only marketed under the Italeri label. The breakdown
of the kit would allow you to build either the troop, cargo, or gunship
versions, but parts are provided only for the cargo version. separate
gunship kit is available, but I haven't seen a troop kit yet with the
jump seats on the walls and the middle of the cargo floor. This kind of
a big kit is very hard to display (it measures around 64cm long (25 inches)
and has a wingspan of about 83,5cm (32 inches). I will build a custom
display base for it with an airfield scene with working lights. I might
just write a short article on that once it's finished but it will be at
least 2-3 months before I can finish it!
The interior
 This
kit is the cargo variant and thus doesn't have the troop jumpseats along
the walls. When assembling the interior, place it in inside the fuselage
halves and tape them together to make sure the interior will fit in later.
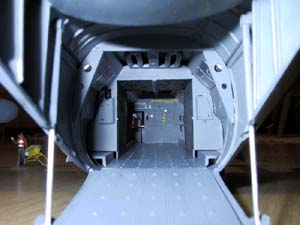
The cargo floor has the rollers molded in, and you can paint them black
if you want. No black anti-skid surfaces are molded on the floor parts.
I painted the entire interior medium grey with silver insulation, green
cushions on the walls, yellow oxygen tanks, red fire extinguishers, black
pipes and lines, brown brooms with simulated wooden handles, dark grey
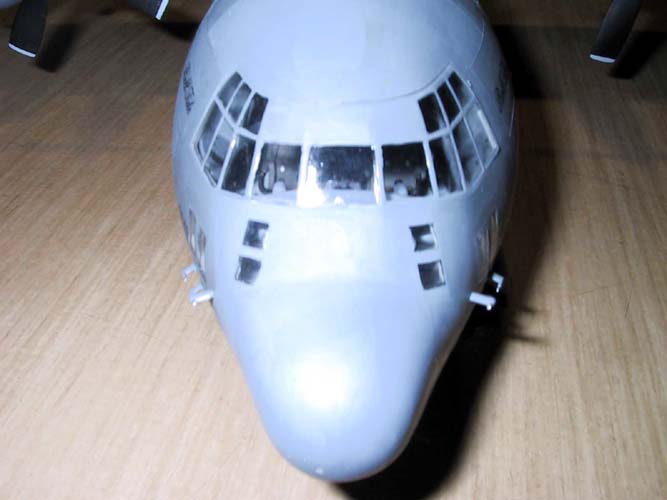
roof piping and black details. The cockpit has nicely molded instruments
but the throttles should be much taller and if you're building the up-graded
version you should add new artificial horizon screens and HUDs for the
two pilots. The radar and FLIR operators station is a little incorrect,
but it can't be seen through the windows anyway.
This
kit is the cargo variant and thus doesn't have the troop jumpseats along
the walls. When assembling the interior, place it in inside the fuselage
halves and tape them together to make sure the interior will fit in later.
The cargo floor has the rollers molded in, and you can paint them black
if you want. No black anti-skid surfaces are molded on the floor parts.
I painted the entire interior medium grey with silver insulation, green
cushions on the walls, yellow oxygen tanks, red fire extinguishers, black
pipes and lines, brown brooms with simulated wooden handles, dark grey
roof piping and black details. The cockpit has nicely molded instruments
but the throttles should be much taller and if you're building the up-graded
version you should add new artificial horizon screens and HUDs for the
two pilots. The radar and FLIR operators station is a little incorrect,
but it can't be seen through the windows anyway.

I painted the instrument consoles medium grey with black instrument backings and white dials. The bed on top of the FLIR operators station was painted olive drab with grey restraining belts and silver buckles.
 The
seats were painted green with brown cushions and grey seatbelts with silver
buckles. Several knobs and dials were picked out in yellow and red to
simulate warning lights and important switches. I was planning on adding
a helmet to each of the seats but I was only able to come up with 2 helmets
so I will add them later on to the base. The cockpit floor and walls were
painted light ghost grey. The rudder pedals were painted silver. The nose
gear attaches to the sides of the nose gear bay so you must attach it
before the fuselage halves are glued together. I used super glue to keep
it tightly in position. The gear bays were painted white, and the oleo
struts and the gear legs were painted silver.
The
seats were painted green with brown cushions and grey seatbelts with silver
buckles. Several knobs and dials were picked out in yellow and red to
simulate warning lights and important switches. I was planning on adding
a helmet to each of the seats but I was only able to come up with 2 helmets
so I will add them later on to the base. The cockpit floor and walls were
painted light ghost grey. The rudder pedals were painted silver. The nose
gear attaches to the sides of the nose gear bay so you must attach it
before the fuselage halves are glued together. I used super glue to keep
it tightly in position. The gear bays were painted white, and the oleo
struts and the gear legs were painted silver.
When you glue the fuselage halves together I strongly recommend using CA glue as it gives a much stronger bond required by the long wings, and fills the gaps at the same time, and believe me, there are quite a few small gaps left once the fuselage halves are together! The wing spar is also VERY important, and just to make sure, you might want to strengthen it by making it out of brass sheet or such. I used it as it came in the kit and so far it has lasted. And I HAVE handled the model quite a bit after the wings were installed!
The exterior
 I
put on all the major exterior components before sanding and painting.
This worked well in my opinion. I had to fill most of the fuselage seams
with super glue and sand them smooth. I must have used up like three 6"
by 4" sheets of sand paper while sanding this model! The wings fit together
almost perfectly and required only light sanding. Same goes for the horizontal
stabilisers. I had to fill a small gap where the fin fits to the fuselage
with a piece of sheet styrene and super glue. After sanding I attached
some of the smaller detail such as the dome on top of the front fuselage,
some antennas, main gear to keep the model of its paint job, and the rear
gate. I also attached the engine nacelles at this point. They fit together
well even with the fan and engine front inside them, but I had to work
on their fit to the wings a bit. I painted the engine fronts black and
the fans silver. The insides of the nacelles were painted the same medium
grey as the cargo bay. I attached the airduct to the left sponson and
the airflow reducer to the vent in front of it. These are optional parts
depending on which variant you choose. So are some of the antennas on
top of the fuselage. If you're building the British version, there's an
external refuelling probe you can use.
I
put on all the major exterior components before sanding and painting.
This worked well in my opinion. I had to fill most of the fuselage seams
with super glue and sand them smooth. I must have used up like three 6"
by 4" sheets of sand paper while sanding this model! The wings fit together
almost perfectly and required only light sanding. Same goes for the horizontal
stabilisers. I had to fill a small gap where the fin fits to the fuselage
with a piece of sheet styrene and super glue. After sanding I attached
some of the smaller detail such as the dome on top of the front fuselage,
some antennas, main gear to keep the model of its paint job, and the rear
gate. I also attached the engine nacelles at this point. They fit together
well even with the fan and engine front inside them, but I had to work
on their fit to the wings a bit. I painted the engine fronts black and
the fans silver. The insides of the nacelles were painted the same medium
grey as the cargo bay. I attached the airduct to the left sponson and
the airflow reducer to the vent in front of it. These are optional parts
depending on which variant you choose. So are some of the antennas on
top of the fuselage. If you're building the British version, there's an
external refuelling probe you can use.
Painting
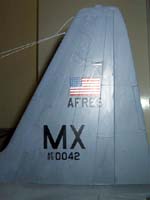
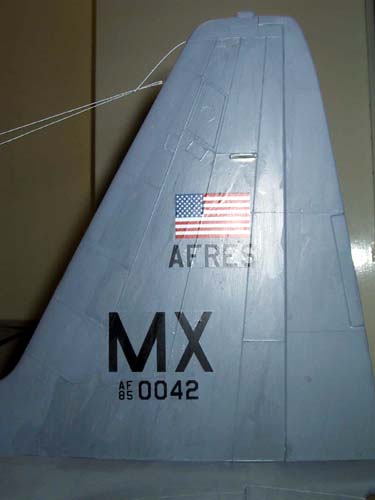
Well, not much to say here! I painted the entire aircraft modern US medium grey, with black propellers with light grey tips, and red and green for the wingtip navigation lights. The compressed air struts that open and close the cargo gate were painted the same grey as the interior of the cargo bay with silver sliders. The tires were painted black with silver caps.
Last minute detailing
 I
added all the small detail after painting. I chose to use the rails that
go on top of the wings, although I wasn't sure if the example I was modelling
had them. I also used all the antennas appropriate for a US C-130H. The
antennas were painted white, and the small disk and antenna on top of
the fuselage was painted white with a medium grey base. The rails were
painted the same color as the exterior, as well as the exteriors of the
landing gear bay doors (duh!)
I
added all the small detail after painting. I chose to use the rails that
go on top of the wings, although I wasn't sure if the example I was modelling
had them. I also used all the antennas appropriate for a US C-130H. The
antennas were painted white, and the small disk and antenna on top of
the fuselage was painted white with a medium grey base. The rails were
painted the same color as the exterior, as well as the exteriors of the
landing gear bay doors (duh!)

The gear doors were painted white from the inside and the front gear door actuators as well.
Decals and weathering
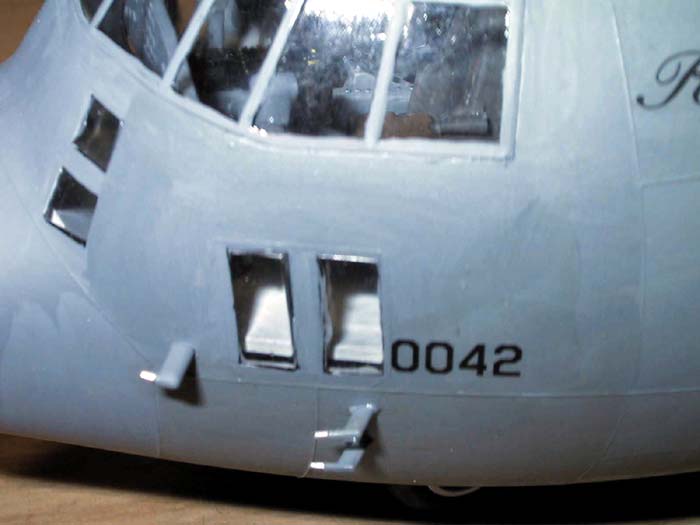
I applied the decals using the microscale system. I glossed the areas where the decals would be applied with Future floor polish and then after they had been applied I coated them with a flat coat. The decals went on extremely well and no silvering occurred, only very little on one of the wing fuel markers.
I also coated the clear parts with Future and put the cockpit glazing on at this point. It fit well.
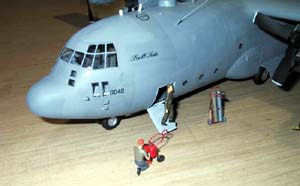
Weathering was accomplished by drybrushing a little silver to the steps on the side access hatch and to the bottom of the rear gate. Grey pastels were applied here and there to simulate fading etc.. Black was drybrushed along the engine nacelle bottoms to simluate exhaust stains. The last parts I attached were the small airducts above the engine nacelles. Why? Well, I forgot to attach them earlier! The final detail I added were the antenna wires.
About the pictures
The pictures were taken with my dads CANON brand digital camera in adequate lighting. The figures included will go on my Hercules diorama once I finish it. They are made by ERTL/AMT and the carts are scratchbuilt.
Thanks to Tieto-Nikkari, Helsinki Finland for the review sample! The best hobby shop in Finland, also ships abroad, and to other Scandinavian countries. Check out their webpage!


Previous: Contents

