 Lend-Lease
Warhawk: Building Academy's P-40M
Lend-Lease
Warhawk: Building Academy's P-40M
as a VVS Fighter
By Matt Bittner
Photography by Scott Hackney
History
The history of the P-40 is vast. Starting with the P-36/Hawk, the P-40 evolved into a first rate-fighting machine. However, it was outclassed in the early to mid part of World War 2, but soldiered on long after.
The VVS was the third largest user of the P-40. Via Lend Lease, a total of approximately 2600 P-40's reached the Soviet Union. It served with distinction on every front, but never reached the level of distinction the P-39 did. In fact, the type disappeared quickly from front line service, being relegated to the PVO, or air defense squadrons. During the early part of the war they were stretched so thin that the type as a whole - again unlike the P-39 - didn't make any lasting contribution to the war effort. In the VVS eyes, it was considered a "medium" aircraft: better than the I-15's and I-16's, but not as good as the P-39, Yaks or Lavochkins.
 The
Kit
The
Kit

The Academy P-40M/N consists of 51 injected molded parts, with an additional sprue of 8 injected clear parts. The model is exquisitely molded, and the detail is very fine and crisp. Comparing it with its Hasegawa cousin, the Academy offers more in terms of cockpit and wheel well detail. In addition, it is the only injected kit I know of that builds into the P-40M.
Decals consist of 3 schemes: an American aircraft from the 74th Squadron, in China, 1944; an RAAF bird from No.80 Squadron, New Guinea, 1945; and one RAF machine of No.112 Squadron, Sicily, 1943.
Construction
Naturally construction starts with the cockpit. I decided to try one
of the Eduard "Zoom" sets, so I purchased the one for this kit.
The Eduard Zoom set consists of 27  photoetch
pieces and a piece of film for the two different instrument panels. The
set also consists of seat belts; a couple of other smaller items for the
cockpit including a throttle quadrant; torque linkages for the landing
gear; replacement hood for under the windscreen; and (very nicely done)
underside cowl flaps. Once the smaller Zoom items were added to the kit
cockpit, the entire cockpit was painted Interior Green and given an oil
wash. If you so desire, you can assemble the fuselage halves before
installing the cockpit since the cockpit can be glued in through the wing
cutout. This is what I did. I glued the fuselage halves together, added
the rear cockpit piece for the -M and then removed whatever seams there
were before installing the cockpit and the instrument panel.
photoetch
pieces and a piece of film for the two different instrument panels. The
set also consists of seat belts; a couple of other smaller items for the
cockpit including a throttle quadrant; torque linkages for the landing
gear; replacement hood for under the windscreen; and (very nicely done)
underside cowl flaps. Once the smaller Zoom items were added to the kit
cockpit, the entire cockpit was painted Interior Green and given an oil
wash. If you so desire, you can assemble the fuselage halves before
installing the cockpit since the cockpit can be glued in through the wing
cutout. This is what I did. I glued the fuselage halves together, added
the rear cockpit piece for the -M and then removed whatever seams there
were before installing the cockpit and the instrument panel.
 The
one piece that wasn't a great fit was the -M rear fuselage piece. Dry
fitting is the key, but even so I ended up using some putty to remove
the seams. Once seam removal was finished the cockpit was added.
The
one piece that wasn't a great fit was the -M rear fuselage piece. Dry
fitting is the key, but even so I ended up using some putty to remove
the seams. Once seam removal was finished the cockpit was added.
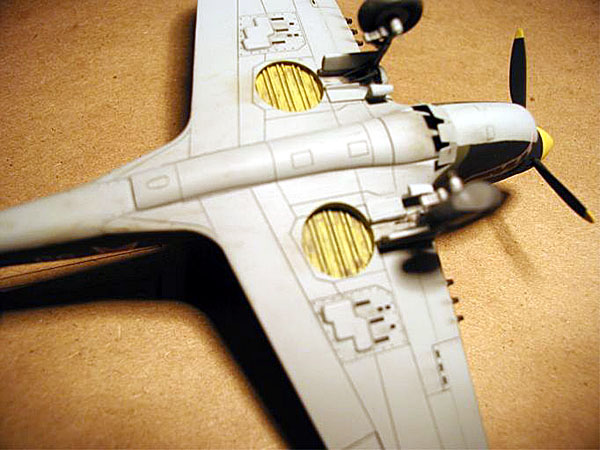
One important note before adding the lower portion of the wing. The "inlet" on the upper nose directly behind the spinner allows a "see-through" effect after the model is assembled. A piece of sheet plastic to block this from the inside is definitely a must.
In light of my experience with some of the Eastern European and CIS
kits, I decided to add the lower portion of the wing assembly to the fuselage
before adding the upper wing halves. Normally you would add the lower
wing halves to the top portion before gluing the whole assembly to the
fuselage. With 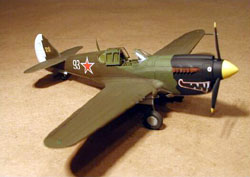 some
of the "non-mainstream" kits, it's easier to add the underside
wing portion to the fuselage first. Well, I should have known that with
a kit this well engineered, it wasn't necessary. There was a very small
gap I had to fill on the upper wing root portion, the rest of the seam,
since it fell on a panel line - was dealt with by lightly sanding. The
underside of the wing to fuselage joint - particularly the rear portion
- needed more attention and a little more putty.
some
of the "non-mainstream" kits, it's easier to add the underside
wing portion to the fuselage first. Well, I should have known that with
a kit this well engineered, it wasn't necessary. There was a very small
gap I had to fill on the upper wing root portion, the rest of the seam,
since it fell on a panel line - was dealt with by lightly sanding. The
underside of the wing to fuselage joint - particularly the rear portion
- needed more attention and a little more putty.
Once the wing was on and blended in I then glued on the horizontal tailpieces. No putty necessary, the seam needing only a light sanding to remove any difference in the parts.
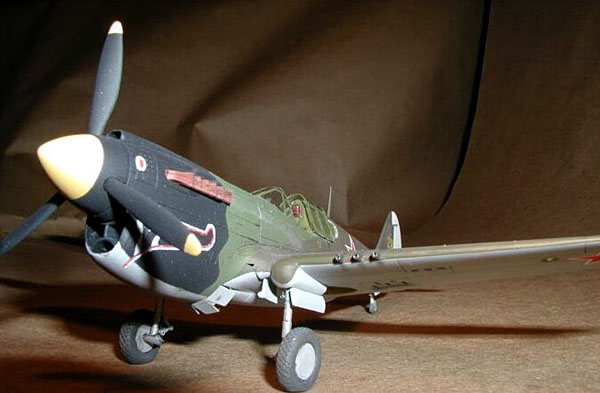
Before I glued on the Squadron vacuform canopy, I scratch built a new
gun sight. The one in the kit is okay, but I really didn't like it.
I then added the vacuform windscreen blending it in before I started painting.
If you were to close the canopy, I would opt 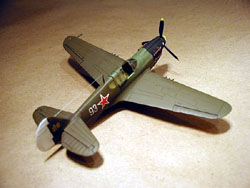 for
the kit pieces; however, the sliding portion of the kit canopy will need
some sanding to reduce its height. In 1/72nd, I have yet to
encounter any kit clear that is truly in scale. Vacuform (or hand
made "squashed" examples) are definitely more to scale.
for
the kit pieces; however, the sliding portion of the kit canopy will need
some sanding to reduce its height. In 1/72nd, I have yet to
encounter any kit clear that is truly in scale. Vacuform (or hand
made "squashed" examples) are definitely more to scale.

Final Assembly and Painting
I also wanted to try the Eduard Express Masks for the clear pieces. They worked okay on the vac replacements, but would definitely work better on the kit parts. I wasn't entirely happy the way they stayed on the vac parts, but don't let that stop you from using them on the kit parts.
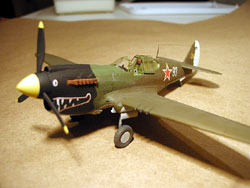
 After
the clear parts were masked, I then started painting. The underside gray
used is from Aeromaster's acrylic range - now sadly out of production
- while the U.S. Olive Drab is from the same source. The AMT-4 color
on the front of the fuselage is Medium Green from Testor's Acryl range
(not the perfect match for color, but one I had in my possession). The
black is also an Acryl paint (which is odd for me, since I tend to stick
with Polly Scale primarily - I don't really like the Acryl paints).
After
the clear parts were masked, I then started painting. The underside gray
used is from Aeromaster's acrylic range - now sadly out of production
- while the U.S. Olive Drab is from the same source. The AMT-4 color
on the front of the fuselage is Medium Green from Testor's Acryl range
(not the perfect match for color, but one I had in my possession). The
black is also an Acryl paint (which is odd for me, since I tend to stick
with Polly Scale primarily - I don't really like the Acryl paints).
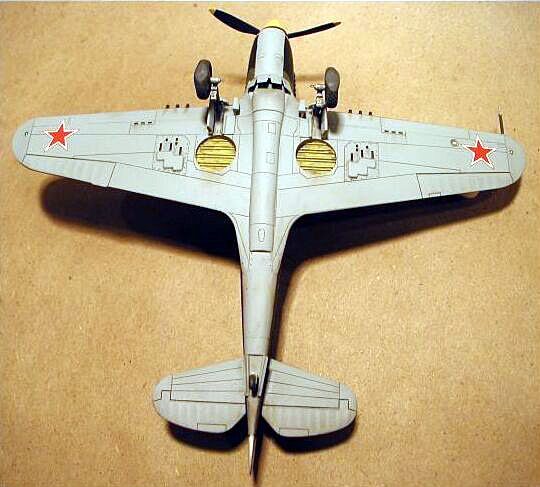
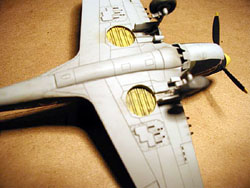
The undercarriage was painted Polly Scale Flat Aluminum. The flattened and bulged main tires are from True Details. I also drilled out the location for the "flip-down" landing light, and installed an MV Lens in the resulting hole.
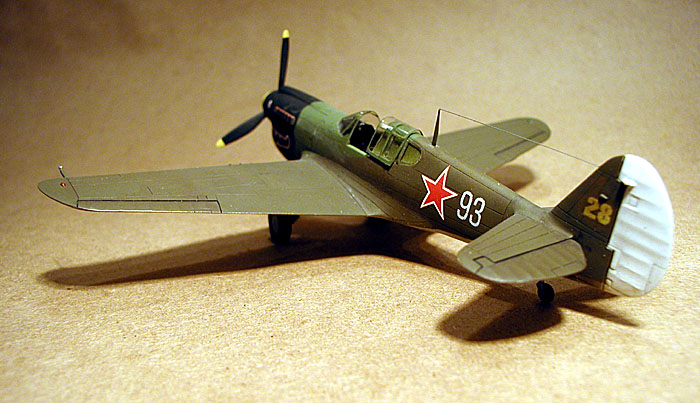
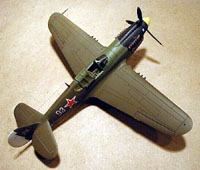
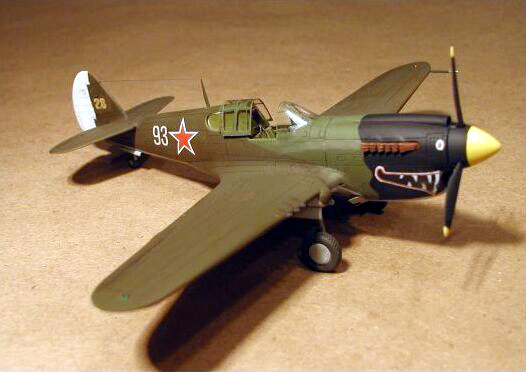
The plane is modeled from a view in Red Stars of a machine from the 191 IAP. Stars are from the spares box while the mouth and numbers are ALPS-printer generated. An oil wash was used to pop out the excellent engraved detail, and oils and pastel chalks were used to give the aircraft a slightly "worn" appearance.
 Conclusion

These new Academy kits are a dream. Excellent in detail and (as far as I can tell) pretty accurate in shape and size. Well worth the cost and everyone needs to buy these to show Academy to produce more. In fact, let me take this time to plead with Academy to re-do their P-40B/C molds. Trash the old molds and - using all available references - please make new P-40B/C molds. This is a much-needed P-40 mark using the current molding technology.
My thanks to Erik Pilawskii for all the help.
References
-
Ehrman, Vlastimil and Valerij Roman, Curtiss P-40, MBI
-
Guest, Carl-Fredrik, Kalevi Keskinen and Kari Stenman, Red Stars, Ar-Kustannus Oy
-
Kinsey, Bert, Detail & Scale Volume 62, P-40 "late marks" (even though their coverage of VVS P-40's is non-existent).


