 Tamiya
1/24
Tamiya
1/24
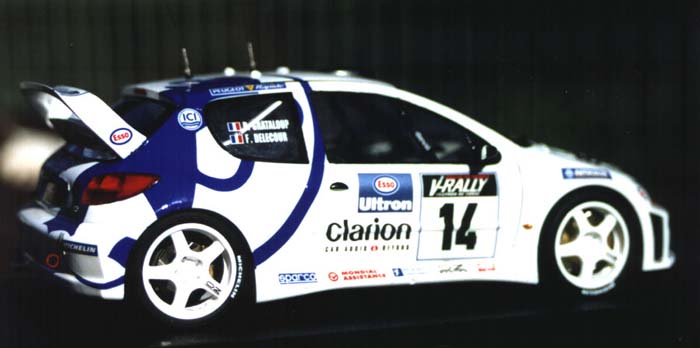
Peugeot 206 WRC #14

By Tony Paton
The Subject
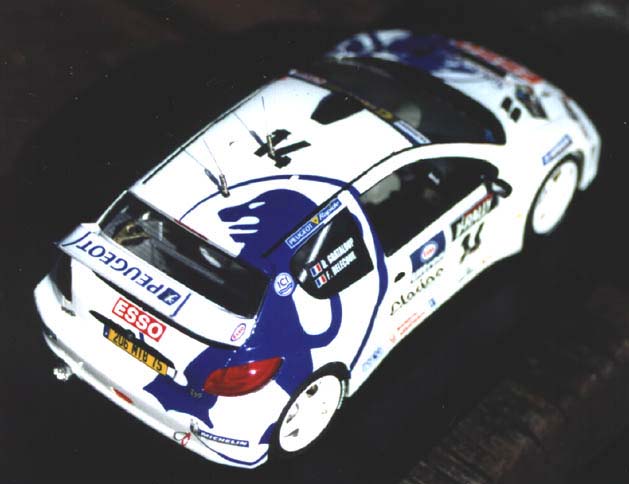
The 206 WRC marked the return of Peugeot into the world rally scene. It debuted at the Tour de Corse rally in 1999 where it held first place for a brief time until mechanical failures ruined it's chances. The version I decided on modelling is the number 14 car driven by François Delecour that did the best in the rally out of the two entered.
Construction
 |
 |
 |
 |
 |
 |
 |
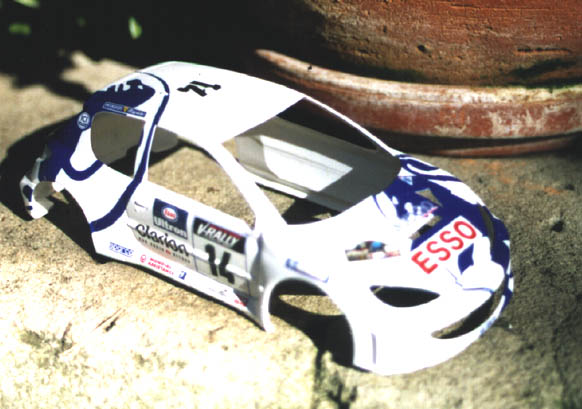
The body shell was sanded and prepared for painting. Beforehand I removed the solid grill on the top of the hood with a combination of drilling and cutting. I also constructed the complicated rear wing. These components were then given a coat of Tamiya's matt white.
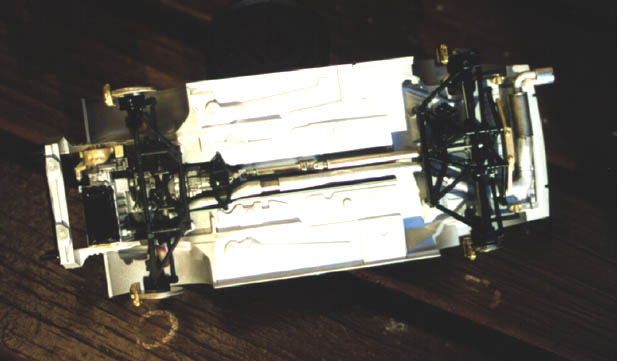
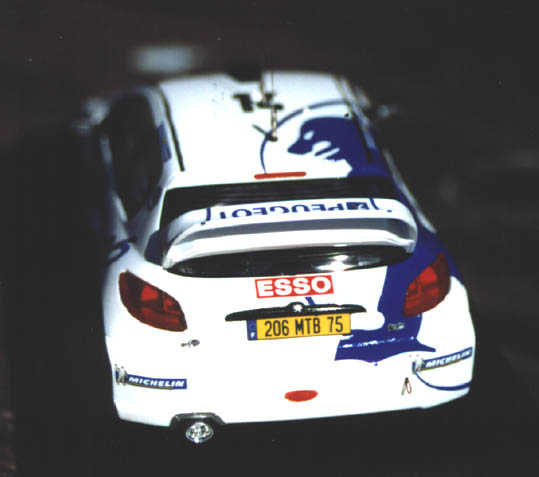
While this was drying work started on the chassis component. The tray and the roll cage were painted in Tamiya's Gloss Aluminium as described in the instructions. The body, wing and wheels were given three coats of Tamiya's Pure White and left to dry for a couple of days.
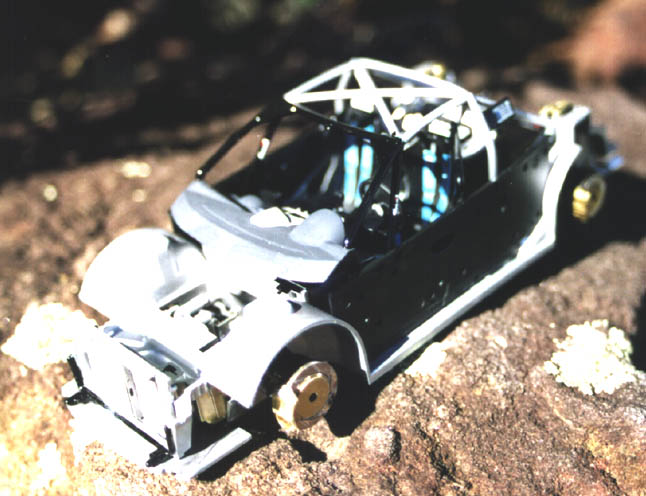
The undersurface and suspension was straightforward. Something I found a bit strange was that the front struts were pink in colour! The photo-etched brake discs were attached and made the whole area look good. The interior was then put together. The fire extinguishers look great and the PE footrests give a bit more realism to it all. The seats have carbon fibre decals for the back and decals for the seatbelts. There is also a spare tyre included to put behind the drivers.
The roll cage was a bit tricky to put all together but with a little care and patience it shouldn't cause any major hassles. A neat feature Tamiya has included is the holder for the helmets that is fixed onto the roll cage.
One thing Tamiya have forgotten about is the rear vision mirror. There is no mention of it in the instructions but it is there on the fret and photos of the real car. The mirror glues onto the roll cage. There is already a hole made for it. Maybe Tamiya were in a rush to release this kit and it was an oversight. So don't forget the mirror!
Once dry, the body was polished up to make the white stand out more. The decals were then applied. The complicated lion motif was not as hard as expected. Tamiya had pre-cut them to make it easier - and it is. There was no need for solvents either. One trick I've heard of is to use a cloth dipped in hot water to put the decals in place.
After drying for a few days I gave the body two coats of Testors' Gloss coat. One thing that impressed me about the decals was how glossy the lion decals were. They were not matt like most other body decals.
When this dried the aftermarket grills were glued in place, along with the headlights. Then the one piece window was painted with the help of the masking seals. This was glued onto the body with white glue and left to dry.
The body and chassis were then mated. No fit problems at all, what else can you expect from a Tamiya Kit?
Final details were added. This included the wheels, rear lights and the numerous latch pins. Tamiya have produced plastic ones and are three times the size of the PE ones. The PE latches look more realistic. The roof air scoop is black, but on the real picture of the car it is carbon fibre. I suggest buying carbon fibre decals to make it look better - carbon fibre is also used on the lower half of the roll cage so it wouldn't go to waste. The car was topped off with two aftermarket aerials from Studio27.
Conclusion
The amount of detail Tamiya is supplying with it's latest kits keeps getting better and better. There were no serious problems encountered with this kit. The only thing to watch out for is to not forget the rearview mirror for the interior as it is missing from the instruction sheet. The decals may cause problems if you try and rush them, but if you take your time the results are stunning. I enjoyed this kit and recommend it to anyone wanting to add to their WRC collection.
The kit and Studio27 upgrade kit were purchased from Rainbow Ten.


