
Building Fujimi's 1/72nd Scale Army Type-98 Direct Cooperation Reconnaissance Plane, Ki-36 'Ida' (Kit number 72058)
By Michael Kendix
History
First flown in 1938, the Ki-36 was a two-seater designed for short takeoff on rough airstrips in order to engage in photograph reconnaissance. Tachikawa continued Ki-36 production until 1944; another 472 Ki-36s were manufactured by Kawasaki. In March 1939, an adaptation, the Ki-55, was built for training purposes; both versions were code named 'Ida'. The Ki-36 was used at the beginning of the Pacific War in Hong Kong, against the British in Burma and Malaya, and in the assault on the Philippines.
The Kit
 Fujimi have produced a number of different 'Ida' kits containing different versions and combinations. This particular kit came in an attractive box with a mottled green camouflage pattern Ki-36 on the box top. The kit permits no fewer than three versions; the Ki-36 reconnaissance aeroplane, the Type-99 Advanced Trainer Ki-55, and the 'Kisaragi' version purchased by the Asahi Newspaper Company. Decals for all three versions are included. The kit contains two different sets of wheels; the pants wheels for the Ki-36 and Kisaragi, and the regular wheels for the Ki-55. A separate set of clear parts is provided for the Ki-55 that does not have a hole for the gun sight. The kit also allows some small differences between versions for the cockpit interior. The kit is packaged in a clear plastic bag; similarly the decals and clear parts each come in their own small separate bags. All considered the entire package is both comprehensive and convenient. The kit has well detailed panel lines and the plastic has virtually no flash whatsoever.
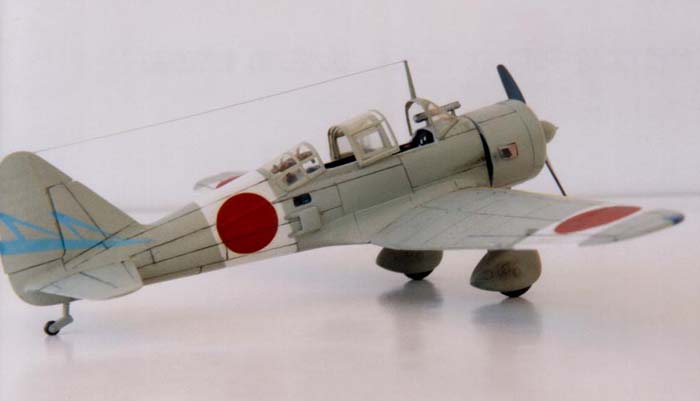
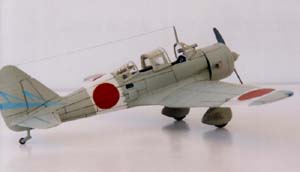
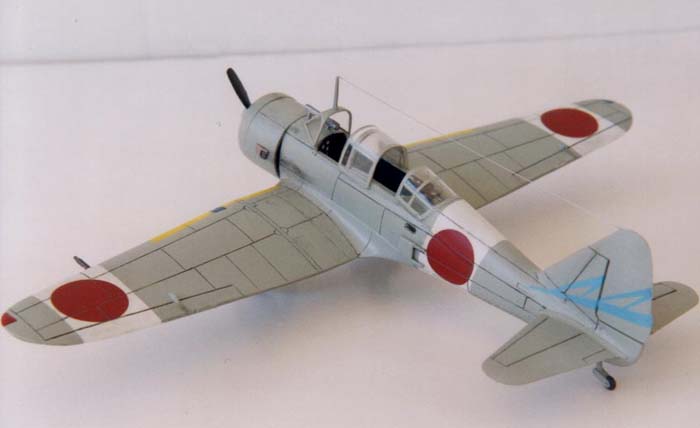
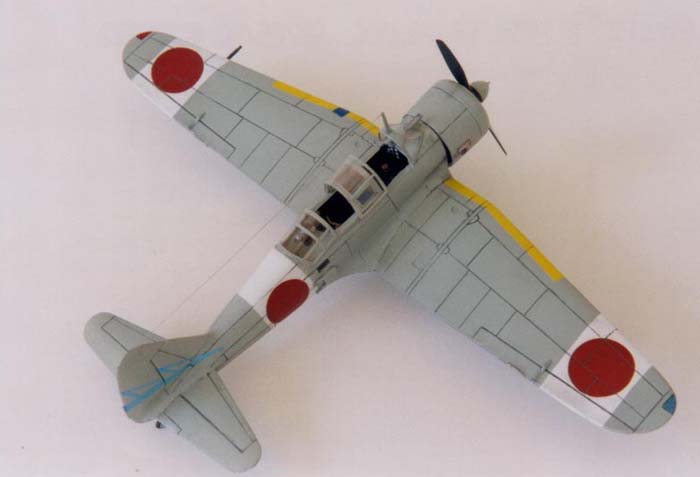
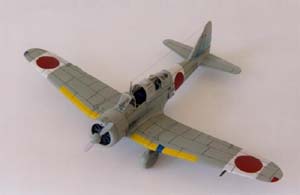
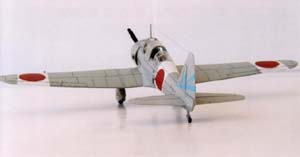 My first task was to decide on a colour scheme, however, there are few references for the 'Ida'. Fortunately, issue 2, 4 of the Asahi Journal contained background information on the 'Ida' and no fewer than 37 different colour schemes. I chose scheme 19, belonging to the 47th Sentai, Narimasu, Tokyo, fall 1943. I picked this colour scheme because it was not too simple or too difficult. The scheme is IJAF grey overall with white bandages wrapped around the fuselage and both wings. It also has yellow leading edges and pale blue tail markings. Ideally, I would have preferred the mottled camouflage colours, however, my airbrush skills are insufficiently developed for that particular challenge.

Cockpit and Engine
 As usual I began with the cockpit interior. The instructions suggest a 'Navy Blue' interior, however, my advisor – Tom Hall, editor of the Asahi Journal – suggested a royal blue. I used Gunze-Sangyo's H5 Gloss Blue. Since the Gunze-Sangyo paint is notoriously fragile, I added Future to the mix and then dulled it down later with acrylic flat. The kit contains only a couple of seats, control stick and an instrument panel; to these I added a couple of sets of after market seatbelts. The engine was painted Model Masters' 'Engine grey' and then dry-brushed with aluminum. I painted the propeller spinner and cowl Gunze-Sangyo IJA Grey.
Fuselage and Wings
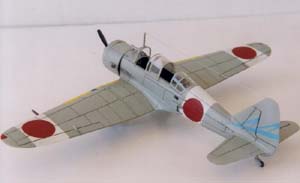
 I cemented the fuselage halves, which did not quite match up. I had to enlarge one of the joining pinholes so that the fuselage halves could be shifted in line with each other. Aside from that, I had no further problems with the fuselage, or with the wings and tail parts. I had to do some filling and sanding for the fuselage and especially at the wing roots. I did not use the clear parts supplied in the kit for the side or underside windows since I could see no convenient means to mask these. I simply used Model Masters' 'Clear Parts & Window Maker' at the end when all the painting and decaling had been completed. I then attached the engine housing (parts 6 and 7) but did not attach the propeller sub-assembly. I masked off the cockpit ready for painting the fuselage and wings. I sprayed white around the fuselage behind the cockpit and around each wings. I then sprayed the masked off wings, tail and fuselage IJA grey. After I removed the masking tape (Scotch Tape) I realized the white bandages on the wings were not symmetric. My problem was that I had set the bandages relative to the aileron flap hinges and these are not an equal distance from the wing tips. At this point, I was fed up with masking and did not want to remove the entire paint job with isopropyl alcohol. I sprayed over the white wing bandages with IJA grey and then used decal paper strips sprayed white to make the new bandages. I then sprayed some decal paper yellow and cut this to make the leading edge wing stripes.

Final Assembly
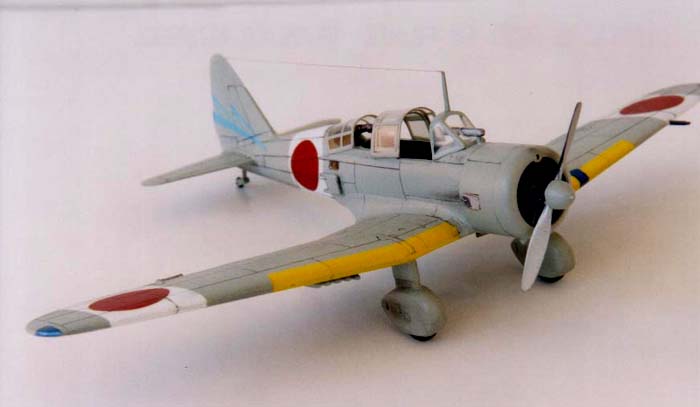
 Once this was dry, I added the landing gear, the ten small bombs, side exhausts and engine sub assembly. I omitted the large 250kg bomb. The landing gear went on without a hitch. It would have been better if the wheels were separate; they are simply molded into the undercarriage pants leg.
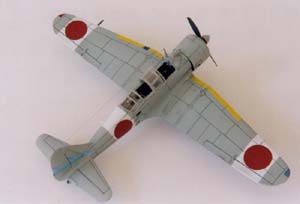
The Kit's hinomaru were a little light so I substituted some blood-red coloured decals from 'Authentic Decals'. I then cut sprayed decal paper to make the light blue tail markings. I used a grey gouache water based wash to highlight the panel lines and some pastel chalks for some fairly light weathering. The entire assembly was then sprayed with a semi-gloss clear acrylic.
 The cockpit canopy is somewhat thick so I used a vacuformed canopy from Falcon, which I then cut into five pieces. For ease of exposition, I will refer to the cockpit parts as 1 through 6, one being the foremost. I wanted to have the cockpit open, despite the somewhat sparse interior. It was quite a challenge for me to work out the position of each canopy segment. First I cut the canopy into 5 parts; rearmost segments 5 and 6 are not separate. I made the canopy frame from thin strips of decal paper sprayed with IJA grey. I drilled a hole in the front piece for the gun sight and glued the rear (5 and 6) and front (1) pieces into position using Elmer's white glue (it is a lot stronger than you think). In the open position, segment 4 goes underneath segment 3 and segment 2 goes on top of segment 3; quite a crowded arrangement. I glued segment 4 into position 3, cemented segment 3 over the top, then I simply placed segment 2 on the top of that. I attached the antenna support, and a piece of .005" wire was used to run from the support to the tail.
 Conclusion

This kit is an old kit that holds up well. The cockpit detail is sparse, the undercarriage could benefit from more detail but the kit provides for three separate versions of the aeroplane, fits well and is a straightforward and enjoyable kit to build.
Reference
-
Tom Hall. 'The Type 98 Direct Cooperation Reconnaissance Plane', Asahi Journal, volume 2, issue 4.