
Dragon Models 1/700 Type 42 Batch 3 Destroyer HMS Manchester
By Richard Eaton
Introduction
I reviewed the Dragon Models Type 42 Batch 3 Destroyer in the July issue of Internet Modeler. Dragon provides the latest outfitting on this recent waterline kit. Bob sent me the White Ensign Models Type 42 PE fittings set he reviewed in the same issue. With a nicely molded model and excellent fittings in hand, it was time to build! Read on.
Building Manchester
 This 1997 kit is labeled HMS Manchester but includes parts and markings for any of the Type 42 batch 3 ships. It is a dandy, with clean crisp moldings and no flash. The parts consist of three trees of hard gray styrene parts, and a decal sheet. The numerous small parts reveal detail that is state of the art.
As is my habit, I separated and sprayed the parts while on the sprue. I painted the ships' decks with Testors Euro One Gray, the hull and superstructure Light Gray, and masts Flat Black. Careful paint application at the start of a kit like this saves a ton of masking down the road.
Before assembly I went over both the kit and the WEM fittings' directions. I wanted to get a feel for where the plastic might leave off and the metal fittings begin. WEM does a great job with this set. The directions gave plenty of information as to how to apply the PE. That is good, because there is a ton of fittings provided.
 Following directions, steps one through six provide the various weapon systems, masts, radar, and exhaust stack. I assembled the parts and prepared them for the PE fittings where appropriate. I trimmed the type 1002 air search radar mount, masts, and prepared the Lynx helicopter for its PE rotors. I chose to complete the plastic assembly as much as possible prior to cutting out the PE parts. I posed the Sea Dart SAM mount in the stowed position though the parts came with missiles. The fit was perfect and only minor sanding and touchup completed the assemblies.

 In steps seven through nine I assembled the superstructures out of individual bulkheads and decking. There were numerous times where parts' choices were given between building Manchester or Gloucester. Careful alignment left little clean up. I posed the hanger doors closed because I wanted to show the helicopter in the take off position. The ships' boats and countermeasure launchers were well molded an in scale. I finished up these assemblies by detail panting and a light dry brush with white to bring out details.

 Next I assembled the hull and painted the deck. Once dry, I applied a coat of clear gloss over the entire ships hull. Decals for the kit include extensive deck warning striping and flight deck markings. These were large decals with plenty of clear area so I was afraid of silvering. I applied Future acrylic floor polish over all decal areas. I then applied the decals. I then applied more future over the decals and, when dry, they looked painted on. I applied the rest of the kit details in a like manner.

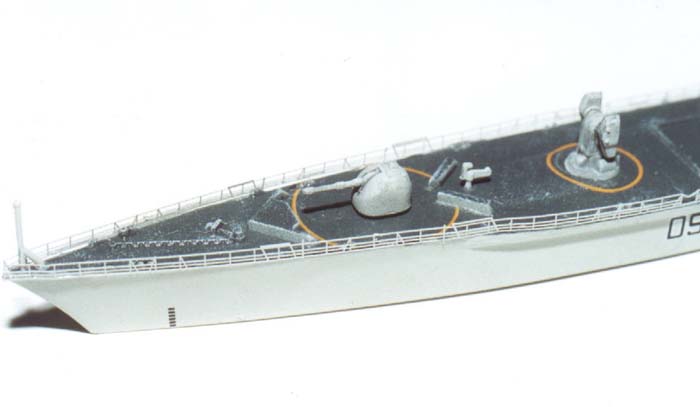
I next assembled the remaining small parts to the hull and – still separate – superstructures following steps 10 through 12. I left off the masts and any other parts that require PE. Here I encountered my only disappointment with the kit. The small deck guns were grossly overscaled. I just did some judicious snipping to make them set on the deck a tad lower.
WEM Type 42 Fittings
 The ship was ready for the PE details. This is my second attempt at PE details in this scale. The quality of the White Ensign Models fittings and instructions made this build a pleasure. I painted the PE in the ship's colors and started attacking the many assemblies. First up was the type 1002 air search radar. I used two single edge razor blades to do the bending under high magnification. It went together like a dream - I mounted it on the kit part and set it aside. The mast fittings were challenging. At one point I almost decided to leave the plastic detail alone. The PE was just too nice! I spent a couple of sessions assembling the yards and antennae on each mast. Boy does it look sharp! Each mast had from eight to a dozen individual pieces to assemble.

Once done I painted the masts as directed and set them aside. I next went over the superstructure adding PE according to the WEM directions. These parts included aerials, cranes, railings and the like. Man talk about details! The engine air intake grating was particularly nice.
 Now it was railing time. I finished what was left on the superstructure railings and started on the main deck. Not having the superstructures in place greatly eased placing the deck railings. The WEM PE had special railings for the bow of the ship. Once those were in place, standard railings went aft to the flight deck. I was able to get the railings fairly straight but I still have a habit of mucking things up by applying too much CA. I need to find a finer tool to apply the CA as a sharpened toothpick does not cut it. I sprayed a few puffs of Dullcote to hide the CA shine. The WEM flight deck guard rail was one continuous piece that wrapped around the stern.
Final Assembly
 With the PE in place I spent one more session putting all the detailed assemblies onto the hull. I tacked on the air search radar masts onto the forward superstructure. When everything seemed aligned, I fixed the superstructures to the hull. I ending up aft by placing the Lynx helicopter on the flight deck. That done, I sat back and marveled at the details. A little more touchup and she was ready to put to sea.
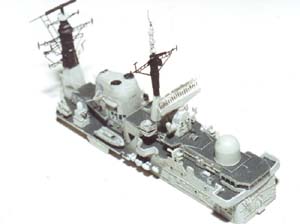
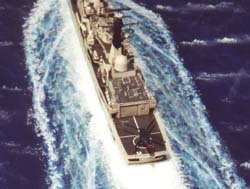
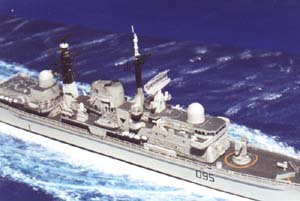
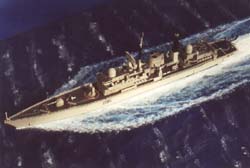
I painted a water scene using acrylic Navy Blue, White, and a touch of Turquoise. I carefully tacked the ship on with a touch of glue and took it out in the sun for some photos.
Conclusion
This kit builds up to a very nice looking model. The numerous detailed parts fit well and, with careful painting, make a convincing Type 42 class destroyer. I think average modelers would have a great time building up this nice kit right out of the box. More advanced modelers will love the WEM detail set.
Our thanks to Squadron Mail Order for the review kit and to Caroline Carter of White Ensign Models for the photo-etch samples for this project.
Sources
-
"Modern Naval Combat" David and Chris Miller (Salamander Books Ltd. 1986)
-
The Royal Navy