 Revell
1/24 Champion Porsche GT-1 Evo
Revell
1/24 Champion Porsche GT-1 Evo
By Tony Paton
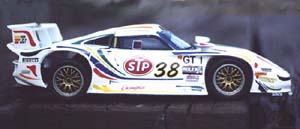
The subject
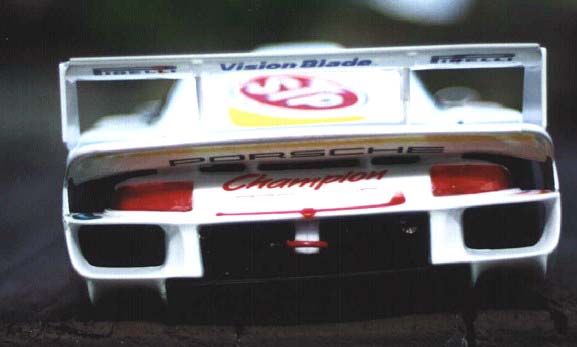
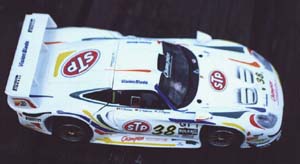
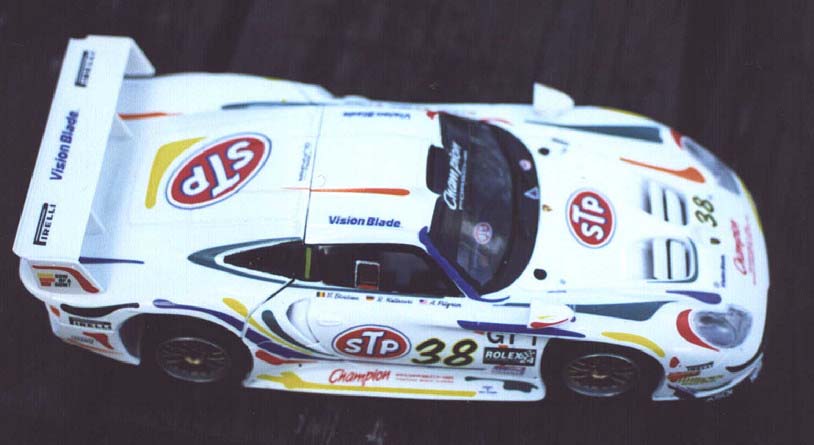
This is Porsche's 2nd incarnation of the incredible GT-1. The "Evo" depicted by Revell in this model is the Champion Porsche team's car that raced in the 24 hours of Daytona in 1998.
First Step.
 On
closer inspection of the body shell, I discover that it was warped. I'm
not sure if this happened in transit or if it was a manufacturing error.
I knew that a lot of glue would be needed to get it right. I attached
the mirrors to the body and attached the wing to the rear, removable,
cowl. These were then painted matt white as an undercoat. Then two coats
of Tamiya Pure White (TS-26) were applied and left for a few days to dry.
On
closer inspection of the body shell, I discover that it was warped. I'm
not sure if this happened in transit or if it was a manufacturing error.
I knew that a lot of glue would be needed to get it right. I attached
the mirrors to the body and attached the wing to the rear, removable,
cowl. These were then painted matt white as an undercoat. Then two coats
of Tamiya Pure White (TS-26) were applied and left for a few days to dry.

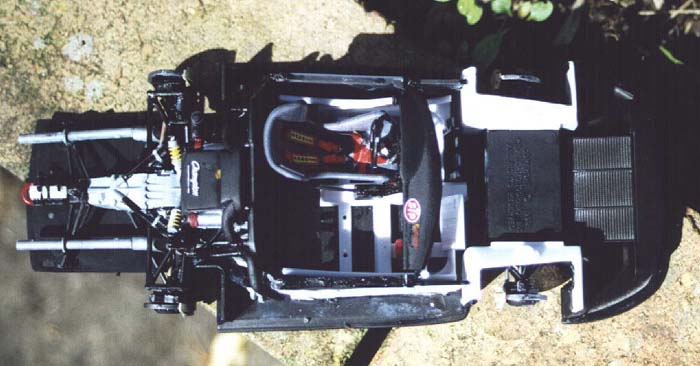
Chassis construction.
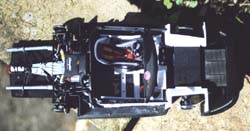 Another
problem was the under tray. This was also warped but I think this was
due to it being too thin! As the complete engine and rear suspension was
attached, the weight caused the tray to bend! Then the floor pan supports
and cockpit supports would not glue flush to the under tray. Huge amounts
of glue and tape held them in place. The tray was still bent and I could
see problems happening up ahead.
Another
problem was the under tray. This was also warped but I think this was
due to it being too thin! As the complete engine and rear suspension was
attached, the weight caused the tray to bend! Then the floor pan supports
and cockpit supports would not glue flush to the under tray. Huge amounts
of glue and tape held them in place. The tray was still bent and I could
see problems happening up ahead.
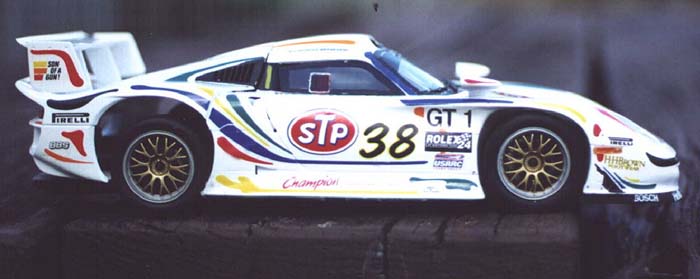
Decals
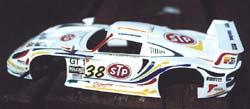 Once
the body and rear cowl had dried it was time to apply the decals. There
are plenty of decals to apply so I set aside a few hours just for this
task. Another problem was encountered here! When the decals were removed
from the backing paper and placed on the model, the decals wouldn't slide
into place. I found this very annoying and had to apply liberal amounts
of water to get them to move. At least I knew they wouldn't move after
they were applied.
Once
the body and rear cowl had dried it was time to apply the decals. There
are plenty of decals to apply so I set aside a few hours just for this
task. Another problem was encountered here! When the decals were removed
from the backing paper and placed on the model, the decals wouldn't slide
into place. I found this very annoying and had to apply liberal amounts
of water to get them to move. At least I knew they wouldn't move after
they were applied.
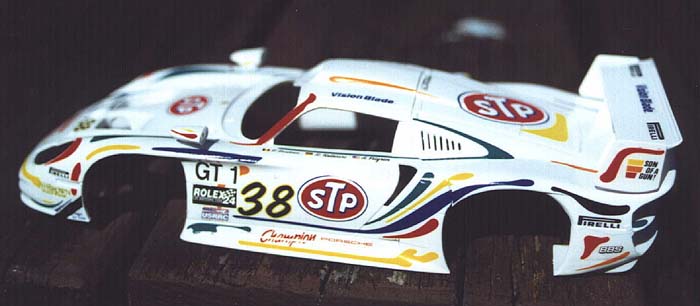
Finally the job was done and it looked stunning. After a few days of drying, a coat of testors glosscoat was applied.
Final construction.
 When
the body parts had dried it was time to do the final detailing. The front
window was very tricky to fit and I put this down to the warped body.
The side windows were no problem. The headlights were also easy to fix.
When
the body parts had dried it was time to do the final detailing. The front
window was very tricky to fit and I put this down to the warped body.
The side windows were no problem. The headlights were also easy to fix.

The wheels are predominately gold with a silver rim. Revell have molded these in gold and I found no reason to spray them, as they looked good as they were. I hand painted the rims silver and left to dry.
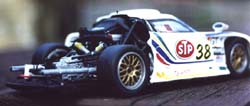
 After
finishing most of the body detail it was time for the part I was dreading.
After a few dry attempts I could see this being a major hassle as the
chassis, that the body glued onto, and the body shell were both warped.
I glued the front section down and taped and left to dry for a day. Then
while keeping it taped, I glued the back half down. After copious amounts
of glue and tape it was finally glued into place. I left this to dry for
a couple of days to let the glue set.
After
finishing most of the body detail it was time for the part I was dreading.
After a few dry attempts I could see this being a major hassle as the
chassis, that the body glued onto, and the body shell were both warped.
I glued the front section down and taped and left to dry for a day. Then
while keeping it taped, I glued the back half down. After copious amounts
of glue and tape it was finally glued into place. I left this to dry for
a couple of days to let the glue set.
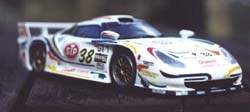
Finally the wipers and window decals were applied. It was time to attach the rear body section. Well, it appears that the floor pan was just a few millimeters too long. The two parts do not match unless you have the rear portion sitting too high in the air. The front section was attached properly to the floor pan. So I've decided to display the model with the rear cowl removed.
Conclusion.
 This
was one of the worst models I have had the pleasure of building. I'm not
sure if things would be different if the parts weren't warped or not.
I would strongly advise Revell to thicken up the floor pan that couldn't
handle the weight of the internal parts. Another criticism was the sprues.
The instructions would call out, for example A21, but the A parts were
in three different sprues. A lot of time was spent hunting down individual
parts. The decals are claimed to be Cartograph but I've used them before
and never had the problems as described above. It's a pity, as the car
looks great once together. I hope I have better luck with the UT GT1 Evo
that I'll review in the next couple of months.
This
was one of the worst models I have had the pleasure of building. I'm not
sure if things would be different if the parts weren't warped or not.
I would strongly advise Revell to thicken up the floor pan that couldn't
handle the weight of the internal parts. Another criticism was the sprues.
The instructions would call out, for example A21, but the A parts were
in three different sprues. A lot of time was spent hunting down individual
parts. The decals are claimed to be Cartograph but I've used them before
and never had the problems as described above. It's a pity, as the car
looks great once together. I hope I have better luck with the UT GT1 Evo
that I'll review in the next couple of months.
I'd like to thank Revell-Monogram for the review sample.


