Alan 1/35 Bison IIBy Richard Eaton | 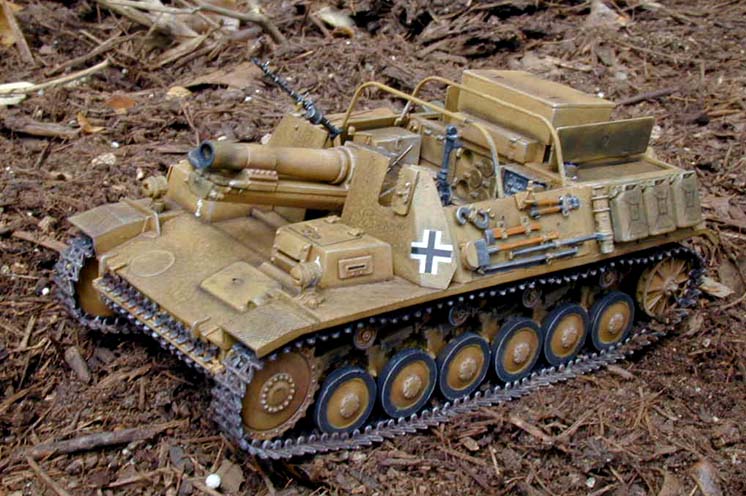 |
Introduction
This kit was expertly reviewed in the February Issue of Internet Modeler by Ray Mehlberger. I had purchased the kit from Great Models Webstore prior to that and had to start it immediately. It is just one of those kits that just burns a hole through my bench. Ray said to go ahead and build it so, if you are into large bore armor models, read on.
Building the Bison II
Well, I have some earlier experience with Alan Hobby models and I must say that they are improving in quality rapidly as new models come out. Their Marder II D was well done but had a few warts especially in the track to road wheel area. I am pleased to report that their new Bison II is a gem.
Construction
 Following the directions in step one, I assembled the transmission and drive shaft assemblies. These parts have fair detail that makes for a great start on additional detail if you like. The kit instructions are well drawn and all parts are numbered.
In step two I assembled the lower hull, fighting compartment rear wall, and floor. Here details are very well done. The floor section has places for seven projectiles at the ready. The compartment rear wall is beautifully detailed with louvers and a shell storage area.
I then assembled the suspension arms, road wheels, return rollers, idler wheels, and drive sprockets as directed. These suspension parts require some clean up, but I just eliminated mold marks with a sanding stick and assembled them. Use care in placing suspension arm parts C56 and C58. They are molded in a compressed pose compared with the other arms and the overall look of the suspension would not be right if you mixed them up.
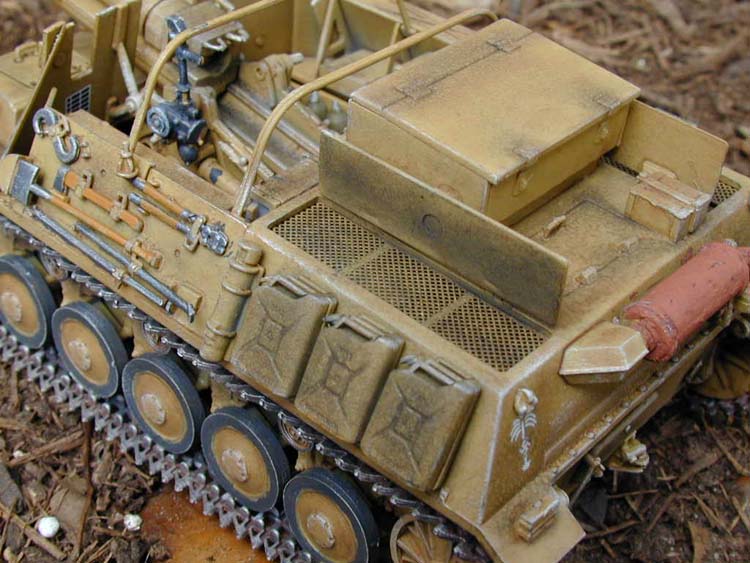
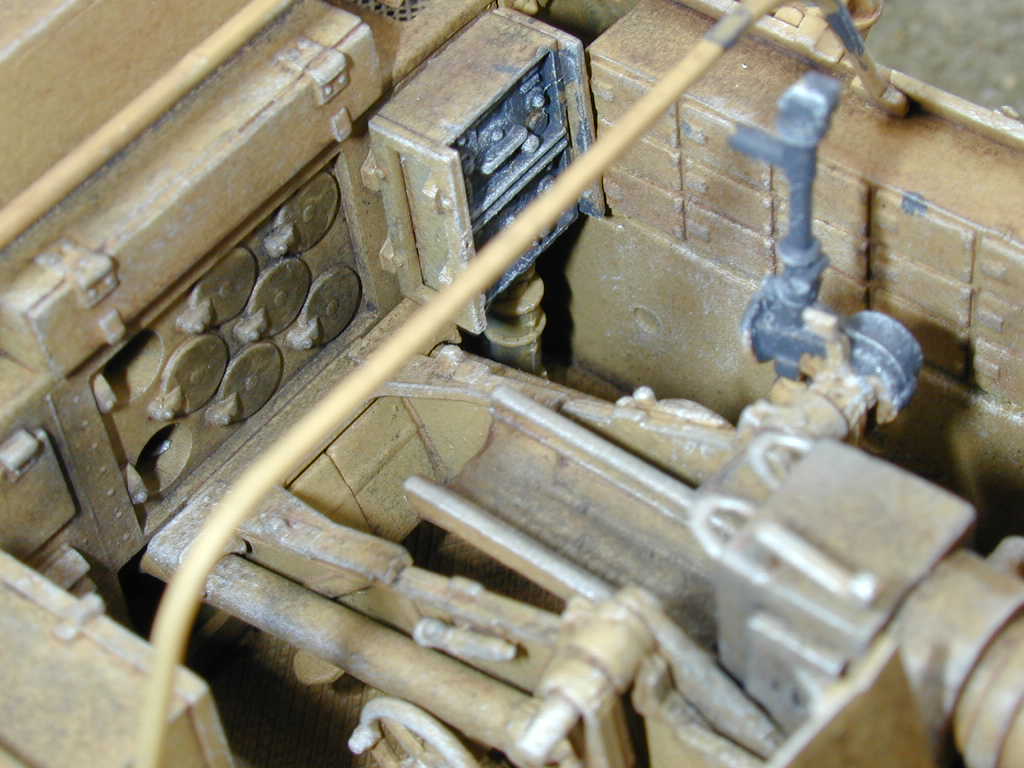
 Following step three I cut out and installed the PE motor screens in the bottom of the upper hull. The fit and look was spot on. They were so well done that I decided to pose the engine covers open on this one.

In steps four and five I assembled the front headlamps and jerry cans. The headlamps were well molded and only required minor clean up. The slit covers are separately molded which is a nice touch. I wound up using substitute Italeri jerry cans for the kit supplied one were a touch on the crude side.
Step six has one diagram and basically calls for you to assemble the tank and add all front and side components, and tracks! Slow down big fellow! I took these parts in the following order. . . .
 I assembled the upper hull components and kept the lower hull separate to ease painting and track installation. Hatches visors, and other hull details fit very well with only the usual cleanup required.

After painting the lower hull and road wheels I then assembled the separate tracks over two nights and applied them after each had setup a tad. The track parts are very well done with super fit. The tracks fit beautifully around the drive sprockets and return rollers. Where I ran into trouble were around the road wheels. They were too thick to fit in the track races - I had not noticed this before and I had to do something quick. I wound up cutting the inner track races so the tracks would snug up to the road wheels. They wound up looking fine unless you turn the model over. In fact I am no expert but I think they look pretty darned good!
 In step seven I added the remainder of the kit parts to the rear hull. Again no fit problems and only minor cleanup required. In steps eight through 11 I assembled the fighting compartment shields, various tools, radio, and all the remaining fighting compartment cases and items. The side shields did not fit quite flush, so I filled the gap between the lower shield and upper hull with putty and sanded till you could not tell. I installed the engine covers in the open position to show off that nice PE screening. I then sprayed the upper hull works with Afrika Mustard. Then I dry fitted, and assembled the upper and lower hull parts together. They fit like a dream.

The Big Gun
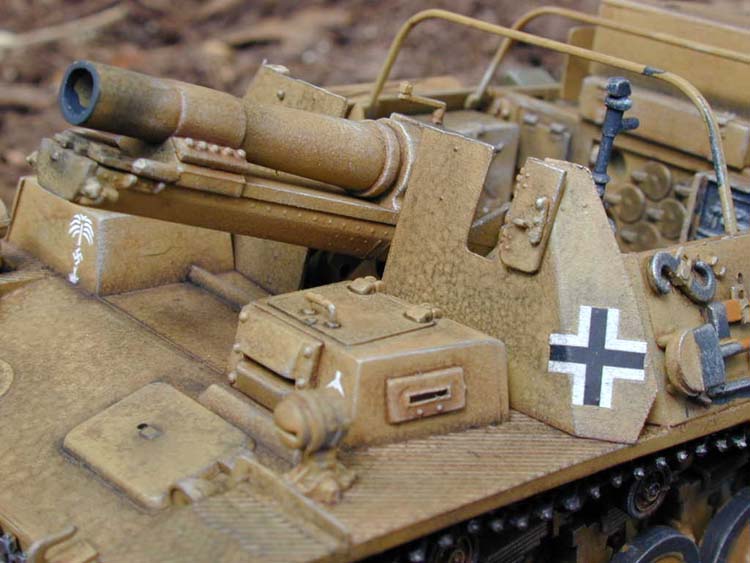
 The big Sig-33 150mm gun is basically just the field piece with the wheels removed and some special mounts added. Ray said Alan has recently put out the field piece version of the gun . I know of no other injected kit of that piece. Following steps 12 through 15 I assembled the gun shield, barrel assembly, and carriage. Fit was fine through out. The only problem I ran into was with the two-piece barrel and breach. There was a very noticeable seem right down the top of the barrel. I use zap a gap CA and light sanding and it clear right up without distorting the roundness of the barrel. The gun shields were scale thin and well detailed. This is one mean looking instrument of war! I think I'll pick up their separate kit of this piece.
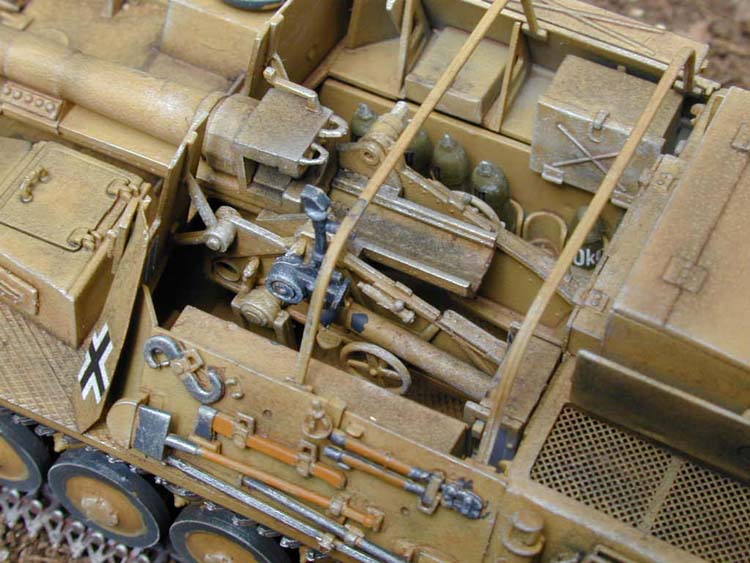
Following step 16 I placed the gun shields on the gun and tucked the entire assembly into the fighting compartment. It fit beautifully and really looked sharp. The kit supplied MG-34 was OK but I replaced it with a sharper Tamiya version. I then added two rear most tarpaulin braces. I left off the foremost one because I thought it detracted from the view of the gun. I also skipped the last step in the instructions that called for assembling the teapot! I did save the parts though!
Painting and Weathering
 Kit directions give color schemes and markings for the 15th Panzer Division, North Afrika so that is what I went with. I don't think the vehicle was very successful mechanically and that was the only theater it served in. I sprayed the entire kit Testors Afrika Mustard at various points during assembly. Once everything was together, I then sprayed the model with gloss coat to aid in dark washes and decals. I painted the tracks with scale black. Once dry, I added a wash of a mix of acrylic scale black and brown to the entire tank. Then I washed the tracks again with rust.
And now my favorite part of armor modeling, dry brushing! I used Testors light gray to highlight detail all over the tank and treads. I painted the tools wood brown and scale black. I painted the nice one-piece shells and casings olive and accented with brass. Two different size shells are included with decals for each.
 I then lightly dry brushed the treads and hull with Testors Steel. I finished up the weathering by applying ground pastel black with a brush to the gun muzzle, breach, and pretty much anywhere I felt like it. I accented panel lines mainly. I then weathered the tracks and lower hull with heavy brown pastel chalk.
Decals
Kit decals went on without a hitch. I applied the kit decals over the gloss coat using Future. I wished that the crosses were a tad smaller as they looked a tad awkward on the gun shields. I then sprayed dull coat over the model to seal things up.
Conclusion
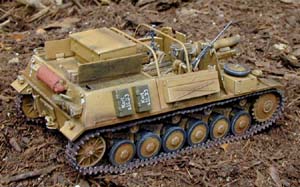
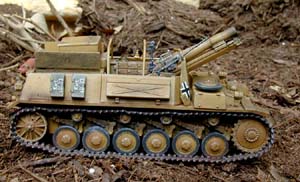
I took the completed model and set it in the soil of my garden for the completed shots. (Sorry we gave away the sand box) This kit builds up fairly easily to a really nice representation of this self-propelled gun. I have a collection of Sig-33 equipped vehicles so this one really hit the spot. I recommend it to the average level armor builder due to the separate tracks. The way Alan Hobby's quality keeps improving with every kit and their variety, I can't wait to see what they come up with next!


