Building A 1/72 Israeli Mosquito from the | 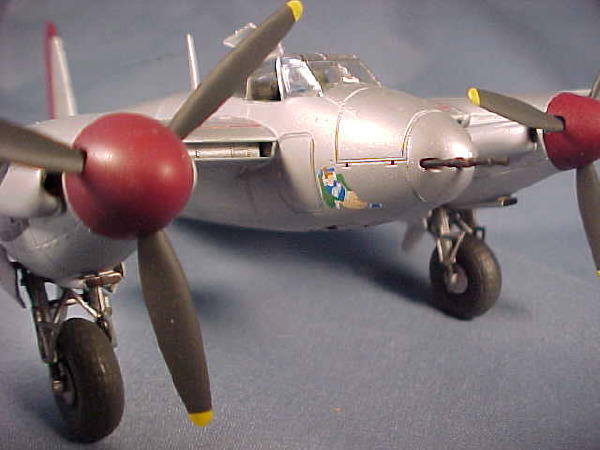 |
Overview
I chose to model an Israeli Mosquito MkVI. Apparently, the Mosquito was very unpopular with the Israeli units as the glue that was used to hold the aircraft together would deteriorate in the hot weather, sometimes with catastrophic results. The pilots of the IAF devised a song about the Mossie, or as it was also called, the Mozi:
Mozi is a mighty fine aircraft
Constructed of plywood and shit.
It never reaches the target,
and when it does, it gets hit!
Oh, why did I join the Air Force?
Oh, mother, dear mother knew best.
Here I lay on the runway,
with Mozi all over my chest.(Israeli Fighter Aces; the Definitive History. Peter B. Mersky)
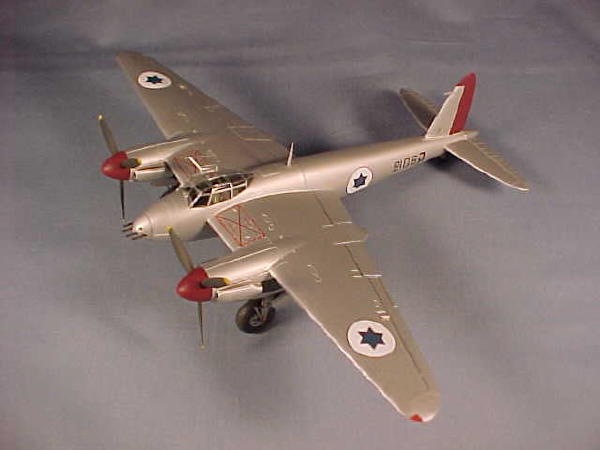
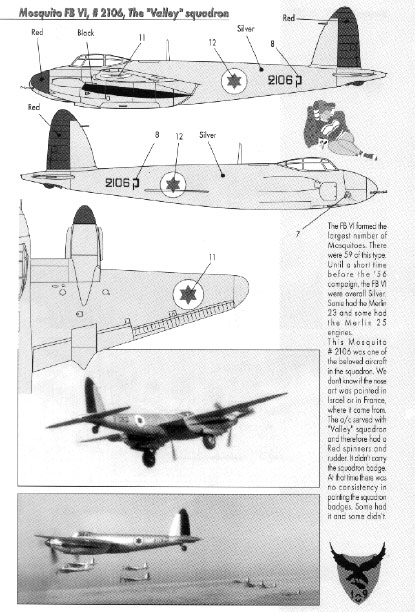
I built a MkVI of the Valley Squadron. This unit was operational with silver doped Mosquitoes until just before 1956. In 1956, they shed the silver scheme. I used some decals from the Tamiya kit and the IAF decals from an Isradecal sheet.
The Kit
I chose the Tamiya kit, as it is very detailed; Tamiya has taken most of the design and detail components of their 1/48th kit and incorporated them in this smaller scale. The level of detail is astounding for an injected molded kit like this (no resin or PE at all).
 All the parts trees and decals are bagged separately. The plastic is a dark gray that Tamiya likes to use. Its texture is very nice; its easily workable with sandpaper and/or scalpel, yet not too soft. The molding is extremely crisp. There are no sink marks on the entire kit and the only ejection pin marks are well hidden in the fuselage and landing gear bays. I didnt even bother to fill them on my kit.
The Build
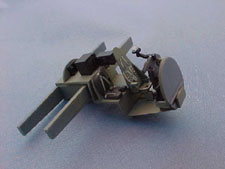
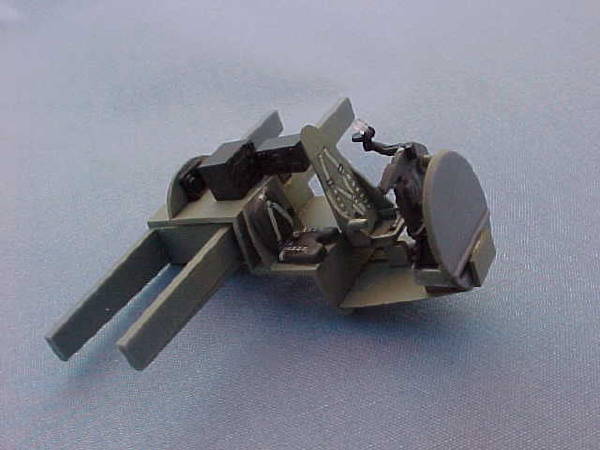
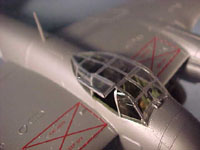
The interior is quite nice. It builds up quickly and simply. There are molded in details on the fuselage halves rather than separate bits. The cockpit assembly is also part of the main wing spars. This makes aligning the wings a real breeze. There are decals for 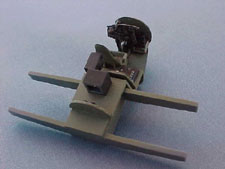 seat harnesses and the instrument panel. They go down nicely and respond well to Solvaset. I have only one minor gripe regarding the interior; there are two radio boxes that are clearly seen through the canopy. The backs of those boxes are wide open, so I chose to use some sheet styrene to close up the backs of the radios on my model.

I digressed a bit from the instructions that ask you to glue the engine nacelles to the wing, glue the landing gear the nacelles, and then attach the entire assemblies to the fuselage. I decided to build the landing gear up but to keep them separate until last. Many many dry fittings showed me that I could do that and it made painting a lot easier. It worked like a charm.
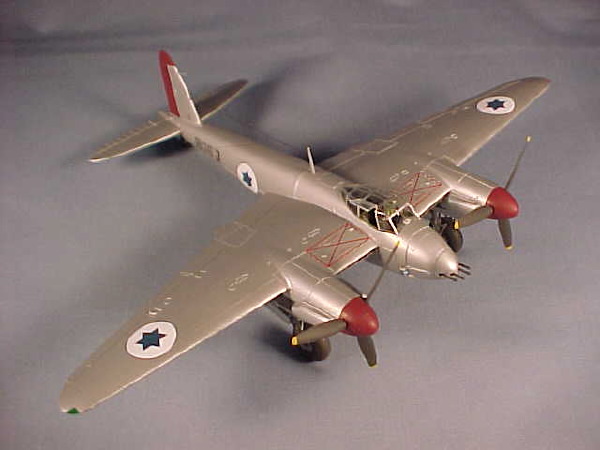
 I masked the engine nacelles (black swooshes) prior to attaching them. When I did attach the engine nacelles to the upper wings, I noticed a very minor design flaw. The trailing edge of the engine nacelles extends behind the wing and Tamiya decided to have the upper wing fit into the engine nacelle at that point. This creates a complex joint that is visible from above very clearly. It took some amount of filling and sanding to get that to the point where I was happy with it. Id prefer, had I designed the kit, to have the upper wing lay on top of the engine nacelle instead. That would eliminate one seam completely and hide the others behind and under the wing. They would have been easier to clean up there as well.
 Regarding the landing gear: the landing gear are works of art. There are 7 components to each gear and they will require a bit of fiddling at the assembly stage. I recommend a slow-acting CA glue so that you have some extra time to do it. I wouldnt use tube glue, as the parts are fiddly. Best-case scenario, you might have globs; worst-case scenario, you might melt the parts.
The canopy is very clear. Again, Tamiya has provided details normally only seen on 1/48th kits; they included green decal stripes to put inside the canopy. After a few moments messing with the tiny stripes, I opted to not use them. In this small scale, its not a noticeable omission (in my opinion).
 Regarding aggravating moments, I also was very frustrated from trying to drill small holes (for paint) in the wing tip lights. Tamiya has included small bits of clear plastic to simulate those lights but they were too small for me to bore out with a drill. I eventually just glued them on and faired them in. I then painted them with Tamiya clear red and green acrylics.

I painted this Mosquito using Floquil Military Classics throughout except for the red rudder and spinners. I used Floquil railroad colors for those components. After applying the decals, I shot a coat of Polly S acrylic flat finish and I got some blemishes that were hard to remove. I will take a Scotch-Brite pad (some day) and work that down a bit, then hit it with Dull-Cote. I am not pleased with the finish that I laid down on this model.
 When I attached the antenna, I used a technique that I hit on some time ago. I measured a length of 1lb test Tippet line (available in rolls from fly fishing shops) and used a permanent black felt tip marker to color it. This will darken it without adding much to the diameter of the line. I then stripped some insulation off the thinnest cased wire that I could find. I cut a small bit off of that casing (call is 1/32 for arguments sake) and threaded the line into it. I secured it with a tiny bit of CA glue. Then I did the same process again with another piece of insulation. These become your insulators (how ironic) on the antenna. Then I glued (using CA again) another piece of Tippet line to the second insulator. I let the whole assembly cure for a while, and then went to work to attach it to the aircraft. I glued the first part to the antenna using CA glue with a little accelerator on a toothpick to secure that. Then, holding it tight, I cut the piece of line as close to the right length as possible. In fact, it is better at this point to cut it a trifle short; the Tippet line has a good amount of stretch to it.
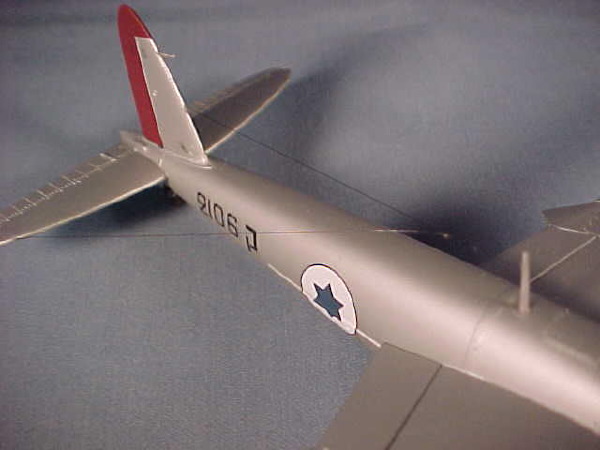
 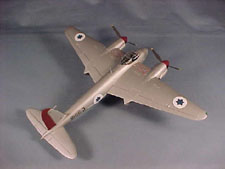 Then I secured that end to the vertical stabilizer, holding it good and tight. I used CA with accelerator again. Once I felt certain it was secure, I released it and la voila; you dont need to heat it to make it tight. Its already stretched. Next I took the loose end of Tippet line that is attached to the insulator and ran the same method, although not as tight, to secure that to the starboard horizontal stabilizer. You can see the results in a photo that I took of the finished product. It was about 10 minutes of work to have a very nice antenna in the end.

 A Note about Isradecals:

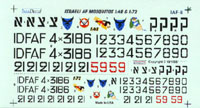
Ive scanned one sheet of the instructions booklet and the sheet of letters and insignias. I didnt bother to scan the sheet of Stars of David. These decals are very similar to Propagteam. They are thin and perfectly in register, and respond well to Solvaset. Be aware, when putting them down, to keep them very wet. Prepare the surface and make sure theres a drop of water or solvent 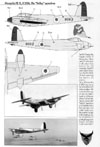 to slide the decals onto. If you dont take that precaution, these decals will want to stay at the first place they touch. They adhere very strongly. If you, like me, put down decals then adjust them a bit, make sure to keep them wet from start to finish.
Overall, I highly recommend this kit and these decals. I had a wonderful time building it up and applying the markings. Great job Tamiya, and great job Isradecals; keep them coming!


