Flintstone's "LeSabertooth 5000"By Tom Grossman | 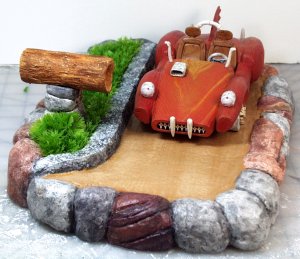 |
Introduction
Have you seen the first Flintstones movie? For those of us who grew up with Fred and Barney, that movie was filled with great live-action moments from the animated series. What a blast! Bedrock was a spectacular place! There were great stone buildings of all kinds and fur-clad people everywhere. What an experience it would have been to have gone to the set and walked those primitive streets!
If you haven't seen the movie yet, I will only say that Fred Flintstone gets caught up in a scheme to embezzle a large amount of money from Mr. Slate, the owner of the quarry. At one point, Fred finds himself with enough dollars to enjoy a lavish lifestyle a la Bedrock. I only know of two kits that were made based on the movie. Both were by Lindeberg. The Flintstone's family car and Fred's little indulgence, the Le Sabretooth 5000. I found my LeSabertooth in a grocery store for under $10. I see them around often.
The kit was a SnapFast but thoughtfully made to reflect the Stone Age spirit of Flintstone engineering. The bone, wood, stone and shell so common in the technology of the era were well rendered in red styrene. There were 28 parts, 2 "Yabado" license plate stickers, three little pots of paint and a brush. Since the kit was not exactly hot out of the molds, the paint had long since turned to stone. How appropriate!
 My research on the 'net turned up nothing. That was a surprise. But, I did get to watch the movie several times. The LeSabertooth makes several brief appearances. These were enough, however, to give me a good idea of what the car looked like and where to put it in a diorama. I chose to use the lighter color scheme for the rock parts pictured on the box rather than the darker scheme in the movie. I also decided to resist the urge to build Fred's really neat looking house and instead, put the car at the curb in front of his house as in the movie. The house would have covered a tabletop but, boy, would that have been a kick in the pants to build and paint!
After looking over the instructions, I decided to just enjoy myself with it and not be overly concerned with getting everything just right. I chose Testors Plastic Cement, (the bottle with the brush in the cap) for assembly and Model Master Red Putty for filling the seams. The putty thins nicely with the cement so you can apply it with a paintbrush. With all the organic surfaces on the kit, washes and dry brushing would be the perfect techniques. The paint of choice was Delta Ceramcoat Acrylics because it's a quality product at a good price and their pallet is huge!
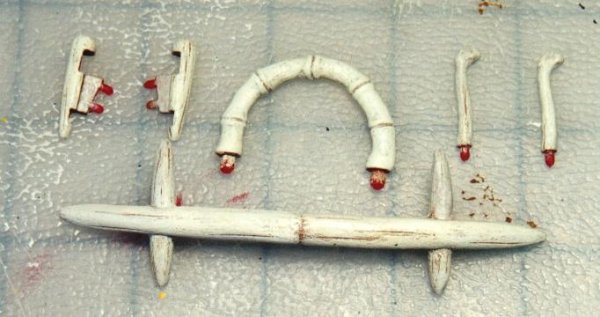
I first assembled the wheels and headlights. The seam along the tread portion of the wheels was a bit much so I smoothed it with a rather course file. Any scratches left by the file would blend in as part of the rock from which the wheels were made as long as they weren't all parallel and uniform. Next, my cardinal sins with this kit began. I did not wash it nor did I primer anything. (I don't recommend this, though, as oils from your skin or residual release agent can cause paint not to stick. I had no trouble with this kit, however.) I base- coated the wheels with Drizzle Grey.
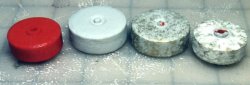 Next I stippled them with Delta Gleams Metallic Gold. This is Delta's line of metallic and pearlescent acrylics. Loading the brush at the ends of the bristles, holding the brush perpendicular to the surface and tapping the end of the brush to the surface does stippling. I choose an older, course acrylic brush because the bristles were thick and spread out from wear. To finish the wheels, I stippled with Seashell White.

The horns on the front wheels were given a Bambi Brown base, shadowed with Brown Oxide and highlighted with Ivory. Next I did a dry wash of Golden Brown. You do this by thinning the paint as you would for a wash and loading your brush as you would for dry brushing. This applies a fairly thin, uniform coat of color. Last but not least, I retouched some of the highlights with Ivory. I sealed everything with Ceramcoat Matte Varnish.
The body of the headlights, ring portion of the steering wheel and the scoop on the hood got the same treatment as the wheels. (Just what, exactly, does that scoop connect to??) The lenses on the headlights got a Drizzle Grey base coat and were dry brushed with Seashell White. The dashboard and the center portion of the steering wheel got a Charcoal base coat and then stippled with Metallic Gold followed by Drizzle Grey. I used this color scheme for the firewall, too.
For the bone parts, I sanded down the flash being careful not to create flat spots along the mold lines. Next, I added more cracks with a sharp-edged file. I also opted to fill the back of the rear bumper with sheet styrene and Red Putty. Then I applied a base coat of Golden Brown. On top of this, I dry brushed Ivory followed by a light dry brushing with Eggshell White.
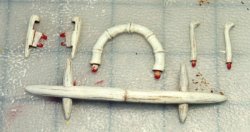 The bones in the grill got the same treatment after I painted the background with Charcoal. These parts were also sealed with Matte Varnish.
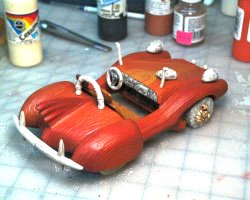
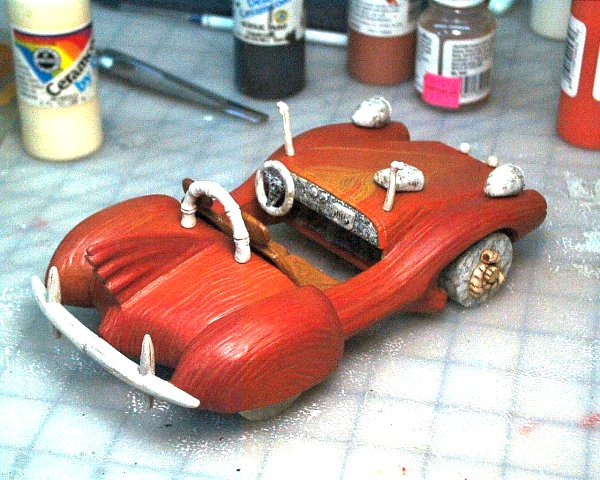
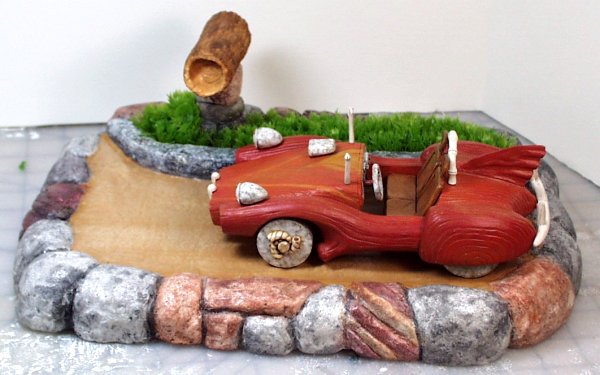
Now for the body!! I started with a base coat of Cayenne around where the grill would be set. Next, I glued the two halves of the body together with the grill in place. After snapping on the back wheels, I glued on the fenders and the fin in the back. I finished base-coating the body with Cayenne. There was a healthy amount of flash and offsets and some of the seams needed to be filled. I did that with Red Putty thinned with Plastic Cement, reapplying Cayenne as needed, To give it the red hue, Napthol Crimson and Cayenne were mixed and dry brushed over the whole car. This really brought out the wood grain. For the orange highlights in the wood, I dry brushed those areas with Tangerine. Bright Yellow dry brushed onto the hood provided the yellow highlights. Next, I topped off the body with a coat of Matte Varnish tinted with Golden Brown. For the seats, Ceramcoat Brown Antique was applied like stain over a base coat of Spice Brown. A quick touch-up of the wood trim along the top of the dashboard followed by attaching the rest of the parts and LeSabertooth was done!
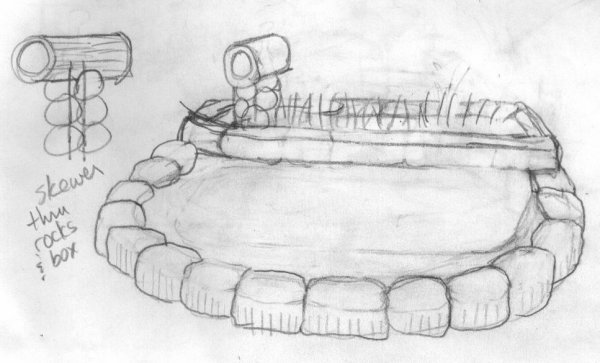
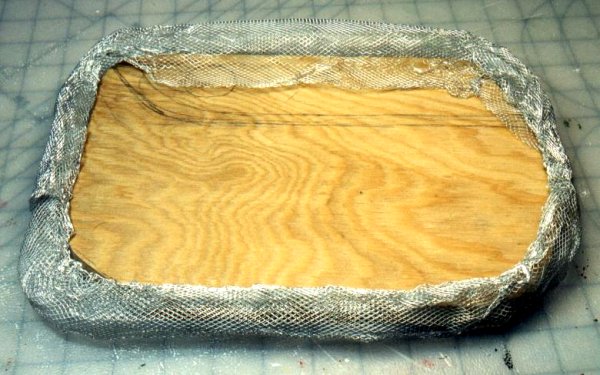
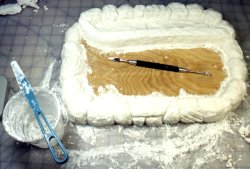
 For the bit of Bedrock residential street that the car would be placed on, I started with an appropriately sized and shaped piece of ¾" plywood. I decided to build a ring of rocks around the whole thing using WireForm. This is a metal fabric product marketed by the American Art Clay Company, AMACO for short. I used Sparkle Mesh, which is made of aluminum, and has a 1/8" diamond shaped pattern. My plan was to cover this with Sculpt-A-Mold, a paper/clay/plaster building material also from AMACO. You mix it with water and have at it! It sets up in about 20 minutes and is bone dry in 24 hours... at least in Colorado! I fashioned a ring of WireForm around the plywood, making it higher in the back for the raised area behind the curb.
 Next, I applied the first layer of Sculpt-A-Mold, using this to secure the WireForm to the plywood. After this layer had set, I shaped the curb from WireForm and put it in place.
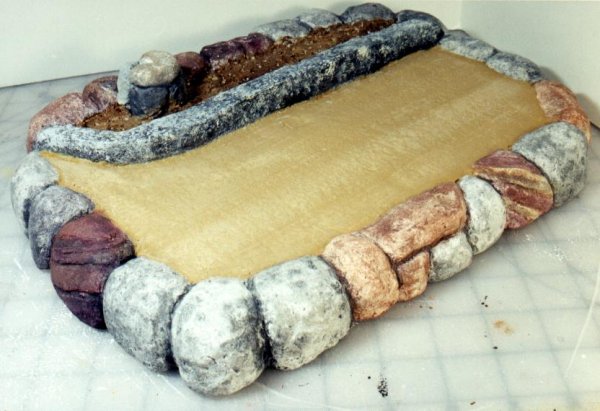
I continued adding Sculpt-A-Mold until I had the rough shape. It was now time to start shaping the rocks and forming the curb. I mixed small amounts of Sculpt-A-Mold and shaped rocks around the perimeter of the base and spread it onto the curb.
 As it sets, Sculpt-A-Mold can be smoothed with your finger. For the dirt in the street, I mixed a somewhat wet batch and troweled it into the street area. I smoothed this and placed the car in to spot I wanted it, pushing the wheels lightly into the wet Sculpt-A-Mold. Next, I formed the first few stones in the mailbox post with a piece of bamboo skewer running up through the center. I also filled the raised area behind the curb with Sculpt-A-Mold and poked holes in it with more bamboo skewer. This is where the grass would be planted later.

Before painting, I smoothed off the rocks with a shoe rasp to give them the appearance of cut surfaces. I created the granite look with a wash of Charcoal. Cayenne washes were used to make the reddish rocks. I used several of the other colors from the car in washes to make the different colored rocks. I base coated the curb with Charcoal and stippled it with Drizzle Grey and Seashell White. The street was painted with Spice Tan and streaked with Ivory.
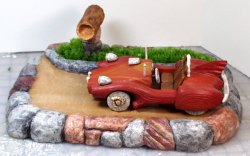
 I made the hollow log mailbox from a tube of WireForm. I folded in the ends before covering it with Sculpt-A-Mold. I created the bark effect by scratching it with the course end of the shoe rasp. Next I made a few more rocks for the mailbox post with the top two shaped to fit the log. The mailbox was base coated with Golden Brown and dry brushed with Brown Antique and the rocks finished like the others on the base. The whole thing got a couple of coats of Matte Varnish.
For the grass, I found a plastic 16" ambulia aquarium plant in a pet store. The plant had several fronds. I cut the fronds up with scissors to make each little plant for the lawn. Each one of these little plants was pushed into one of the holes in the dirt area behind the curb. I think there are 70 or 80 pieces all together.
 Conclusions
The car was a blast to build!! That's something about kits like this that makes them lots of fun: you can color outside the lines!! I was pleased with how quickly the base came together. Especially when I started painting. So, if you have a kit that looks a bit lonely, design yourself a custom and have at it!!
Would you like to try a sample of WireForm? Click here
See more photos of the Le Sabretooth 5000 at Tom's Model Page
Resource Info
Tom Grossman, Tom's Model Page
Plastic Cement #3502 & Model Master Red Putty: Check your local hobby retailer. The Testor Corp, 1-800-TESTORS
Delta Ceramcoat and Gleams Acrylic Paints: Check with local art and/or craft retailers Delta Technical Coatings, 1-800-423-4135
WireForm & Sculpt-A-Mold: Check your local craft, art and hobby retailers American Art Clay Company 1-800-374-1600
On the Bench and Beyond at Tom's Model Page


