Revell AG 1/72 PzKpfw VI TIGER I Ausf. E with Part's PE ZimmeritBy Bill Glinski |  |
After many years of building 1/72nd aircraft Im hooked on 72nd scale armor after seeing a new Revell kit built up at a Seattle IPMS meeting a year ago. Ive been pumping these babies out ever since. So Im biased, but where else can you build a nicely detailed Tiger tank with zimmerit for under $20?
The Kit
 The model consists of 182 pieces molded in dark OD plastic. The detail is crisp throughout. Two sets of wheels are included, the rubber rimmed cast wheels and the later style all steel wheels. Also included are two types of exhaust shields plus separately molded turret pistol ports and gun sights. With good references and careful study of the kit parts you can build a mid or late production Tiger. Instructions are provided to build a late production only. The decals are included for two late versions.

Tow and track replacement cables are molded separately as is the jack. On the down side the rest of the tools are molded to the top of the hull making for some tedious painting at the end.
The 88mm gun barrel is thick and not to scale, it has almost no taper as seen in photos and on drawings. No figure(s) are included so you have to scrounge elsewhere.
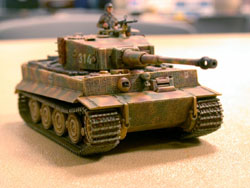 Photo-etch Set
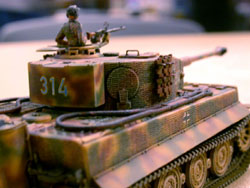
I used the Part brass photo-etch zimmerit set. Part offers two different sets of zimmerit for the Tiger, a factory fresh pattern and a worn pattern. I purchased the new pattern. The set contains twenty-five nicely etched pieces and instructions. Thanks to Dave Kuligowski of Mighty Military Miniatures for introducing me to the Part photo-etch line.
Construction
I first studied the kit and photo-etch instructions to see if the kit required any modifications. I found two problems, first was attaching the zimmerit pattern to the rear of the hull. The photo-etch piece for the hull rear had no cut out for the track clamp. I had to remove the molded track clamp by shaving it off the back of the hull; I wasnt able to salvage it for later use. The alternative would have been to cut a hole in the photo-etch part, which I was reluctant to do. Second no locating holes for the kit pieces are present on the zimmerit so I dry fitted the appropriate brass pieces marked and drilled locating holes. I also had to take into account were to deviate from the kit instructions to allow adding the zimmerit. The photo-etch instructions have you adding the zimmerit with the kit fully assembled.
 Once I was satisfied with the planning, construction began. I usually leave off the wheels and tracks for last to make painting easier. I completed the lower hull as per the instructions except I left off the exhausts, exhaust shrouds, rear fenders, bow gun, headlamp, shackles, jack and cables. The turret was built leaving off the main gun, turret basket, hatch, MG mount and spare tracks.

At this point I added the zimmerit after checking the fit of each part. The brass parts were attached with gel type super glue to give me a little working time to get things aligned. I used a brass tube and a glass surface to roll the rear portions of the turret zimmerit pieces. Everything fit perfectly. Once all the zimmerit was added I lightly sanded edges and corners to blend everything in and to get rid of sharp edges.
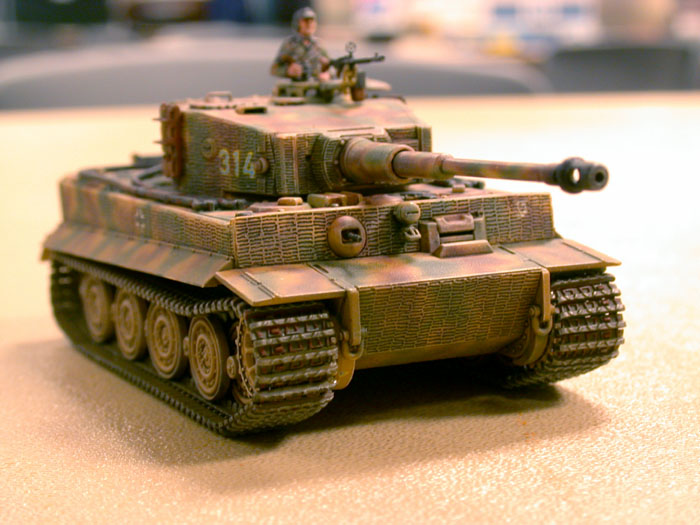
I feel the kit barrel and muzzle brake are over scale so I replaced it with one from a Hasegawa Tiger kit, ironically its the best part of that kit. I added the rest of the parts except for the running gear, cables, jack and MGs.
 Painting and Finishing

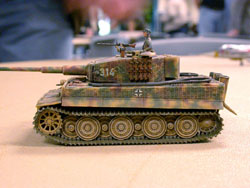
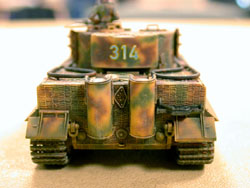
I airbrushed the entire model using automotive gray primer and checked for any flaws. I chose a late war camouflage scheme for a Tiger in France in July of 1944. Revell instructions call out Revell AG color paints, no FS equivalents are mentioned. They call for sand yellow, red brown and sea green. My personal preference for a dunkel gelb base coat is Model Master British Gulf Armor Light Stone with a little white added. The model and wheels were painted with the light stone. I used Pactra Hull Red and Dark Green for the disruptive pattern, but then any red brown or dark green will do. Fortunately I have old stocks of Pactra paints, with its lead content theyre still usable after all these years. For tight camouflage patterns I usually mix my paint six parts paint and four parts thinner. I used a Badger 150 with a fine tip and needle and sprayed the pattern almost a quarter-inch away at 9-11psi, frequently cleaning the tip with thinner to prevent clogging and paint splatter.
 After drying overnight I painted the tools, which was a bit frustrating because my hand isnt that steady, resulting in a lot of touch up painting to correct my mistakes. I sealed the paint job with Duracryl automotive clear lacquer thinned four parts thinner to one part clear. I use this due to its rapid cure time, I can lay down an oil paint wash after an hour without fear of lifting the paint. The wash consisted of a mix of burnt umber and black artists oils thinned to accelerate the drying time. Once dry I wiped the wash with a cloth and artists oil thinner. When done I resealed with clear then applied decals.

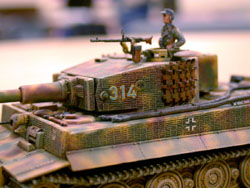
I decided on markings for a Tiger in the 3rd Company of SSsPzAbt 101. The crosses were taken from the kit, the PzAbt 101 marking is from a Hasegawa sheet and the numbers were from a HO scale Trident Lines German Tank Numbers sheet purchased from Walthers.
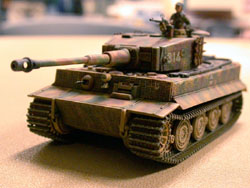
 The next day I applied Testors Dull Cote sprayed 6 from the surfaces at 25 psi. When the flat coat was dry I drybrushed the model and wheels with Testors sand. The tracks were painted black with some dark earth mixed in and then drybrushed with steel. I then installed the running gear, tracks and remaining parts with gel super glue. Some of the drive sprocket teeth needed removal to allow the tracks to fit. A bit more work is required for the track sections, but the results are worth it.
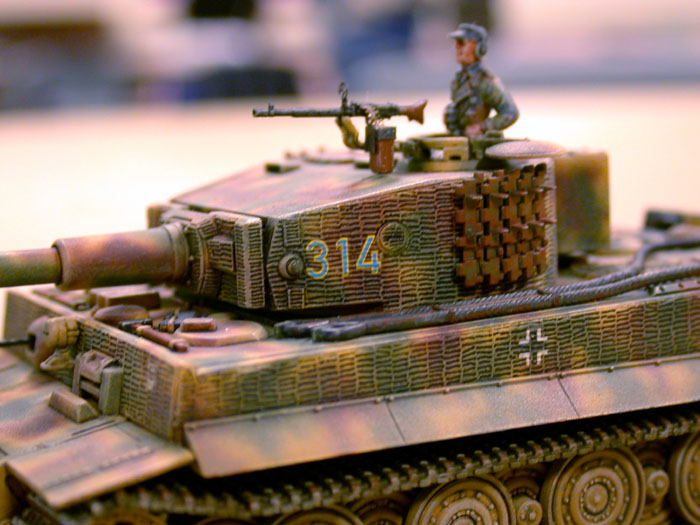
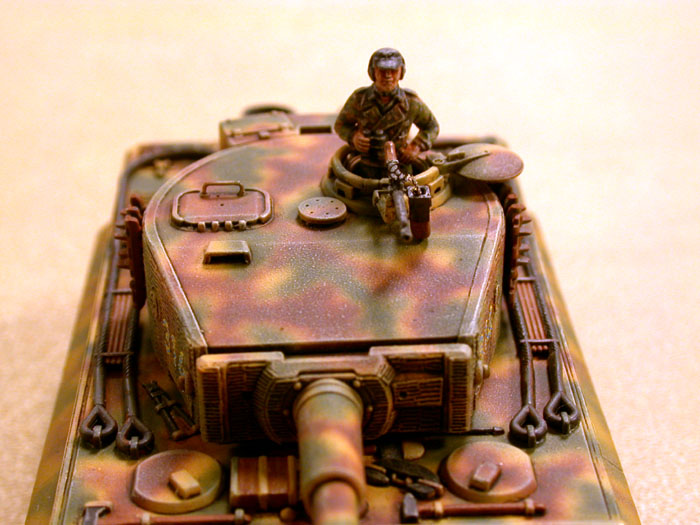
I left off the side mounted track replacement cables for personal preference. I made a brass handle for the gunners hatch, scratch built the MG ammo box, and added a gun sight and ammo belt from an Eduard aircraft sheet. The figure is from an old ESCI half-track kit, best figure in 72nd from a kit (in my humble opinion), he even  has a throat mike molded in. Final weathering consisted of spraying the lower hull with dark earth and the gun muzzle and exhausts with dark gray.
Conclusion
If youve never done a small-scale armor kit then I highly recommend this kit. The detail and ease of construction make it enjoyable and is a great value for your modeling dollar.


![]()


