Boeing 737-800 NG: Building Boeing's Latest High Tech DesignBy Tim Bradley | 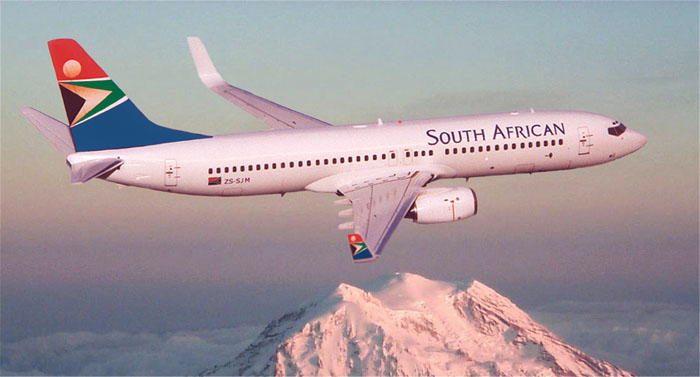 |
Project
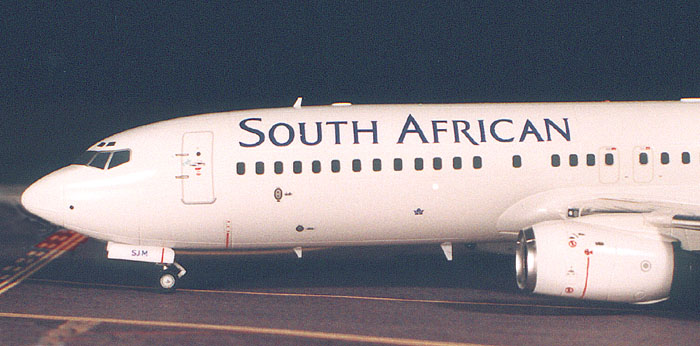
It's funny how we get stimulated into doing a new project. Sometimes it's a new kit, other times a decal sheet that's new to us. For me it was the real thing. I'm lucky enough to live about twenty minutes South of Boeing Field in Seattle. Boeing was performing a pre-delivery flight check on a new South African 737-800 with blended winglets. Well, that's all it took for me to start modeling. I had the Revell kit and the Bra.Z resin winglets, but no idea of what scheme to do. A check of DRAW Decals web site informed me that the earlier SSA sheet was redone with the addition of winglets!
Prototype History
 In February 2000, Boeing began offering an advanced-technology blended winglet designed by Aviation Partners Inc. as a new order option on the -800. The winglets are now available on Next Generation 737-800's as well as on the Boeing Business Jet (737-700 and 737-800).
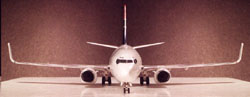
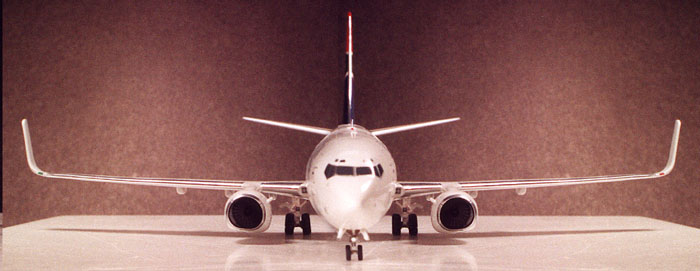
The 8-foot carbon graphite winglet will extend its range, carry up to 6,000 pounds more payload, and will save on fuel. In May 2001, the first 737-800 with winglets made their world debut in revenue service with German Carrier Hapag-Lloyd. Initial customers include: South African Airways, Air Berlin, American Trans Air, Polynesian Airlines, and Hainan Airlines.
The 737-800 can seat 162 to 189 passengers and being the best-selling jetliner of all time - has carried the equivalent of the world's population - about 6.1 billion passengers.
The Kit
The 1/144 Revell kit is available in two liveries, Hapag-Lloyd and KLM. The kit is typical of current Revell airliner kits - excellent recessed scribing, detailed wheel wells, and very useable factory decals, all make this an award winning model of the 737.
First, what I'm going to explain is how I build an airliner. After talking with and seeing how other modelers build their models, I want to pass on some of these construction tips that have worked for me. Another thing I do is build in sub assemblies when possible.
Fuselage
 As in all airline kits the first thing to do is fill in the windows. I started with a long strip of Scotch tape that is laid down and burnished well on the outside of the window openings. From the inside a light coating of ZAP was dribbled into the holes. Next I took a pinch of baking soda between my fingers and dusted a coat on the wet areas. I didn't fill the holes up in one pass. I added another layer of this mixture to back it up for strength. Next on the list was the nose weight. I always slightly over-weight a model, I like the feel. This kit uses a nose wheel well box and it has a flat spot to mount the two 1/2-ounce peel-and-stick lead car wheel weights (go see your tire dealer). To make sure these didn't come loose, I added some ZAP and baking soda to the base.
Before I glued the two body halves together I wiped all the mating surfaces down with Polly S Plastic Prep. This removes all the mold release and finger grease. The halves were glued together with the help of my work light. I placed my light at a 90-degree angle to the area where I was gluing. Do only a two or three inch section at a time making sure that both pieces are parallel. You will see the highs and lows with the light. This cut my sanding down by 75 percent.
 When the fuselage halves were together, I installed the cockpit glass using the same method. The Scotch tape is then removed. I cleaned up some pinholes with a very thin coat of ZAP. Next, I laid two strips of tape close to the windows - one on top and one on the bottom. I ran a bead of glue and smoothed it out with a finger. I used ZAP Kicker to set it. I then wet sand with the tape on, making sure not to disturb the recessed lines around the windows. When low enough, the tape was removed and I did a final sanding with 600 to blend it in. With this method, you will never have any cracks from shrinking putty. In fact, I didn't use any putty on the fuselage. All the joints are sanded and the body is put aside.
Wings
The wings were assembled per the instructions. I spent a little time with my work light on the leading edges. Holding the seams 90 degrees to the light will show all the places that needed special attention. It's better for you to see it now, than the judges later.
 Here is where I get questions all the time. "When do I glue the wings and stabilizers on?" It depends. The Airfix and Minicraft wings are butt jointed to the fuselage. Dry fit the wing, does it fit clean with no gaps? If it does, assemble, sand, prime and paint as a sub assembly. Always leave the stabilizers off until final assembly. Revell included a portion of the fuselage with the wings. So, these wings had to be installed and painted with the body. This joint was probably the trickiest job on the entire kit. Although not difficult, sanding took a little extra care.

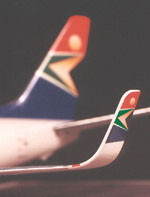
Next the Bra.Z resin winglets were attached. This is a very simple step. Cut the wing at the wing tip panel line with a fine blade saw. The winglets were glued on with ZAP. The perfect fit of the Bra.Z parts required very little sanding to look like the real "blended winglets"
Engines
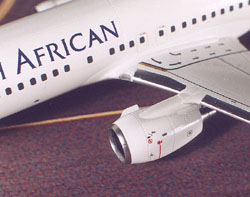
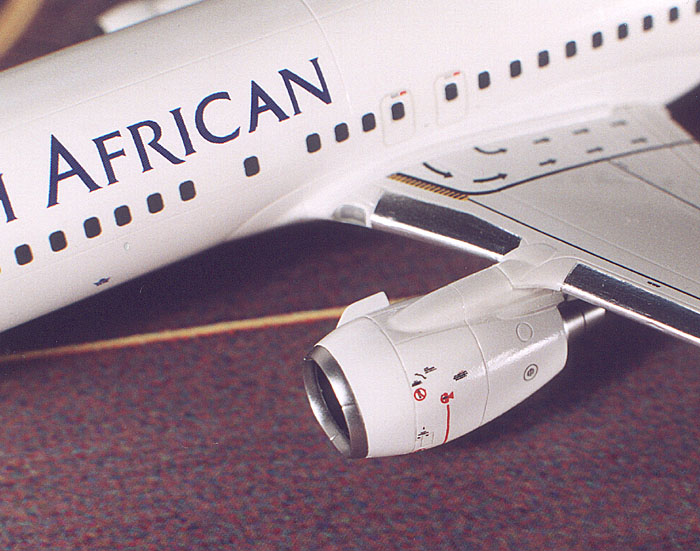
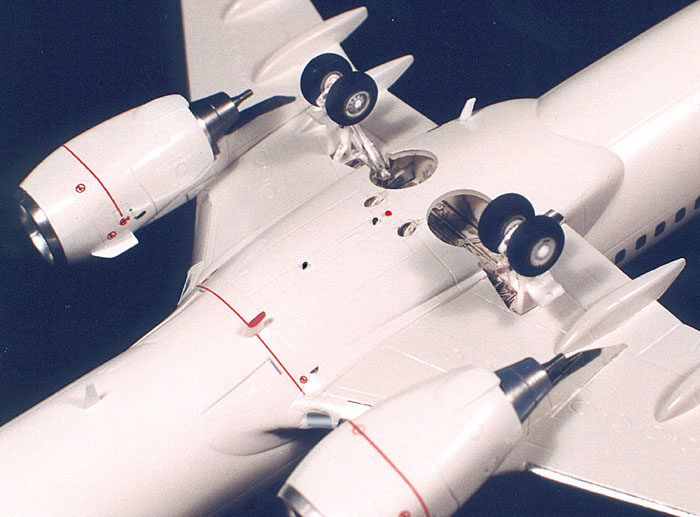
I first painted the inside of the engine nacelles two colors. A coat of green zinc primer was shot in the rear behind the compressor fan while the front was painted aluminum shade. The fan was painted a steel color and the hot section or exhaust end was done in burnt aluminum. All the metalizer paints were by ALCLAD 2. The two nacelles halves were cemented and the intake lip - a separate piece - was tacked in place with some contact glue. It was then lightly profiled to the match the nacelles. I removed the lip and sprayed them ALCLAD Highly Polished Aluminum. When dry, they were carefully glued in place. The rear hot section was masked over with tissue covering the metalizer parts. The nacelle and pylon were sprayed white. Later, the top pylon to wing mount was taped off and shot with Boeing Gray. The engines become another sub assembly to be installed later.
Painting
 First thing was surface prep. With the PollyS Plastic Prep #556007 (about $4.00 for 1 pint) I wiped down all surface areas to be painted. I dipped an old toothbrush in the Polly S and scrub out all the recessed seams of sanding dust. The first step was to spray the primer on the body and wings. Two light coats of Tamiya Fine Surface Primer sprayed from the can were applied. This is a thin near white primer. After it was dry, it was time again for the 90-degree work light or better yet - the Sun. Correct any imperfections and re-apply another coat of primer to the area. When everything looked "judge perfect, I airbrushed the wing with Boeing Gray. This was custom mixed by spraying 4 cans of Tamiya Color TS-26 Pure White into a quart glass jar and adding drops of Tamiya gloss black to make the correct shade. I have Boeing Gray (BAC 707) by the pint now.
After a week to cure, (Tamiya feels dry to the touch in minutes), the wings were taped off with Tamiya masking tape. The body was wiped down again and sprayed using - yes, you guessed it- Tamiya Pure White TS-26 from the spray can. This is the best gloss white I have found and the easiest to spray. These Tamiya Colors in cans have a self-leveling agent that works wonders. This model was sprayed in my garage with no orange peel. I removed the masking tape as soon as it tacked up. The model was set aside for two weeks to dry. Tamiya says their paint needs this time for the paint to "shrink" down. I used only one brand of paint. I have found that mixing brands leads to problems later.
Decaling
I decaled the 737 as you would any other model. DRAW Decals are wonderful decals; thin to the point they look painted on. The decals are thin enough to see the panel lines underneath. This thinness is one of two quirks of ALPS printed decals. You must trim right at the overlap or you will see a doubling of color. I started decaling on the right side first. After the right side was complete I applied a thin coat of Future Floor Wax with a cotton swab over each decal. ALPS decals have no clear coat and this protected the decals when I worked on the left. After all the decals were on, the entire model was swabbed down in sections with Future. I like the sheen this produces - a scale gloss. Not wanting to tape off the complex edges or use decals that were for the -200, the leading edges of the slats and stabilizers were Bare Metal Foiled.
Final Assembly
 The completed engines were glued on and the pylon to wing gap was filled in with white glue and painted Boeing Gray. I found two problems with the landing gear. The nose gear hydraulic arm, part # 39 in step 13 is shown backwards. Just flip it around and glue. In the early Hapag-Lloyd 737 kit, the main gear scissors are shown mounted on the back of the oleo strut. In the newer KLM version, Revell has corrected this. They face to the front. The wheel wells were detailed by washing with Tamiya smoke. The gear was glued in and given a wash to bring out the excellent detail. The stabilizers are now attached.
Is The Aircraft Airworthy?
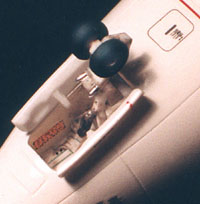
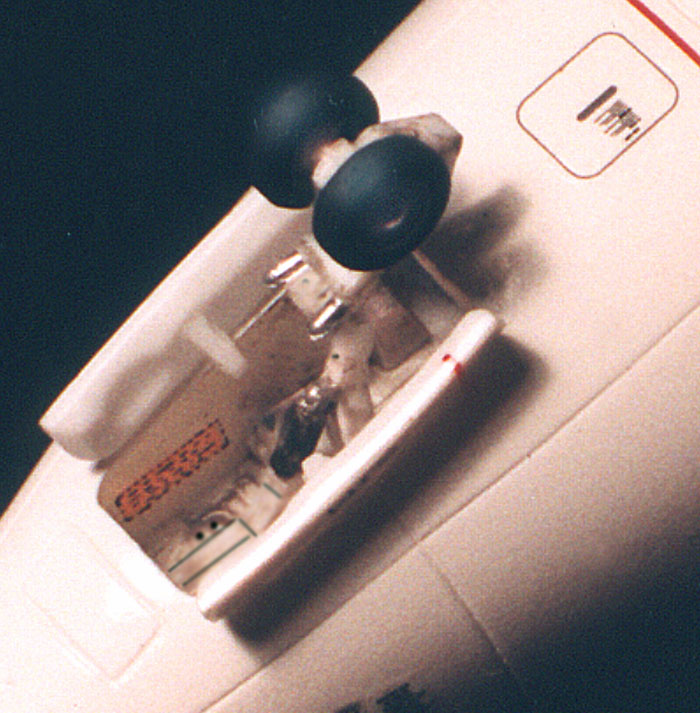
Too many airliners I see at contests look like travel agent display models. Super glossy paint jobs looking like it came from George Barris's paint shop and all the very important little details are always left off. I added all the final extra detailing, the nav-com antennas, brass pitot tubes, taxi /landing lights, drains and red, remove before flight flags on the landing gear. A note to the eagle eyed here, due to the deadline of this magazine, some of my final details have not been applied yet.
Conclusion
The Revell 737-800 is by far the nicest of the 737 kits. I wish all airline models would be this well designed. Revell's idea of making the engine inlet rings a separate part should be adopted by other kit manufacturers. One small item, after the kit was finished, the engines have a slight nose up angle. The nacelles should be parallel to the bottom of the fuselage. Even with the noted three items, the combination of the Revell 737-800 kit, DRAW's Decal, and the Bra.Z winglets, this was close to being the perfect airline model.


![]()


