Tamiyas 1/72nd Scale P-51D North American Mustangby Michael Kendix | 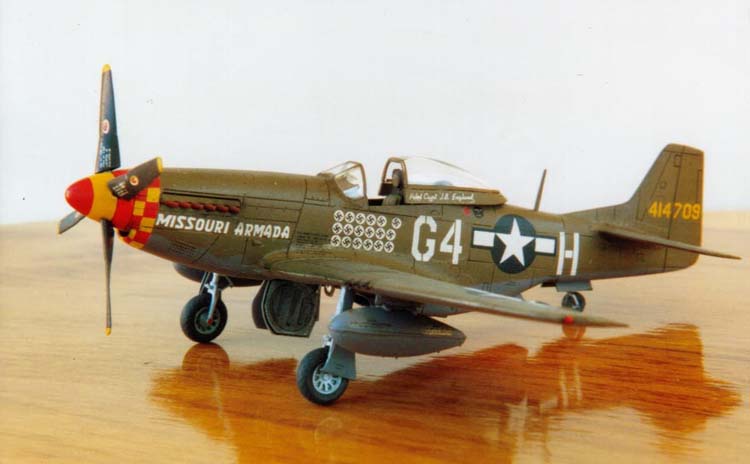 |
Background
The Mustang needs little introduction to aeroplane lovers and model builders alike; it remains one of the most popular subjects, and a healthy range of modeling opportunities exist in various scales to build the different versions.
 The Mustang is outside my area of modelling interest, however, the Northern Virginia IPMS chose this for its 'Build The Same Kit Contest', so I went with the flow. The club had to decide upon a kit for this contest and it came down to a vote between the P-51D and a 1/48th scale jet. Facing the proverbial 'Rock or hard place'' I chose the 1/72nd scale item and we won by a single vote. The bloke sitting next to me had voted for the jet and was really upset, pointed a finger at me saying, "You'd better build it!" I gave my word that I would and so it was I felt obligated to build it, despite it being beyond my usual area of interest. I had to do a little research into the background of this aeroplane for which purpose I purchased the Squadron "P-51D Walk Around" book and that, plus Ken Robert, who is a docent at the National Air & Space Museum's (NASM) Garber Facility in Silver Hill, Maryland, helped a lot.

Inside the Box
 This kit represents one of Tamiya's recent forays into the 1/72nd scale area: a most welcome development to those that like to build in the so-called 'Divine scale'. This was my first attempt to build a Tamiya kit and it is pure quality throughout. There is no flash, or significant fit problems and the level of detail is first rate. I built mine using only the box's contents, except for the choice of colour scheme but of course, there is no shortage of aftermarket decals for the modeller to make his or her own variation. The box contains one finely detailed sprue of grey plastic parts, a separately sealed sprue of clear parts containing two alternative canopies - "Dallas or Normal", a decal sheet for three aeroplanes and a set of clear instructions.

Choosing a Colour Scheme
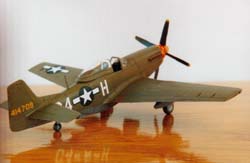
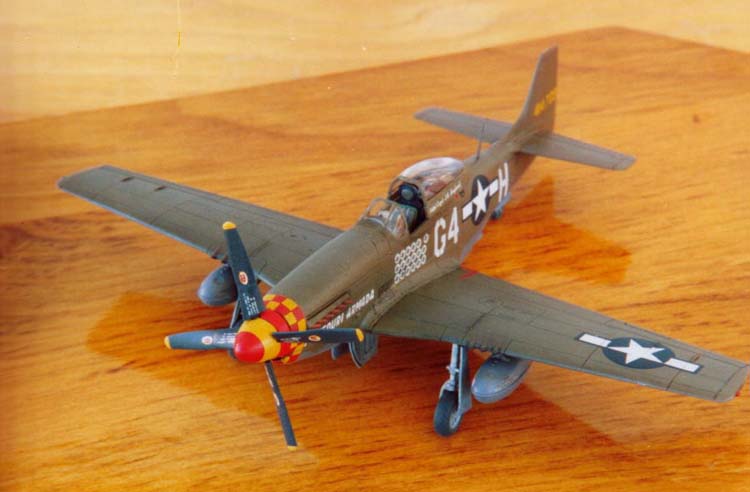
 The kit's decals are excellent but provide only for schemes that show a lot of natural metal finish (NMF). As I only spray acrylics and the Metalline acrylic metal paints are not readily obtainable, I looked for an alternative scheme. Further, if I could, I did not want to complicate matters by incorporating D-Day black and white invasion stripes. I found a SuperScale decal sheet number 72-729 "P51-D Mustang Aces". I selected Major John England's "Missouri Armada" 362nd Fighter Squadron, 357th Fighter Group from December 1944, whose plane had the late-version filleted tail with a simple olive drab over grey colour scheme.

Interior
 Construction began with the cockpit. Part A26 comprises both the bulkheads and floor and I attached the pilot's seat, instrument panel, control column and gun-sight. Part A3 adheres underneath the cockpit floor and provides detail for the underside cooling system. A discrepancy exists as to the appropriate interior colour. According to Ken Robert and Dana Bell (of the Smithsonian's NASM), "Interior Green" is too light and so I selected a slightly darker "Medium Green", made darker by the burnt umber oil wash I gave it. Aside from that, I followed the kit's instructions for cockpit colour.

The kit's fuselage pieces have excellent molded interior detail. I attempted to paint it using the pictures in the "Walk Around" book as a guide. There was no decal for the instrument panel; rather the kit has a detailed surface panel that was quite straightforward to paint. There is a decal for the seatbelts, and had I not needed to build this kit in time for the club meeting, I might have cut out some foil to give the seatbelt decal some body. I finished by giving the entire subassembly and the fuselage's inside walls an oil wash of burnt umber.
Fuselage and Wings
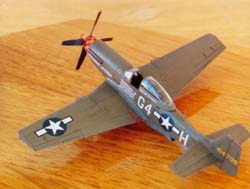
 Once the cockpit and fuselage interior were dry, I glued the fuselage halves together, and attached the wings parts and tail. I also added the other details, comprising the cooling system parts, exhausts and drop tank mounts. Despite Tamiya's best efforts at fit, I needed to use putty and had to sand the seams smooth. In particular, the fuselage's underside has a lot of detail that has to be carefully fitted and sanded. I masked off the seams and laid down Squadron White putty. When it was dry, I used nail polish remover to remove the excess putty. Once that was sanded and smoothed, I sprayed the underside light grey.
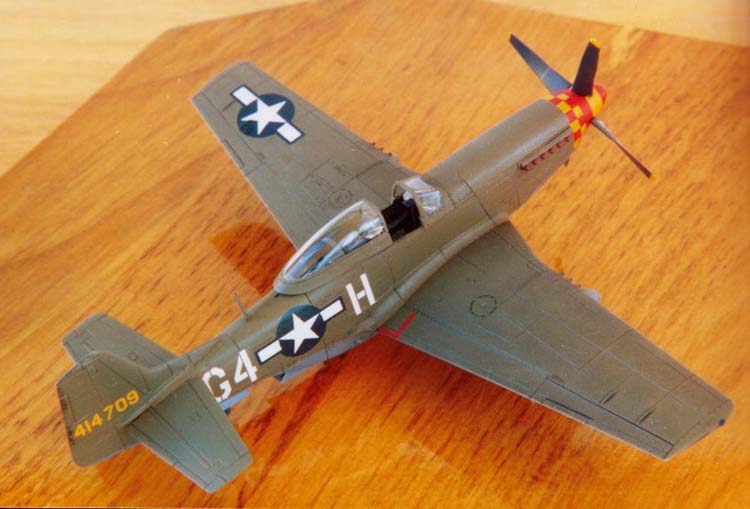
Some hairline seams were in evidence and I used typewriter correction fluid and sanded to eliminate these. I then masked off the underside and sprayed the upper surfaces olive drab. I painted the wheel wells medium green and gave them a dusting of yellow: the latter colour appears in photos and I guess it is primer. I coated the entire assembly in Future to create a gloss surface ready for the decals.
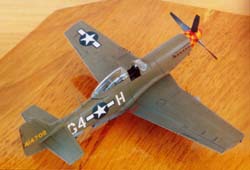
 The decals in the Tamiya kit are a little thick, so where I could, I used the SuperScale set. The latter contains all the markings and numerous tiny decals with the various notification and labeling instructions for the maintenance crew, including those for the kit's 75-gallon drop tanks and propeller sub assembly. I found applying the red and yellow check pattern on the front fuselage fairly challenging: I needed three attempts before I succeeded, so it was fortunate the SuperScale set had several spare. I also had to mask off the spinner to spray the red and yellow pattern.

Once this was finished, I sprayed the entire assembly with a coat of Testors Clear Flat. Then, I applied an oil wash of burnt umber and black: thinning the oil paints with Turpenoid, an odourless turpentine substitute. The wash helped to highlight Tamiya's excellent fine engraved panel lines and to give the somewhat plain colour scheme a little depth.
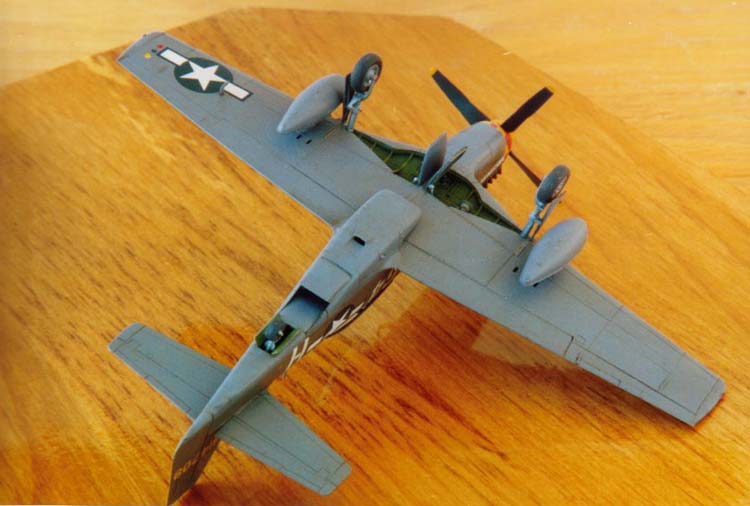
 Once that was dry, I added the landing gear, propeller, drop tanks and clear parts. I used the 'Normal' canopy - I hope that was correct. I used decal tape for the canopy frame. The clear part light next to the undercarriage is excellent. I painted the back of the light in aluminium, which I then over-painted that with olive drab. I painted the final details, such as the exhaust pipes and the landing lights, and I was finished.
Conclusion
As I mentioned, this is an excellent kit. Those who wish to do so can enhance it using the plethora of aftermarket details that have sprung up to accommodate such desires. Personally, I think the kit stands on its own with a single small exception. Most pictures I have seen depict the flaps in the dropped position, presumably the hydraulics bleed out once the aeroplane has landed and the crews keep it that way to enhance maintenance. One could do the operation oneself without aftermarket help, though that is somewhat beyond my skill and time quotient. Nevertheless, I recommend this kit strongly for all levels of modellers be they experienced or novices.
Acknowledgement
 I would like to thank the bloke sitting next to me at that Northern Virginia IPMS meeting who compelled me to build this kit. I would also like to thank Ken Robert and Mike Lampros for their advice on colour schemes and general hand holding, while I fretted through the choice of various colour schemes.
References
-
Larry Davis and Don Greer. "Walk Around P-51D Mustang." Walk Around Number 7, Squadron/Signal Publications Inc., 1996.


![]()


