| Richard Marmo's SCALEWORLD |
Spend enough time reading model articles, meaning everything from brief reviews to multi-part construction features, and you'll discover that they tend to separate themselves into two distinct groups. Most deal specifically with the subject at hand and when criticism is warranted, it's imparted in a constructive manner. The intent, of course, is to provide information that will help the modeler -or kit manufacturer- improve the quality of their work, always a noble goal.
However, there are a few writers who seem to intentionally adopt a style of criticism that insults, intimidates, degrades, antagonizes and alienates their readers. Fortunately, there aren't many who fall in that category.
Can they build quality models? Absolutely. As a matter of fact, some are professional modelbuilders. Unfortunately, their writing leaves a little to be desired. That they have an over-large ego is not left in doubt because they're constantly telling you how good they are. If they scratchbuild, it gets worse because they consider scratchbuilding to be real modelbuilding, whereas kitbuilders are simply too lazy to move away from their computers and do some legitimate building.
I'm a professional modelbuilder and professional writer (freelance in both areas) and would never stoop so low as to insult the intelligence of my readers or clients. I believe strongly in constructive criticism and I use it frequently in combination with humor. Is it possible for modelers (including me) to improve? Certainly. In fact, I learn as much from other writers as what I write teaches others.
That's where proper constructive criticism comes in. I'm constantly making the point in my articles and books that whatever works for a particular modeler is the right method. Just because I do things a certain way doesn't mean you have to. Adapt my methods if you choose, but you don't have to slavishly copy me.
I've never had a problem with readers (or manufacturers of reviewed products) taking offense at my comments, even when I was describing an error, omission or other problem. My philosophy is to give everyone a fair shake but no whitewash, an approach I've always used. Those who prefer to combine constructive criticism with demeaning comments need to rethink their approach. No one is going to listen to what you have to say if they're forced to wade thru a barrage of insults and vitriol.
Opinions?
Last month I published an excellent letter from Ronnie Ugulano that was received in response to my rant on women modelbuilders. Since then, I've learned that she has a fascinating website (http://ronnieuggie.com ). A substantial part of it is devoted to the models (WW-I for the most part) built by her husband, Dennis Ugulano. All are built to 1/72 scale and of high quality. If biplanes are your thing, you'll want to check their site out. Keep in mind that their site is not strictly about modelbuilding. They also are deeply involved in homeschooling their children and there's quite a lot on that subject to be found on the site as well.
One of the latest entries from TESTORS (www.testors.com) in their HSO (Hobby Shop Only) series is a repop of a kit that hasn't been available for the last year or so, the Northrop B-2 in 1/72 scale. Considering our ongoing war against terrorism and the fact that the B-2 has seen combat over Afghanistan, adding one of these kits to your 1/72 collection is almost esssential. A 1/72 scale model, with it's 28 1/2" wingspan, would also dominate your showcase.
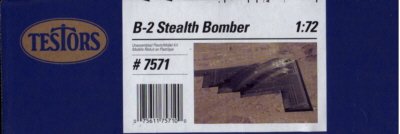 The kit, which was originally produced about the same time the B-2 was entering service, is a very nice effort. Granted, you can nitpick here and there, but it looks right. That is a testament to the late and sorely missed John Andrews. This B-2 is one of the last projects he developed, that fact alone being sufficient reason to pick up a copy.
So what about the kit? For starters, you get a total of 98 parts, all of them molded in dark gray (except for six clear parts). All parts are contained in a single bag. Clear parts are in a bag of their own, which is then added to the main parts bag. Decals are by Scale-Master and take up every bit of space on a 5 x 9" sheet. Instructions take the form of an
8 1/2 x 11", 12-page booklet. One interesting feature of the instructions is the fact that a special sheet was included to show a simpler way of doing some of the assembly for the less experienced modeler. Everything is packaged is a very sturdy, end flap, corrugated box that measures a substantial 13x21x4". Price is reasonable for what you get. $25.00.
All of the major parts are crisp and flash free with no ejector pin marks on the finished surfaces. The sprue that carries all the smaller parts has quite a bit of flash around the wheel halves. However, it's the thin variety that'll flake away as soon as you cut the parts loose. Because of the flying wing configuration, the model's broken down into three major sections; center 'fuselage' and outer wing panels. Each section is roughly the same size and the joints have been engineered so that you shouldn't have any problem with the wings sagging.
You'll also find that the center section has one weapons bay open. The reason for this is to allow you the option of installing a rotary launcher and it's complement of eight SRAM missiles. Wing panels are molded with the split flaps open and you're given a choice of a closed refueling door or open refueling socket.
By now you're wondering if there's anything wrong with this kit. Well .yes. Actually, it's an omission in the instructions. Strangely, the only description we get as to overall color is that it's a dark gray. Specifically, the color of the plastic. You're told to apply the decals directly to the plastic surface and spray the whole thing with Dullcote. Well and good, but I come from the 'paint the whole thing' school. Having FS numbers would have been a huge help. The only other problem is one that certain people are bound to point out it's not 1/48 scale. True enough, but in 1/48, it'd have a whopping 42 3/4" wingspan. And if you happen to build in God's scale (1/32), you'd be dealing with a spectacular 57" span.
Not having FS numbers isn't that much of a problem. There are several websites on the internet that contain excellent shots of the B-2, both on the ground and in flight. Just go to a search engine and type in 'Northrop B-2'. Although I can't give you an FS number for the actual paint, I'd suggest that FS36118 Gunship Gray is pretty cottonpickin' close.
All in all, a very good kit that can stand as a fitting memorial for John Andrews. Go buy one.
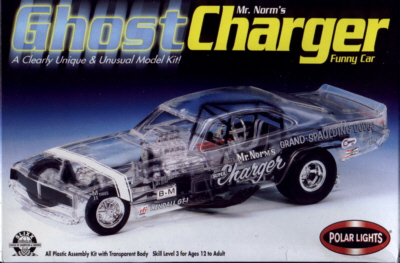 A couple of new releases from POLAR LIGHTS (www.polarlights.com) should catch the attention of funny car afficianados. The subjects in question are the John Mazmanian 1968 Plymouth Barracuda and the Mr. Norm's Grand Spaulding 1969 Dodge Super Charger. Both are level 3 kits, meaning many parts and full details. In other words, these are kits that you build. What makes both of them just a little unusual is a technique that's been seen before but not often. Both the 'Cuda and Charger are offered as Ghost kits.
If you've ever seen any of the visible kits from Revell or Monogram (before they merged) or Renwal, you know what I'm talking about. If not, a brief explanation. Essentially see-through models, every part on both kits is perfectly normal except for the body. All body parts are provided in crystal clear styrene. This allows the entire interior, from the frame on up, to be seen through the outside of the car. When you add the normal decals to the clear body, then drop the body over the chassis, the result truly is ghost-like. Assuming that what's underneath is interesting enough to justify the method and a funny car is the result can be fascinating indeed.
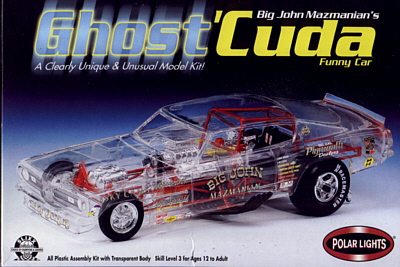 Instructions are a combination of clear illustrations and detailed text. Yippee!! Not only do they not leave anything in doubt, you should have no trouble at all building either one of these kits. Decals in both cases are excellent, giving you every marking carried by the real cars. The 'Cuda kit even gives you grille insert decals as an option to the chrome inserts.
Parts are cleanly molded in white, chrome and clear with everything being contained in multiple bags. The only things left loose are the decals and instructions. Everything is packed in boxes that are so full that just replacing the bagged parts in a way that'll allow you to put the top back on is a project.
Both of these kits are essentially identical under the skin, though you do have a few options offered. These include different injectors on the engine and a choice of tires. Nonetheless, detail is everywhere. Both engines contain some 30 parts and in each case you get a flexible supercharger drive belt that's installed after all engine parts are dry by stretching it over the pullys.
The chassis and roll cage is built up piece by piece and you're warned to make sure that the chassis assembly is straight and true. Botch this step and your model's headed for file 13. Most of your effort will be expended on the chassis and interior, so take your time and detail to your heart's content. Add decals to the clear body, install over the chassis and you're done. There's also an optional brace you can install at the front of the chassis to show the body in it's raised postion. I doubt I'd use it if I built the car as a ghost. Incidentally, don't think you have to build these as ghost models. If you prefer to paint the bodies in order to create conventional scale models, go right ahead.
Whether you build these kits as ghost or solid models, they're both excellent candidates for your car collection. The price, at $19.99 each, isn't scary either.
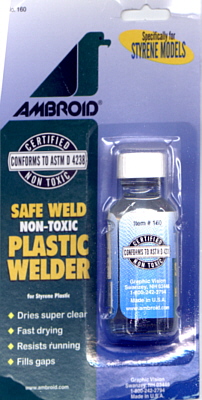 Are you an environmentalist? Worried that you're damaging the ecosystem with some of your modeling supplies. Wondering what that liquid solvent is doing to you? Well, now there's an alternative. AMBROID (www.ambroid.com) , manufacturer of our old, reliable Ambroid ProWeld, has a new product. Called Ambroid Safe Weld, it's described as a non-toxic plastic welder that's certified non-toxic, conforms to ASTM D 4238 and is intended specifically for styrene models. Price is $2.89 for a 1-ounce bottle.
"Sure, sure," you say, "I've heard that story before. Then I tried it and it didn't work.". You're right and I've had the same experience. But as weird as it sounds, this stuff seems to do what it says.
Aside from the label, it's indistinguishable from normal ProWeld. Perfectly clear, water consistency and with a brush applicator in the cap. It's even the same price as ProWeld. But then you open the bottle and things change in a hurry. ProWeld is not something you want to smell or should. While I wouldn't suggest you stick it under your nose and snort, Safe Weld has a definite citrus odor that's basically that of a fresh orange. Huh? It smells like an orange and it's supposed to glue styrene??
As they say, the proof is in the pudding, so I tested it on a 1/72 scale 500-lb bomb. I slopped it on just like ProWeld, not being particularly careful to keep it off the outside surface, and held the parts together for 20 or 30 seconds. Amazingly, the stuff actually kept the two parts together. It also made the surface of the bomb very sticky, especially where it got under my fingers. Anyway, after extricating my fingers, I found that I could still pull the two bomb halves apart but when pressed back together, they continued to adhere. Left it to dry for awhile and after an hour or so I had a nice solid joint and the surplus that left the surface sticky was also dry.
The package says that it dries super clear, is fast drying, resists running and fills gaps. All true, relatively speaking. It does dry clear, though that's irrelevant except where clear parts are concerned. As for fast drying, generally speaking and compared to other non-toxic products, that's true. If you're comparing it to ProWeld, no. That it resists running is obvious because it sat where I put it. Whether or not it fills gaps will depend on the gap in question. Besides, that's what putty is for. One thing it won't do is allow you to use our old squeeze-out technique. You know what I'm talking about. Slop on a large amount of ProWeld, let it work til the joint edges are soft, then squeeze the parts together, release pressure, squeeze again and continue til the softened plastic is pulled across the gap to function as a filler.
On balance, if you're worried about the environment or your health, take a look at this new Ambroid Safe Weld. It'll also eliminate complaints from your significant other about how your model cement smells.
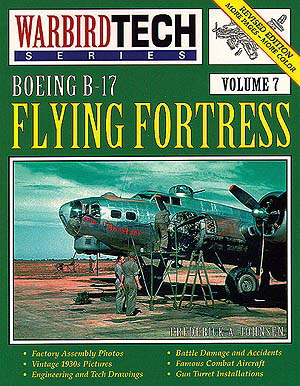 Finally, a couple of old books that are new. If that sounds confusing, it really isn't. You're all familiar with the Warbird Tech Series from SPECIALTY PRESS. You'll also recall my review a few months ago on the Boeing C-17 (Volume 30), which was also the first volume in their revised and improved format. They added four pages of color, used a 50% heavier stock for the cover and switched to glossy stock for the book's pages, improving immeasurably the quality of the photographs. At that time I told you that SPECIALTY PRESS would be applying the same revisions to their previous volumes as each came up for reprint. That is beginning to occur.
First up is the revised Volume 7, Boeing B-17 Flying Fortress by Frederick A. Johnsen. Text is essentially unchanged, though the cover now has a photo of "Boss Lady" on it. The color section is expanded to include an improved photo of "D-Day Doll", a shot of "Mason and Dixon", three photos of "Five Grand" instead of two, a USAF B-17G in arctic markings and more.
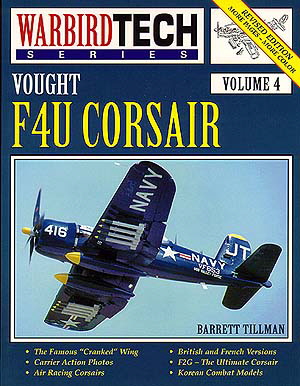 The second volume to get "the treatment" is Volume 4, Vought F4U Corsair by Barrett Tillman. Again, the additions lie in the color pages. If there's a single photo in this volume that will get your attention, it's the F4U-1A color shot that takes up half of page 69. Any of us who build Corsairs are familiar with the photo
in black and white. This one's in full, glorious color, is heavily faded/weathered, has no markings other than star-and-bar national insignia along with a narrow, horizontal white stripe on the vertical fin (but not the rudder), is described as belonging to VMF-214 and photographed at Vella Lavella in late 1943. A pilot is sitting in it and the photo's caption says that "A wartime caption states that the pilot of this plane might be the squadron commander, Major Gregory Boyington.".
The second volume to get "the treatment" is Volume 4, Vought F4U Corsair by Barrett Tillman. Again, the additions lie in the color pages. If there's a single photo in this volume that will get your attention, it's the F4U-1A color shot that takes up half of page 69. Any of us who build Corsairs are familiar with the photo
in black and white. This one's in full, glorious color, is heavily faded/weathered, has no markings other than star-and-bar national insignia along with a narrow, horizontal white stripe on the vertical fin (but not the rudder), is described as belonging to VMF-214 and photographed at Vella Lavella in late 1943. A pilot is sitting in it and the photo's caption says that "A wartime caption states that the pilot of this plane might be the squadron commander, Major Gregory Boyington.".
There are several new flying shots, ditto for carrier shots, an F4U-1B in Korea loaded for bear and an F2G Super Corsair air racer. Both volumes retain their $16.95 price tag.
Both books should be available from your local hobby shop or order them directly from Specialty Press, 11605 Kost Dam Road, North Branch, MN 55056 or call them at 800-895-4585. Keep in mind that there is a $4.50 shipping and handling charge per order.
See y'all next month.


![]()


