Special Hobbys 1/72 Lockheed TR-1A/U-2RBy Chris Bucholtz | 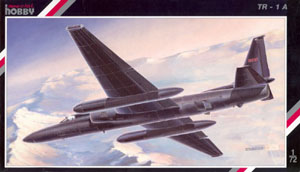 |
History
As useful as the U-2A, -B and -C were, by the late 1960s the development of new types of sensors made it desirable to send the U-2s aloft with more intelligence gathering devices packed inside their fuselages. Lockheed met this demand by taking the original idea of the U-2 and building an entirely new and much bigger aircraft, the TR-1. The new plane was 12 feet, 9 inches longer, had a span 23 feet greater, and could fly 10,000 feet higher than its predecessor. The Air Force acquired 12 TR-1s in 1967, followed by 37 more in 1979.
The TR-1s principal mission was to be battlefield monitoring in the event of a war in central Europe, using the ASARS-2 synthetic aperture radar. Although the end of the Cold War ended this mission, and led to the TR-1 being reclassified as the U-2R, other opportunities for the U-2R presented themselves, mainly in the Gulf War, where the ASARS-2 system helped provide real-time information on Iraqi targets in Kuwait and assisted in the search for Saddams Scud missiles.
The TR-1 airframe also flies for NASA as the ER-2 high-altitude research aircraft. Although it looks like a glider, the J75-P-13B turbojet makes a whale of a noise on takeoff; this writers father can attest to that, because he used to be awakened every morning at 5 a.m. by the sound of one of the NASA ER-2s launching from nearby Moffett Field in northern California!
 The Kit

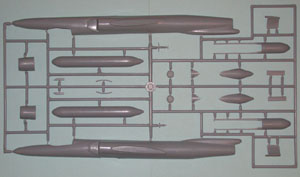
Its not often you get a chance to build a model of your dads alarm clock, but heres my chance! Special Hobbys kit has a lot inside the box, including 20 injection-molded pieces, a vacuform canopy and 48 resin parts. Even so, the modeler has to make a few parts himself. This fact, plus the structural challenges presented by such a large short-run model, make this one for the experienced builders.
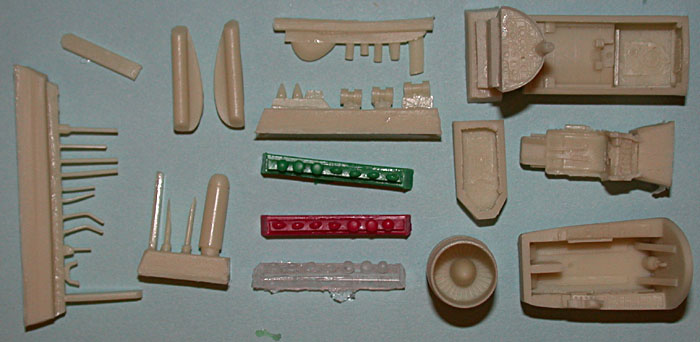
The cockpit is all resin, including a nice tub, an ACES II ejection seat, and a cleverly done combination instrument panel and coaming. The control yoke and column are provided in resin, but the hub that mates these two parts must be provided by the modeler in the form of a bit of styrene rod. The instructions label this with the cryptic legend 0O,8-1, which may be a measurement or it may be map coordinates to the factory where they make the proper diameter rod. Who knows, really? A bit of trial and error should get you past this bit of vagueness.
 Both fore and aft wheel bays are provided in resin, as is the tail pipe. The detail on these parts is very good. The main gear strut is plastic, as are the main wheels; all have flash and need to be cleaned up. The outrigger struts are plastic, but the wheels are resin.
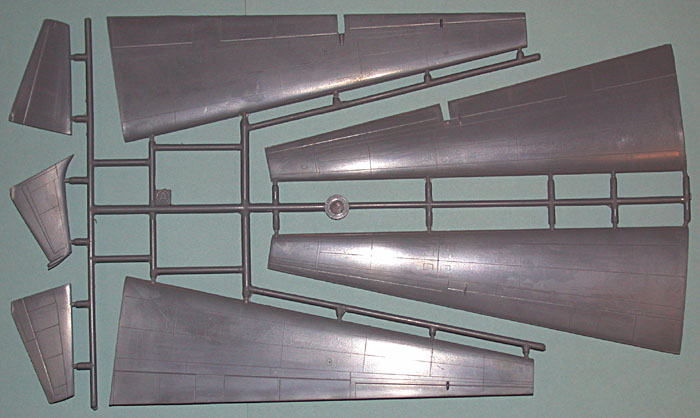
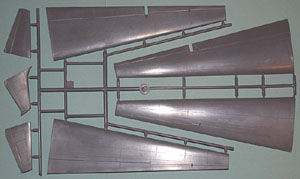
Detail on the wings and fuselage is comprised of very petite panel lines, the equal of anything youd see in a mainstream kit by Hasegawa or Tamiya. There are no locating pins, and the wings butt-join the fuselage. I plan on using some vacuform modeling tricks here, like strips of styrene inside the joint of the fuselage halves and a wood or metal spar through the wings to make sure the model behaves over time with no excess gravity-induced wing droop.
The mid-wing pods are provided as four pieces--top, bottom and segments that go up and over the wing leading and trailing edges. This arrangement is involved, but at least allows the modeler to adjust things before sanding them down. The tail and horizontal stabilizers also butt-join the fuselage; all these are single-piece parts. The splitter plates and intakes provide three-quarters of an inch of depth to the intakes, which is enough for most of us to live with.
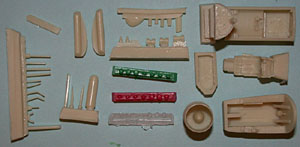 Various sensors, antennas and the fuel dumps are provided in resin. An interesting touch are the landing lights, provided in red, green and clear resin. The red and green pieces are solid, which limits their usefulness; a better approach might be to use only the clear parts and to paint them with Tamiya clear red or green acrylic paints. Two vacuformed canopies are included, so hacks like your reviewer can mess one up and still have a chance at finishing the model. More steady-handed folks ought to have few problems with these sturdy but clear canopies.
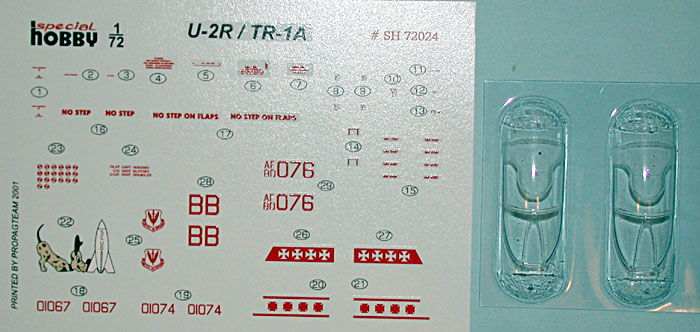
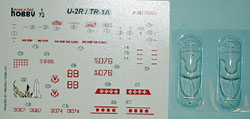 The decals will come as a pleasant surprise for those of us who may think the TR-1/U-2R was merely a black, featureless aircraftthese are black with little red markings! Three schemes are provided: A TR-1A flying as a U-2S today (with an uprated GE F101-GE-F29 turbofan) that flies as a test aircraft at Palmdale, California, which has a sparse sprinkling of markings in red; a U-2R of the 17th Reconnaissance Wing, which flew in the Gulf War and which has mission markings and tail art of a hound dog sniffing a cartoon missile with the word Scud written on it; and a U-2R without the wing pods from the 17th Recon Wing as seen at the Beale Air Force Base Air Fest in 1997, which has the tactical air command badge and a red fin flash on the tail. No NASA birds are provided.
Before you start fretting that there are few resources for the TR-1/U-2R, be aware that the back of the box has an 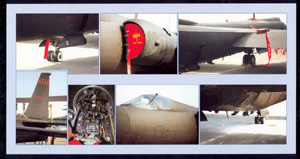 assortment of full-color detail shots of things like the cockpit, the intakes (with FOD covers), the landing gear and so on.
One more thing to consider: youll need space to display this thing. Its 10 and a half inches long, with a wingspan of around 17 inches, very large for a single-engined jet!
Conclusion
Special Hobbys TR-1/U-2R is not for beginners; in fact, Id recommend builders tackle the Academy U-2A first as a trainer for this much larger variant to get the feel for handling such an unconventional shape. Also, the two models will look great next to each other! Well done, Special Hobby!


![]()


