Building the Banner Models 1/350 USS Arizona with Tom's Modelworks FittingsBy Richard Eaton | 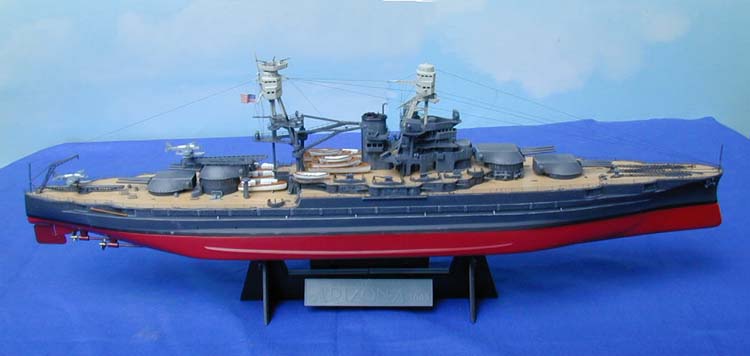 |
Introduction
I was excited when Banner finally released a large 1/350 kit of the BB-39 Arizona. This kit was extensively reviewed in the September 2001 issue of Internet Modeler. I was chomping at the bit when the kit arrived in a huge box! After reading Tracy's excellent review I had formed some strategies for the build. I knew that there were several hurdles to pass on getting a decent build out of the kit. I was not going to correct the model lines. Knowing that the Revell kit was its basis I ordered Tom's Modelworks excellent Arizona PE detail set 3528. With both in hand I was ready to attack this beast! Read on.
Tom's Modelworks Arizona Set (3528)
Old Tom has made my day with this set. It includes two frets of finely etched brass. One fret has a multitude of ships railings that look really sharp. An instruction sheet leaves no doubt at all where each railing goes on the model. The other fret contains the ships cranes, catapults, mast booms and other details. Again an instruction sheet details how to cut, bend, and assemble the various components. The only thing I found lacking with the set was the absence of hatches and other detail for the ships bulkheads (which the Banner kit desperately needs). I shot both frets with battleship gray and let them dry.
Building Arizona
The huge box and tree upon tree of parts are impressive. I planned to employ several basic techniques to add details to the model. There are minor sinkholes and ejector marks on kit parts so drag out the CA and sanding sticks on this one. I then prepared the parts as much as possible while still on the sprue. I filled, sanded and cleaned as many problems as I could find.
The Main Deck and Hull
|
|


I went over the instructions. They have nicely done exploded views with all parts identified. I quickly realized that the four-part deck was the first major hurdle to overcome. This alone precludes following the direction steps as presented. Two separate portions of the main deck are molded with the single piece hull. Three other deck areas (the stern, bow, and amidships deck) are all separate pieces! This can be a real heartbreaker as the pieces as molded do not line up well. Cleaning up all those joins could be a real bear and wreck the look of the model. I dry fit the separate deck pieces onto the hull taking care to get the tightest joins possible. I used small shims inside the hull until things started looking up. Once happy I glued them in place. I used CA, putty, judicious sanding, and a lot of eyeballing until the huge main deck area looked uniform from bow to stern. Whew! Just re-scribe what deck plank detail gets sanded off. I sanded off the poor anchor chains molded into the bow deck section.
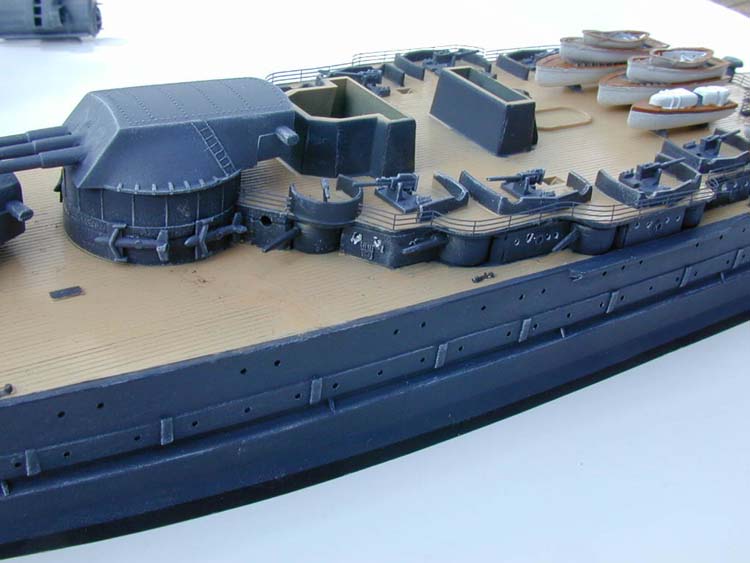
At this point I ran into hurdle number two. The mid gun deck has joins to the hull dividing the walls of the structure at mid porthole. Hello Revell! The portholes are way too large for the scale as well. I figured the easiest thing to do to get past this problem was to join the gun deck to the hull and panel over the walls and portholes with thin styrene sheet. I installed the five-inch guns and glued the gun deck in place. Once I had the sheeting in place I cleaned and sanded and re-drilled the portholes. One might be concerned over covering up all that molded in bulkhead detail. Don't be, there is no detail on any vertical surface in this kit. Hello parts bin! I found a fret of left over PE hatches, fire fighting hoses, and other goodies and applied them where they looked good. According to some pictures I dug up. Wow the hull and main decks are together! Time to see how things look.
Of course the proof is in the painting, so I shot the hull with Tamiya Battleship gray. I then masked and shot Testors Tan onto the deck, cleaned up some more, and re-shot until I was happy. I was aiming for a Measure One paint scheme for this build. The Tamiya gray is very dark (almost anthracite). I've read sailors call the measure one gray "black" so I figured with dry brushing I'd be OK with this. I then masked the hull and sprayed on a flat black waterline. I lightly dry brushed the raised decking with dark brown to highlight the planking.
Deck Detail
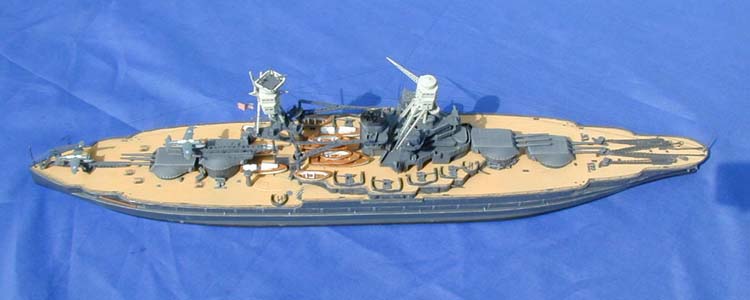
I pulled off the various masking off turret mounts and splinter shields and found I needed to do a good bit of touchup. Knowing this, I wanted to complete all hull and deck so I could limit things to just one touchup pass. Following step three in the instructions I installed the various pre-painted deck fittings around the ship. Once things were in place I went over hatches, splinter shields, bout mounts, and the like with a fine tipped brush so that there was clean demarcation between the deck and all gray parts.
Ships Boats
The kit comes with a multitude of ship boats. I decided to do them all at once. I chose to paint the hulls in peacetime white. After spraying all boat parts white I hand painted the decks and spars in light brown. Once dry I added them to the deck. Pile them up!
The Main Guns
I drilled out the barrels of all the main guns. I then assembled the main guns using masking tape to back the large turret gaps that allow the barrels to elevate. I just poked the barrels through the tape. I assembled the main guns in a stowed position. The kit turrets have poor molded in ladders on the sides so sand them off and replace with PE. I used white glue to fill the barrel elevation gaps and applied several layers to form blast bags. I then shot the turrets with battleship gray. I brush painted the "blast bags" flat black. I then glued the turrets in place fore and aft.
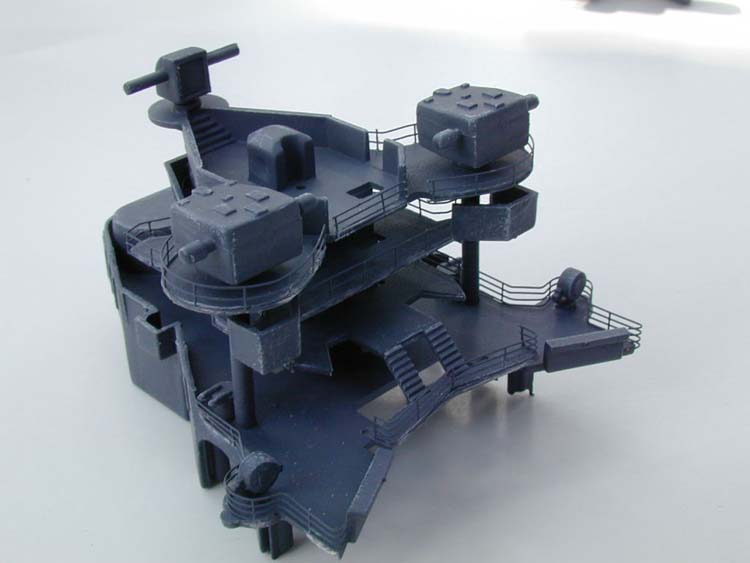
Superstructure, Mast Towers, and Cranes
From here on the kit instructions are to my liking. I like to take things in sections so that detailing would be easier and to cut down on PE damage as the kit progresses. Each section included cleanup, assembly, a scale black wash, dry brushing with Testors flat light gray and PE details. Following step eight I assembled the main superstructure and added the gun directors, searchlights, and other parts. I then placed hatches and other detail on the bulkheads. I am a firm believer in adding PE rails from the top down with ships. Following Tom's excellent directions I added the rails from top to bottom. I used my usual method of measuring, bending, and dry fitting to make the runs around these complex structures. Folks there are a ton of complex bends in railing this ship. You might want to detail a simpler project before taking on this one. I then built the ships single funnel in the same manner.
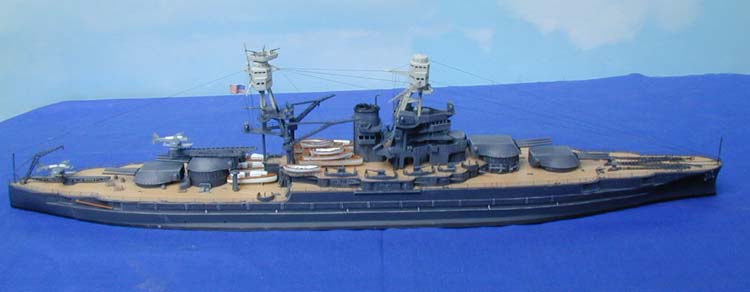
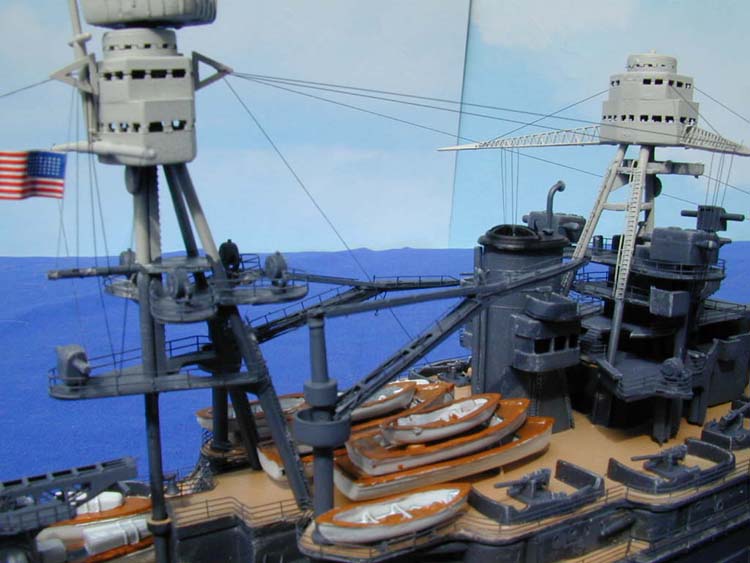
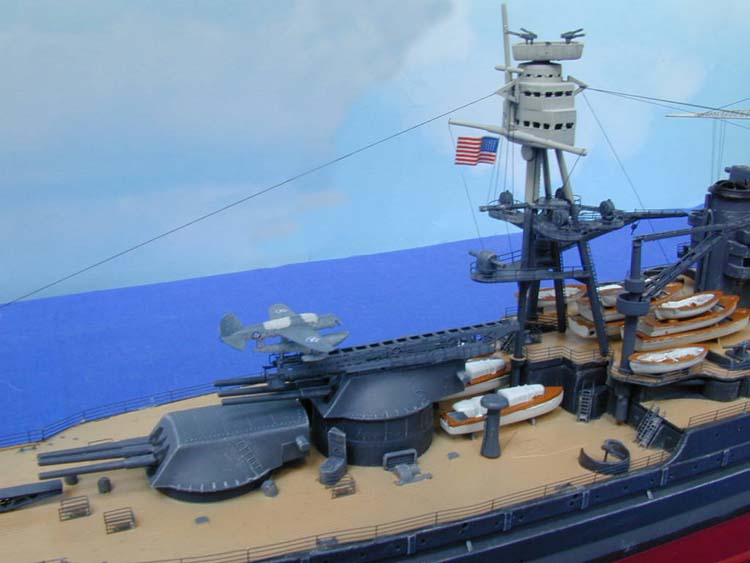
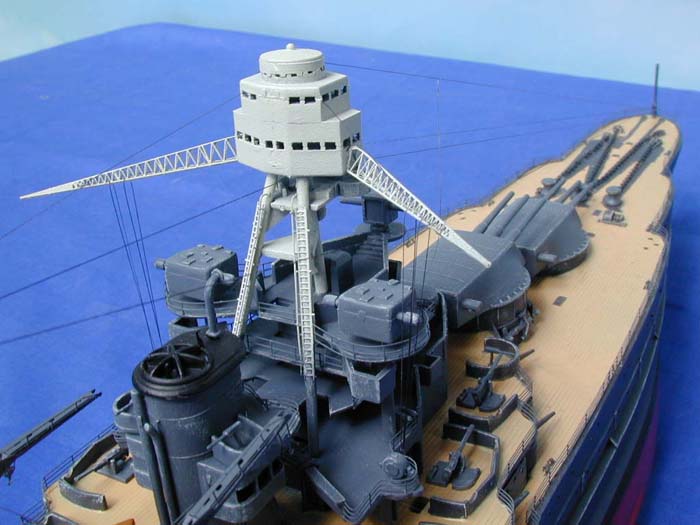
I built the ships mast towers in steps six and seven. Use care in aligning things as the portholes are split here too! The kit provides two large masts with large yardarms. I didn't use the one on the forward tower because it did not exist on the Arizona. I modified the rear so that it looked more accurate. I bent and installed the two angular PE booms on the front tower as described in Tom's instructions. These large arms are angle aft and just look awesome! Once the fore and aft towers were complete I masked them at funnel top level and sprayed the top structures haze gray to complete the measure one effect. I then touched up the mast top gun platform splinter shields and installed the AA guns. These smaller weapons are generally crude and should be replaced. That must have been a nosebleed post if ever there was one!
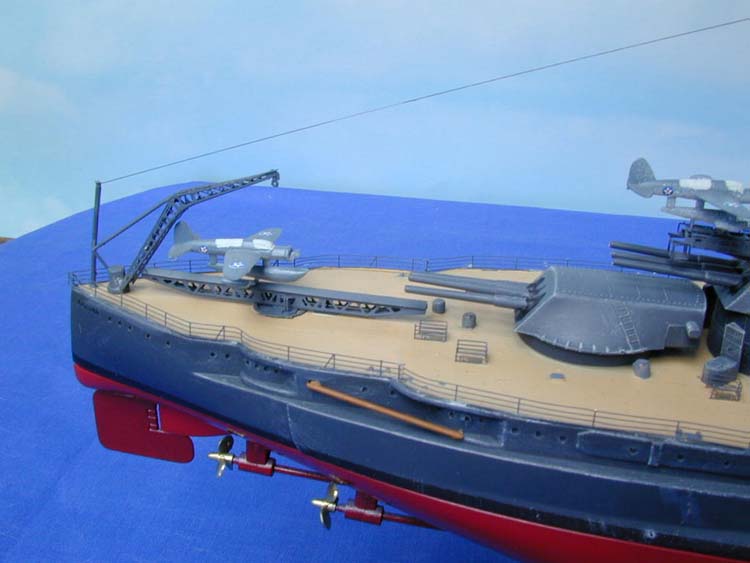
Step eight has you assemble the ships cranes. I assembled Tom's replacement parts. These are really sweet. I cut down the kit supplied crane parts so they would accept the PE booms and then CAed them in place. These included the two large mid ship cranes and the stern aircraft crane.
The Air Department
The kit includes two Kingfisher observation aircraft. These are best replaced but I spiffed mine up and used them. Filling and sanding help but the planes are just molded a tad flat. I sprayed them with blue-gray and then painted the canopies light gray. I added the markings and was happy at that. Tom's does include PE supports for the wing pontoons but I went with the birds as is.
The catapults are another matter. Tom's detail set supplied two detailed catapults that are small kits in themselves. The kit-supplied cats don't hold a candle. I assembled, painted, and added them to their mounts.
Final Assembly
I wrapped things up following step nine of the instructions. It basically depicts finishing the model. I added the pre-painted AA guns to the mid gun deck. Prior to placing all the major component on the ship I did an over all dry brush of the hull and all deck components to bring out details and enhance scale effect.
With everything pretty well built I added the main deck railings around the perimeter of the ship. Tom's instructions and parts were spot on so this went quickly. I then wrapped up assembly by dry fitting, adjusting, and then cementing the main superstructure, funnel, Tower masts, and cranes to the ship. This method worked well while holding down the damage to the extensive PE. I then added the kit supplied decals. I used a cheap thin necklace material for the anchor chain. I sprayed the chain flat black and CAed them in place. Assembly complete!
Rigging
I use invisible nylon thread colored with permanent marker for rigging in this scale. I used various references and went to town. I ran support and wireless aerials to represent the ship's rigging at a distance without doing too much damage to the PE.
Conclusion
It is so great to have a large scale Arizona that is economical! Despite the hurdles, I recommend this kit to most ship lovers. Average level ship builders would have a lot of fun building right out of the box. It builds up to a nice representation of this historic ship. You might want to get an easier PE job under your belt if you are planning to use Tom's PE details. They are first rate and easy to work with but there is a ton of PE to build into this ship. I want to thank Roll Models for supplying this Banner kit for this project.


![]()


