Skywave/Pit Road 1/700 IJN Destroyer MinekazeBy Tim Reynaga | 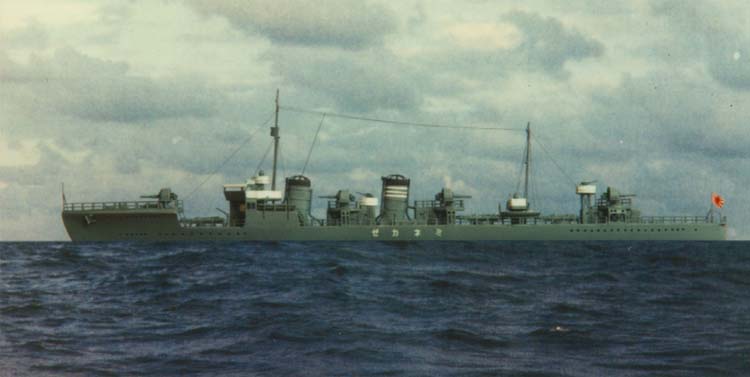 |
Introduction
Coming between the foreign designed (and often built) vessels of the earlier part of the century and the innovative Kagero and Fubuki 'Special Type' destroyers of the 1930s, the Minekaze ('Summit Wind') Class was a significant transitional design for the Imperial Navy. An entirely Japanese effort, Minekaze represented a complete break from previous practice of closely following British designs and methods. Rated as First Class destroyers, they displaced about 1,214 tons when built.
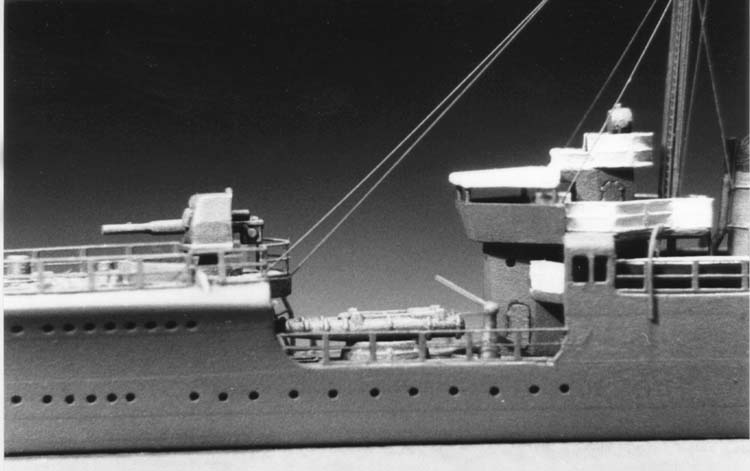
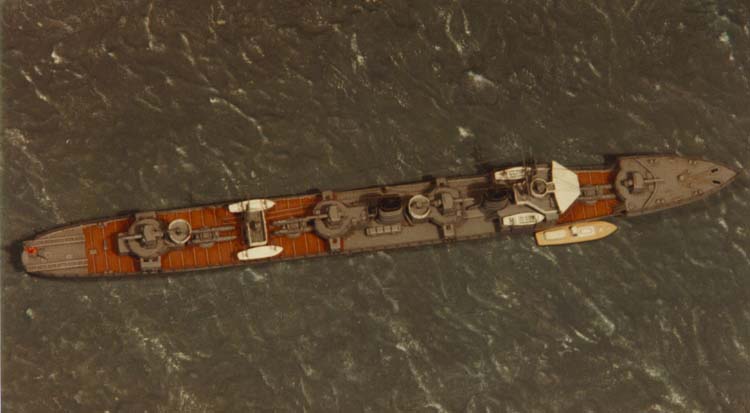
The lead ship of her class and the similar Kamikaze and Mutsuki Classes to follow, Minekaze incorporated a number of distinctive design innovations including a lengthened forecastle with a break forming a well deck immediately forward of the bridge. This odd arrangement, apparently derived from contemporary German torpedo boat practice, offered the advantage of a low, semiprotected area for the forward torpedo tubes. Armament consisted of four 4.7"/50cal. s.p. guns, six 21" torpedo tubes in double launchers and two 7.7mm machine guns. Ships of this class could also be equipped to carry up to 20 mines. Machinery consisted of four Kampon boilers running two shaft geared turbines at 38,500 shp. Rated speed was an impressive 39 knots. One ship of this class, Shimakaze, reportedly achieved 40.698 knots on trials. Actual speeds under operational conditions were, of course, somewhat lower, but these ships were still very fast and compared quite favorably with their foreign contemporaries.
Commissioned during the 1920s, the thirteen ships of the Minekaze class were the mainstay of the Imperial Navy destroyer squadrons throughout the decade until gradually replaced by more advanced types. Obsolete by the beginning of the Pacific War, the Minekazes were relegated to secondary roles, much as the U.S. 'four pipers'' had been. They soldiered on throughout the war as patrol vessels, high speed transports, target control vessels, and even as Kaiten (human torpedo) carriers. Most ultimately were to fall to U.S. and British submarine torpedoes. Minekaze was one of these: on February 10, 1944, while serving with the First Surface Escort Division, she was torpedoed and sunk 85 miles NNE of Taiwan by the submarine USS Pogy (SS-266).
The Kit
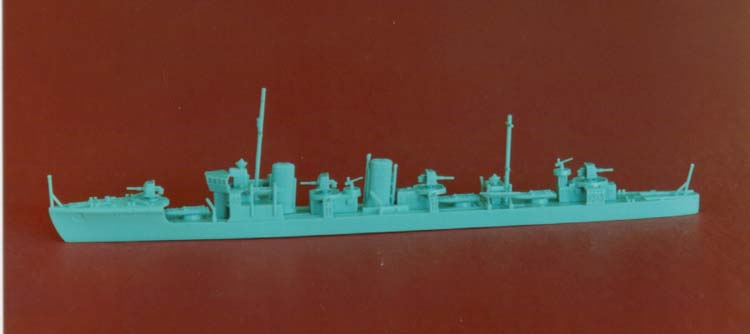
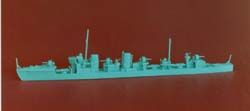 The kit from which the model was built is the excellent Skywave/Pit Road release in 1/700 scale. Typical of Skywave/Pit Road efforts, the outline is accurate and the moldings crisp and superbly detailed. I particularly liked the minutely reproduced non-slip deck surface detail. The markings were well rendered, including flotilla numbers and shipís names for the hull sides and stern as well as naval ensigns. Another plus was the inclusion of alternate funnel caps, weapons, and other parts to depict Minekaze as she appeared at different points in her long career. Although not without its shortcomings, I liked the kit and would give it high marks.
 I began construction with sharpening the hull portholes by drilling each one out with a #77 drill bit. These were depicted on the kit as tiny depressions along the length of the hull. Though not very convincing in this form, the presence of these faint marks did save the considerable time and effort of locating and marking each of them before drilling. As it was, it proved surprisingly difficult to drill a series of tiny, equidistant, horizontal holes in a straight line! The same was done with the portholes on the deckhouses. Though a bit tedious to accomplish (there were 105 of these things on Minekaze), this small improvement considerably enhances the scale appearance of plastic ship models.
 Next came the construction of the bridge and deckhouses. These parts included some delicately molded surface detail including portholes, ladders, and doors. The problem was that these details did not all match the photographs in my references. The contemporary photographs in the Kojinsha/Maru Ship Vol. 10 section on the IJN Minekaze Class ships and the drawings on the Model Art Publications volume on IJN destroyers show arrangements slightly different from those of the kit. I donít know if these discrepancies were due to differences in detail between ships in the class or simple error by Skywave/Pit Road, but I altered the model to conform with the photographs. Even though not all of the kit detail was inaccurate, I removed all of it. This way the new parts would not clash with the molded details, which looked slightly different.

I replaced the ladders and doors with photoetched parts from Gold Medal Models (GMM) sets. These minute parts, made from chemically etched stainless steel, are reasonably priced and feature some of the finest detail I have ever seen. The doors, for example, even though only about 2mm high, have visible relief-etched dogs and hinges! They are terrific for adding (or replacing) kit detail and are much easier than scratchbuilding. I cannot recommend them highly enough.
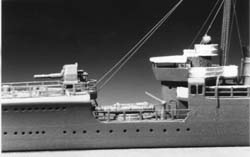
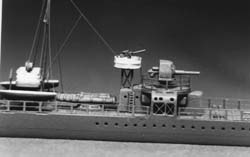 Another change on the deckhouses was to hollow out the flying buttress supports under the gun mounts. They were molded solid due to the limitations of the injection molding process, but they really should be opened up. Carving them out with a hobby knife was not the most exciting part of this project, but it did improve the scale appearance. It also afforded the opportunity to correct a small error in the kit: the large buttress supporting the aft gun mount was depicted as a symmetrical unit divided into two equal sections. This was accurate for the similar Kamikaze and Mutsuki classes but not for the earlier Minekaze Class, which had a unique asymmetrical arrangement.

The bridge was next, receiving much the same treatment. I thinned the windbreak to scale thickness as well as removing the molded-in guard rails. These were to be replaced with more accurate photoetched parts later. Since Minekaze had no bridge windows at the early point in her career which I wished to depict, I also removed these. Finally, I filled the rather massive slots on the bridge sides with cyanoacrylate (super glue), sanded smooth. These slots were to accommodate the over-scale kit davits for the shipís whaleboats. I tossed the kit parts and replaced them with better looking davits made from wire.
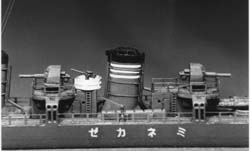 After the bridge I attached the funnels. These parts were probably the weakest aspect of the kit, being molded solid with surface detail that was both inaccurate and over-scale. The grab rails ringing Minekaze's funnels, unlike those of most Imperial Navy destroyers, were fitted parallel to the funnel tops rather than the deck. These were depicted on the kit as parallel to the deck and were poorly executed, so I sanded them off. I also hollowed out both funnels and removed the oversized vent pipes molded on the ends. All of this detail was to be replaced later.

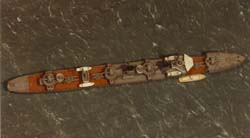
At this point the torpedo tubes, main guns and sundry details were cleaned up, assembled, and given a light coat of gray paint. The precise shade of the Japanese Imperial Navy's grey is a matter of continuing debate among modelers, but I find that Testors Gunship Gray (FS 36118) is a convincing match for this color. I airbrushed a light coat, taking care not to obscure the delicate surface detail. After allowing a week for the paint to thoroughly cure I masked the hull in narrow strips with masking tape and appied a second coat. Removing the tape left a series of slightly raised bands along the hull sides which simulated the effect of hull plating.
After the hull was painted, the linoleum covered deck areas received their color. I used Humbrol HG15 Weinrot (wine red) for this, which seemed to be a reasonably good match for the brown color of Japanese linoleum decks.
 When the painted deck areas dried, I began the process of weathering. Since I wanted to depict the vessel as she appeared in the 1920s, this would be fairly subtle. (Peacetime Imperial Navy ships were relatively clean and well maintained, so dramatic rust, fading or other weathering effects would have been inappropriate.) I began by applying a thin wash of flat black to the gray areas. Capillary action drew the thin paint into recesses, giving an illusion of depth. Excess paint was dabbed away with a tissue, then set aside to dry. The same was done with the brown linoleum areas using a thin, darkened mixture of the basic color. After this dried, each area was drybrushed with the base color, blending the shades together. Finally, again after allowing the preceeding step to dry thoroughly, each area was gently drybrushed with a lightened blend of the base color. This served to bring out subtle details and highlights and to visually integrate the whole.

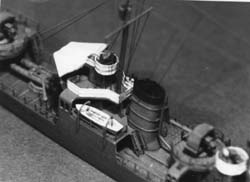
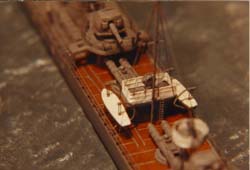
When the paint was dry I turned my attention to the smaller details. The funnels were the most complex of these subassemblies. First, they received new grab rails made from ultrafine copper wire taken from the coil of an old transistor radio. Each rail was applied separately by wrapping it arround the stack and securing it with diluted white glue applied with a fine paintbrush. The ends of these wires were to be hidden later under the small vent tubes coming up from the main deck. It was a simple but fiddly process because the rails must be equidistant from each other and parallel. This required quite a bit of careful manipulation to get it just right, which is why I like the slow setting white glue. Time and patience did the trick.
 The spidery wire funnel caps were fabricated from thin copper wire using the kit provided solid funnel caps as a guide. This procedure was the most difficult part of the entire project. I made these by first making the longitudinal spans, pressing a wire over the kit part and trimming the ends. They were then bonded to the previously hollowed out funnels, the insides of which had been painted flat black. The caps formed the basic structure against which the remaining spans were built up, one by one. (Perhaps these funnel tops will appear as photoetch parts in some future aftermarket set!) In the end, the completed funnel assemblies consisted of 35 parts altogether!

Following the completion of the funnels the tops were painted flat black highlighted with dark gray. The white stripes on the aft funnel were from the kit provided decal sheet. Vent tubes made from copper were were added to the ends of the stacks. Again, the kit parts differed from photographs, so I used the photos as my guide.
 The main guns and torpedo tubes came next, followed by the small 7.7mm machine guns. To depict Minekaze as she appeared immediately after completion, the shields on the main guns should be flat. However, these were changed almost immediately to a semi-enclosed type which provided better protection. I used these parts as provided in the kit, the only modification being to hollow out the muzzle ends. The 7.7mm guns were improved by replacing the barrels with wire and adding circular ammo drums punched from .010 styrene stock using a Waldron punch and die set. The kit bases were discarded. These were replaced with plastic discs for a better scale appearance. The railing arround these positions was replaced with photoetched railing attached with white glue. To simulate the canvas covering over these rails I applied a coat of Micro Mask. The coating shrank slightly as it dried, leaving the underlying rail structure just visible under the scale canvas. Painted flat white when dry, they looked great. The same method was used to depict the canvas covered railings around the searchlight platform and the bridge area.
The safety rails surrounding the weather decks were made using GMM photoetch parts. The Minekaze was the first kit in which I used photoetched rails, and I am a convert! They are so much easier than the old fashioned method of building up the rails with wire and look almost as good. Moreover, since I completed this project GMM has released improved sets which are even better, accurately reproducing the slight sag and even the stud links of the chain used in IJN safety rails. Wow! Definitely for a future project!
The ship's boats came next. These were nicely represented in the kit with thwarts and even scribed planking. Unfortunately, the motor whaleboats were marred by ugly knockout pin marks right in the middle of them, so I filled them in with putty to represent canvas covers. The forward whaleboats were fine, so I painted the insides white and added tiny photoetched oars, painted gray. The davits were made from wire shaped using the kit parts as a guide. The miniscule pulleys were photoetched parts. These assemblies are quite fragile when complete, so great care has to be taken not to damage them in handling.
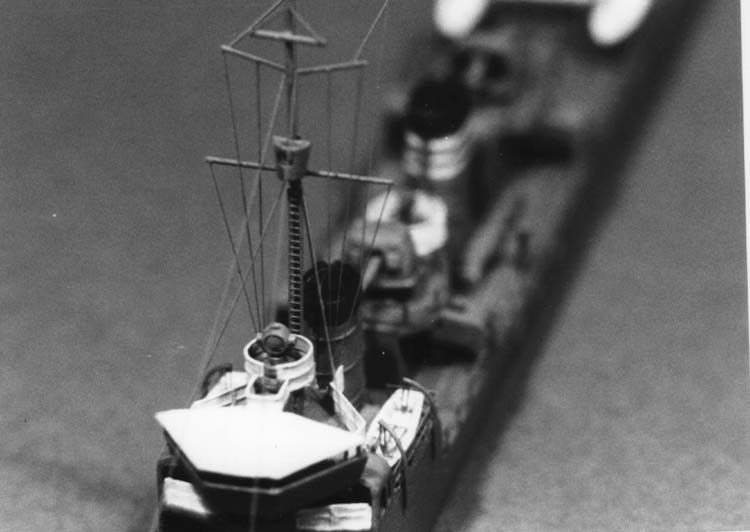
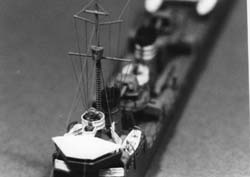 The final step was the mast work and rigging. Minekaze had a relatively simple mast arrangement consisting of a pole and yards which I built up with various sizes of copper wire and attached with white glue. The crowís nest was cut from the kit part and hollowed out, and a photoetched ladder was added to the foremast. Rigging was made from the same ultrathin wire I used to make the funnel grabrails. These assemblies were painted using a mixture of the hull color, slightly lightened and thinned. The jack and flagstaffs were similarly built up from copper wire and painted gray. The naval ensign was from the kit provided decal sheet.
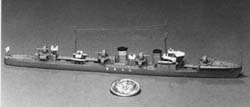
Skywave/Pit Road's Minekaze was a real pleasure to build. Though not a perfect kit, it builds up into a very attractive replica: I was fortunate enough to win a third place with it at the 1998 IPMS Nationals in Santa Clara, California.
References
-
Japanese Naval Vessels Series, Voume 10 (Japanese Destroyers Part One). Kojinsha/Maru Ship Specials, published in Japan.
-
Drawings of Imperial Japanese Navy Vessels, Volume I (Japanese Battleships and Destroyers). Model Art Publications, published in Japan.
-
Warships of the Imperial Japanese Navy 1869-1945 Hansgeorg Jenschura, Dieter Jung, and Peter Mickel, U.S. Naval Institute Press, Maryland, 1977


