 ModelKrak 1/72nd Austin Series 1 Armoured Car
By Matt Bittner
Photography by Scott Hackney
History
My primary reference - Armored Cars of Russian Army, 1906-1917 - is unfortunately all in Cyrillic. Since I don't read Cyrillic - and I'm not sure how this book is broken up in terms of chapters - I am unsure of which section to have translated to provide a history of these cars. Be that as it may, I still feel this book is an extremely valuable - and the only - resource on early Russian armored cars.
The Kit
The ModelKrak Austin Series 1 kit consists of approximately 21 resin pieces. I say approximately because it appears my kit is missing a few parts like the rear axle and drive shaft. Granted it's not a problem to scratchbuild these pieces, but something others should be aware of. The resin is exquisite and some of the best molded I have seen. I have found no airholes and the level of detail is outstanding. There are no decals supplied in the kit.
Construction
 With most resin kits, construction starts with removing parts from their pour blocks. The most "difficult" removal being the chassis and body, since they're each attached to their own large pour block - on the underside for the body, and on the top for the chassis. If you're not removing the block with sandpaper and water, be sure to use a mask so you don't breathe the resin dust. Once in your lungs the dust never leaves.
Once all pour blocks are removed, actual construction can begin with gluing the chassis onto the body. Be sure to put the chassis on the right way - the molded in leaf springs go towards the front. I used five-minute epoxy to glue these parts together so I had plenty of time to position these parts in the right location. Once the five-minute epoxy dried fully, I ran a thin bead of CA around the chassis-to-body joint.
 Now I was ready to glue on the other parts and it didn't take long to get them all in place. Since I had no axle for the rear, I first drilled through the rear differential, adding the "first" axle out of brass rod. Once this dried I noticed it wasn't thick enough for the wheels, so I glued on some Contrail tube over the brass rod to bring it up to the correct diameter. I did not glue the wheels on until all painting was complete.
I also added some extra details that were evident in the references but weren't included with the kit. These included a step on the "port" side leading to the door (I couldn't tell if there was one on the "starboard" side so I left it off). I also added an actuating lever leading from the cab to the front of the car to control the small "door" in the front of the car which appeared to help with cooling and/or heating of the engine. One last item added was the "plug" on the front bumper where the starting crank went. Plus I drilled out the included light to accept an MV lens.
 Since the kit did not include the drive shaft I fashioned one out of brass rod. In addition there were no pipes supplied leading to or away from the muffler - again, these were fashioned out of brass rod.
Final Assembly and Painting
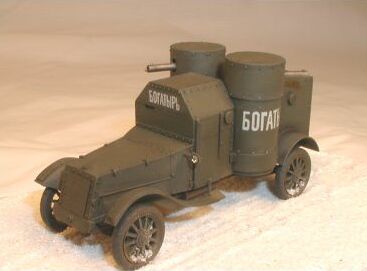
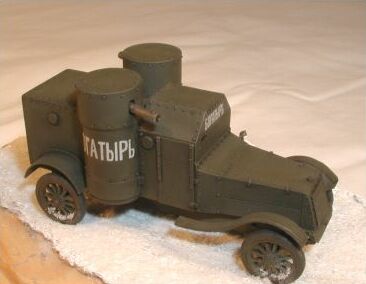
Now that all the parts were on I sprayed the model with an olive green in the Polly Scale line (unfortunately I can't remember which exact paint). This included spraying the wheels. Once it was dry I then painted the wheels an off black and started giving the whole model an oil wash. After the oil wash was finished I went back over and highlighted the raised parts with lightened paint. I then added the ALPS-generated decals and after the dull coat was sprayed on started weathering with pastel chalks. After the chalks I dusted some graphite powder onto some of the rivets and other edges.
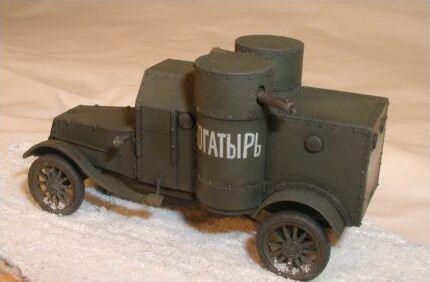
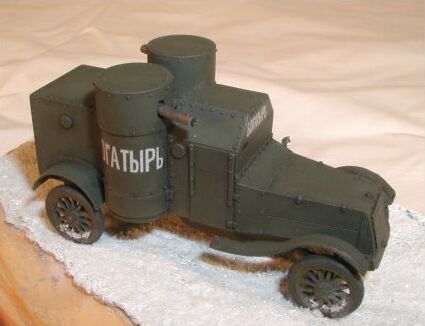
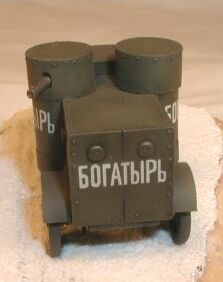 I modeled this particular car after a specific one in the Russian book. The Cyrillic on the car basically means "of or from wealth or privilege" and I really have no idea why this saying would be on an armored car. Odd indeed. The photo has the car sitting on a road of snow, but not heavily weathered. In fact most of the photos of the Austin's in this book show very clean vehicles. The drivers must have had a lot of pride in their automobiles.
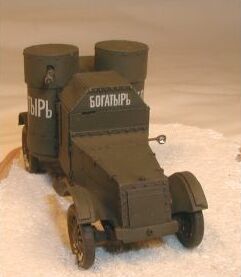
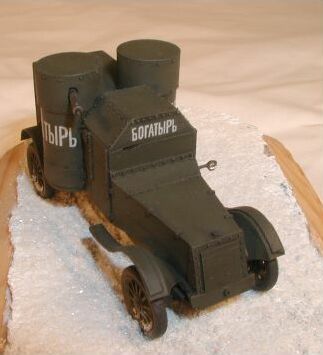 Because this particular car was on a road of snow I decided to try and show this in my display. I found a base very inexpensively at a local "Hobby Lobby" (an arts and crafts type store) and to it I added Celluclay as the initial ground material. Using an extra tire supplied by Modelkrak I drilled through the hub and inserted a brass rod, rolling the tire over the drying Celluclay resulting in "tire tracks". Once the Celluclay was completely dried I sprayed Polly Scale's White over the Celluclay. I then dry brushed some gray on the higher spots after the white dried. The snow is a model railroad product - Arizona Rock & Mineral Co., "NW & SF Sleet Snow", N scale, No.132-1 - which is actually crushed marble. I first thinned some white glue with water, brushed this mixture on the base then sprinkled the snow over the base, giving it a good coverage. Once the glue-mixture dried I tapped the base on its side to remove any loose "snow". I also added some of this white glue mixture to the wheels of the armored car and sprinkled snow into it. The armored car is glued onto the base using straight white glue.
Conclusion
 This was an extremely enjoyable build. With the small amount of parts this kit has means a relatively quick build. I feel the snow base really sets off the car. It was fun using the picture from the Russian book as my influence. I highly recommend these series of cars by Modelkrak.
References
Armored Cars of Russian Army, 1906-1917


