 OGENOK'S 1/30 SOVIET ISU-152 ASSAULT GUN TANK
by Ray Mehlberger
HISTORY:
The original KV chassis was used to produce the mighty SU-152. This consisted of the big 152mm Model 1937 corps gun/howitzer mounted in a low, heavily armored superstructure on the chassis of the KV. This type went into production in February of 1943 and was first used in numbers during the Kursk offensive later that same year. The gun had a 17,300m (19,000yd) range and a high velocity (1,900fps). With massive frontal armor and a low silhouette, it was known as "Zveroboy" (Conquering Beast) by it's crews. Later, when the Stalin tank replaced the KV in production, it was built on the IS chassis and these vehicles were designated as the ISU-152. This is the subject of this kit review.
THE KIT:
 |
 |
 |
 |
 |
 |
I got this kit in trade, years ago. Yes...I have the scale right....it is 1/30th. Upon opening the box one is confronted with some pretty heavy, sometimes CRUDE, moldings. At the time I traded a fellow in Poland for this kit, it was the only show in town for this particular vehicle. DML has since released an ISU-152 in 1/35th scale. I wanted this particular tank model, so started to turn this sow's ear into a silk purse (to quote an old saying).
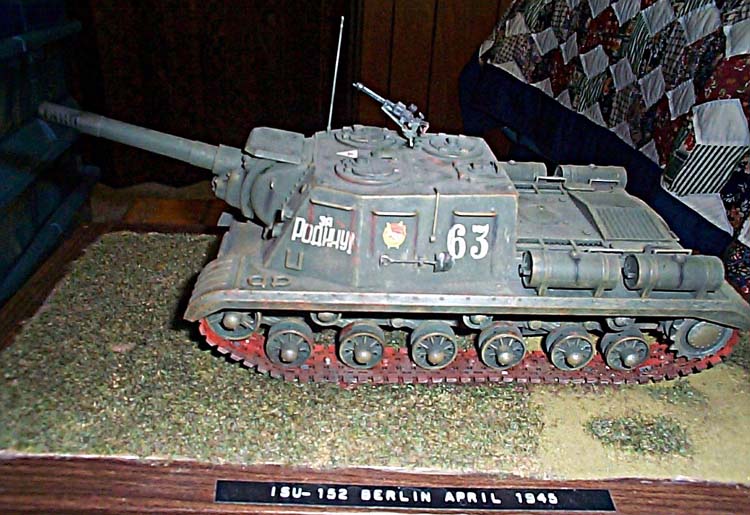
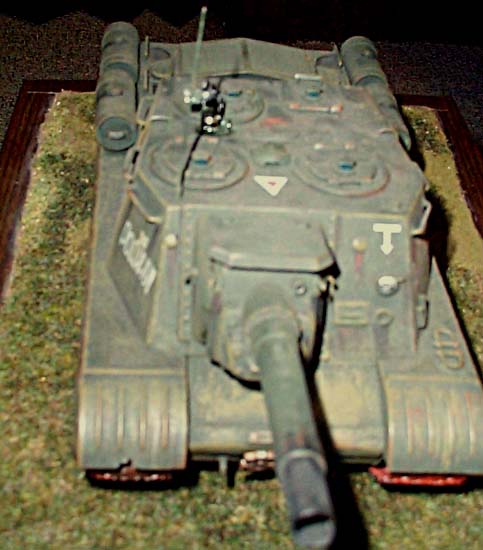
The parts were covered with a lot of flash and had very heavy sprue trees, so they needed a lot of cleaning up. The kit was molded in a dark green styrene. The main body parts (top and bottom) had a mirror like surface to them. Much too shiney for the cast look this beast had in real life. I fixed that by using a stiff brush soaked in liquid cement and stabbing at the surface. Any resulting "strings" of molten plastic that occured were knocked down with sand paper. The grab handle in the kit are molded way over scale...so were replaced with copper wire. The radio aerial was replaced with some stiffer steel wire.
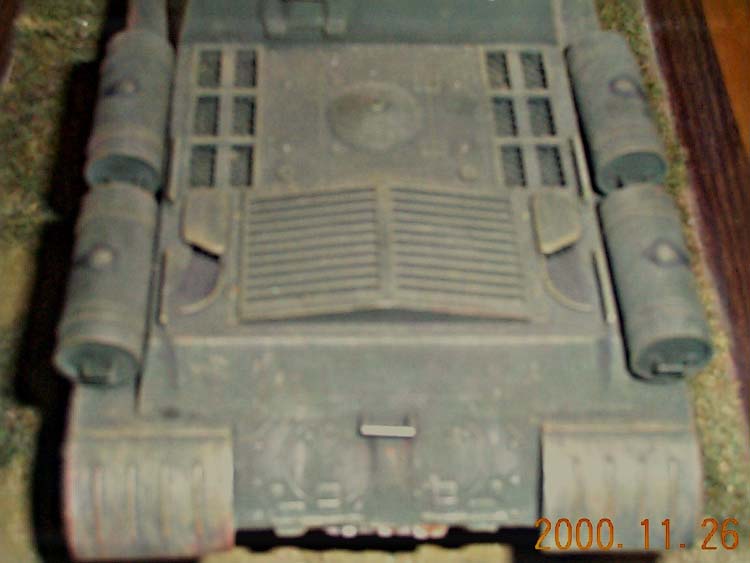
The main inaccuracy in the kit....namely the engine air intakes...was attacked first. In the kit they were molded with too few openings! This was determined from many different books I have showing the top of this vehicle. The intake area as molded in the kit has the screen molded in also...this whole area was cut away using my dremel tool. I used evergreen plastic strips to reframe the intakes correctly and a piece of mesh screen was then glued into place behind the frames. Since I now had a SEE INTO A VOID, with nothing below this new sceening, I built up some shallow boxes as baffles and painted the inside of them flat black. These were now glued behind the screens and the upper deck was then fixed onto the lower hull.
The auxiliary gas tanks were indented in each end and had a seam that would have to be filled there, which would be hard to do with the ridge all around the edge. So I cut some disks from Evergreen card and glued them into each end of these gas tanks. I then cut some aluminum strips, out of a 7-UP can, and bent these into carrying handles for each end on the gas tanks. These were then CA glued into place. Drawings in my books showed a wire...that comes out of the roof of the vehicle...on each side. It drapes a short ways over the sides of the tank and then terminates in a small tube-like thingy. I believe these are turn-signals?? I used wire and stretched sprue to replicate them.
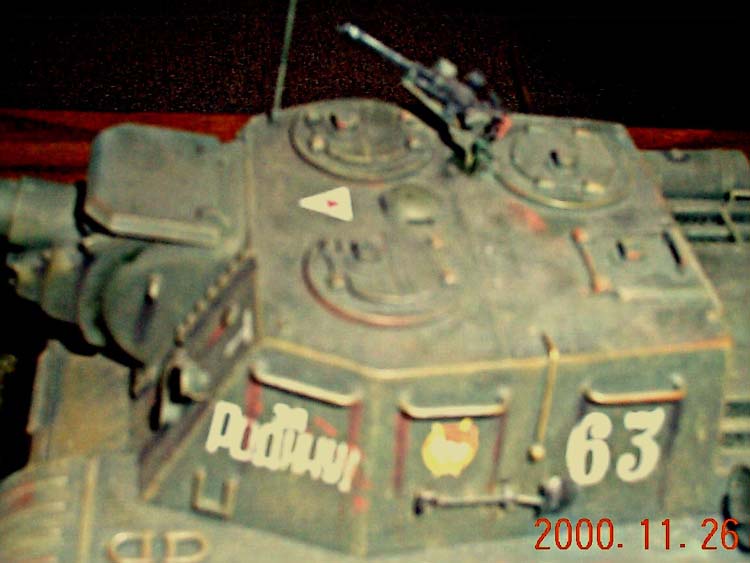
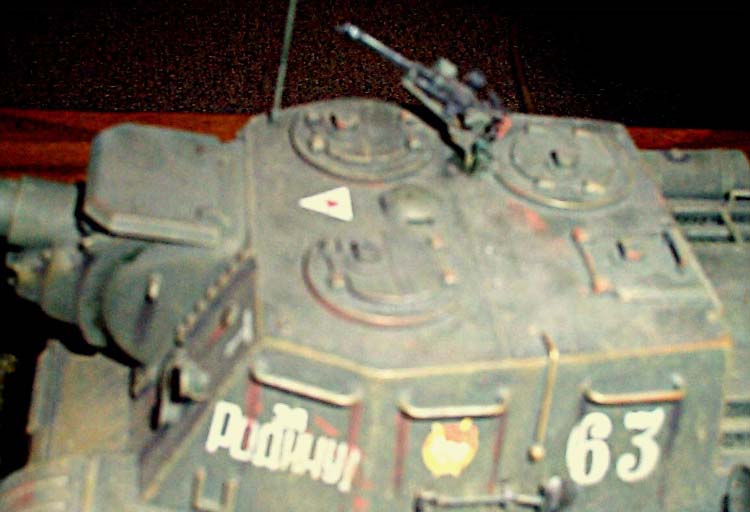
These same pictures in my books show that this vehicle had a flexible machine-gun mounted on the roof. I used one from a Ertl kit in 1/35th scale. It did not look too undersized up there, being as the basic vehicle is 1/30th. I made some spade grips for it and added a Waldron brand 1/35th ring and cross-hair sight of PE.
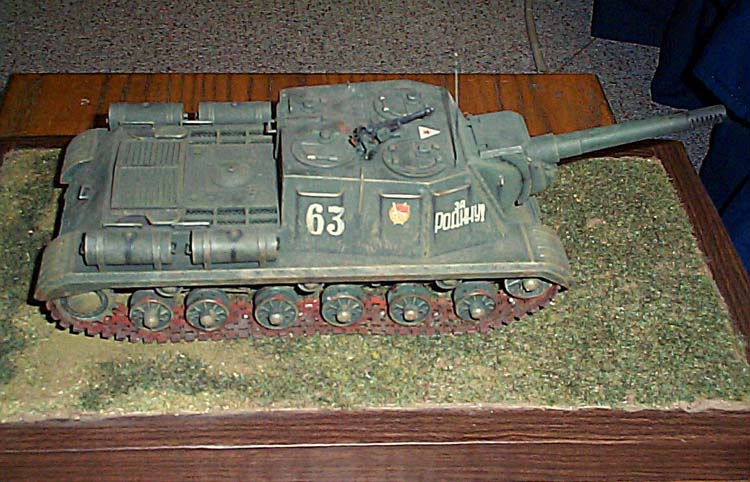
The other bad part of the kit is the treads. Ogenok chose to mold what should be shark's tooth shaped teeth that engage the drive sprockets as half spheres!! These would be impossible to file...being continuous rubber-band type treads...so were left as is.
Finishing
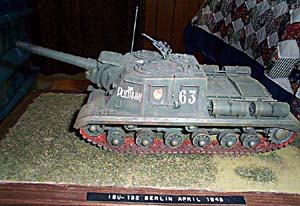
The vehicle was painted in a dark forest green color, then heavily weathered with washes and pastels. Fuel spills were painted onto the auxillary fuel tanks. I used VLS dry transfer Soviet tank decals for all the markings. Steve Zaloga's "The Eastern Front" book, and Chris Ellis' "Tanks of WWII" book were used for marking references. I added a tactical number, the Russian slogan "For the Motherland", and the Order of the Red Banner flag to the sides of the vehicle. The self-propelled brigade marking, for an unknown unit, was added to the front and an aerial recognition mark was added to the roof.
Conclusion
This model has taken a few awards...at local contents...and most recently at the Region II IPMS Convention....last month October, at Wilkes Barre, Pennsylvania.
Ogenok makes a few other vehicles in 1/30th scale too...but they would be a real challange to turn into a decent kit. But...hey...isn't that what real modeling is about?


