 My Turn at Immelmann – Building ICM's 1/72nd Fokker EIV
by Pedro Nuno Soares
Introduction
As any modeler knows, life has the bad habit of intruding into the really fun bits of our humble existence, and due to such an axiomatic truth I had been put off from the modelling bench for quite a number of months.
This notwithstanding, during that period I had been regularly checking IM and the WW1 modeling pages and the more I checked the more I wanted to get something done again. So looking at my pile of unmade kits I picked ICM's Fokker E.IV. In general terms, modern Eastern Europe kits are now becoming easier and faster to build up and since what I really wanted was to get something done in the least possible time, the E.IV looked like a good choice.
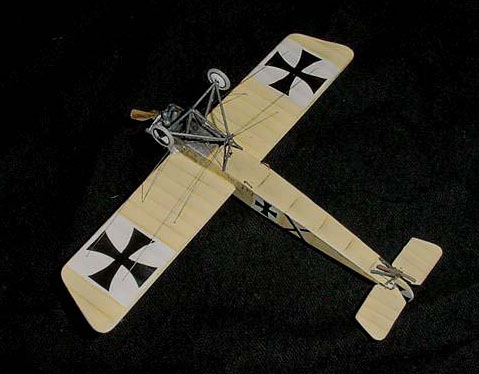
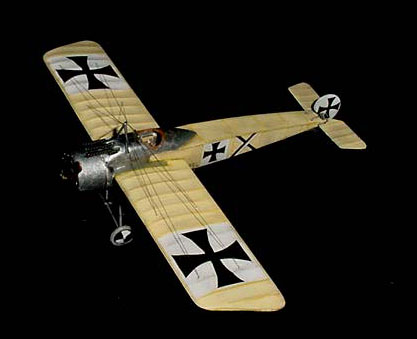
The E.IV was the last incarnation of the famous Fokker Eindecker. Powered by a 160 hp Oberursel double row rotary and armed with up to three forward firing spandaus, it was meant to be the ultimate development of that (in)famous breed. In the end it was found that the excessive weight imparted by the bigger powerplant and the extra guns not only annihilated whatever power gains there were but also made the aircraft a more tricky platform to fly and the E.IV was declared an operational failure, with less than 50 aircraft being built until the end of March 1916.
The Kit
 |
 |
 |
 |
 |
 |
 |
 |
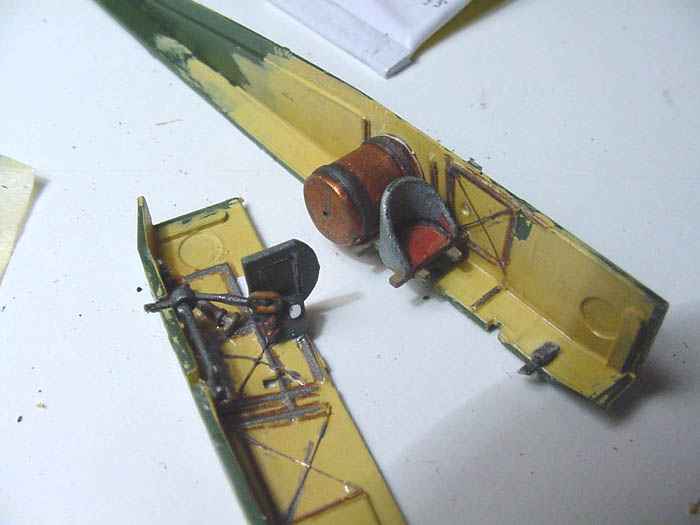
Having absolutely no references on the type, but armed with Matt Bittner's comments on the WW1 modeling list (thanks, mate !!) I proceeded to open the box and this is how the story goes: As usual I started at the cockpit. I painted the sides of the fuselage some shade of CDL I concocted for the occasion out of a couple of humbrol shades. I then proceeded to paint the fuselage structure in wood colour, I carefully painted all the raised bits in brown. The more I looked at it the stranger it seemed for some reason I could not discover, when suddenly a click echoed in my brain and I found what was wrong. There was no wood on the fuselage structure since Fokker products were welded steel tube. So I painted it again accordingly, this time in some dark metallic shade.
I then added stiffening wires at cross angles between each section of the fuselage frame on both sides, with thin wire taken from an old transformer. The beautiful gas tank was painted copper colour and I made a new panel for the front of the cockpit. As far as I know there was no instrument panel on the Eindecker and as such the decal provided by ICM should not be used. After adding a couple of switches here and there, just to busy up the cockpit, and all the little bits and pieces supplied in the kit, I added the seat and this proved to be tricky because there were no locating holes for it. In the end I found out I had placed it too far aft, but when I discovered it, it was too late.
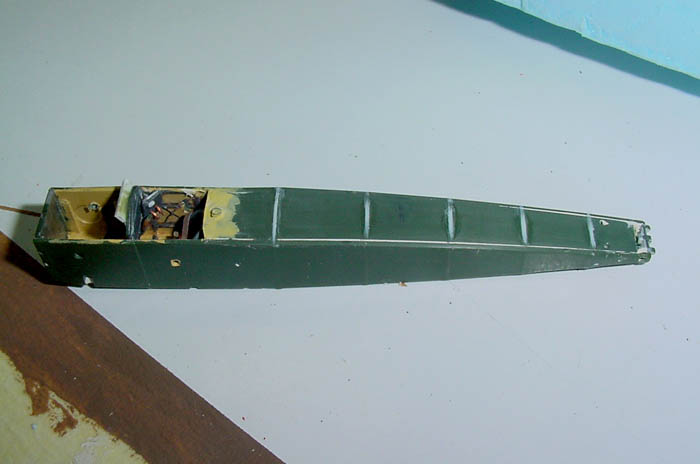
The fuselage parts were then glued together and brought about the need for some putty. Sanding it did away with most of the fuselage frame details, so I added new ones cut from .005 plastic sheet. Once dry these were sanded till they left just a very slight impression of themselves.
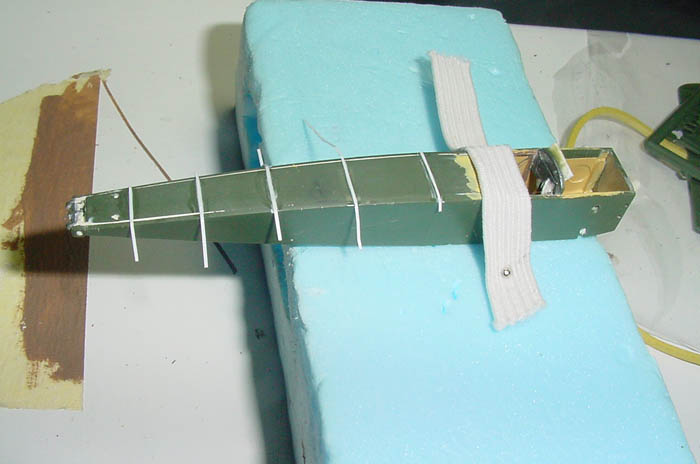
The wings were next and in order to reinforce their assembly into the fuselage I inserted small pieces of straight pin into their butt ends were they joined the fuselage.
One final modification was the opening up of a hole in the top front panel of the fuselage to accept the third Spandau machine gun, since the kit part only has holes for two guns. Time to paint now and I first sprayed the entire kit white, because I was thinking that later on I would mask off the squares on the wings and fuselage for the crosses, when shooting the CDL. Well, if the idea was a good one, the results were a disaster since the frisket film I used lifted the white paint, so I had to re-spray the wings CDL once again.
For CDL and keeping to my tradition of using cheap household paints, my choice this time was Dyrup's 'vanilla' enamel, which I now find a little too yellow, but still quite passable.
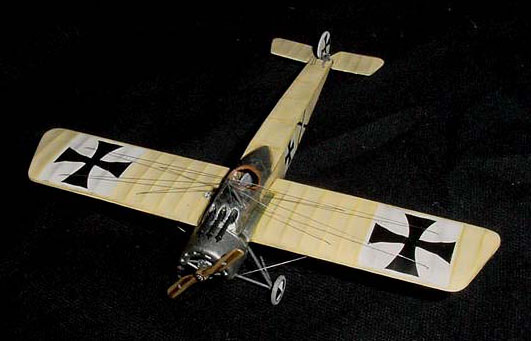
After the CDL was applied I masked off the areas at the front fuselage to be left in CDL and sprayed the aluminium panels with Robiallac's aluminium paint. Onto this I then brush painted in humbrol 56 my poor interpretation of the polishing marks that are so characteristic of eindecker cowlings. If you want to see what it really should look like I suggest a peep into David Solosy's fabulous EIV.
The decals on the kit are probably the worst part of the package since they are very, very thin, very hard to loosen from the backing paper and very prone to breaking. Further to that, neither the white squares for the crosses nor the black and white 'X' for the fuselage in Max Immelmann's aircraft are included, so I had to make do with squares and stripes cut from painted white and black decal sheet. Also the cross for the rudder is a tad too big. Since I had no substitute for it I used the kit decal and it does look a bit strange.
After decalling and a coat of matt varnish (humbrol matt cote) I weathered the kit with graphite and watercolour pencils in various shades of beige and yellow, after which I sealed it all up with a couple of coats of humbrol satin cote.
The rest of the kit went together pretty well, especially the undercarriage, which looked at first like being a little complicated. In fact using CA you get it done faster and easier than most biplanes u/c that I've come across lately.
All that was left now was to rig the beast and this I did with 'smoke' invisible sewing thread. I am a follower of the sewing rigging doctrine and after some planning I decided to rig as much as possible with one length of thread at a time. So I made a hole right through the top of the upper fuselage pylon and other holes at the front and rear end of the u/c triangles. So with a long length of wire, I first got it through the front u/c then through the front hole on the wing, through the pylon, back through the rear hole on the wing and finally through the rear triangle of the u/c. This I did four times, one for each pair of inner outer wires on each wing. When all the wires were passed through all the holes it was just a question of pulling everything tight and anchoring the end and the u/c holes with a drop of CA. Fast and easy.
The remaining wires were added and the prop, painted in brown watercolour pencil over a brown enamel base was added.
As a final touch the spandaus were added and this required trimming their butts slightly in order to get them to fit into the holes in the front fuselage.
Conclusion
As a conclusion I'd say that though not perfect (overly thick wings and elevators and starving cow ribs) ICM's EIV was great fun to build even if it did not turn out to be the weekend project I was initially contemplating. Especially because of some fitting problems and the lack of a more complete decal sheet.
P.S. I just read that Immelmann's EIV with three guns was using a captured 160 hp Le Rhone. This, I believe, would be a single row engine, so maybe it should have been also mentioned on ICM's instruction sheet.


