 Building the Revell Golden Hind

by Richard Eaton
Introduction
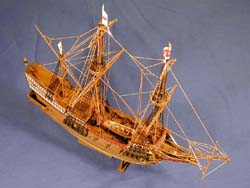
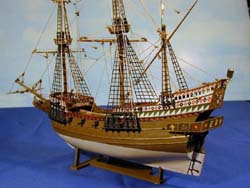
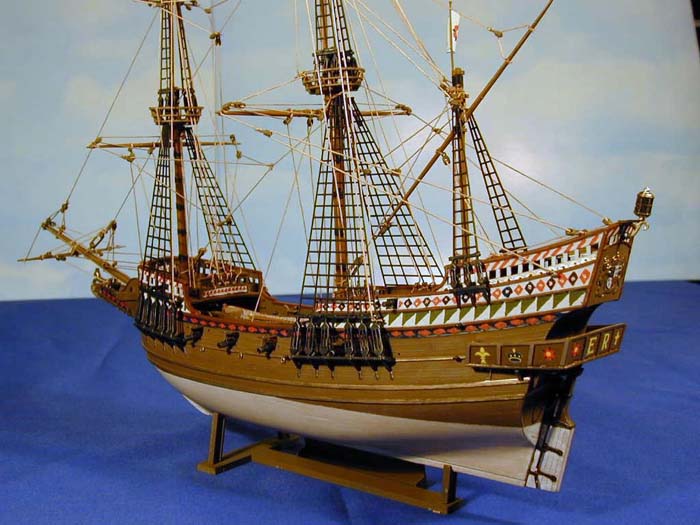
I recently got a chance to relive a wonderful build of my youth when I found a 1965 molding of the Revell Golden Hind. I built this kit in my earlier years and just loved it. It is out of print now, but it is readily available and not terribly expensive. The kit is very impressive both in its detail and excellent assembly instructions. The bright color scheme is molded in relief in the plastic easing painting and the rigging instructions are top notch. Even if you don't know a lanteen from a sprit sail, there are easy to follow details that build up to a convincing rigging scheme. If you are into ships of this era or just want to get a feel for sailing ship building, read on.
The Kit
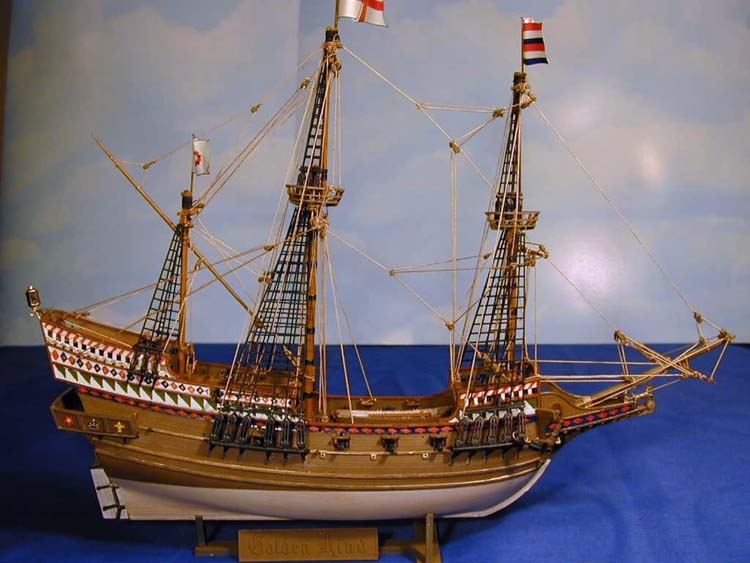
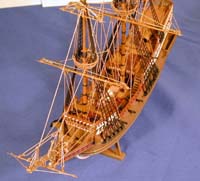 The molding on this kit is very crisp, and there are a significant number of details provided in a kit of this age and scale. Judging from the five crew members provided, the kit scales roughly out to around HO scale. There is no flash, and only a few ejector pin marks, or sink marks on visible surfaces. There are some mold separation marks to deal with throughout, but they clean up easily. Parts are molded in hard brown styrene. Two types of rigging thread are provided and a nice large sheet of Vac sails is provided. I chose not to use them. There is one sheet of decals (still good) and a sheet of flags. A six page double sided booklet contains a nice history and thorough directions.

Prep and Painting
Painting and rigging make or break a kit like this. I went through the instructions and painted most parts in their base colors while they were on the sprue. I used light earth brown for the hull and Testors wood for the decking. I planned to add a dark brown wash over everything and dry brushed highlights later. I then masked the hull and sprayed the lower part and upper painted works flat white. There is no distinct waterline molded in, so take care in establishing one.
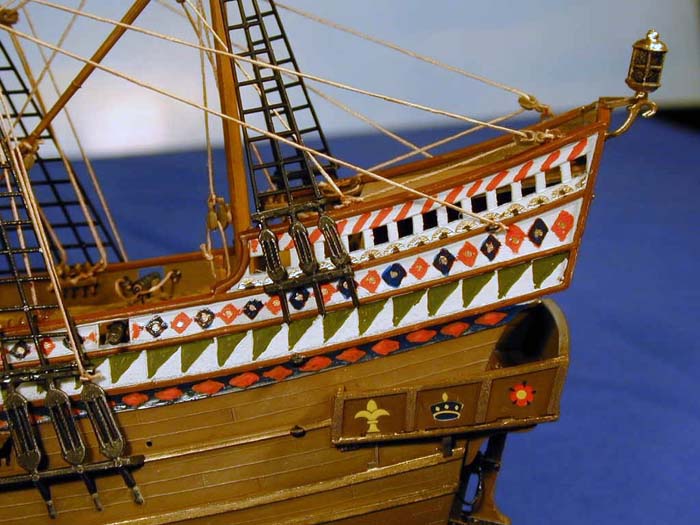
 Once dry I then hand painted the extensive color motif on the upper hull. I used the kit suggested scheme though I have never seen two paintings (or kits) with the same pattern. Using a fine round brush I first applied the dark gloss blue on the lower banding and upper diamonds. I then applied the reds as indicated. Again there are clear demarcations molded into the plastic. I know you are probably think this is daunting but just take it in sections. It is great therapy! I finished up with the gloss gold details and then a few spots of black. Some touch up and things started to sharpen up. I then painted the raised planking in a dark chocolate brown. I painted the beautiful crest of arms on the aft bulkhead as directed.
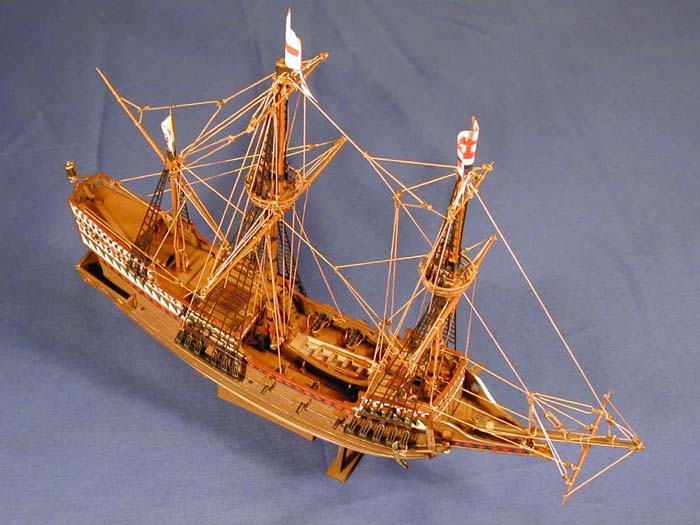
 I generally created a symphony in brown as I painted railings and gratings in dark brown, fittings in lighter brown and the ship's boat a series of washed white and browns. The deck planking is very well molded. The details just flew out with a dark brown wash. The masts were painted a light brown and detailed with darker browns and flat black. I sprayed cannon barrels and other metal fittings flat black and lightly dry brushed with steels to bring out details.
Assembly
This kit goes together easily with good fit. In step one I assembled the multitude of deck fittings onto the main deck. I did not secure the ships boat as indicated as called for to easy later parts placement. This is a good point to touch up and details the main deck fittings.
 Step two calls for assembling the hull main deck, stern and rudder. The massive rudder is in two parts and requires filling and sanding. I also filed and sanded the hull seam along the keel. Once happy with the fit of things, I clamped things down and applied cement.

In step three I assembled the forecastle and bowsprit as directed. Be sure and add the rigging details shown in notes A, B and C because once the forecastle deck is in place you would be hard pressed to back fit. A thick anchor rope is provided. Wind that around the anchor post and feed it out the bow. The gammoning tie around the bowsprit really adds realism when wound correctly. Once the "prerigging" was done I finished assembling the bow components. I left off the figurehead deer for now.
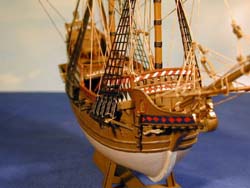
 In step four I assembled the large and small cannon and put them in place on the deck. The cannon barrels rest on a two piece base. These I touched up and dry brushed to bring out the nice details. I then placed the cannon in the ports and applied the cannon rigging. This gets a tad tricky in some of the closer fittings. I was glad I left off the ships boat at this point.
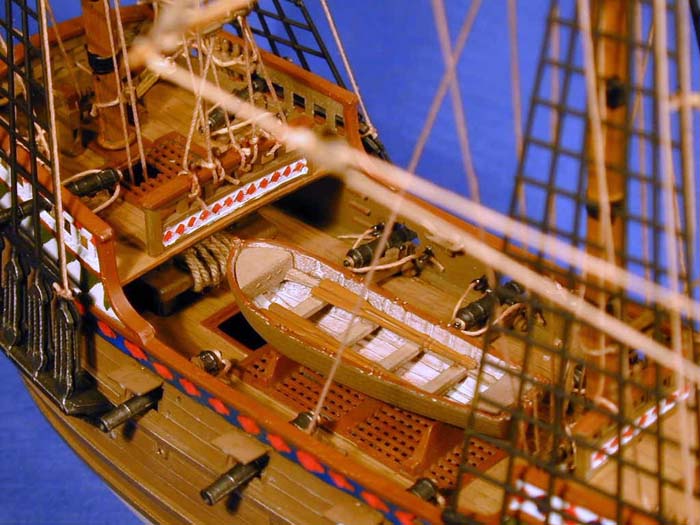
In steps five and six I assembled the aft quarter and poop decks and fittings. Note that the aft decking rests within the wide deck ribs in the hull and not on top of them. I touched up the deck ribs with deck color after assembly. I then assembled the aft gallery components. Here I added the kit decals as directed - I prayed that they would not disintegrate due to age. They went on fine. I oversprayed the decals with some Dulcote. I then went over the aft portions touching up and detailing.
 In step seven I added the gun ports, anchor (huge and nicely detailed), cat heads, and shroud dead eyes. Use care in separating the shrouds as they are delicately molded. I had pre-painted the shrouds flat black and, once assembled, I dry brushed them with steel to bring out details.
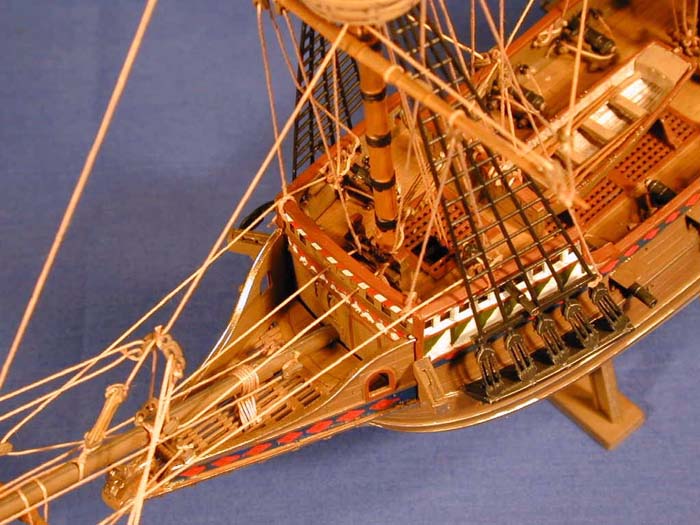
In steps eight through ten I assembled the fore, main and mizzen mast assemblies. The masts are in several parts so use care in alignment. I detailed each mast at this point before adding them to the ship.
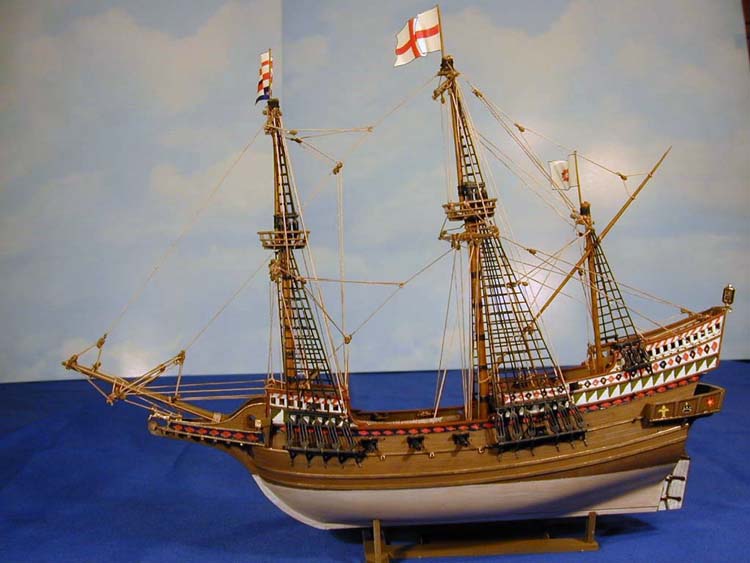
In step eleven I added the pre-painted ships ratlines. You are probably getting sick of all this nautical terminology at this point but fear not; the directions explain all components. The ratlines are the angled webbing that support and provide access to the crow's nests. The directions have you place all the yards (spars) in place at this point but don't do it!
Rigging
 The directions provide a simple standing rigging scheme that is relatively easy and will provide a good looking model. If that's what you are into, fine. The last five pages of instructions give a detailed running rigging that I had to do. Rather than bore you with a blow by blow account I'll just give you my tips on turning a great model into an accurate one.
1. The kit comes with a multitude of blocks (as in block and tackle). Clean up the blocks and widen the holes for easier rigging. Tie off all the blocks in place on the masts and yardarms as directed BEFORE placing the parts on the model. Use a minute amount of CA to lock the ties you make.
 2. Once all the blocks are in place the rigging is much easier. Generally, secure the rigging thread at the pin rail, cleat, or kevel on the hull first. Then just thread the line up and through the various blocks and tie at the terminus. Secure with CA. Make the lines as tight as possible tightening as you go.
3. Take your time and do the rigging in multiple sessions.
4. It doesn't take a genius or psychopath to rig a ship (or an aeroplane for that matter).
5. Once the rigging is in place, tighten the cotton thread by applying a bit of water with a Q-Tip. As it dries it will tighten up a bit.
Conclusion
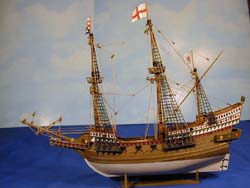
 This kit is a real joy to build and a great education. The instructions and build teach you a lot about sailing ships. This kit is out of print but still readily available at meets and online auctions. Heller and Airfix still have a Golden Hind kit in production. I have seen the Airfix kit in 1/72. It is larger than the subject of this article and has good detail in the plastic. It lacks the nomenclature and rigging details of the old Revell. Wrapping up this baby I almost feel 15 again and I am ready for another three master! Arrrgggg!
References
I know of no references for the actual ship. I don't think anyone knows exactly what she looked like. If you want to read about the amazing career of this ship and her master Sir Francis Drake you might browse the Sir Francis Drake website.


