Tamiya's 1/48 Nakajima |  |
Overview
 "In the summer of 1944, U. S. Marine and U. S. Army infantry divisions captured the Mariana Islands during several months of viscous (sic) combat. This important victory provided air fields from which to attack all the important Japanese cities and industrial targets in the home islands. U.S. Army Air Forces crews flying Boeing B-29 Superfortresses began flying daylight, precision bombing raids against Japan in November. In January, tactics changed to night, low-altitude attacks and the Gekko was one of many types of Japanese night fighters pressed into defending the homeland. There were some spectacular missions flown by IRVING crews but overall, Japan's night interceptors achieved limited results. The B-29 cruised approximately 80 kph (50 mph) faster than either the B-17 or B-24. Gekko crews usually could rarely make more than a single pass at the fast Superfortresses. Lt. Sachio Endo was credited with destroying eight B-29s and damaging another eight before he fell to the gun crews of a B-29. Another Gekko crew shot down five B-29s in one night but these combat successes were rare. The overwhelming number of B-29s, with their great speed and defensive firepower, were no match for Japan's night fighter forces. Escorting Allied fighter aircraft also took their toll. Many IRVINGs were
  shot down, destroyed on the ground, or expended during Tokko missions. Tokko is the Japanese term for Special Purpose Attackers, known in the West as kamikaze attacks. By war's end, Nakajima had built 486 Gekkos. Although the IRVING night fighter was an able night fighter, there were never enough to significantly impact the air war."
(Quoted verbatim from the National Air and Space Museum's web site)
When Chris called me to ask if I could take care of his gekko, I wasn't terribly gung-ho about the idea.When it turned out to be Tamiya's newest release, I warmed to the idea. Still, I was given this review sample with a very short deadline for completion. I was convinced, though, that it would be doable since Tamiya kits have a reputation for being extraordinarily well engineered and simple to build. This kit is no exception to that although it does have its share of problems.

 The Fondle

I tore open the kit and feasted my eyes on bag after bag of superbly molded dark gray plastic. The crispness of this molding floored me even having seen many other Tamiya kits before. The decal sheet was well printed and registration was not an issue since the decals were quite simple. I test fit several parts together such as the fuselage halves, the wings and so forth. I foresaw that this would be a straight-forward build with little or no need for filler of any sort. I built a fairly ambitious time line for completion; I'd have it done by May 22 for the June issue of Internet Modeler.
 The Build
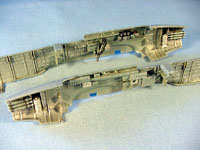
As I started to do more part clean up, I realized that I had judged the quality of the molding too soon. As it turned out, there were a number of minor sink marks all over the exterior of the fuselage halves. This was caused by very deep molding done on the inside of the fuselage. I'm the sort of person who likes the interior detail, but not at the cost of corrupting other moldings. In the best of all possible worlds, these details would be molded separately, not integral to the fuselage half. On inspecting the interior of the fuselage halves, I discovered numerous ejector pin marks as well. Many of those marks were in very awkward places, obliterating structural molded in detail. Fortunately, the vast majority of the ejector pin marks would be hidden either by interior detail or fuselage structure. Several were very prominent, however, which I think could have been avoided.
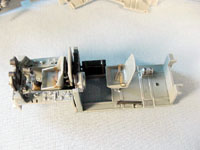
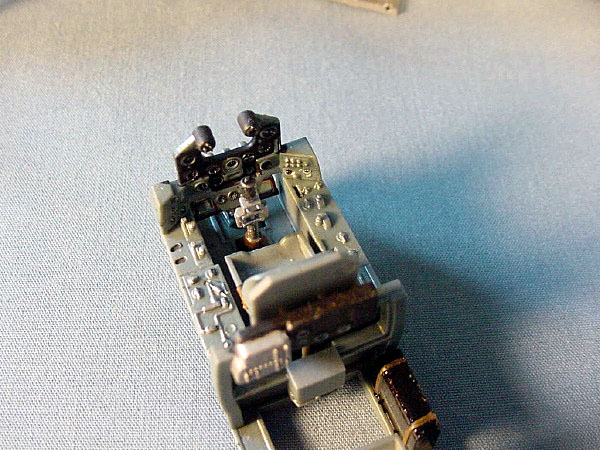
 I began work by cleaning up and separating parts of assemblies that would be the same color, and those which could be built up prior to airbrushing. For example, I starting construction by building the cannon framework for the oblique firing guns. I planned as much in advance to build what things that could be airbrushed as units. I sprayed everything that called for black by using Floquil Grimey Black. That included the landing gear, tail wheel, cannon, etc. I then sprayed the interior color. I know that as a two step process, you can paint the base coat of silver or aluminum then paint a clear blue/green over the top of it. I chose to use a single color equivalent; the color that I found in my stash that was pretty close was Model Master Metallic Blue. It didn't coat very well, requiring multiple passes, but the results were acceptable after Dull-Cote muted the gloss of it. If I were to do it again, I'd do the two step process; the results would be better, and it would probably go on easier. The Model Master paint was very finicky. I'm a guy who hoarded huge supplies of Floquil when they stopped producing it because I love the way it sprays; Model Master can't touch Floquil for fineness of pigment and spray quality.


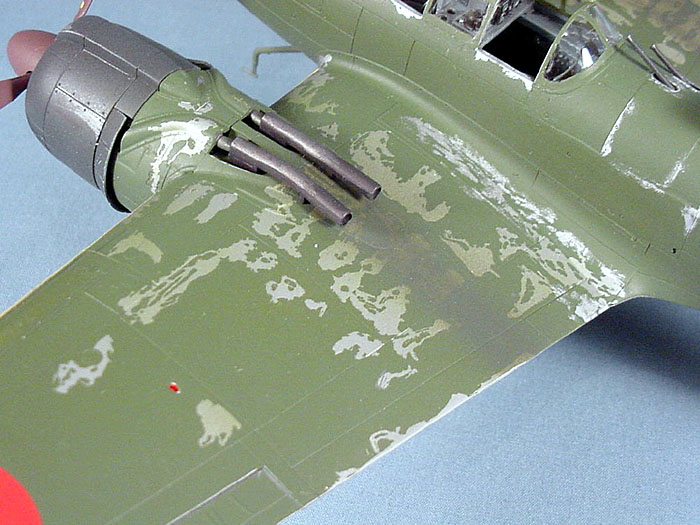
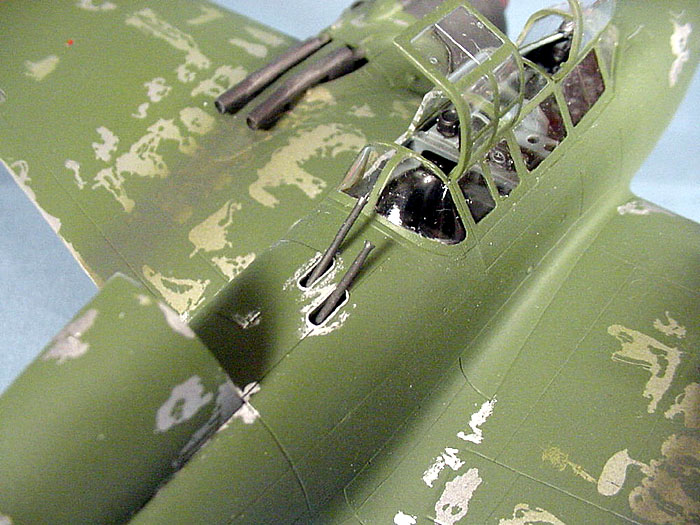
The first of a string of errors on my part occurred in here somewhere. When I attached the cannon of the Shrage-Musik (whatever the Japanese word for that is... ) to its frame, I did it incorrectly. I attached the gun on the right forward of the gun on the left. Part of the confusion was in the instructions, I think, (pointing the finger anywhere but home) in that the orientation of the illustrations for the cannon frame is reversed between steps four and five of the instructions. Tamiya did that a few times in the instructions; sometimes reversing 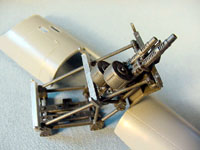 orientation like that, or turning things upside down in subsequent illustrations. Apparently doing as well as I did on spatial relations on my SAT's when I was a kid was a fleeting gift. In any case, after a small amount of whining,I applied debonder (fortunately I used CA glue to attach the cannon) and pried them loose. Regarding the color of the cannon, I just sprayed them with grimey black and then lightly scrubbed them up with a silver pencil to pull out the beautifully molded on detail. The completion date moved to May 23 though.
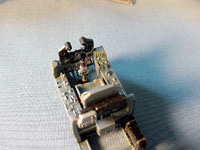
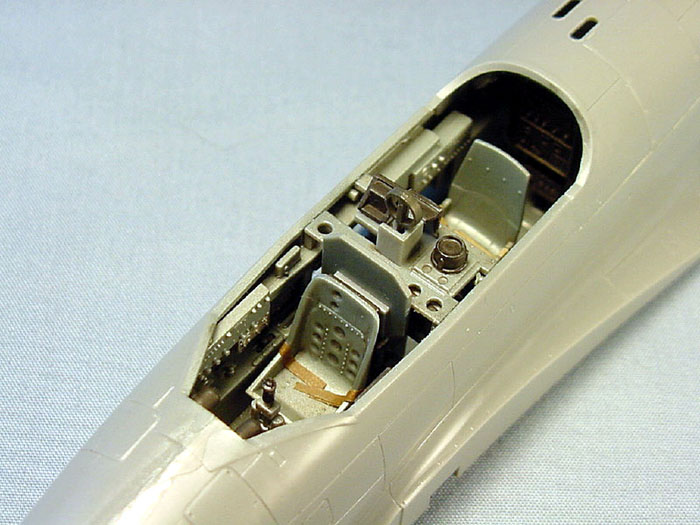
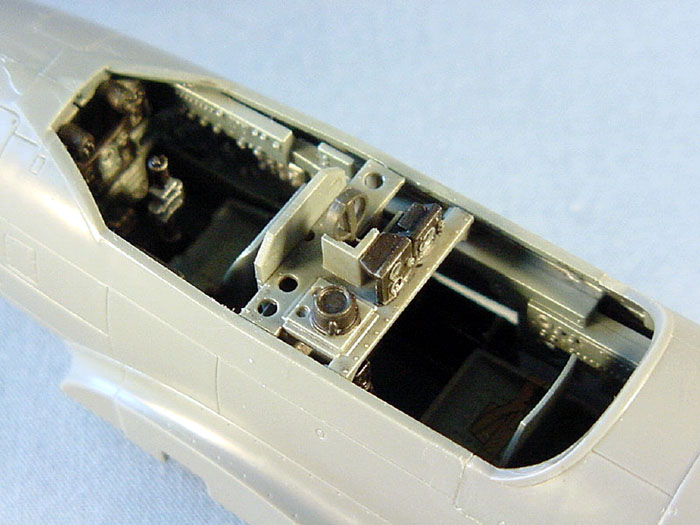
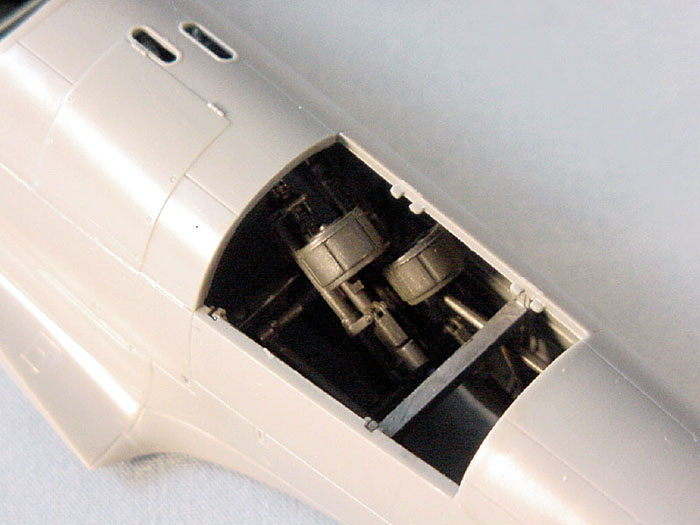
On the interior painting, I followed the instructions pretty much; I have remarkably few references on Japanese aircraft interiors. I understand that there will be a new publication on that subject out some time next week. Timing is critical! In any case, after spraying the interior blue, I did a somwhat darker wash, then a light dry brushing. I later did a silver dry brushing to pick out some of the details. Having done that, I sprayed the interior with Dull-Cote. The result is a bit more depth. 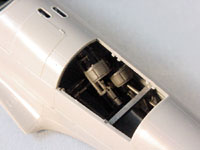 The decals for the instrument panel are pretty nice. A word to the wise is in order; these decals respond VERY well to Solvaset. I have used other Tamiya decals before that were resistent to solvents, including Solvaset. I believe they've changed something, because I made a brown blob out of one of the decal seatbelts using Solvaset at less than full strength. I ended up replacing the decal seatbelts with seatbelts fashioned from brown painted masking tape. Completion date forecast at May 24.
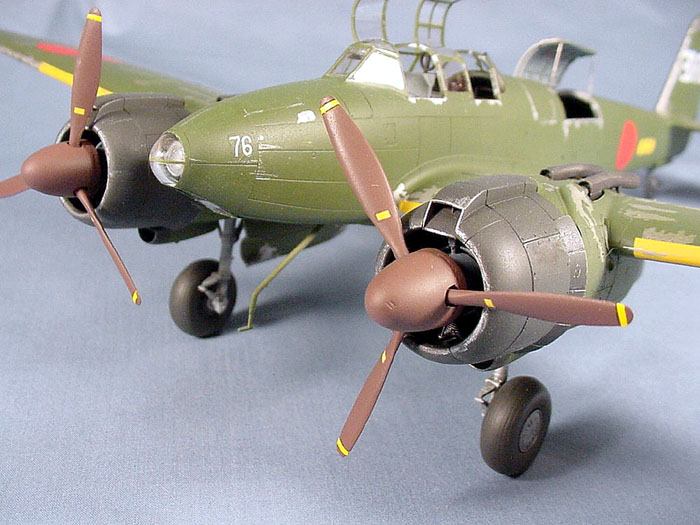
The engines were very straight-forward. The only parts in that area that raised my eyebrows were the nacelles behind the engines; they were these three part affairs. That seemed overly complicated to me; I'd have done those as two part assemblies. In the end, however, they fit together beautifully and I have no complaints about them whatsoever. It was at the engine assembly point where I committed another faux pas. I discovered much later that I'd neglected to paint the insides of the nacelles. I had to very carefully paint inside there without touching the engines which were at this point completed in their entirety. I managed to pull it off so they look okay now. Completion date might be around May 25.
All the parts align and fit nearly perfectly. I didn't use any filler in building this model except for a couple of ejector pin marks. I couldn't ask for a better engineered kit.

 The Painting

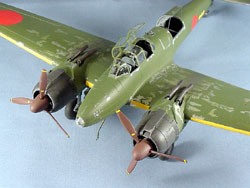
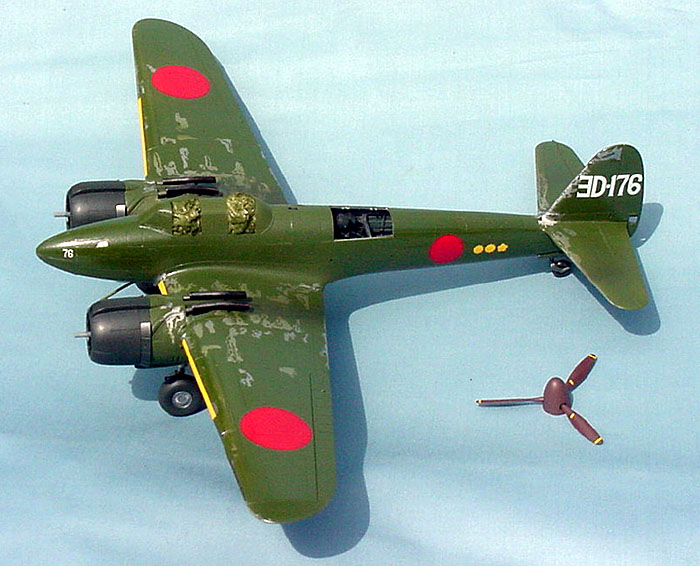
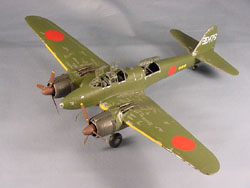
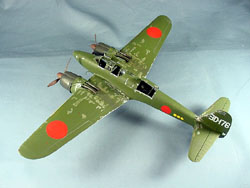
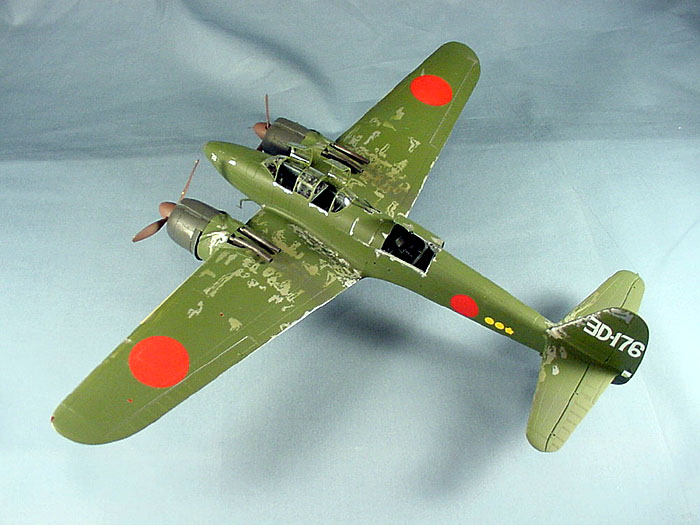
I decided that I'd do something a bit of a challenge for me.I wanted to do something to complicate the otherwise boring green markings on this bird, so I tried to simulate paint chipping. I'd always used either silver paint or silver pencil but had seen absolutely remarkable results from painting silver, masking, painting the overcoat, then pulling off the masking. I have been dying to try Alclad so I decided to go for it!
In order to do an Alclad job, you have to spray it over a gloss coat; I chose to spray gloss black on the entire aircraft. Not being a car modeller, gloss finishes are a serious challenge for me, but I was fairly happy with the results. Rather than being really  glossy, I had really smooth and I was pleased enough with that. I then sprayed the entire bird with Alclad aluminum. This stuff is great! It doesn't need to be thinned at all and it sprays like a dream. A word of caution; make sure to have excellent ventilation, a respirator, an expendable canary, whatever... Alclad atomizes very finely and gets up in the atmosphere. I'm glad to have a decent spray booth and a dual cartridge respirator that can handle organics.
I prudently sprayed a test piece with Alclad in order to test it with masking materials. I picked up some no-name rubber cement and applied it to the test piece and it came off without disturbing the finish, so I decided to apply that to the wings of the Gekko. 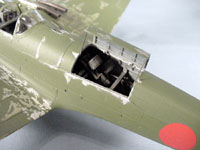 To my utter despair, the rubber cement proceeded to eat through the Alclad and into the gloss black! The test piece that I sprayed Alclad did not have gloss black under it, so the test was different than the real thing. I had a minor disaster on my hands. Fortunately, I saw it happening before I had applied very much rubber cement, so the cancer could be isolated. I think that it was at this specific moment that I popped open a Sierra Nevada Pale Ale and contemplated my navel for a while. Having removed any trapped lint, I boldly went back to the model room and carefully daubed at the area of concern with a flannel cloth dipped in lacquer thinner. I got down to bare patches in some areas and black in others. The next day, I held the model under running water will sanding with 600, 1200, and 1500 grit sandpapers. After the thing dried, I resprayed the Alclad on the offending area and started over. May 26-27?
 While I was at work, I realized that I didn't have an appropriate masking material since my Humbrol stuff dried out in the bottle. No matter, I said to myself, I'll stop at Skyway Model Shop on the way home to pick up some more. Of course when I got there, they'd sold their last bottle of the stuff an hour earlier. Had I offended the god of modelling (her name would be Aurora, I believe) that seriously that I'd be thwarted at every attempt to complete this project? Was I being punished for some reason? Rather than go to another store during rush hour traffic, I decided to go home and chance that I might have something that would work as masking material. I ran across two long forgotten, ancient plastic bottles of Microscale MicroMask. What really surprised me was that they were both still good; there was only a little congealed matter around the lids. I think I'd had these bottles over 10 years. I didn't bother testing these because I knew that this mask didn't have a solvent that could attack the Alclad.
 I daubed here and there with a toothpick loaded with MicroMask and found that I really couldn't tell with any authority where it was. It's translucent blue but when put on thinly, it's not blue enough to be seen clearly. I tried to emphasize paint chipping around the engines and other logical areas, then daubed randomly in other areas.
Before I had painted the green, I had to attend to the clear parts; they needed to be masked and some needed to be attached prior to painting them. In the process, I not only clouded a clear piece with CA glue, I actually cracked it. The clear pieces are extremely thin and need to be handled with great care. I replaced the broken clouded piece with a 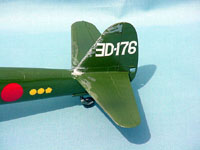 spare clear piece and another bit of acetate. I then, in the process of dipping it, proceeded to drop it right into the Future bottle! It was surreal watching the plastic float silently and slowly to the bottom of the bottle. I wasn't silent though. I had to pour the contents into a large vase, all the while keeping my eye glued to that one piece of clear plastic at the bottom of a quart of clear liquid. I was able to fish out and salvage the piece all right. Completion date on or about May 27.


After painting the green, I couldn't wait to remove the masking material to see how it turned out. It really did look like paint chipping! Unfortunately, because I wasn't able to see quite clearly enough where the mask was going, I ended up having some interesting swirls and patterns that would be inconsistent with random paint chipping. I ended up going back to mute and adjust some of them by spraying a dusting of green over the wings again. In the end, I added some more paint chips using Floquil silver and silver quilting pencil.
 The Decals
As I said earlier, these decals respond very well to Solvaset. Be
careful to not overdo it or you may end up with plastic blobs. To get
a surface to which the decals would adhere, I sprayed the whole model
with Future. This doesn't give a gloss finish really, but it does fill
in the roughness of the flat paint that can cause decal silvering. The
decals are simple and straightforward. All of them went on without a
hitch. They're clearly printed and thin. I toyed with using Testor's
Dull-Cote because I really like the finish that it produces, but I had
such hard luck along the way that I decided to go with Polly Scale acrylic
flat. It's not as flat as Dull-Cote, but there's also no danger of frosting
with the acylic. I shot that on and it doesn't look too bad.
All that was left at this point were incidentals. I had a great time
building the Gekko up even though it was a comedy of errors. If anything,
it taught me two things: a) don't hurry; you end up losing time in the
long run and b)  nothing
is irretrievable; you can recover your model from most common household
disasters. I completed the kit the morning of May 28!
nothing
is irretrievable; you can recover your model from most common household
disasters. I completed the kit the morning of May 28!
I strongly recommend this kit to anyone interested in WWII Japanese
aviation. The kit built up like a dream in spite of my own shortcomings.
The molding flaws on the fuselage were minor. Thanks for letting me
take care of the Gekko!
The Tamiya Gekko is available from Roll Models for only $33.75.


