A Pair of Pitts: Building Two LS 1/72 Pitts S2AsBy Ted Holowchuk | 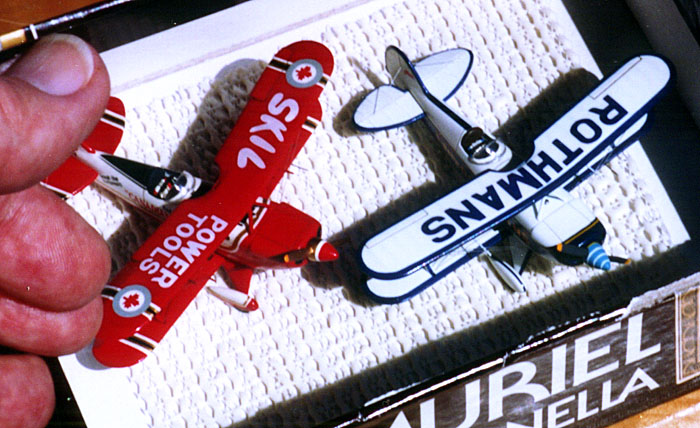 |
History
Curtis Pitts designed the first Pitts Special aerobatic biplane for himself in 1945. 55 years later evolved Pitts Specials are still winning international aerobatic competitions. The second Pitts Special, registered NX86401, built for Phil Quigley in 1947 became the most famous Pitts of all when acquired by Betty Skelton. It was re registered N22E and named "Little Stinker" complete with Skunk mascot painted on the turtle deck behind the cockpit. Many Pitts Specials have been built over the years both at home and in factories. The Third Pitts Special has the distinction of being the only "big" (about the size of a Boeing Stearman) Pitts. Because of its size and strength this "big" Pitts was named "Samson". The two-place S-2A depicted by the LS kits is the most produced version of all the Pitts. The present production versions are the two-place S-2B and the single seat S-1T. Aviat Aircraft has license rights to all Pitts production and also builds the S-1-11B "Super Stinker" Pitts Special to compete with the current crop of high-powered aerobatic monoplanes.
The Build
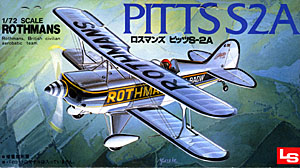
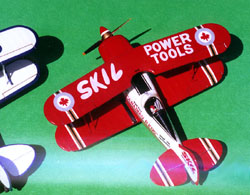
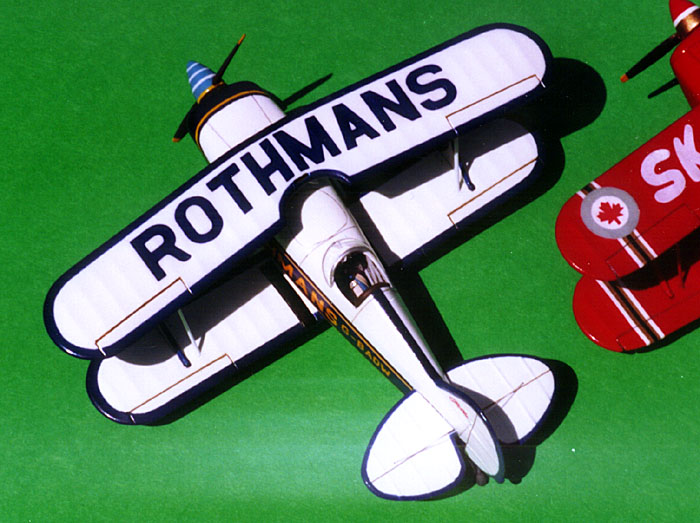
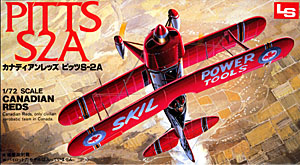 Before I begin, a little background history: I was intrigued by these two colorful LS kits, one in the markings of The Canadian Reds Aerobatic Team sponsored by Skil Power Tools and the other in the markings of The Rothmans Aerobatic Team, which had converted to the American planes from their Belgian Stampe SV4s. I bought both kits sometime in the last millennium, 1992 to be precise. I started both kits in April of 1992 and built them up to the stage where they were both painted in gloss white. I then selected the Canadian Reds plane and completed it in December of 1994. Yes - two years and eight months. How could it take so long? At that time I set the Rothmans airplane aside to "rest a bit". During the ensuing years I would open the box, fondle the parts and put them away promising myself to finish this project someday. I'll start tomorrow! Tomorrow finally came in January of 2001. Where did the time go? Well I did get at it and completed the "Rothmans Project" in March of 2001 - almost nine years to finish a tiny model. I'm sure glad I don't build models for a living!
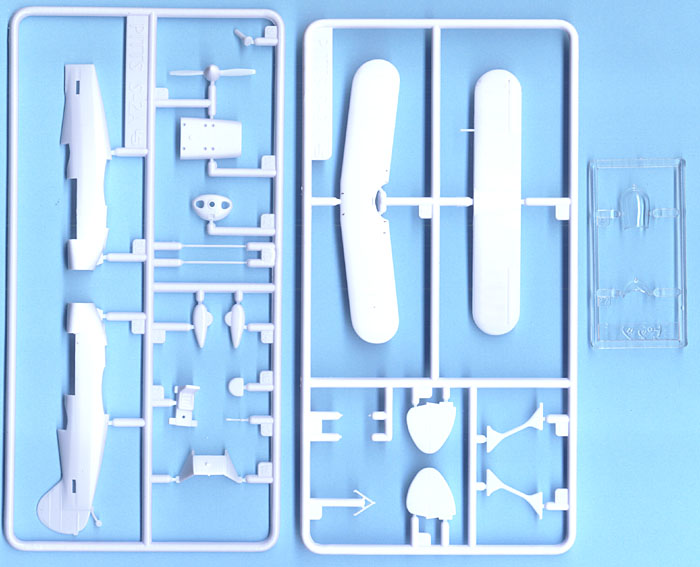
 These are nice kits, each containing two sprues with 21 parts in white plastic (red plastic for the Canadian Reds version) and one clear sprue with a windscreen and an optional full canopy, a decal sheet and an instruction sheet. Except for the decals, painting instructions and box art the two kits are identical.
As usual, detailing the cockpits came first. A nice seat, instrument decal and stick are included in each kit. Using a reference drawing, I built up some interior framework on the fuselage sides and painted everything in the cockpits a medium gray. The seats were painted the appropriate colors for each application; red and white for the Canadian Reds and blue and white for the Rothmans. I used foil and photo-etched parts to make up seat belts for each seat. The decals for the instrument panels were glued to pieces of plastic card stock and installed in a fuselage half. I painted the throttle parts and the stick. The cockpit interiors were washed and dry brushed and the fuselage halves were then joined. 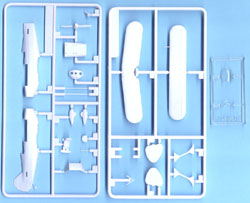 When this joint was dry the lower wings were attached. My recollection (after nine years) is that everything fit ok with little or no problem. The tail planes, upper wing and landing gear were dry fitted to check for proper fit. It was now time to address the dreaded rigging. How to do this? Rigging comprises double landing wires between the cabane strut tops and interplane strut bases and double flying wires between the fuselage/landing gear joints and the interplane strut tops. I drilled blind #80 holes in the undersides of the top wings and the topsides of the lower wings and right through the tops of the landing gear struts. Single holes were drilled through the stabilizers and fins and small notches were filed in the fuselage bottoms for the tail rigging. I usually leave off things like the tailplanes, landing gear, etc. and only assemble them after painting is complete.
On the Canadian Reds I cut and displaced the ailerons and rudder. On the Rothmans I drooped the elevator. At this point it was time to paint. The cockpits were stuffed with tissue to mask them off. All parts were sprayed with gray automotive primer lacquer and sanded ready for paint. This revealed the need for a little filler here and there. Some minor rescribing was also needed. When all looked good to me I sprayed a coat of white lacquer auto primer on the parts and buffed them down with Scotch-Brite for a smooth surface ready for paint. Everything was sprayed with white Floquil lacquer. At this point the progress on the two models parted company. The Rothmans parts went into a box for "a little while" and the Canadian Reds was set up to finish.
 Continuing with the Canadian Reds
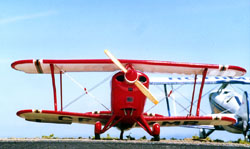
As I recall I made masking templates from photocopies of the decal sheet. The wings, fuselage, wheel pants and tailplanes were masked with tape and sprayed red; I don't remember what red I used. The fuselage top in front of and behind the cockpit was sprayed black. All masking was removed and the paint edges checked for "paint leaks". Leaks were cleaned up and touched up and then all the parts were sprayed with automotive clear gloss lacquer. As I recall the decals were pretty good, but a bit thick. They went on ok. The gold striping on the wheel pants and fuselage didn't fit very well, so I sprayed decal film with gold and cut out strips and applied these in lieu of the kit decals. Now came numerous coats of clear gloss auto lacquer with light sanding between coats. This buries the decals so the edges don't show. Careful sanding and spraying with clear results in a clean smooth surface with no decal edges showing. When all was looking good a final coat of semi-gloss lacquer was applied for that well kept look, without being too glossy and toy like.
 During all of this prep and painting the propeller blades were broken off, repaired and broken off again. What a klutz! The spinner was masked and sprayed white, red and gold. The propeller blades were painted black on the backside and gold on the front with yellow tips.

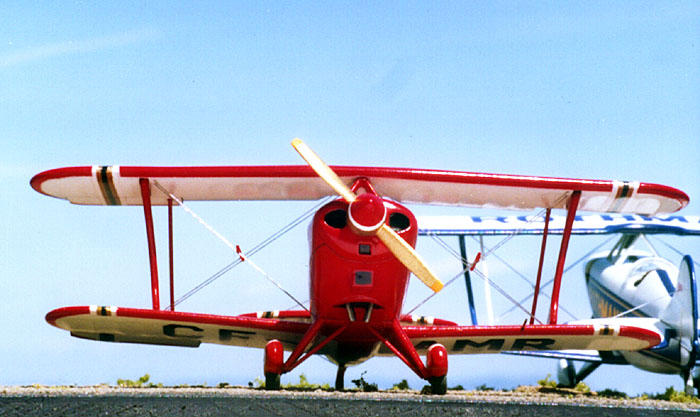
Remember all those #80 holes we drilled earlier on? They were all cleaned out ready to receive the rigging. All parts were now ready for assembly. The cabane struts were installed and left to dry. As the landing wires run over the tops of these struts, little notches were filed in them to accept the rigging. The rigging is .006 monofilament fishing leader. Great stuff. I superglued one end of a piece of line into the rear hole of each lower wing near the interplane strut bases and led this line over the rear notch in the cabane struts, applied slight tension to it and superglued it into the notch. The same was done with the front landing wires on both sides. If you wind up with a bit of sag in one of your lines just hit it with warm air from a hair dryer and it will shrink up snug. The top wing was dry fitted to the cabane struts and the interplane struts were glued to the lower wing. Using five-minute epoxy, the top wing was glued to the cabane and interplane struts. The epoxy gives a reasonable time to get things into perfect alignment. I let epoxy joints like this sit overnight to ensure a good hard joint. The landing gear struts were next installed along with the wheel pants using 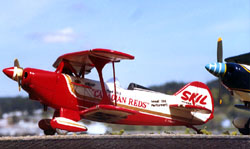 five-minute epoxy. Now the wing rigging was completed by installing the flying wires. Pieces of monofilament were glued into the blind holes in the underside of the top wing and led through the holes in the landing gear struts. When all was dry, the ends of the monofilament were trimmed flush with the inside of the landing gear struts and touched up with paint as required. Vibration dampers, for the crossings of the landing and flying wires, were made from small diameter wire and carefully superglued in place. Finally, the tailplanes were installed. When they were dry I attached a piece of monofilament in the notch in the underside of the fuselage, ahead of the tail wheel, and led it through one tailplane, the fin, the other tailplane and back to the small notch in the bottom of the fuselage. Light tension was applied to this piece and each joint was touched with superglue. Excess line was trimmed off when all was dry.

The windscreen went on with white glue and the frame was painted. The aileron rods, the pitot tube and the exhaust pipes were painted and installed and the wheels and tires were painted. The rest of the model was touched up as required. The prop was attached, given a spin and I was off into the wild blue yonder in my Canadian Reds Skil Power Tools Pitts Special. (Ed. Yeah, him and Walter Mitty!)
Resumption of Work on the Rothmans
 January 2001: Well, here we are almost nine years later about to finish this model. As I said earlier, this project was completed up to the "Painted White" stage. After examining the parts and taking inventory, I found all the parts were still there and the white paint was still in good shape.
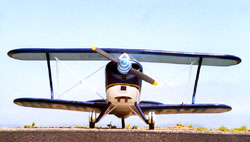
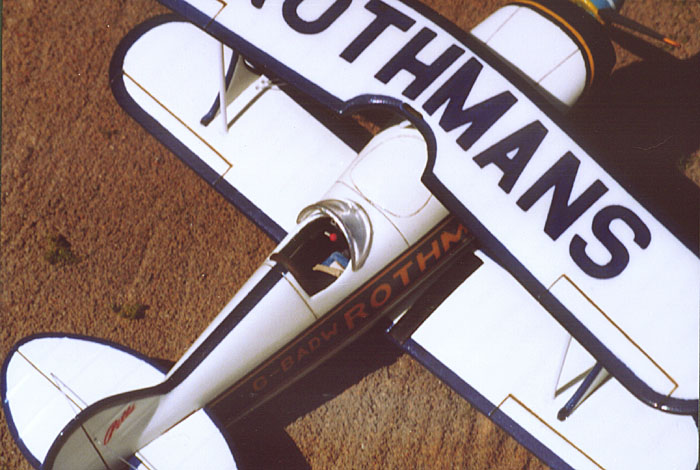
Using automotive flexible striping tape, I masked off all the edges of the wings, tailplanes, rudder and interplane struts. Sort of tedious and a lot of eyeballing and remasking, but it was eventually all masked off. Years before I had mixed a blue paint to match the decal blue. I don't remember what paint I used, but I still had it and it seemed to still be ok. I added a little lacquer thinner to thin it out a bit more. I stuck the bottle on the airbrush and squirted blue paint on all the appropriate parts. After a short dry time all the masking came off. I examined all the parts and cleaned up/touched up any paint leakage under the masking. Now a couple of coats of clear gloss lacquer got the project ready for decals.
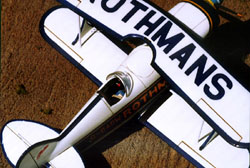 I thought I was in the home stretch until I ran into the decals. The Canadian Reds decals were thick, but those for the Rothmans were of almost card stock thickness after they came off the backing sheet in the water. I had no option but to use them, so I went ahead and stuck on the upper wing "Rothmans" decal. They seemed to be 1/16th inch thick. Oh well! On went the fuselage decal and the small "Pitts" decal. None of these wanted to stay down, even with Solvaset. So they got some white glue and water and gentle dabbing and prodding until dry and that took care of the problem.
I put the nose decal piece into the water and waited ten minutes, it seemed, for it to loosen from the backing paper. Now I gently slid it off the backing paper and applied it to the aircraft. It stayed straight instead of following the curve of the nose. It stuck out there like a piece of cardboard. Hmmm! I know - decal solvent. Nope. Stronger Solvaset. Nope. So I then tried to bend it around the nose, whereupon it broke into 4/5 pieces. Ok. I'll try to patch in the pieces. No such luck. "Darn it!" I said. Well, model building is problem solving. What next?
 Because the fuselage already had decals on it, I used Parafilm to mask off the fuselage so that those decals would not be lifted of. I used flexible tape to mask off the nose section, making sure to line up with the fuselage decals. The nose was painted blue along with a piece of clear decal film. The now blue decal film was cut into narrow strips and applied to the wheel pants and along the spine of the fuselage to correct an earlier poor masking job. Next came the yellow striping on the nose. Another piece of clear decal film was painted yellow, cut into strips and applied to the nose using solvent, prodding and many "gentle" words of encouragement. It all finally came together and didn't look too bad except for the step from the decal surfaces to the painted surface.
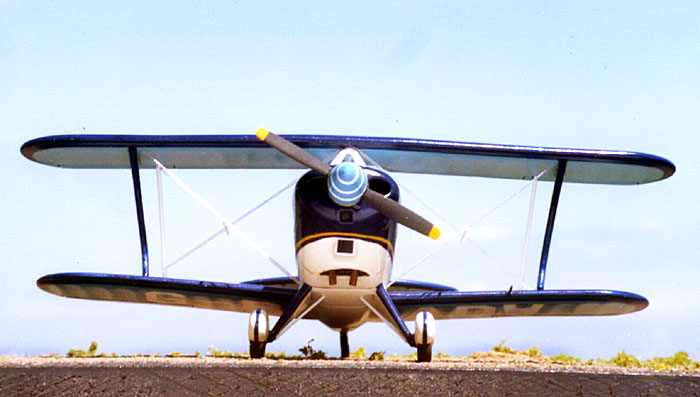
Numerous coats of clear gloss lacquer and sanding finally evened out the surfaces so that most of the decal edges were gone. A light wash of gray oil color accented the panel lines and the job was acceptable. A final coat of semi gloss clear lacquer finished up. Oh yeah, I forgot the spinner and prop. The prop blades were painted yellow, the tips were masked off and the blades painted dark gray. The blades were given a shot of Dullcoat. Next the blades were masked with Parafilm and the spinner was painted light blue followed by a couple of coats of clear gloss lacquer.
 Now I had to apply one yellow and three white stripes to that curved conical spinner. The yellow was easy; a narrow strip from the painted decal piece and I got it set in place ok. The white decal stripes did not want to cooperate! Why me? After a few tries it dawned on me that straight strips do not want to line up on a conical surface. I got out my scribing template and used curved sections to cut curved narrow strips of white decal film and finally managed to push, prod and swear them into place. Clear gloss lacquer followed by a coat of semi gloss completed the spinner and all looked well.

As with the Canadian Reds, the next steps involved rigging, final assembly of wings, landing gear, etc. and I was finally done. And it only took nine years! Amazing.
Conclusion
All in all these are actually nice simple little kits. Most everything fit well and went together with minimal problems. The rigging is not complicated and could be done by a novice with little problem. The painting is not difficult, but can be tedious especially masking the Rothmans' curved wing edges, tailplanes and rudder. The decals were a problem of sorts especially on the Rothmans, I might look for an alternative if I were to do it again. Let's see, who has an ALPS printer? However, it was possible to complete the project as described.
Upon completion of these models I noticed a few things I would change if doing this again:
1. The wing tips should have been thinned down some.
2. The spinners look a little big and could be smaller.
3. The "SKIL POWER TOOLS" decal on the upper wing has some bleed-through of the underlying red paint giving the white lettering a pinkish tone.
4. Vac-formed windscreens would have a more delicate look.
It took too long to complete, but I did enjoy it and both aircraft look pretty nice sitting in the display case; especially next to my B-52.


