Building the Samek Models 1/700 Razumnyj Type 7 DestroyerBy Richard Eaton | 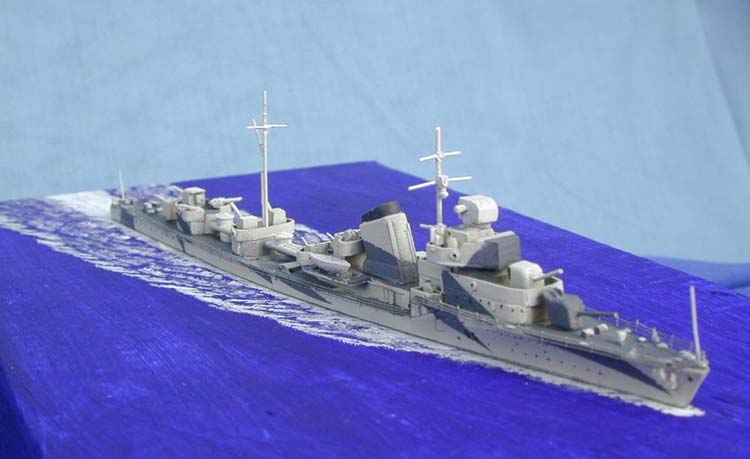 |
Introduction
Recently Bob Pearson asked me to do a buildup of the Samek 1/700 Russian Type 7 class Razumnyj WWII era destroyer that he had reviewed in the June 2000 issue of Internet Modeler. I have never built a Samek resin before, but I have heard great things about them! I dug around until I found some Eduard 1/700 PE railing and anxiously awaited the kit! Bob covered the history and kit in his review so I will dive right into the build. Read on.
Building the Razumnyj
 |
 |
 |
 |
 |
 |
 |
 |
Opening the box I found a plethora of very finely molded resin parts with no evidence of air bubbles anywhere. I mean, this is some of the better resin I have seen in a water line ship kit. Bob had already cleaned up most parts from the resin flash so I had only the fun part to deal with. Thanks Bob! He also glued an L shaped bit of sprue to the hull bottom for a handle. I have never done this before but I will from now on. This really makes things easier in the following steps.
Hull and Superstructure
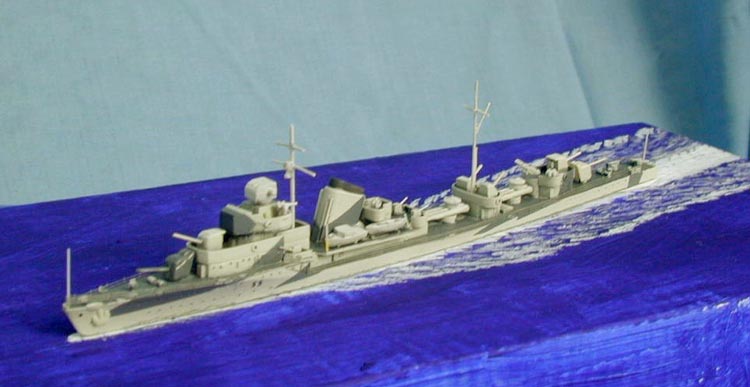
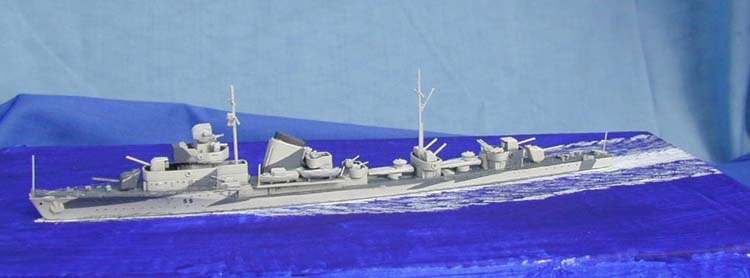
The kit directions do a nice job of breaking the build up into assemblies. That is exactly how I like to model small ships. Did I say small? The hull on this sleek destroyer measures about 12 mm at the widest and 160 mm in length. But boy does Samek want to pack the detail in this one.
I couldn't stand it so I skipped the many detailed gun and fittings at this stage and assembled the superstructure components and placed them on the hull. I love the look of this rakish vessel. I started with the bridge components. There is a superstructure with a flying bridge topped by a gun director turret. There are no locating marks molded into the hull or parts so care should be taken in aligning components. There is a nice plan view of parts placement but it basically comes down to eyeballing the components. I used CA throughout assembly.
I then assembled the midships superstructure consisting of the boat deck, funnel, and searchlight platform. I dry fitted this assembly and the bridge to the hull to try and get alignment with the parts. I'm glad I did too because there is a tight fit between these assemblies and I'm sure I would have messed up on the smoke stack placement. Once happy I glued them in place. I skipped placing the boats at this stage because I was not happy with the parts and was still looking for my spares box.
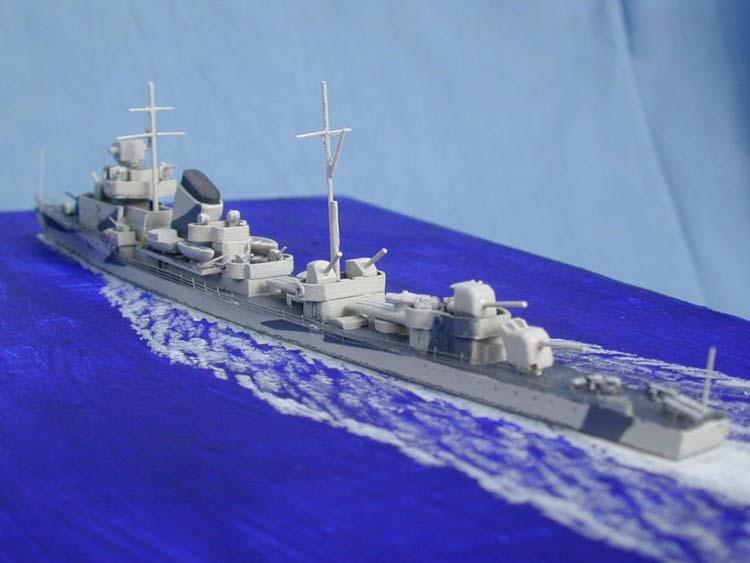
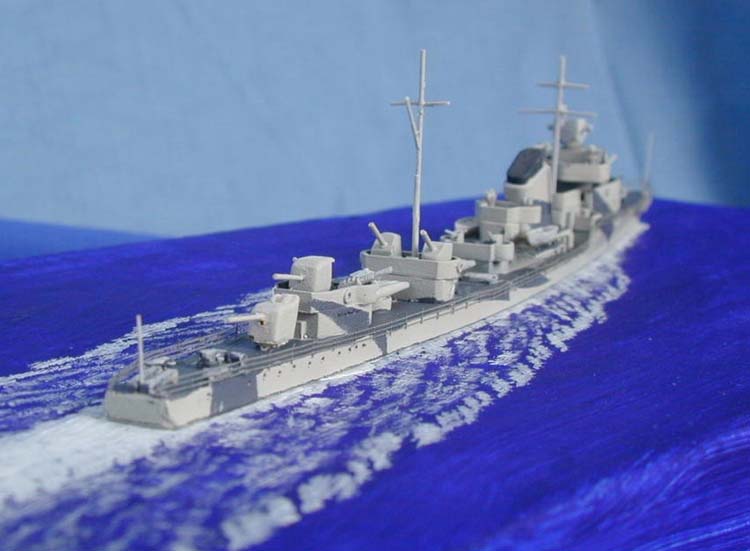
I then assembled the mid-ship triple A platform and aft turret mount without difficulty. About those turrets - the kit come with four main battery turrets and four secondary turrets. All were drilled out and barrels made from the various width styrene rod supplied with the kit. The rod is color coded and used extensively throughout assembly. I then glued the two triple torpedo launchers in place. At this point I was ready to try for the neat dazzle camo scheme suggested by the box art.
Basic Painting
I sprayed the hull with a light coat of gunship gray and let that dry. I then carefully masked off the hull and superstructure to go for that neat splintered effect. I mean this took tiny slivers of masking tape to achieve this. You have to stand back and look at the ship at a waterline view to really see what you are doing. Once I was happy with the masking I sprayed a couple of light coats of haze gray on all horizontal surfaces taking some care to keep it off the deck. Once this dried I pulled the masks off and had a look. Not too shabby! I then did general touchup of the deck and I was happy.
Details, Details
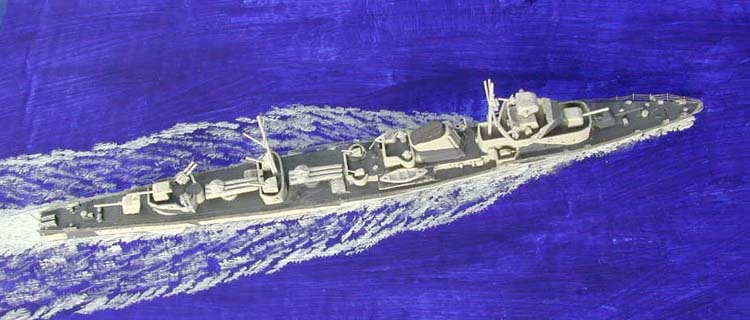
Kit directions have you make individual small gun mounts, searchlights, vents, davits and masts out of the rod material and a few near microscopic resin parts still in the flash. I tried for awhile but began to lose as many parts as I was completing. At this point I found my stash of 1/700 parts trees left over from previous projects. Oh yes! I used these to replace the boats, single and dual AAA mounts, search lights, torpedo launch housing detail, and the gun director. Was I happy with this choice? You bet. Did I use any of the remaining Samek parts? You bet. I measured, cut, and assembled the two ships masts and boat davits out of the remaining rod material. This made for very nice scale thin parts with enough detail to be convincing. I did not mount them on the ship quite yet though. I did touchup painting and dry brushing of all the details in preparation for the PE railing.
Markings and Final Assembly
The kit comes with no markings. I found a sheet of Verlinden dry transfers that had extremely fine lettering, stars and numerals. I transferred the ships numbers on the hull and even found tiny stars for the bow. I decided to put complete deck railings around the ship. Most of the superstructure railings consist of splinter shielding so I did no railing there. I sprayed the Eduard PE haze gray and carefully cut out a few spans. Switch to max magnification here. I bent one rail carefully into a tight V and glued the apex at the bow point. Boy here is where Bob's "handle" sure made a difference. I then tacked down the railing on first one side and then the other with the tiniest amounts of CA. I then glued to lengths of railings on either side of the hull to complete the model.
Conclusion
I painted the cut out box bottom following Bob's drawings for the wake and took some pictures for this article. I enjoyed this little build but do recommend the kit for the experienced ship modeler because of its size and complex parts. I'd also recommend having PE rails and replacement part for the secondary weapons and small boats. The Samek Type VII destroyer will make an interesting addition to any collection of WWII era destroyers.
I thank Bob Pearson for offering me this very nice kit that he acquired through Lubos Vinar at VAMP MAIL ORDER.


