Building the Emhar 1/35 Mk IV | 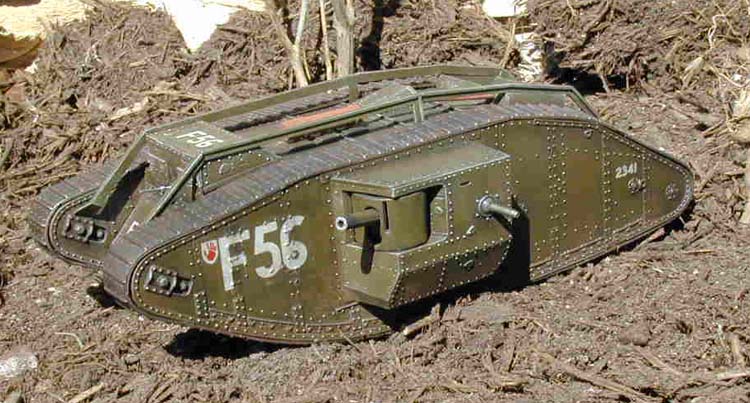 |
Introduction
I started this kit many moons ago and recently finished it up. The big 1/35 Emhar Mk IV really is a lot of fun and offers a unique chance for an interesting finish. One of my favorite aspects of modeling is dry brushing. Boy did I go to town with this kit! Read on.
History
At the beginning of The Great War, the only mobile armor on either side of the vast trench battles was the armored car, with its light firepower and insufficient armor. It could not even dare to face the massive artillery duels and merciless enfilading fire of the trenches. Instead the armored car saw its greatest use in the deserts of the Middle East.
 The tank was a different matter, just a handful of men in Britain and France share the credit for the development of the armored fighting vehicles. Politically Winston Churchill threw his weight behind it, despite at that time being First Sea Lord and having little to do with land fighting. Some others who were soldiers were also instrumental in early tank development - Ernest Swinton on the British side and Jean-Baptiste Estienne on the French.
Ernest Swinton had spent time in France as an 'Official Observer', at that time the nearest thing to a War Correspondent. There he encountered the Royal Artillery's' 'Caterpillar gun movers'. Lieutenant-Colonel Swinton, whose official position gave him more influence than his rank implied, soon began lobbying for the development of a battlefield capable version of the armored caterpillar, which could cross trenches and destroy enemy machine gun positions unimpeded.
 However the Minister of War, Lord Kitchener, was a traditionalist, and the idea soon foundered. The idea then reached Churchill's ears and the Admiralty's land ships committee was soon formed. After a series of false starts, a promising vehicle was developed, tested and finally shown off in January 1916. This was 'Mother' the prototype of the tank, Mark I. 150 were immediately ordered and delivery began in the last week of June.
Swinton was appointed head of the unit to be equipped with the tanks, but was forbidden to even describe his unit to the men he was recruiting. The term 'tank' was chosen as a result of an attempt to fool the Germans into believing the new vehicle was a mobile water carrier.
 The section was formed as the Heavy Section, Machine Gun Corps in another attempt to preserve secrecy and moved to France in August 1916 and went into battle midway through the following month. But this proved too early. The tanks were unreliable and incompletely developed when they entered battle at Flers-Courcelette. The terrain was muddy and the tanks were not immune to the devastating power of the artillery, but it proved the point. Tanks could overrun enemy machine gun posts with impunity, giving the poor infantry following them a fighting chance.
A similarly limited degree of success was to be achieved twice more, at Arras and Messines Ridge, before the operational commander of the newly formed Tank Corps, Hugh Elles, managed to convince the British High Command to allow the tanks to operate over ground undisturbed by preparatory artillery bombardment. This 'fair trial' came at the Battle of Cambrai, which began on 20th November 1917, where the tank came into its own, albeit briefly. There were no reserves to back up the breakthrough as the High Command thought it unlikely to occur.
 The French developed their own tank as did the Germans, each differing in principle. The British tanks were rhomboids, able to climb out of trenches. The French fielded lighter smaller tanks and the German boxlike contraptions. British tanks effectively fell into Male and Female version, the Males armed with 6-pdr guns and machine guns, with the Females being completely armed with machine guns.
The Mk IV was the first operational 'mother' with greater power and armor. The first tank duels took place on 24th April 1918 near Villier-Bretonneux between British Mk IVs and German A7Vs, with the latter either destroyed or running from their British opponents – albeit at hardly more than a walking pace. By the Armistice the Allies were able to field a powerful armored fighting force.
Building the Mk IV
This Emhar kit is molded in hard olive styrene with fairly decent molding and only moderate flash. Separator marks abound but are well hidden in construction. Vinyl tracks come in four parts and are nicely done. Markings for four versions (two British, two German) come with the kit. I have heard tell of shape problems with this kit but it still builds up to an easily built dramatic large model.
Construction
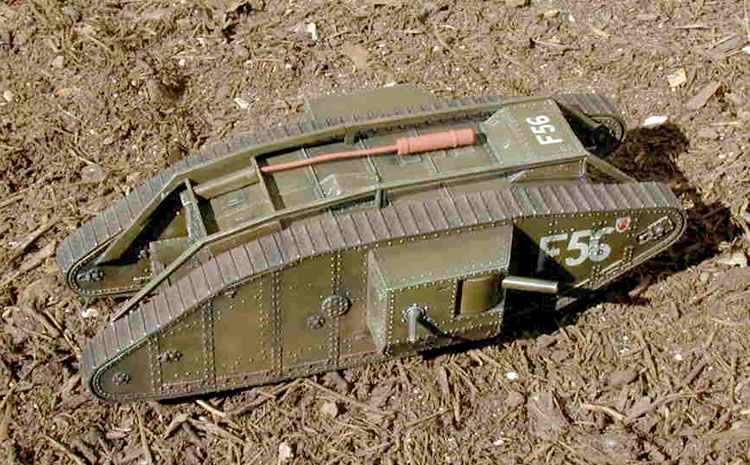
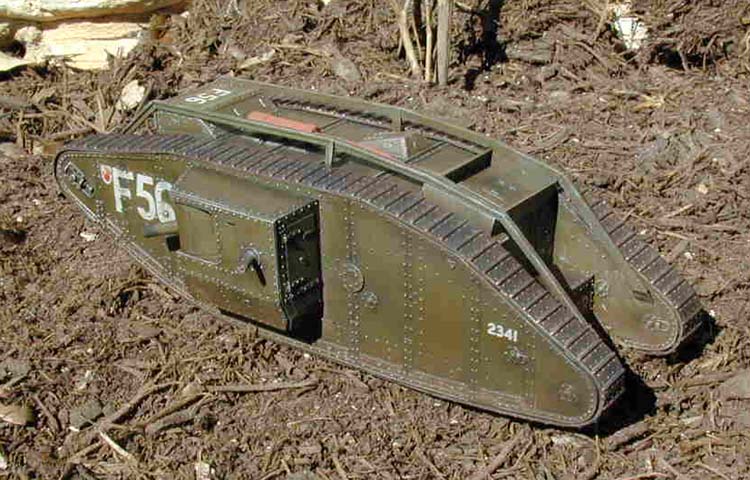
 Kit instructions include two pages of assembly directions. On page one I assembled the fighting compartments, guns, idler wheels and tracks. The 6-pounder guns are crude but are all but hidden within the side compartments. With a little clean up they easily swivel and train in elevation after assembly. The machine guns have swivel balls molded in them and again can train around. Putting together the side compartments I found fit problems that would continue throughout the hull. Basically every joint and seam need filling and cleanup. I assembled the two large tracks using normal styrene cement. The joints leave a visible gap that I closed up with careful trimming.
On page two there are four instruction blocks that assemble the large hull and finish off the vehicle. I cleaned up the three huge pieces that form the hull and cemented them together. Dry fit here. Once this was taped together I added the commander's compartment and top hatch in place. I then assembled the exhaust system and glued this to the top hull. The directions give you good indication how this is aligned. I then dry fit and assembled the inner track housing to the hull. I then added the front and rear drive and idler wheels. These need to be cemented and dry before adding the tracks. I stretched the tracks around the runners and then secured them with the outer track housing. This is a tad tricky so take your time. Try as I might the tracks had some gaps apparent at the front and rear. I aligned them to come as close as possible. I then added the upper framework to the hull in eight pieces. Be careful on alignment here because it is not very evident how these should meet the hull. I wrapped up assembly by adding the side fighting compartment assemblies.
Painting and Weathering
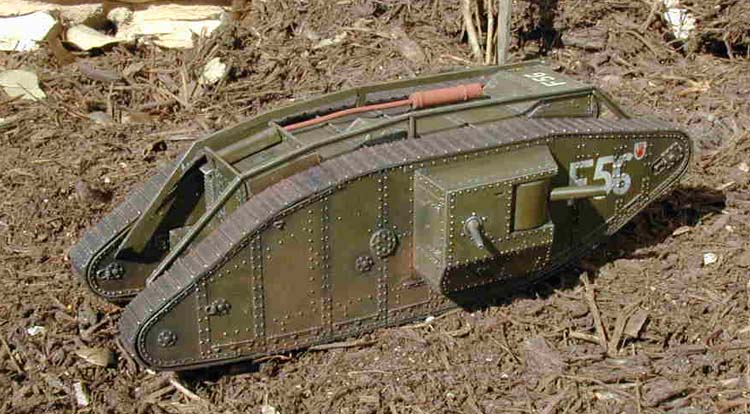
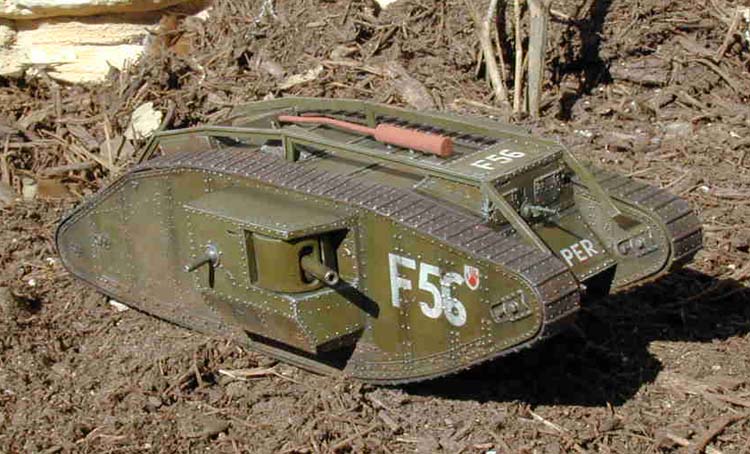
 Kit directions give color schemes for both German and British versions. There is some debate as to the actual color used during hostilities. The British tank was either olive or field drab. I sprayed the entire tank with Testors Olive Drab. Once dry I then sprayed the model with gloss coat to aid in dark washes and decals. I painted the tracks with burnt metalizer. Once this had dried, I added a wash of a mixture of acrylic scale black and brown to the entire tank. Then I washed the tracks again with scale black.

And now my favorite part of armor modeling, drybrushing! I used Testors light gray to highlight detail all over the tank and treads. I followed that up with Testors Steel lightly drybrushing the treads and hull. I finished up the weathering by applying ground pastel black with a brush to the gun muzzle, breach, and pretty much anywhere I felt like it. I accented panel lines mainly. I then weathered the tracks and lower hull with heavy brown pastel chalk. What a blast!
Decals
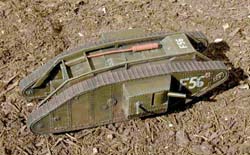
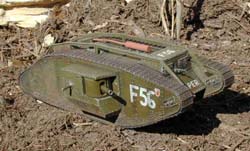
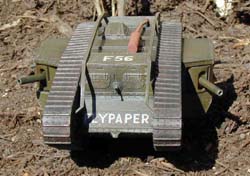
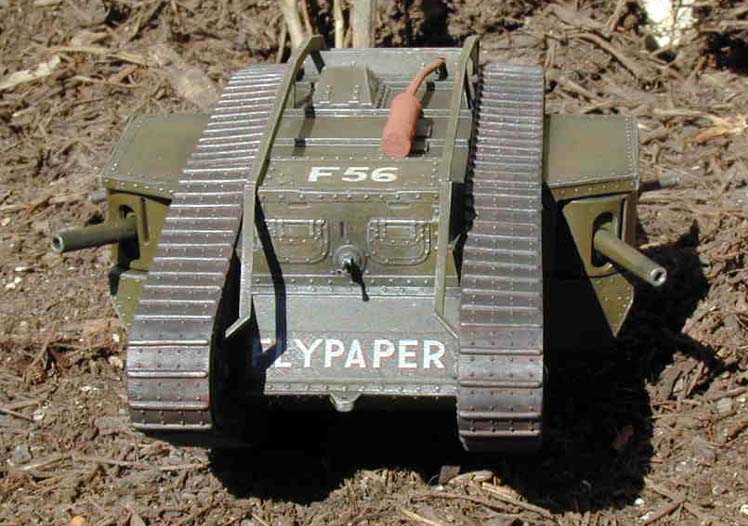
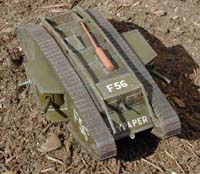
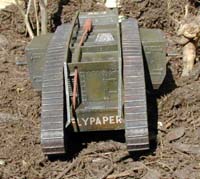 Kit decals allowed for four different markings. I chose the British F56 markings because I thought "Flypaper" name on the front and rear looked cool. Those German crosses looked enticing too.

I applied the kit decals with so-so results over the gloss coat using Future. This worked well for the flat surfaces but the hull riveting was a challenge. I applied the large side decals over the riveting and applied numerous coats of Solvaset. The first two or three applications did next to nothing; I must have applied it six times over a couple of days. I then sprayed dull coat over the model to seal things up.
Conclusion
I took the model and set it in the soil of my garden for the completed shots. This kit builds up fairly easily to a monster of a tank. Set this baby down beside a WWII tank and it dwarfs it! I recommend it to the average level armor builder due to the amount of dry fitting required and filling required. If you are into Great War (or not) this makes a nice addition to your armor collection!


