Tameo 1/43 Stewart SF-1By John Jameson | 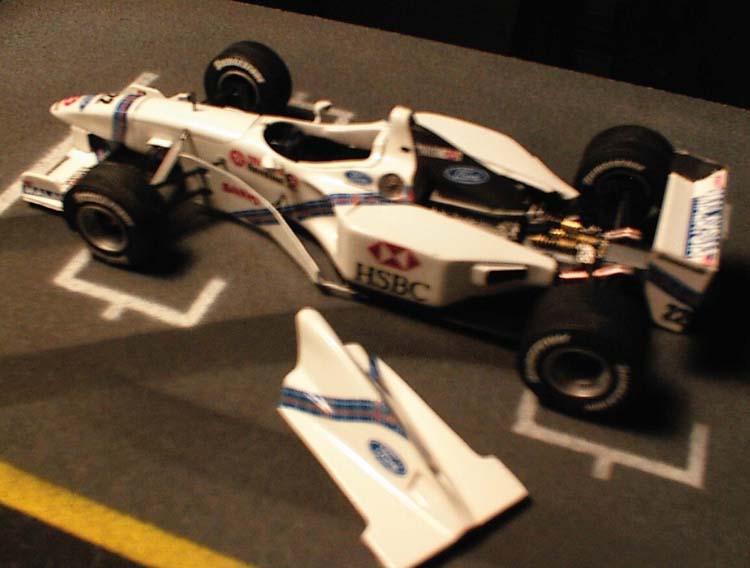 |
Introduction
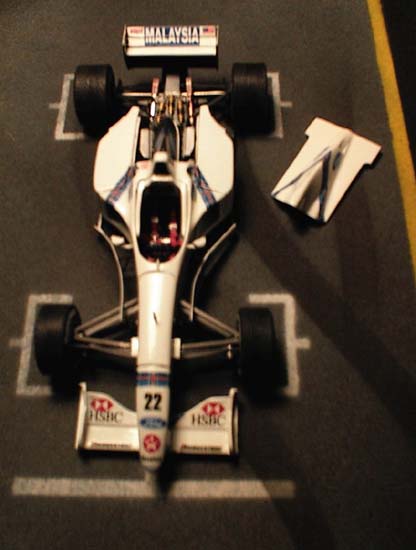
The 1997 Formula One season saw a new team on the scene, from an old familiar face, Jackie Stewart. The team, owned by Jackie Stewart - with a heavy investment from Ford, ran their own chassis, called the SF-1 and it was powered by nothing other than a Ford Cosworth engine. The team's best finish of the year was a 2nd place showing at Monaco. The race was run in the rain, and driver Rubens Barichello finished 2nd behind the Ferrari of Michael Schumacher. It is this race that the kit is modeled after. The Stewart team went on to finish 9th in the Constructors Championship in 1997 and the #1 driver, Barichello finished 14th in the Drivers Championship. The Stewart team struggled in 1998 and 1999. There were signs of a fast car and real potential, but they just weren't consistent and reliable enough. At the end of the 1999 season, Stewart sold the majority interest in the team to Ford Motorsports, who in-turn changed the badging of the car and team to its present day Jaguar.
The kit
 This is Tameo kit # TMK250 and is in 1/43rd scale. All of Tameo's kits are excellent and this one is no exception. Although this kit is not in Tameo's line up of full detail 'Super Kits', it is more than the average kit in that it does feature lift off body work, namely the rear cowl and some engine detail. The kit is comprised of a white metal body and engine pieces, photo-etch suspension and wing pieces, turned brass wheels with PE inserts, rubber tires and two sets of decals. As customary with all Tameo kits, two complete decals sets are provided to correct any mistakes. The car can be built as either the Barichello version or Magnussen version. This race was run in the rain with a spectacular showing and 2nd place for Barichello, so that's the driver I chose to model this kit after. The kit does come with rain tires and a standing driver figure. The decals also come with helmet and suit decals for either driver. Customary with Tameo kits, excellent CAD-like instructions are provided in color with color reference shots of the car. Tameo kits are absolutely wonderful. If you haven't built one yet, you really should give them a try.

The Build
|
|
|
|
 |
 |
 |
 |
 |
 |
 |
 |
 |
 |
 |
 |
 |
Have you ever had one of those builds that just didn't seem to want to get done? Well, that was the case for me with this one. The build probably took more that a year to complete and went from bench to back burner more times than I care to admit. It is because of this fact that perhaps completing this kit has given me great satisfaction. The harder the victory is to achieve, the sweeter the reward. In the least, it's a work in perseverance.
I had to re-order parts and another set of decals at one point, putting the project at a complete standstill. I had the most unfortunate incident when a bottle of CA glue tipped over on my bench and glued the lift off rear cowl and two photo-etch spures to my bench top overnight. Remember boys and girls - close your glue tops tightly when walking away from your work area. I thought the kit was a complete write-off, but I contacted Tameo in Italy directly and was able to order the spares with no problem.
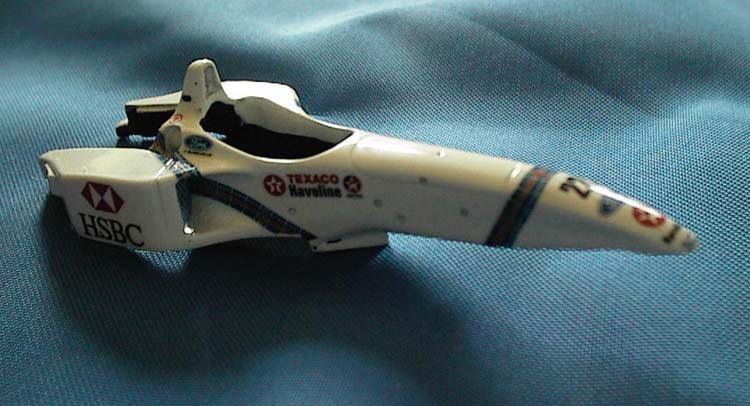
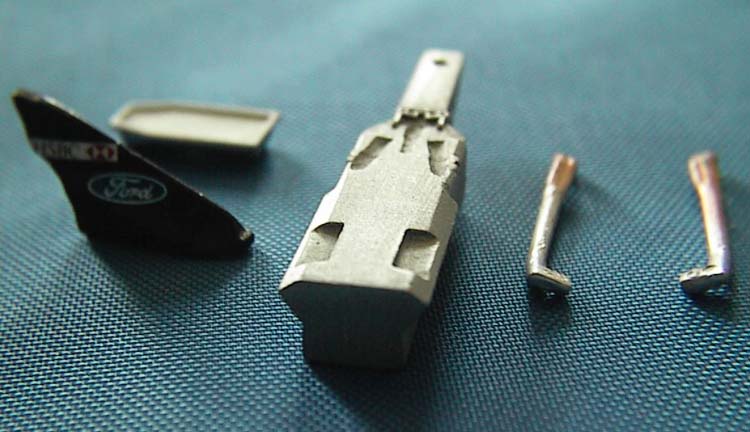
I started the build as I do with all of my 1/43rd scale kits by first attaching the front lower body piece to the body. I also attached the rear photo-etch vents to the body. I used epoxy glue for this kit. I then filled and cleaned up this area so no seam lines would show. I cleaned and drilled out the front suspension and bargeboard mounting points. I checked the fit of the fuselage to the under tray and made some slight adjustments with files and sandpaper.
Usually, at this point, I would temporarily secure the under tray and bend up the photo-etch suspension arms and test fit the whole thing to ensure the ride height was even. This kit, however, features a lift-off rear cowl and some engine detail. As a consequence, the rear suspension is attached to the engine block pieces. So to ensure a final even stance on the car, I first had to prepare the engine. I epoxy glued the two white metal engine blocks together. I then cleaned up and drilled out the rear suspension mounting points. Next, I folded up the photo-etch suspension arms, temporarily attached the block to the under tray and the under tray to the fuselage and test fit the suspension. Everything looked nice and even.
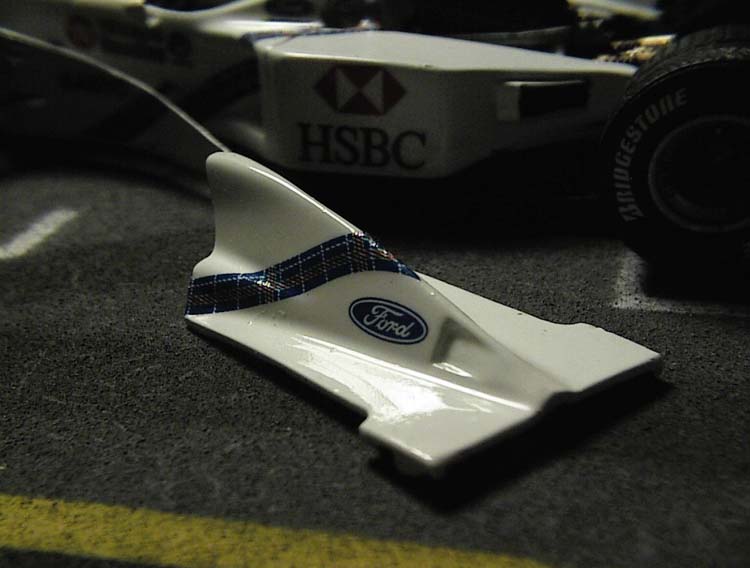
I then primed and painted the body and rear cowl with an automotive PPG pure white paint. My automotive paint requires a clear coat. Experience has taught me that I must clear coat before I decal and then clear coat again to protect the decals and finish. So I lay down a light clear coat, which is a two part clear coat. Next I proceeded to decal the cowl and body. I was not happy with my attempt at the Stewart Tartan stripe on the rear cowl the first time; it just didn't line up right. I removed the decal and applied the Tartan stripe from the second decal set, since I had two sets of decals.
It was at this point that the little glue accident occurred. I had just decaled everything and cut out the wheel inserts and brake bits from their photo-etch trees and left it all sitting out on my bench top. When I returned the next weekend, I found that my CA glue had tipped over and glued all the photo etch pieces as well as the rear cowl piece, finished side down, to the bench top. Now while I was able to chisel off the rear cowl and some of the photo-etch, I needed to strip and repaint the cowl, and most of the photo-etch was going to have to be replaced. I was so disgusted with myself that I put the whole project away and forgot about it for a couple of weeks.
I contacted Tameo and requested an extra set of decals and two photo-etch sprue replacements. These arrived in several weeks with a note to send along $10 US cash. I was so impressed that Tameo sent along the items after a brief request without even the hassle of billing. Needless to say I sent along the $10 with a very big thank you note.
Two or three months later I then took this kit out of its hibernation. I proceeded to refinish the rear cowl and again apply the rear Stewart Tartan stripe. I sprayed metalizers of various colors to the different brake components such as the calipers, disks and rings. I painted the suspension arms all a semi-gloss black. I used some ScaleMotorSports 1/43rd carbon fiber decals and decaled the front brake intakes, engine air intake scoop and underside of the cowl. I also added some CF to the inside of the cockpit. The scale is so small that the decals aren't really noticed unless you are in good light and looking hard. I then assembled the brakes and ducts to the suspension front and rear.
I painted the wheels silver and the wheel inserts a semi-gloss black and CAed the inserts into the wheels. Next, I cleaned up the seat with 800 grit sandpaper and test fit the photo-etch seat belts. I then painted the seat, formed belts and assembled all of this together with CA glue.
Next was the steering wheel. I removed the steering wheel and dash pieces from their photo-etch tree. The steering wheel is made up of two layers of photo-etch glued together with another photo-etch steering wheel center which are all then glued to a turned or machined aluminum shaft. Then a photo-etch gear paddle and dash are glued to the end of the steering shaft. I airbrushed this whole subassembly flat black and then hand brush painted the steering wheel blue.
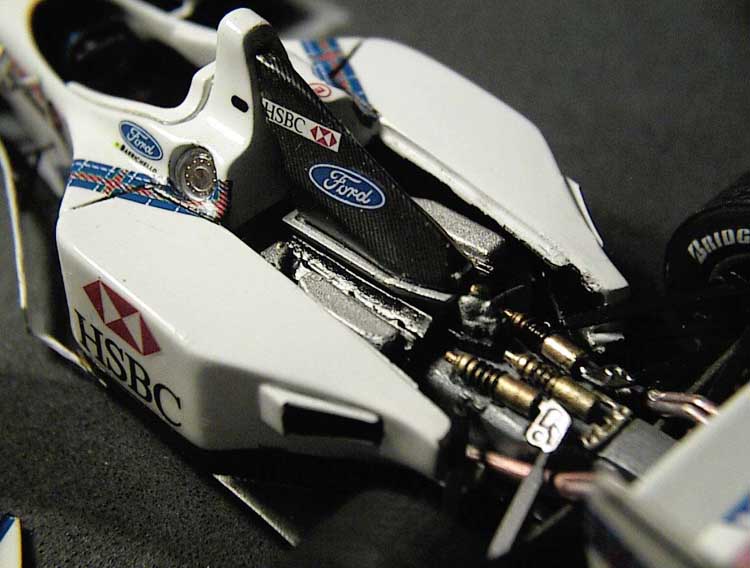
The next subassembly to work on was the engine. I had already assembled the engine block. I airbrushed it a with metalizer aluminum paint. I also painted the three machined shock pieces metalizer gold.
I next epoxy glued the rear suspension and brake assemblies to the engine block. Once the suspension pieces were in place, I laid the block flat on the table and checked the height of the wheel hubs to ensure the left and right hubs were even. I then cleaned the exhaust pieces and airbrushed these a chrome silver onto which I misted spots of copper and exhaust metalizer to represent the heat stained exhausts of the real car. I attached the exhausts to the block, which weren't all that easy to thread through the rear suspension arms. To finish the engine block assembly, I brush painted the spring coils on the shocks a semi-gloss black and CAed these to the block.
Next, I moved onto some of the final assemblies. I epoxy glued the seat to the under tray checking for clearance of the fuselage by test fitting the fuselage before the epoxy set. I then epoxy glued the engine block and rear suspension to the under tray. While this was drying, I prepared the radiators, the engine valve and electronics top piece, painting them black and silver. I then glued the radiators to the under tray, again checking for fit by test fitting the fuselage before the epoxy set. I also glued the valve and electronics motor top piece to the engine. I scratch built some cooling line with some very fine solder run from a drilled whole in the oil pump/top engine piece to the radiator. It wasn't much, but since the engine would be the focus of the final build I wanted to do what I could. I then CAed the steering wheel assembly to the Monocoque. Finally, I ran a bead of epoxy around the under tray and secured the fuselage with clamps and left it to dry.
Before the front suspension can be attached to the Monocoque, the bargeboards must be finished and put in place. Tameo, on one of the photo-etch frets, includes a bargeboard bending jig. This is simply a slit on the end of one of the photo-etch trees that is curved to represent the curve of the bargeboards. I removed the two bargeboards from their photo-etch sprue and shaped the first to slide into the curved slit or jig. Next, I flipped the jig over and shaped the second bargeboard. Voila - nice symmetrical bargeboards. What a nice way to engineer the bargeboards.
I attached the bargeboards with the tiny barge struts using epoxy glue. While this was still setting, I added the front suspension. I checked the suspension height by placing the car flat and measuring the wheel hub height ensuring it was all even. While this was drying, I prepared some of the final detail bits, such as the mirrors, fuel filler and underside photo-etch diffusers. I attached the engine air intake, mirrors and fuel filler.
It was at this point that I realized I hadn't fit the driver headrest piece. This is a white metal cockpit wrap-around piece that sits on the back of the driver's seat. I should have fit and secured this to the main body before I primed and painted the whole thing. I didn't look far enough ahead in the directions. Fortunately, it wasn't a costly mistake. I was able to sand and fit the headrest piece so it fit reasonably well. I was able to paint and secure it without it being real obvious. I will never forget that piece again.
The final steps were the wings and wheels. The front wing was a one piece white metal wing. I had primed and painted this when I did the body. It is attached to the main body via a photo-etch strut. I squared the body up and epoxy glued the front wing to the body. I used a thin piece of plasticard, slid underneath the wing to provide support while it dried. In hindsight, I should have attached the photo-etch strut piece to the body before I painted and finished the body. I think that would have looked better, but it is a minor point for sure.
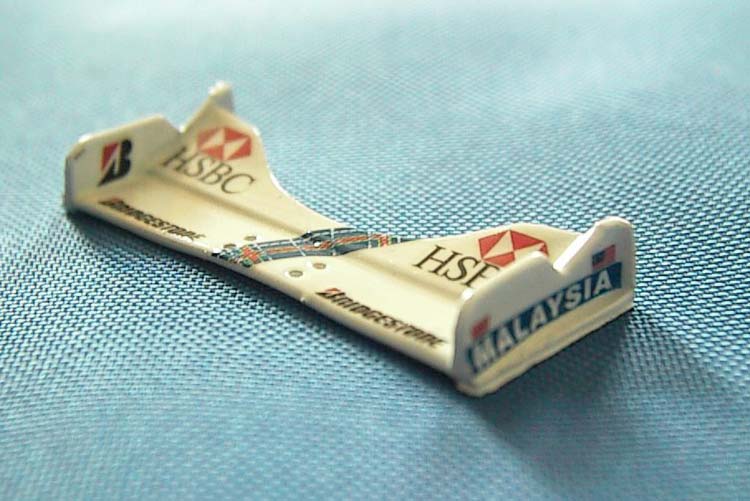
I then proceeded to assemble the rear wing, which can be the most difficult task on some of these 1/43rd scale kits. The rear wing consists of one white metal main horizontal piece, two wing endplates, and five individual photo-etch horizontal pieces. I pre-painted, decaled and clear coated the wing endplates and horizontals. I then epoxy glued one wing endplate to the main white metal horizontal and got this as true to the eye as I could. Once this was almost completely set, I epoxy glued the other wing endplate and one of the photo-etch horizontals. I used some small blocks to jig this wing assembly up until it was dry. Since the first wing end plate epoxy joint wasn't completely cured, I was able to make slight adjustments as I jigged it up.
The next day, I then slid the remaining photo-etch horizontals into place and secured them with Testors clear parts cement. I find this glue invaluable for situations where little bonding is really required but clear, clean joints are a must. When this cement dries it is crystal clear, it's just not that strong. With the wing assembled, I carefully brushed a coat of flat black to the wing horizontals to be black. I wasn't too worried about the brush painting because I was going to carbon fiber decal all this as the next step. I then again used some ScaleMotorSports carbon fiber decals and applied this to the entire inner area of the wing and the horizontals.
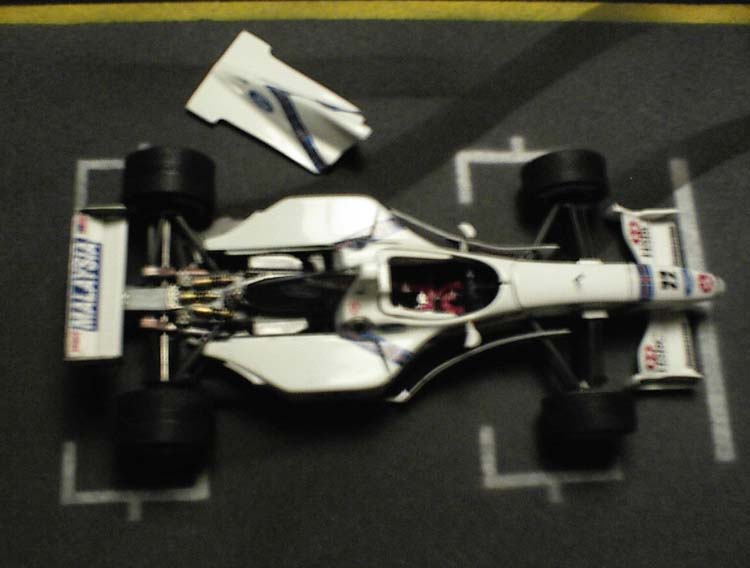
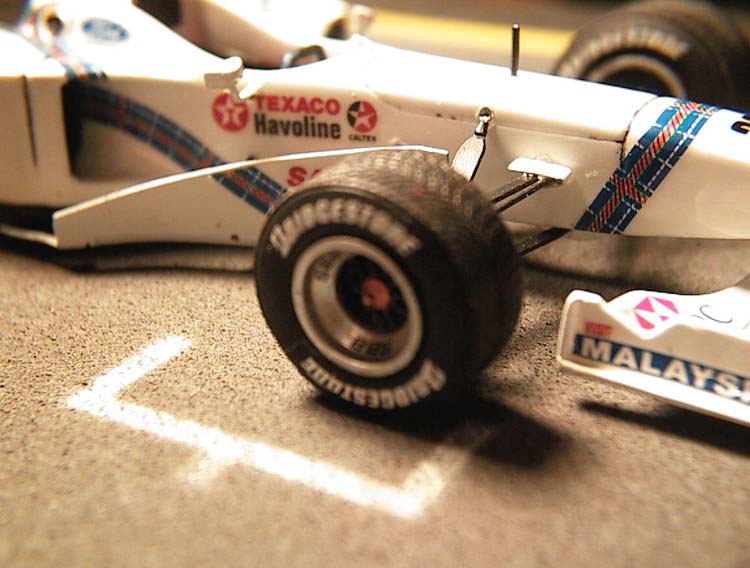
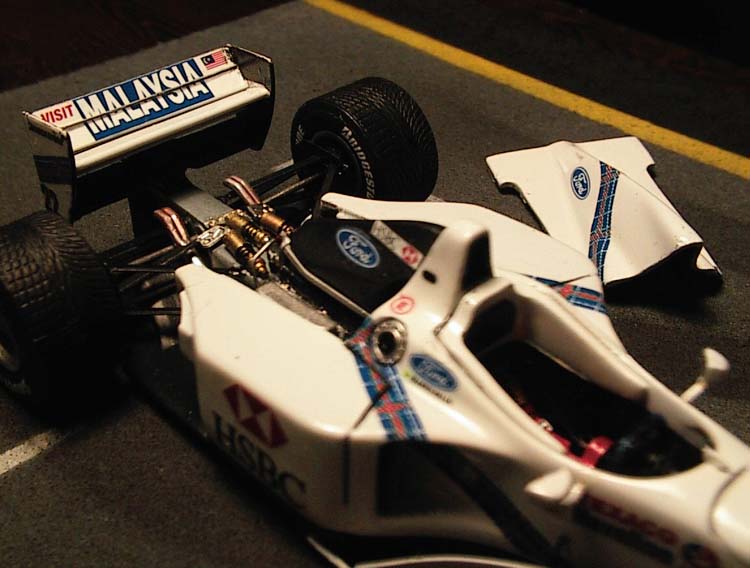
The final steps were now to attach the wheels and rear wing. I attached the rear wing with epoxy. I CAed the rear wheels to the hubs using the tiny brass shaft/nut pieces. Because the brake and hub assemblies have so much detail, I did not want to permanently attach all the wheels. I wanted to be able to remove one or more of the wheels to show off the detail. Because of the lift off bodywork, I think this kit would be a fantastic subject for a diorama. So I have the plan of doing a pit scene diorama, where there will be a wheelman and a wheel off the car. So I used some temporary glue to attach the front wheels. Voila, (well not quite) one nice looking model.
Conclusions
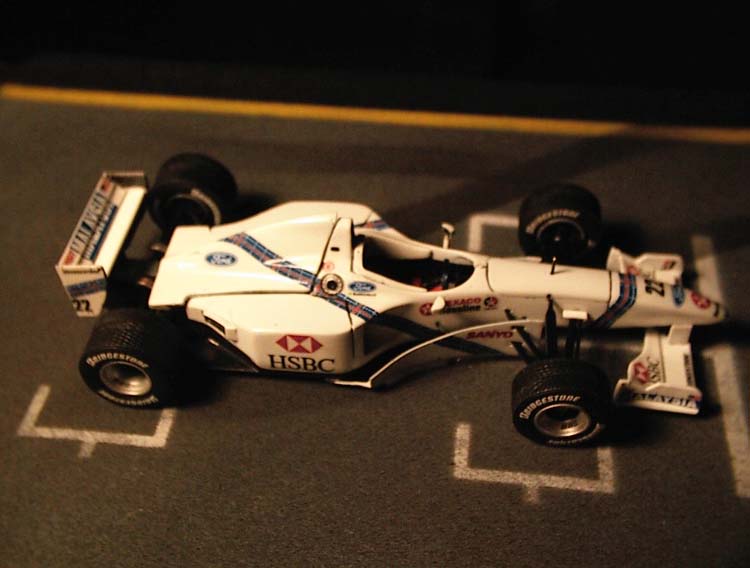
What can I say? This is another wonderful kit from Tameo. I like the lift off bodywork so much that I am going to purchase the other Tameo kit with lift off bodywork, the Prost AP01. Like all Tameo kits, it is superbly engineered. With a retail price of around $35 US$, it really is one of the best bangs for the buck.
I am so relieved to get this kit finally built. It is a striking kit with the lift off bodywork. While it took more work than an average kit, I believe it is a good way to prepare for a 'Super Kit'. I haven't finished the driver figure yet and have plans to build a diorama around this kit so I'm not completely done.


