Airfix 1/8 Gromit's AeroplaneBy Tom Grossman | 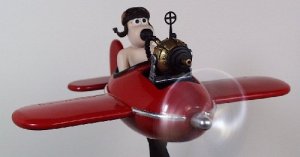 |
History
I have seen many enjoyable claymation pieces. Among the most memorable are the first three "Wallace and Gromit" features by Nick Parks. These are the adventures of the English inventor Wallace and his not-so-typical dog, Gromit. They are all a tour de force of excellent animation, meticulous attention to detail and brilliant imagination.
It was very exciting to learn that Airfix had made kits of the vehicles from "A Close Shave". The motorcycle and side car were nice but Gromit's Aeroplane caught my eye the most.
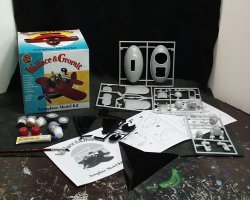 If you haven't seen any of the videos, I'll leave the story for you to enjoy. The uniquely shaped box contained five trees of parts and stand, Humbrol paints, a brush, glue and wonderfully diagramed fan fold instructions that include the paint scheme. The kit was injected in a different type of plastic than that used by most American manufacturers. It is softer and less brittle. As I was looking things over, I could see that this kit would be another adventure as I began to see things that could be made more accurate.

The Stand and Electrical Parts
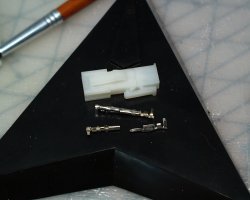 I noticed that that someone at Airfix had thought about motorizing the plane. There were battery mounts under the base of the stand. Seemed like a good idea to me, too!! Having learned a lot from the last kit I put electrical parts in, I decided to do this one right the first time. I got a Molex WMF-3901PRT Mini-Fit Jr. Connector at a local electronic supply store and a Cermag FA 130 DC motor at a local hobby shop. I also wanted to be able to control the speed of the propeller. With the help of my electronically literate friend, I got a hold of a 0-100 ohm wire-wound variable resistor/potentiometer (pot for short). Since I was unable to obtain one with an on-off switch built in, I also dug up a small slide switch.

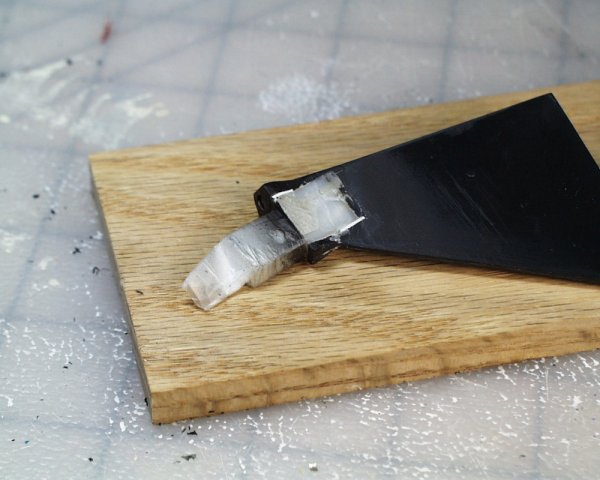
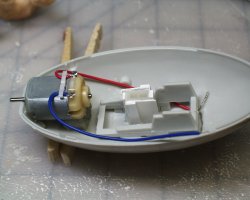 The mini connector would give me a positive connection between the batteries in the stand and the motor in the plane. I planned to use epoxy putty to hold it all into place. The sleeve end of the connector would fit through the enlarged opening in the panel at the bottom of the fuselage. I made an outer sleeve to enclose the connector out of sheet styrene. It turns out that the Testors Liquid Cement I used also worked on the material the connector was made from. My homemade sleeve and end of the connector it held were tightly glued together! I mounted the outer sleeve side of the mini connector and the motor in place with Apoxy Sculpt epoxy putty. This was FAR easier than the special home-made styrene mounting brackets I had dreamed up at one point.

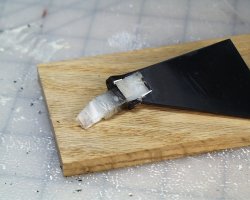 The stand would receive the larger end of the connector. I cut a connector-sized slot in the top of the arm. I used Apoxy Sculpt to secure the connector in place. Looking back, this would have gone better if I had set the connector first with Testors Liquid Cement. I had to cut quite a bit off the corners of the connector to restore the smooth flat surfaces of the stand arm.
There would not be enough room under the stand for the switch, the pot and the battery box. The batteries would have to be in a wooden base that I would make later. The base of the stand had quite a few sink marks in it. After removing some of the existing battery mounts underneath, I cut holes for the pot and the switch at one of the sink marks. I glued a piece of styrene over the hole for the pot and super glued the nut in place. This was reinforced with more Apoxy Sculpt.
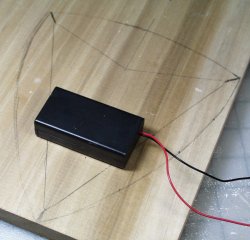 For the battery pack, I drew a nice Wankle shape around the base on a piece of poplar and traced around the pack inside the shape. Since the battery pack was the same thickness as the poplar, I glued a thinner layer of poplar onto it. This layer had cut outs for the switch and pot. A little scroll saw work and sanding and the wooden base was ready. The plastic would later be sprayed flat black. The wood was sanded smooth. After the wood and plastic pieces had been glued together, the whole thing got a couple coats of Krylon Satin Varnish.

Gromit
 The picture on the instructions (and all through the flight scenes in the video) showed Gromit with his arms inside the cockpit. The kit was designed with Gromit's arms outside the cockpit. This is understandable because the Gromit in this kit is the same one used in the motorcycle. His arms can't fit inside because his legs are folded up to make room the wheel for the motorcycle's sidecar. To get Gromit's feet down, the rails on the seat frame had to be cut off. After considering several alternatives, I decided to make myself a new Gromit out of FIMO polymer clay, at least from the neck down. I chose FIMO because it is harder than other clays when baked. I started with a crumpled a foil armature. Next I added the legs. The armature was covered in FIMO in several layers with the previous layer baked first. Once I had the legs and torso done, I added the arms. I carefully wrapped him with paper towel to prevent marring during baking and wire to keep his arms in the right position. This turned out to be easier than I was expecting. He fit quite well into the cockpit, too. Incidentally, the seat was covered with Parafilm to protect it, as unbaked clay will interact with plastic.
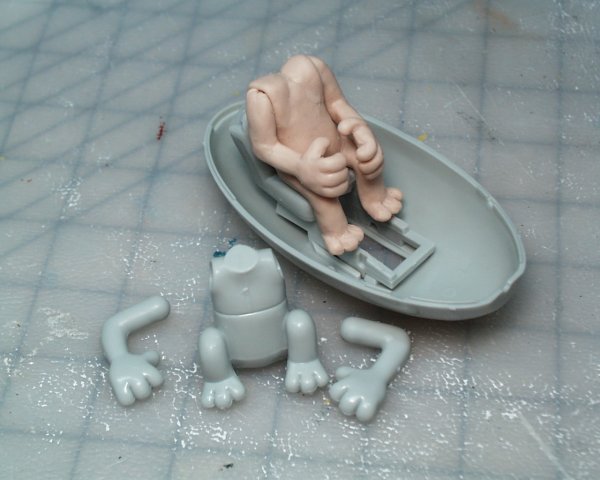
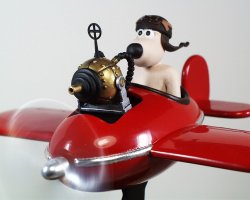
The motor was connected to the mini connector in the fuselage. I even fashioned a control yoke for Gromit to hold, just like in the movie! With all the cockpit parts and Gromit in place, a test fit of the upper half of the fuselage showed that the motor would be visible underneath the suds gun. The kit included a panel for closing up that opening, if the builder so desired. Since this panel fit nicely over the opening from underneath, I made an inside cover for the interior of the fuselage. Some sheet styrene was used to close one end. Gromit's original head was glued in place on his new body. He was painted a tan color and detailed according to the paint scheme in the instructions. I did use Delta Ceramcoat acrylics instead of the included Humbrol paints. The inside surfaces of the fuselage were painted flat black. After cutting the spaces for the wings, I glued all the cockpit parts in place and added the top half of the fuselage. Finishing the stand before this point allowed me to use it during construction. I covered it with plastic wrap and Parafilm to protect it.
The Finish
The wings were glued in place. A small amount of putty was needed to fill the gap between the inside edges and the fuselage. I chose Model Master Acryl Italian Red mixed about 50/50 with Guard's Red. These paints would give me a gloss finish without having to use clear coats. They are also airbrush ready and can be poured right into the paint cup on my Iwata Eclipse HP-C without thinning...or so I thought.
I carefully masked off Gromit and the rim of the cockpit with Parafilm before proceeding. I use Clay Shapers to place the Parafilm. These are tools designed for working polymer clays. Each has a soft, rubber tip of different shapes at each end. The plane was sprayed over all with red barn red as a base coat. The first two coats of gloss paint did not go on smoothly. After allowing at least 24 hours for curing, I wet sanded some of the areas with 600 grit sanding sticks to get the bumps out. A re-application covered the sanded areas but still did not go on smoothly. More sanding. It was at this time that a friend of mine suggested thinning the paint and dropping the pressure to between 10 and 15 lbs. This worked like a charm. The next coat went on wet and dried smooth.
Once the paint had cured for at least 24 hours, I set about adding the chrome trim to the fuselage and the propeller. I started by painting these areas with Model master Acryl Aluminum. For the chrome effect, I used AMACO's Easy Metal Foil. This is a thin metal leaf system that comes in a variety of metal colors. First, the areas to be covered are painted with a sizing solution. This is allowed to dry for 20 minutes. Next, the metal foil is carefully removed from the package and placed over the sizing. The metal is pressed into place with a paintbrush. The sizing acts like contact cement, adhering the foil instantly. There are no second chances. It is possible to re-apply the sizing and add another layer. Can you guess why I mentioned that?
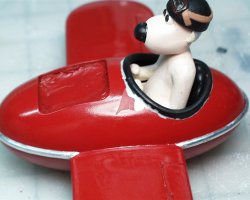 Now for the fun part!! When it was time to remove the mask, I first used a fresh Excel blade to separate the mask from the paint I wanted to leave down. I thought I had cut all the way around the cockpit padding. But as you can see in the picture, I missed. Yes, that's bare plastic showing right against the padding.

A week or so later, I picked the plane back up and set about repairing the damage I had caused. I sanded around the cockpit until I could detect no more shelves formed by the edges of layers of paint. I masked off my chrome, the padding and Gromit with Parafilm places with Clay Shapers. More red paint was applied with the thin-low-pressure technique and the project was saved.
To add the final leather-look to the padding, the Parafilm was peeled back far enough to expose it and tucked down inside the cockpit. This would protect Gromit while I did the drybrushing. More Parafilm was put in place on the fuselage around the padding. I drybrushed with two dark brown Ceramcoat colors. When everything had cured over night, I CAREFULLY removed all the masking. How nice that nothing else had gone wrong!
 For the finishing touches, I used sheet styrene to add length to the straps on Gromit's helmet. These were glued in place and painted to match the rest of the helmet. The suds gun was painted black overall and drybrushed with Delta Gleems Bronze. The rubber parts were drybrushed with Delta Black-Green. The bracket for the gun was drybrushed with Delta Gleems Silver. I added the mounting screws with a dot of bronze and a tech pen. At last, I put in the batteries and flipped the switch. At full power, the propeller created quite a draft. With the potentiometer, I was able to adjust the speed to a reasonable level. What a fun kit this was to put together, despite all the problems. I learned an awful lot, too!

References
Special thanks to my modeling pals and fellow Modelers in Action Model Enthusiast Society members, Bob Hise and Scott Longberry for their help and suggestions. Modelers in Action Model Enthusiast Society https://www.gremlins.com/mia
Wallace and Gromit Video Collection Cat #4101059
Aardman Animations CBS Fox BBC
Airfix Wallace and Gromit Models
Humbrol Ltd.
Marfleet, Hull HU95NE
England
00 44 1482 701191
https://www.airfix.com
FIMO polymer clay and Easy Metal Foil:
American Art Clay Company
4717 West 16th Street
Indianapolis, IN 46222
800-374-1600
https://www.amaco.com
Parafilm
Micro-Mark
340 Snyder Avenue
Berkely Heights, NJ 07922-1595
https://www.micromark.com
Clay Shapers
Humming Line Store
5080 Diamond Drive
Colorado Springs, CO 80918
719-268-9848
https://www.hummingline.com/store.html
Model MasterAcryl and Testors Liquid Cement
The Testor Corp
620 Buckbee Street
Rockford, IL 61104
1-800-TESTORS
https://www.testors.com
Delta Ceramcoat and Gleems Acrylics
Delta Technical Coatings
2550 Pellissier Place
Whittier, CA 90601-1505
1-800-423-4135
https://www.deltacrafts.com
Apoxie Sculpt
Aves Studios
455 Hwy. 35
South Hudson, WI 54016
715-386-9097
https://www.avesstudio.com


