ALAN 1/35 S.I.G. 33 GERMAN HOWITZERBy Ray Mehlberger | 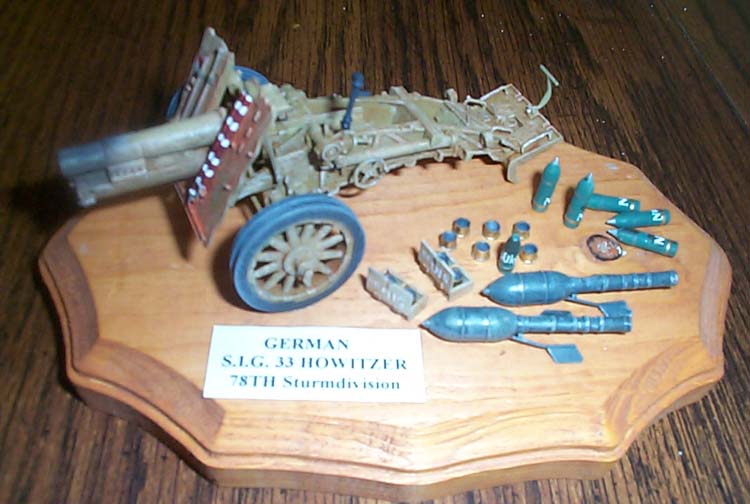 |
Since I just did the in-box review in last month's (April) issue, I will not repeat the history of this weapon again.
Assembly was started with step no. 1, which is the gun barrel and breech (the breech part no. 89 is not called out by its number on the instructions). The handle on the breech locking handle should point forward. This is part no. 79. The seam down the center of the barrel between the two halves was particularly troublesome at the muzzle end...it seems to be wider there. I cleaned this seam up with a flexi-file. I added some of my ARMOR RESEARCH CO. photoetched brass barrel rifling to the barrel of this kit. The two little handles, parts no. 97 should have one end in the location hole, on each side of the breech, and the other ends wrapped around the side of the breech block slightly and glued in place.
I then moved to step no. 2, which was the assembly of the gun barrel trough. I found that I had to sand down the bottom of the square raised area on the back of part no. 96, so that it would seat down into parts 93 and 94 and the bolts molded on the front of it would lign up better with the flanges on these two parts. The holes on the sides of Parts 93 and 94, in the triangular shaped areas need slight enlargement. The sides of part no. 11 should be sanded down or it will hit the shield supports later too. This assembly has to be trapped between parts 70 & 71, in the 3rd assembly step before adding parts 76 & 112. I also found a shallow sink on the sides, near the front of parts 93 and 94. After roughing up these sinks a bit with the point of my X-Acto knife I filled them with Epoxy two-part putty.
 Step 3 was now tackled. Parts no. 76 & 112 on this drawing should be reversed...they are shown on the wrong sides. Also, there is a long pin on the outside of part no. 76 that should be shortened so that only about 1/16" is protruding. These two parts engage the barrel trough (assembled in step 2) and the pins on them fit into the holes you enlarged earlier, after lining them up with the holes in parts 70 & 71. I left glue off enough so that the barrel trough would pivot up and down for now. Later, it would be permanently glued after the wheels had been added to get the angle of the barrel I wanted finally.
The elevation wheels, part no. 77, should be mounted...one each to each side. This is only shown on the instructions for the right side.
Step 4 is parts that are added to the trail of the howitzer. Part no. 6 is shown that it can be mounted one of two ways...for towing or for firing position. I chose the firing position. Again some parts are only shown for adding to one side. These are part numbers 1 and 12. There should be one of each added to each side.
Step 5 shows the positioning of the ground spade and its lift handles to the trail of the howitzer. I found some nasty sink marks to fill on the inside of these spade parts, numbers 14 & 15. These were dutifully filled with some Epoxy putty.
Step no. 6 is the assembly of the two rockets included in the kit. There were some nasty sinks in the egg shaped business ends of these, so again I did an Epoxy putty job on them. I found out from a fellow modeler on the internet that these were incendary rockets. I painted them overall schwarzgrun (black-green) with some light dry brushing of a lighter green.
 Step 7 is the assembly of the spoked wheels and the brake mechanisms. I found that one of the parts no. 4 (I believe this is a brake adjustment knob assembly) had only one half of the round adjustment knob molded...the other half was missing. I punched out a disc...with my Waldron punch set...the right size and replaced this mismolded half moon. The instructions don't tell you...but parts no. 32 are "HANDED". There is a left and a right side. To get these on the right sides make sure that the raised arcs molded on them are forward facing on the weapon.
Step 8 is the axle assemblies. Make sure you pay attention to the left and right handedness of parts 30, 31, 41 & 43. There is a long rod piece that is to go between parts 30 and 41. It is not numbered on the instructions, but is part no. 34 on the parts trees. I found that I could better add this part by bowing it first and popping it into the location holes in parts 30 & 41 AFTER the glue on them had dried. It was then glued permenantly in place. Make sure that you identify the correct no. 42 in this step with what is illustrated. This is because there are 2 parts that are numbered 42 and the other one goes on the back of the shield later.
Step 9 is the assembly of the shield, its supports, and some canisters that mount to the back of it.
Step 10 is the mounting of tools to the shield. It will be found logical to paint these tools off of the model and add them later when the howitzer is painted. Part no. 22 are aiming stakes. They should be painted with red and white barber stripes. I found this rather hard to do with a hand brush and keep the stripes uniform. The finished job does not look too bad...but I am not entirely happy with the results either. I don't know of a better way this can be accomplished. I found the shovel to be too angular, so I took sandpaper to it to give it a more rounded shape on the blade's corners. I also found the location holes for the tail lights to be misplaced, so you will have to jockey things around so that they will not interfere with the positioning of the pick and shovel.
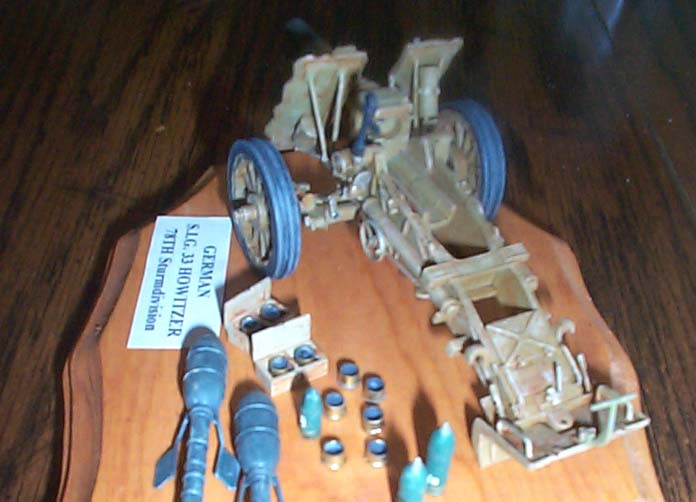
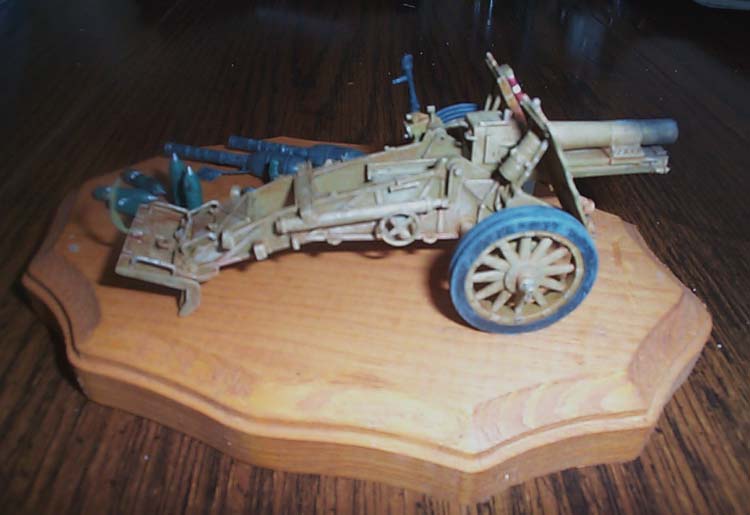
I painted the howitzer with a base coat of Model Master acrylic no. 4796 Panzer Dunklegelb 1943. This was given a wash of Windsor & Newton Burnt Sienna oil paint. After drying, a drybrushing of successive lighter shades of tan was added. This was done with Tamiya acrylic XF-57 Buff and XF-55 Deck tan.
I painted the ammo schwartzgrun and the number 6, 7, and 108 percussion caps were done with a PEN-TOUCH pen bought at Michael's (an American stationery store- ed.) that dispenses copper paint from its fine point. This same pen was used to indicate the raised copper lips on the ammo shells too. It was finally used to indicate the metal latches on the ammo boxes.
The tires were done in grimy black acrylic paint and the wood spokes and rims were done in dark wood color with some lighter tan drybrushing. The rings hanging down on the wheel hubs were painted steel along with the bolt heads on the wheels being touched with this color also.
When I went to use the decal sheet in this kit, I was dismayed to see them shatter when they hit water. I tried to salvage them with Microscale brand liquid decal film...to no avail. I then dug out a Micro scale sheet of German armor and tactical markings that I had in my decal file and tried to use those...again things shattered. At this point I went to the local hobby shop and bought some Woodland Scenes brand of railroad drytransfer letters and numbers and used them for the stenciling on the ammo and ammo boxes. Not exactly the same as what was on the kit's decal sheet...but close enough. I did manage to put a division marking on the shield of the howitzer...but had to do it in about 2-3 pieces...groan. So beware the decals in this kit and get some newer and fresher replacements. I learned the hard way.
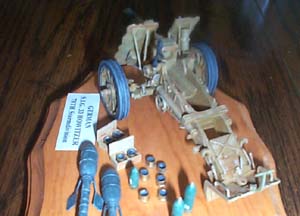
I was going to take this model to a contest and wanted it easy to handle, so I mounted the howitzer and the ammo, rockets, and ammo boxes onto a decorative wood base...bought at Michael's store. These were all attached with TACKY brand white glue. I then ran a label out on my computer to name the weapon on the base.
Conclusion
At the contest I took it too, it placed a third. I believe I might have gotten a little too carried away with the weathering and that's why it did not place higher in this contest.
It was a pleasant model to build and its price is only around $12.00. I intend to get one to replace the sad one in the Maquette kit of their Panzer I mounting this weapon. Their's leaves a lot of room for improvement.
Highly recommended for the experienced modeler, because of its complexity and some of the problems mentioned earlier.


