Dragon 1/35 Sturm-Infaneriegescutz 33 Panzer IIIBy Jack Ginther |  |
Introduction
The Sturminfanteriegeschutz 33 Assault Infantry Gun is essentially a 150-mm SIG33 on a PzKpfw III chassis. This was apparently the third attempt to mount this gun on a panzer chassis and the first to be fully enclosed. The first attempt was on the PzKpfw I chassis. The second attempt, on the PzKpfw II chassis, was known as the Bison. The enclosed compartment for the gun was in reaction to the failure of these previous attempts that mounted the SIG33 exposed on chassis. According to Chamberlain and Doyle's Encyclopedia of German Tanks of World War Two, the initial order for 12 chassis was placed in July of 1941 and delivered in December and January. This was the same hull as the StuG Ausf E and F/8. In September of 42 the order was placed to mount the heavy weapon capable of demolishing houses with two or three rounds. Secondary armament consisted of a hull mounted MG34. 24 of these were built eventually built by Alkett, the first 12 delivered in 14 days. The units were primarily used in the fighting around Stalingrad. I find no references to its use later in the war and no further orders were placed, probably indicating that the configuration was less than a success.
The Kit
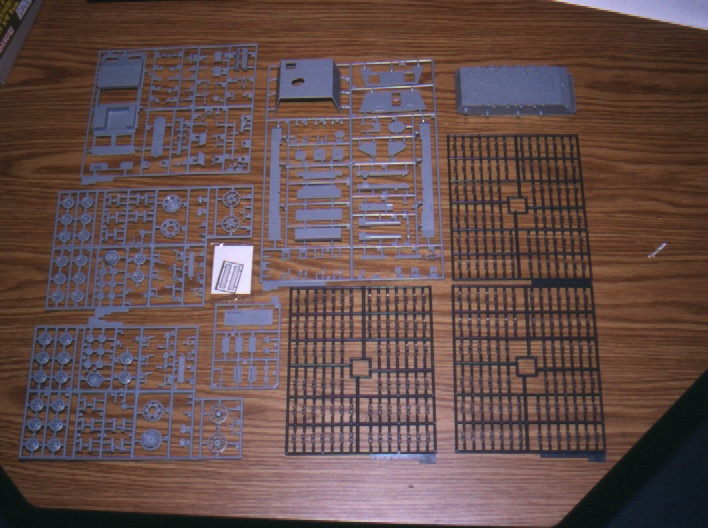
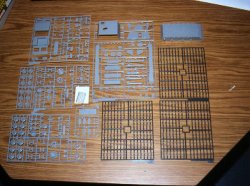 The kit contains three sheets of black track links, five sheets of gray parts, the lower hull, one sheet of metal etch parts, decal sheet, assembly instructions and color sheet. The kit is of a hard plastic with some molding lines. As will be noted below, there was some flash on the parts, but not excessive. There were a large number of injector pins used in the molds requiring more than usual sanding. Overall the kit appears to be a good representation of this vehicle as depicted in the various photographs I found.
Assembly
After washing the parts I proceeded to assemble the kit generally following the instructions provided. The suspension parts are first mounted to the hull. As mentioned, there are an unusual number of injection mold fill points. This was especially evident on the Idler wheel, as there is a fill point between each of the spokes requiring extra care in removing. Some flash was also evident on the road wheels and other parts. Do not glue the drive wheels in place when originally instructed. Keep them free so you have some play when assembling the track to avoid the problem of needing a half link. The track assembly is tedious with the individual links but they fit fine, look realistic, and keeping the drive wheel free made it easy to match up the tracks at the end.
 As you proceed through the upper hull, gun and enclosure assembly, be sure to take special care when removing small parts. Because of the hardness of the plastic in this kit, I damaged a couple of small parts using my clippers. Be especially careful with the small hooks that are to be mounted on the upper housing. Carefully scribing of the parts with a knife works. I did not paint the parts during assembly waiting to finish the unit as a whole. Be careful to note points in the assembly where holes must be filled or opened. I used both cyanoacrylate filler and contour putty as appropriate to perform the fills. Watch the assembly pictures carefully. Make sure you have the chassis oriented as shown in all steps. The orientation shifts between assembly drawing steps event though the drawings look similar and if you do not pay attention you may try to mount a component on the wrong side. This problem is compounded as I found some instances of parts being mislabeled when there were several similar parts used in the same assembly step. Just pay careful attention and dry assemble before you glue.
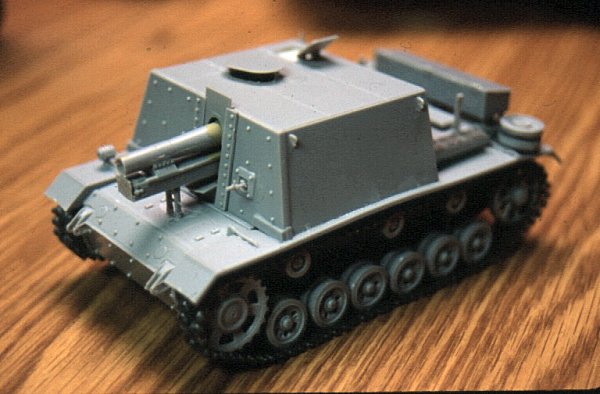
The main gun went together well requiring little sanding to eliminate visible seems. Be careful to get the main gun well mounted before the enclosing it in the housing. It uses a plastic washer glued to a post to hold the mount down. In taking care to not glue the gun in a fixed position, I did not get the washer properly glued. After the enclosure was completed the washer popped off. It would have taken drastic steps to get back inside so I hard mounted the gun barrel to its support bracket. The result looks OK as long as you do not want to show off the flexibility of the gun. Hold off on the mounting of small exterior tools until the model is painted.
Finishing
After completing the assembly, I finished the model using Tamiya paints. The kit provides a large foldout sheet with a couple of camouflage schemes. The pictures I have seen would indicate the tank was used both with and without camouflage. Given the era, the units were probably manufactured with a dark yellow (Dunkelgelb) finish. I used Dark Yellow (XF-60) for the base. Camouflage was added with Flat Brown (XF-10) and Dark Green (XF-61). I hand painted the rubber surfaces and other small areas requiring special colors. I sprayed the upper hull with Future wax after applying the decals. Small tools and parts that were finally painted were mounted. I then used a very thin flat black wash to accent the seams before a final step of weathering with chalks.
Conclusion
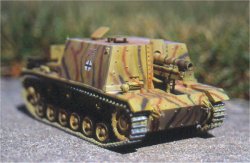 I was pleased with the final result from this kit. The parts all fit well and there is enough challenge to make assembly interesting. It makes a fine addition to my collection of one of the many German, small run tank variants.


