Academy's Boeing 377 in Pan Am's Interim LiveryBy Norm Filer | 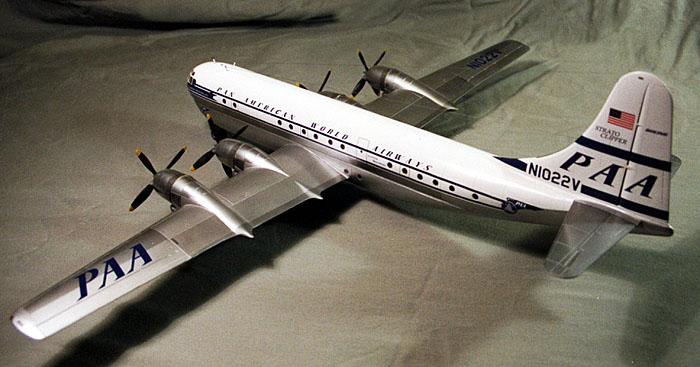 |
Background
Michael Benolkin did a good job of outlining the Stratocruisers history in the January 2000 issue of Internet Modeler. Rather than repeating it, I would suggest going to the archives and pulling up that First Look review.
Since what we built was a Pan American Airlines model, it might be appropriate to outline a bit of history about Pan Americans Stratocruisers.
Pan American was the original and largest user of the Boeing Stratocruiser. They ordered 20, (Boeing model 377-10-26). Then purchased the prototype Model 377-10-19 from Boeing after the flight test program was completed and converted it to a 26 as well
Later, to further complicate things, Pan Am purchased American Overseas Airlines and absorbed their six 377-10-20 versions. They finally ended up with a fleet of twenty-seven, just about half of the entire fifty five airplane production run.
 If the above gyrations seem complicated, the remainder of the fifty-five airplane run is equally complex. Then there is the ultimate disposition list. Oh boy, glad I am not much of a serial number guy.

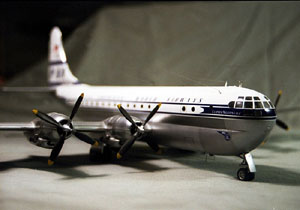
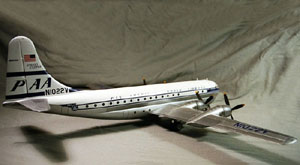
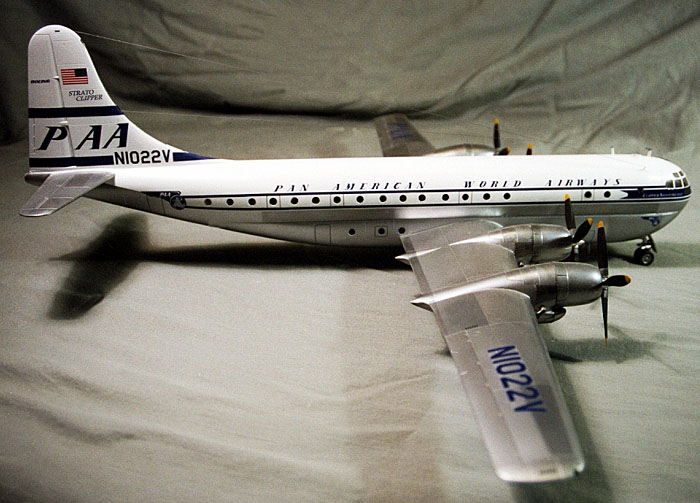
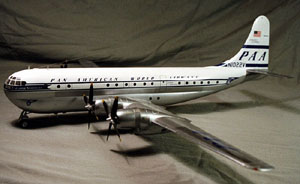
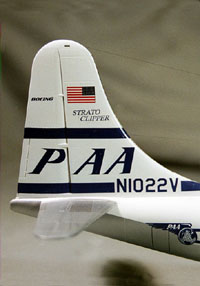
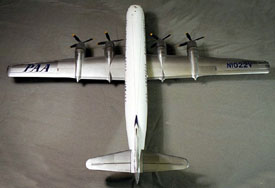
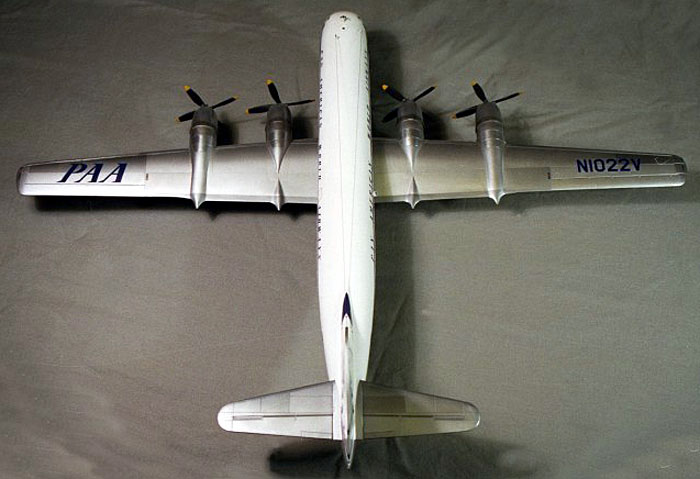
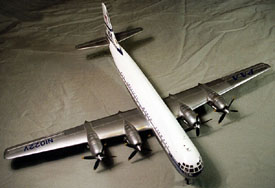
What is important to us is that all the Pan Am birds looked pretty much identical structurally. They never flew any of the square-windowed Stratocruisers used by some of the other airlines. The fleet was delivered in the original all natural metal scheme depicted in the kit. Later they were repainted in what is sometimes called the interim scheme that kept the same fuselage markings, but added a new white top. The tail markings were completely revised to include a large PAA.
When Pan Am placed the very first order for the yet-to-be-built Boeing 707, they incorporated a whole new paint scheme that included more modern white and light blue markings. Since the Stratocruiser would be around until the transition to jets was completed, they too, received the new light blue and white scheme, complete with the big blue basketball on the vertical tail.
All of the Pan Am Stratocruisers were traded back to Boeing for new 707s in 1958-9.
The Build
I have found that big four engine models are difficult to complete. Perhaps it is my short attention span, but I tend toward wanting to move on to something else before the current big project is completed. I usually have one or two of these big projects laying around the work area in various stages. Some will lie there for weeks without anything getting done, and then I pick it up and work a bit. Pretty soon it is back under the pile somewhere again. Once in a while (rare) they even get finished.
Perhaps one of the roadblocks to completion of this one was the overall natural metal finish. They demand almost perfect surface preparation and on large, complex projects like this, that is daunting. But being a Stratocruiser nut off to the workbench went the first of the four Academy Stratocruiser kits.
Fuselage
 The flight deck was the first to get my attention. It is well done, and quite complete. In fact the assembly is a natural to put considerable time into detailing. The arm rests on the pilot and copilots seats, the tables and instrument panel all tend to suggest doing neat stuff. Unfortunately, very little of it will be visible when the model is complete.
Be sure to include a lot of weight in the nose or this big beast will not be a pretty sight on your display shelf. I figured out that it takes about 2 ounces to make this thing sit on its nose gear. After you have installed the nose gear well in one side, there is plenty of room to install all the weight you need.
One area that always requires attention is the clear windows. This kit is no exception and perhaps even required extra effort to get it right. There are a lot of windows on this thing and they are not all the same size. In addition, they have a very subtle curve. Academy provides a very small dot on the top of each clear window. The small dot goes toward the top of the fuselage. I always have some concern with this type of windows as they need to fit well and conform to the curve of the fuselage or they look terrible. The good news was that they fit quite well. In fact the good news on the windows continues for the whole kit. For such a big complex model, everything fits well.
 One hint that helps later is to glue the under fuselage plug into one of the side parts prior to gluing the two fuselage parts together. All of the four Academy kits generally share the same fuselage parts. So the Pan Am bird has a plug, the C-97 has a cargo door, and the two KC-97 kits have the refueling pod. If this part is glued to one of the fuselage sides, the alignment of at least one side can be almost perfect. If you wait until the normal instruction assembly point, after the fuselage is glued together, the part does fit well, but you are still going to need a spot of filler here and there.
Installing the flight deck required a bit of care. Its exact location is indicated by small locator tabs, but mine tended toward wanting to wander around a bit. If you let it happen, this will haunt you later. Also my preference is to delay the installation of the cockpit glass until as late as possible. This kit may be the exception to that. Academy thoughtfully made a significant portion of the fuselage a part of the clear nosepiece. That keeps the glue away from the clear areas, but means the part must be smooth with the rest of the fuselage or it will not look good. I found this to be one of the few areas that required a bit of work to get right. I started on one side and worked my way around the clear part in several sessions. This worked OK, but I still had a very small jog between the fuselage and the canopy at the top. This is where the way the parts were designed helps. The mismatch area will all be painted when finished, so it is a simple matter to sand and fill to a perfect surface. If I were to do it again, I would pay more attention to the lower joint that falls right at the fuselage upper and lower lobe join. In the end this is more difficult to get right than the rest of the canopy. This is especially around the front, where there is very little room between the glass windows and the seam.
 The little-bit-at-a time system also works well for the joining of the two fuselage sides. The bulkheads and wing spars need to be in the right places, and really strong. I applied a lot of super glue around these parts to be sure they are solid. I spent some time test fitting the two fuselage sides and found some small areas that required a bit of adjusting to get as good a fit as possible. The area around the nose wheel well is not matched perfectly and required a bit of adjustment, and later filling. A slow and careful effort here is important. There are a lot of matching stuff that all will require near perfect alignment. Get it wrong and the mismatch is difficult to impossible to cover up or correct later. The out of sequence installation of the under fuselage plug helps here, as does whatever canopy fitting you were able to do. I used liquid cement and started around the canopy, worked my way to the rear on the upper fuselage and then down the belly. I would glue and tape, check and then let it dry before doing more. All the time I was thinking of having to make all this into a perfectly invisible joint because it was going to be natural metal. The fit of the two parts is really very good. It just is big, complex and takes some planning and careful work.
Wings
 The wing parts are common to the Academy B-29 and the B-50 kits. Having built a couple B-29s and one B-50, I felt on comfortable ground here. The top and bottom wing parts go together very well, but the small trailing edge flap upper and lower parts are not a particularly good match with the wing. Academy instructs you to assemble the wings, and then install the flaps as a pre built assembly. If you do it this way, it is very difficult to get the lower wing flaps to fit well, and the upper flap part requires a lot of work in a very visible area to get to fit even decently. Here is the best way to do them. Glue the upper and lower flap parts to the upper and lower wings before you glue the wing parts together. The flat mating surfaces between the flap parts and the wing parts makes this very simple. You can align everything perfectly, using clamps to hold it in place and then glue it without a chance of mismatch. Then you can assemble upper and lower wings and spend a lot less time trying to make the upper wings look good.

The location of the engine nacelles is somewhat difficult to determine on my kits. The lines look faint, and crude in places and not visible at all in other places. A bit of attention will keep you out of trouble here.
Engine Nacelles
All of the nacelle parts are location specific. Dont just start gluing parts together without careful study. The parts are a bit flimsy, and require careful alignment. I found that assembly of the front, and then later the rear end worked pretty well. Afterwards I found that they stayed flexible enough to bend around a bit to get them onto the wings in the right places. That its gotta be perfect fit, cuz its silver was in the back of my mind. And again Academy did a really good job.
 As long as were working on the nacelles this is a good place to make a recommendation. One of the failings of the kit is the rather poor effort around the exhaust/supercharger area of the engine nacelles and cowlings. Since this kit was completed The Cobra Co. has released a replacement set of engine cowling that make this area look right. They provide new cowlings, new and much improved exhausts, a nose wheel steering yoke that Academy completely missed, and perhaps the real clincher, a new set of correct props. More on those darn props later.
Another aside worth noting: if you screw up the nacelle assembly process, that B-50 kit on the shelf will not be of any help at all. For some unknown reason Boeing switched the supercharger/exhaust from the port to the starboard side when they built the Stratocruiser. This makes the whole thing different between the two kits.
Final Assembly
One great thing about this kit is the fit of the wing to the fuselage. This is a straight butt joint. No smooth wing body fairing to worry about and the fit is just about perfect. Since this is such a big hummer I decided to delay this until the very last. In fact it was all painted and decaled before it was glued together. And it worked well. One of the bad things about big kits like this is I am always snagging parts on stuff as I rotate it around and handle it. The rug monster usually wins these battles and I am left with finding or making a replacement. Working with just the separate parts was a big help.
The main gear struts are a bit of a challenge. The gear door struts (parts C44) are difficult to determine exactly where they go. The location of this part also helps locate the main gear struts. After several abortive attempts, and some frustration, I finally ended up installing the main gear struts, then the C44 part, putting it where it needed to be for proper alignment, then finally the part C34 V shaped brace. It will work, but it is difficult to get right. Oh yeah! If you dont get it all right, one or more tires will not touch the ground! If it isnt too bad, subtle sanding of the high tire can fix this.
Painting and Finishing
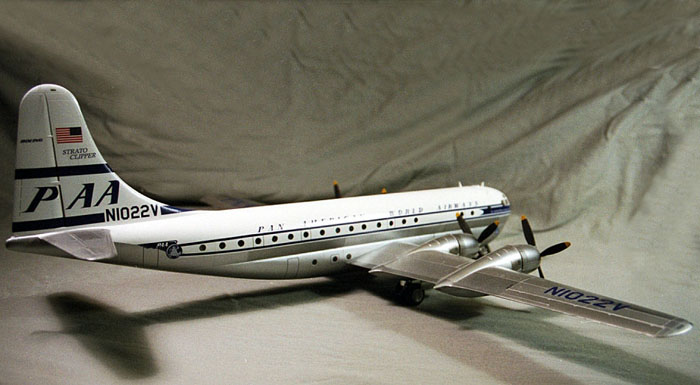
As I mentioned above, these big complex projects sometimes exceed my attention span. At this point the big monster had cycled past my work area several times and sat around several more times. At this point Gerry and I made a deal. He would finish the thing and add it to his growing collection of Pan Am airliners, and I would go to work on the computer and ALPs printer to make a set of tail markings for the interim scheme that had the much more appealing white top. He did and I did. The results are the much more colorful model you see in the pictures.
 Gerry spent considerable time sanding, polishing and getting it ready for paint. The white is automotive lacquer and the silver is a combination of several different silvers and Bare Metal foil here and there to provide the multi textured appearance of aluminum.
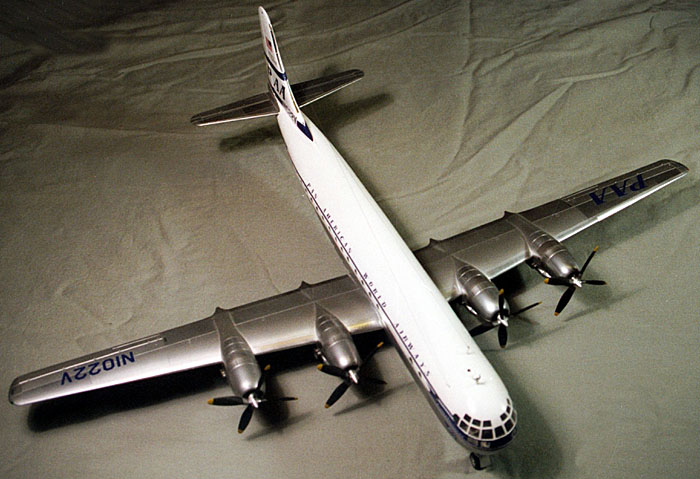
The white is one of the highlights of the build. It is beautifully smooth and has a soft sheen that enhances the overall appearance. One advantage to using the automotive lacquers is they sand and rub out to a fantastic finish. The car model builders have been doing this for years with fabulous results, but us airplane guys seem to lag a bit. Well, maybe it is just me that is slow.
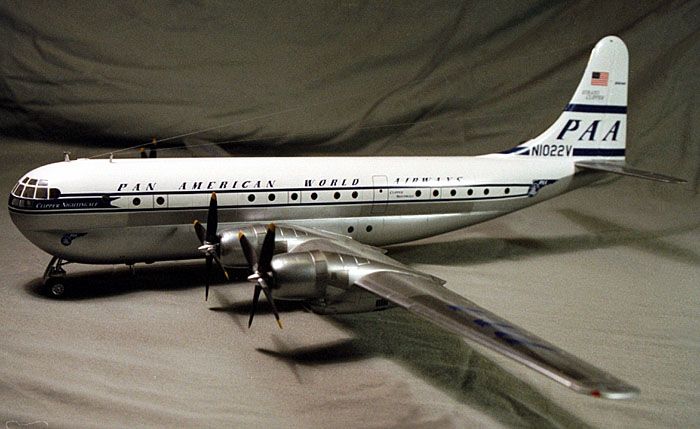
The kit decals are a bit of a project. They are excellent decals, just rather large in places and alignment is important. (Where have we heard that before) Academy cut out the decal film where the windows go on the side stripe. This does help, but it takes some care to get everything lined up. Also, since we were using the side stripes, but on a white topped bird, the narrow white stripe on the bottom of the blue stripe was fun. We replaced all of the tail markings with new decals printed on the ALPs printer.
The final question was those incorrect props. After looking around for a possible replacement, we finally just used the kit provided ones. It is my opinion that Pan Am did not use this prop. But at the time this model was completed no one else had a correct one either. The Cobra Co. replacement set mentioned above is the perfect choice. Due to the way they are assembled, replacing these on our kit would be almost a complete rebuild, so this one sits with the wrong props. If you choose to do this bird, by all means go with the Cobra parts.
Conclusions
It is big, it is modestly complex and it looks fantastic when finished. With a bit of attention to alignment, and surface preparation it could be a very impressive addition to your collection. The problem areas are all rather minor.
Now that the kit has been around for a while, there are a few after market items available for the kit. The Cobra cowlings and exhaust parts and props are almost a must have. Paragon has done a really neat set of flaps for the B-50 kit that are a drop in fit on the 377. Like some other aircraft, the 377 often were parked with the flaps lowered and the added busyness really adds to the appearance.
This scale is probably not the first choice of most airliner builders, so markings for the other 377 airliners are not common. Liveries Unlimited has done the basketball Pan Am scheme, and there is also a set of the square windowed Northwest scheme and a BOAC bird from Flying Colors.
Academy has done a great job with the B-29, releasing several different alternatives. Then they used a lot of common parts to turn out another winner with the B-50 series. Now they have finished the process with a really fine Strato series. If you like the big Boeings, you have to have this one.


