Building the AER 1/72 SU-85By Matt Bittner | 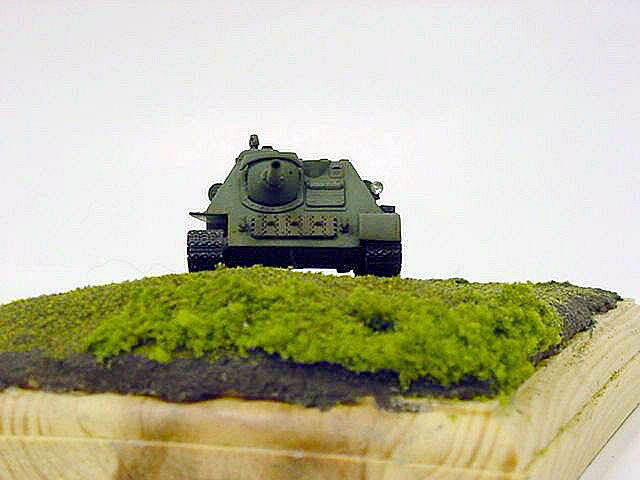 |
History
The SU-85 was based on the SU-122 (which in turn was based on the T-34/76). It was found that the best gun for penetrating the armor of the German "Tiger" was the 85mm AA-gun. So, tests were conducted on mounting the 85mm gun onto an SU-122. The tests were successful, and the machine known as the SU-85 saw action for the first time in September 1943.
 The Kit

The AER (now Eastern Express) SU-85 consists of 133 plastic injected pieces, including link and length track. Everything is well molded and there is little flash present.
I also used the Eduard photoetch set for the AER (again, now Eastern Express) SU-100, which is a little too large for the SU-85. (This is because there are two different companies that made the molds for AER. One company did the SU-85 (and now T-34/76) while a different company made the molds for the SU-100 and T-34/85. The SU-100 and T-34/85 are a tad larger than 1/72nd, and also have the incorrect spacing for the road wheels. The molding for the SU-85 and T-34/76 is extremely well done and accurate.)
Construction
Since most small-scale tank kits come with hollow fenders, it was imperative to fill these in and blank them off, so you couldnt see all the way through. This was 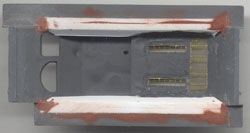 accomplished with sheet styrene and putty. Once that was accomplished I then worked on thinning the upper, rear hull so when I added the photoetch (p/e) screens, this area wouldnt be thicker than it should be scale-wise. Once this area was thinned, then I worked on removing the plastic grills, and filing and sanding these areas until I could get the p/e grills to work.

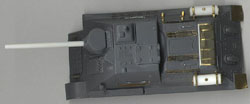
One item with the p/e, though. Since the p/e was designed for the off-scale SU-100, the rear-most grill/grate over the engine is too big for the AER SU-85 kit. So I cut it down to size and added a piece of thin plastic sheet to the cut area to complete the frame. At this point the rest of the p/e grills were added. I couldnt use the p/e front-most fenders because on the SU-100 theyre squarish, while theyre rounded on the SU-85. Instead I cut one off on the left side, and thinned the fender behind it. Plus I thinned the right front-most fender (or mud guard) until it was more too scale. I was able to use the p/e rear mudguards since they were squarish on both machines. I bent one a bit and added a dent to the other to give it the look of it having been shot at.
 While I was working on the cutting, thinning and gluing of the grills, I also worked on the road wheels, carefully cutting them from the sprue and making sure they stayed round. These were then glued together, and after the lower hull was built up and both the wheels and lower hull painted, the wheels were added to the lower hull.

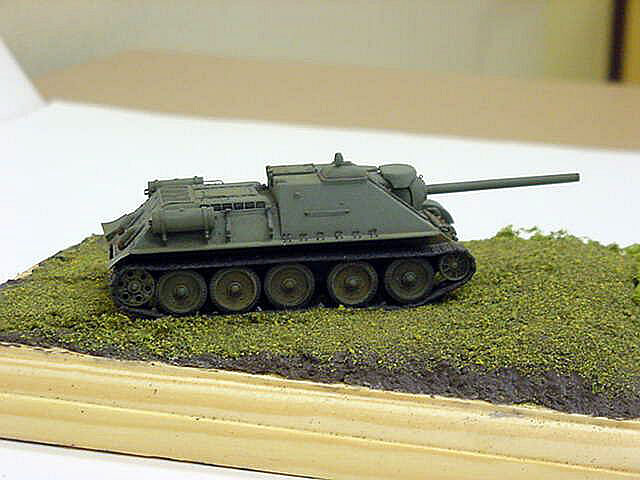
Work then continued on the upper hull, adding more of the p/e items as well as some of the smaller kit items. I decided not to roll the p/e extra fuel tanks, instead replacing them with round sprue tube. I then added the p/e ends and handles to these, and then using the p/e supplied mounting hardware, glued these to the upper hull. I did have to replace the main barrel, as the one with the kit (actually, I have more than one SU-85 kit, and that barrel was also flawed) was out of round. I chucked a piece of round sprue into my Dremel to get the taper then drilled the end of the barrel to make it somewhat hollow. Handholds were replaced with wire, as the kit ones were out of round and too thick, and I didnt like the flat p/e ones. I also hollowed out the periscope ends on the upper hull.
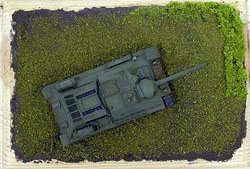
 Now the upper hull was reading for painting. I used Polly Scale Pullman Green, found in their model railroad range. Once the bottom hull was dried, I then painted and started to glue on the link and length track. Unfortunately Eastern Express does not give you enough link and length track, and youll have to use some of the separate links found on the regular sprue. This is a definite area to dry fit, as I had to remove some of the teeth from the areas where the separate track touched each other. Plus I had to enlarge the holes for the sprocket teeth (alternatively you could cut away the teeth something I did not wish to do).
 Finishing
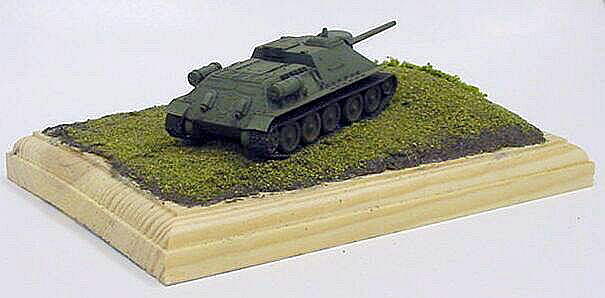
Once the tracks were on, I could now glue the upper hull to the lower hull. The tracks hide most of the gap where the two meet, but I had to give some attention to the gaps around the drive sprocket and return roller, since this area was visible (especially in the area where I cut the front mud guard). I then used a combination of oils and pastel chalks for weathering, as well as some lightened Pullman Green.
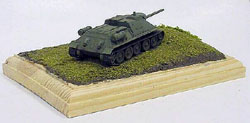
I then popped out some of the rivet detail using graphite sticks. The base is varnished wood with a layer of Celluclay. The grass is Woodland Scenics held down with thinned white glue, as is the bush toward the front of the base.
 .....
.....
Conclusion
This was a fun build; although with the extra work it too awhile. Personally I find this level of work a necessity, as it helps to bring the small-scale armor more to life, and look less like toys a comment I find extremely annoying when describing small-scale armor.


![]()


