Building MAC's 1/72 |  |
 Introduction

An earlier edition of Internet Modeler provided both an in depth preview of these kits and some background on the Phönix D.I and D.II.
These two kits are so similar that it seemed reasonable to build them simultaneously. The differences are confined primarily to some of the kit part's shapes: wing's profiles, headrest and horizontal tail to name a few. Construction, however, is virtually identical. Even the paint schemes and the methods used to produce them have obvious similarities.
The Cockpit Interior and Engine
 The kit provides excellent interior detail that can be supplemented according to the builder's taste and skill. There is a photoetch sheet that contains a seatbelt, control stick handle and foot rudder control. Unlike their Pfalz D.III and D.IIIa kits, MAC got the positioning and shape of the floor piece correct. This piece also provides a mount for the engine. I sprayed the interior of the fuselage clear-doped linen (CDL or light beige), the seat leather brown, and the foot rudder and control stick black with a dry brushing of aluminium. I painted the seatbelts sand with aluminium for the buckles, and the instrument panel black and the clear acetate depicting the dials, white.
 One of the great things about many Austro-Hungarian World War One aeroplane subjects is the exposed engine. The kits engines are identical and excellent, and two are provided in each kit; just as well because I busted a set of intake pipes trying to drill out the ends. I painted the engine "Engine Grey", which has a blue hue and then dry brushed with burnt aluminium and aluminium. When closing the fuselage, I had to manoeuvre the engine and Dremel out some of the fuselage to ensure the engine fit into the fuselage. I added the intake pipes later and painted them copper. I also added a pipe running the length of the engine using thin piano wire.
Fuselage and Flying Surfaces
 After closing the fuselage, I added the lower wing, which has convenient locating pins and holes in the fuselage. I found the fuselage seam difficult to hide following the usual puttying and sanding procedure. I used typewriter correction fluid to hide the finest cracks. Despite my best effort, a slight indentation remains on the underside down the centre of the fuselage. I would advise anyone else to use a piece of plastic card along the inside of the fuselage to facilitate joining the two halves.
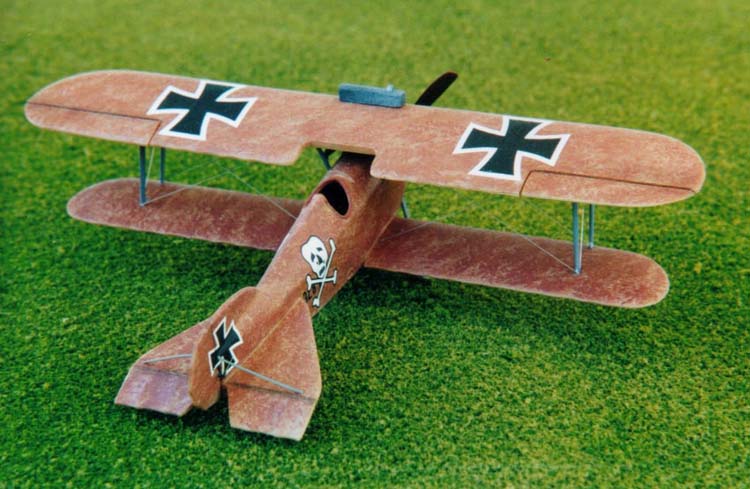
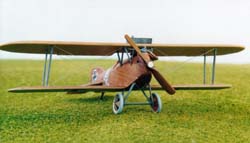
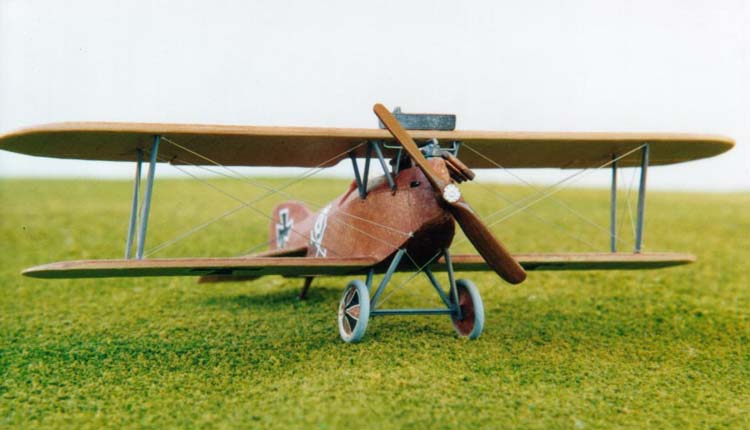
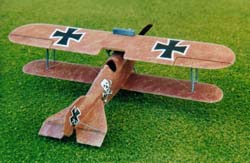
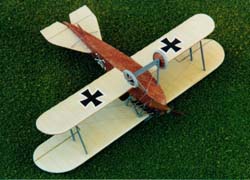
 I scored the wings ailerons along their joins and bent them to re-position them. I prefer this to cutting them off entirely, rather they are bent and the join is reinforced with Pro-Weld administered with a Touch'n'Flow applicator. I sprayed the wings and tail undersides CDL – I used Misterkit's British CDL. This is not the first time I have used the product and I find it to be most satisfactory. It has a reasonably smooth texture and it is also fairly durable for an acrylic paint. Once that was dry, I masked off the CDL and painted the fuselage and upper surfaces of the wings. For the Phönix D.I, I used a base of Misterkit "Albatros Red Brown". Once dry, I used an old brush to add splotches of enamel paint: first my
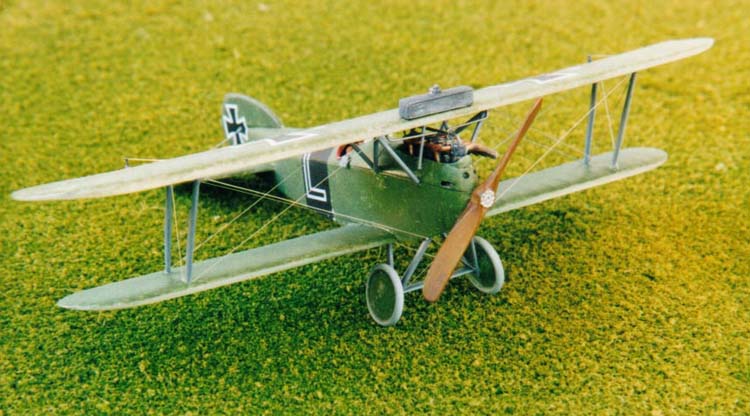
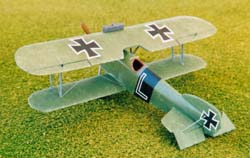
 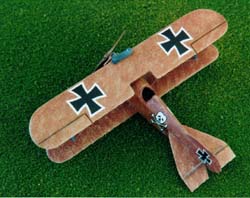 own CDL mix (sorry it is old and I cannot remember the recipe) then brown (Humbrol 70) and finally another shade of brown (Humbrol 113). The Phönix D.II was given a base of Misterkit "Phönix Dark Green". I then "splotched" this with enamels: CDL, then Testors Flat Green and finally Model Master Dark Green. This was my first attempt at this sort of camouflage coverage and I was pleased with the results.

Top Wing
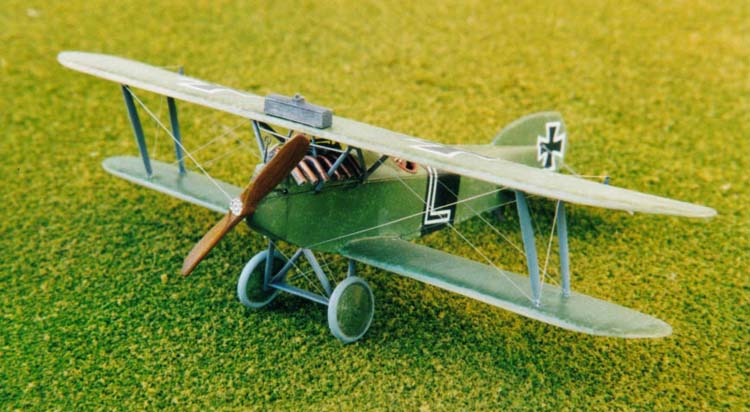
Once I completed painting, I commenced the most difficult episode of building a biplane: mounting the top wing. This is easier for single bay biplanes such as the Phönix D.I and D.II 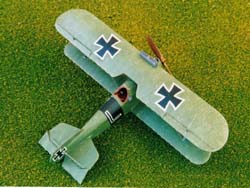 but nevertheless, I usually find this a mildly "exciting" experience. I used regular Testors glue in the orange-coloured tube, placing small amounts on the locating holes in the upper wing. I glued on the interplane struts, which were painted dark grey, and waited for the glue to set up a little. The benefit of using Testors is that, unlike superglue, you have some time to make the inevitably necessary adjustments to the relative position of the wings. I turned the top wing the right way up and after putting small amounts of glue in the locating holes of the lower wing; I guided the struts into place. I used several cassette tapes to act as a jig and support for the assembly and left it to dry. The next day, while attempting to add the cabane struts, the assembly dismantled. I repeated the process but added Pro-Weld using the Touch 'N' Flow applicator, at the ends of each strut this time. I did not use the kits cabane struts: they did not fit and I easily constructed replacements for these "N" shaped struts.
Detailing and Decals
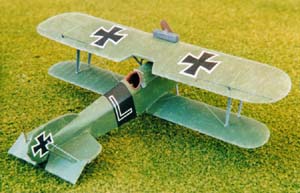
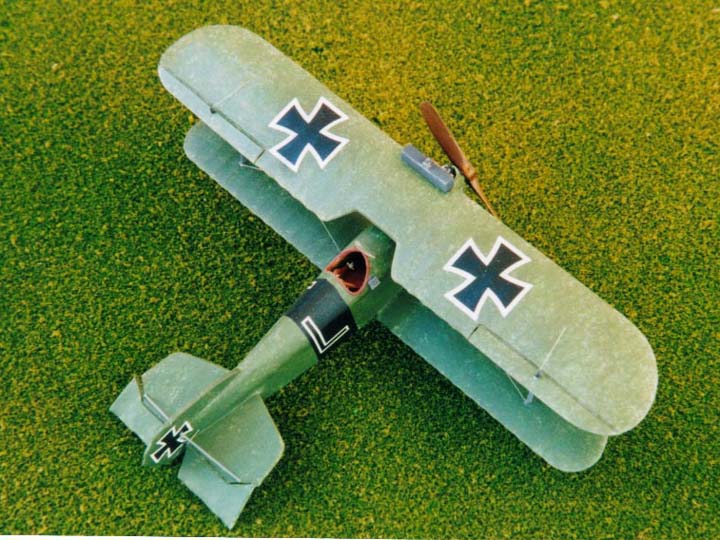
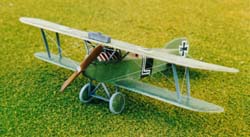
 All the decals were applied prior to the top wings being glued. I covered the model in a couple of layers of Future to help the decals lay down and there were no problems. I selected one of the kit decals for the D.I; namely, 328.26, because I liked the wheel hub decals. For the D.II, I chose the Linke-Crawford scheme depicted in the Datafile on page 13. The black and white "L" decal was taken from the Toko Aviatik Berg D.I kit. I added some extra piping made from piano wire for the engine exhausts. The exhaust on top of the upper wing was painted engine grey and then dry-brushed with aluminium. I also added a flare rack on the D.II made from thin plastic card and a few pieces of .020" plastic rod. The undercarriage was straightforward to assemble and glue onto the fuselage, the wheel hubs having been painted the same colour as the fuselage (brown and green camouflage). The rigging was made from .005" stainless steel wire from Small Parts.

Conclusion
 These are outstanding kits. The molding is excellent, the fit is good and the detail is right on the money. There are not too many opportunities to model Austro-Hungarian World War One subjects in injection molded kits, and MAC has filled this gap admirably. Aside from the kit's decals, which provide a few choices, there are several excellent schemes and the Datafile covers both aeroplanes. I recommend these kits.
Acknowledgements
I would like to thank Peter Plattner for his help and patience in answering my myriad of questions on his techniques and colour recipes. Those wishing to view some truly wonderful examples of World War One Austro-Hungarian models may visit his site
I would also like to thank the members of the World War One Modeling discussion list: in particular, Steve Perry was most helpful. The discussion list is run by Allan Wright; courtesy of the University of New Hampshire. All mistakes that remain are my own responsibility.
References
-
Peter M. Grosz. Phönix D.I-D.II: Windsock Datafile 31." Albatros Publications Ltd., Berkhamsted, Hertfordshire, U.K. 1992.


![]()


