Classic Airframes 1/48 Lockheed Hudson Mk.IBy Michael Benolkin | 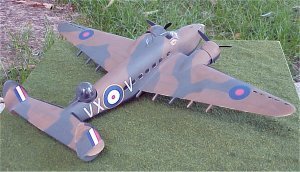 |
Part Deux
When we left off last month, we had finished assembling and preparing the various sub-assemblies. The nose and tail sections were also installed on the fuselage. The area where the leading edge of the horizontal stabilizer mates with the fuselage required a bit of filler with sprue bits and cyano and the result was a beautiful join.
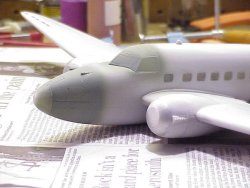 The nose section was another matter. As I mentioned last month, the nose halves are molded as top and bottom. This allows for some height adjustment to align to the height of the nose. In this kit, the height alignment is great. It is the width that needs a little adjustment - the nose is a little too narrow for the front of the fuselage. I was able to easily compensate with a little filler and sanding to adjust the profile, but on the next kit (and what I suggest to you) I will narrow the width of the front of the fuselage to match the nose. This will prevent the loss of some scribed details and also eliminate the slight width problem with the one-piece cockpit canopy/windscreen. This part is also fractionally too narrow for the fuselage.

When I sand the mating surfaces of the fuselage halves, I will also focus more on the nose to adjust the width at the nose. Taping the nose halves together and doing frequent dry-fits with the fuselage halves should render a perfect fit. As I said, this one step will also improve the fit of the windscreen as well. There will be some minor width adjustments required for the resin interior, but this should provide a better overall model.
 It was time to join the wings to the fuselage halves. I used Testors Liquid Cement to get a solid join, but what was this? The dihedral was steeper on the right wing while the left was fine. I quickly removed the right wing, re-assembled the sanding jig and adjusted the wing root accordingly. This time the wing dihedrals were correct on both wings. The best I can figure is that since I had sanded the same angle on both wings using my jig, I either altered the angle of the fuselage wing roots when I sanded them flush or there is a minor difference in angles on the kit. In any case, this is easily adjusted by sanding the wing at the wing-fuselage joint until you obtain the correct dihedral. This challenge took all of five minutes to conquer.
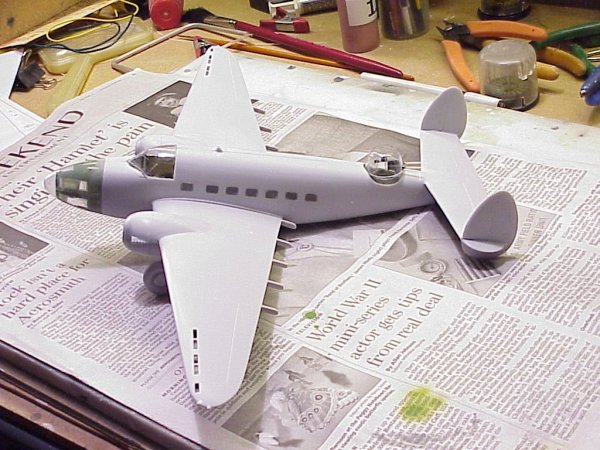
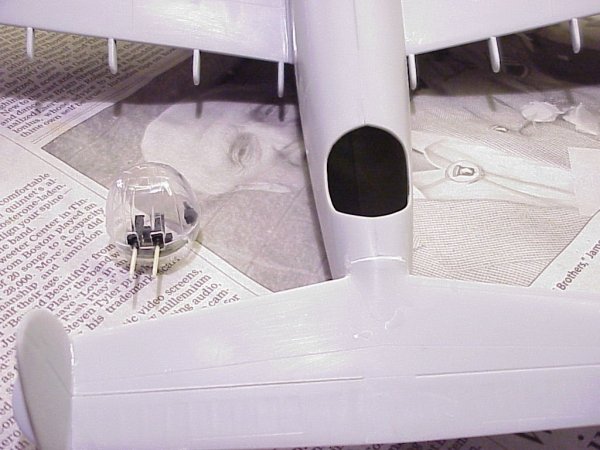
 The openning for the Boulton-Paul turret needed attention next. As you saw in the photo last month, the openning was slightly misaligned, but the openning is also too small. I searched around for a bottle cap that was approximately the size of the turret. I wrapped medium grit sandpaper around the lid and sanded the openning until it fit the lid. This eliminated the stepped openning and rendered a good fit for the turret.
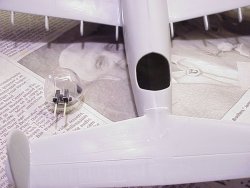
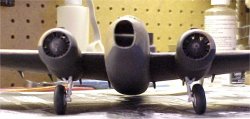
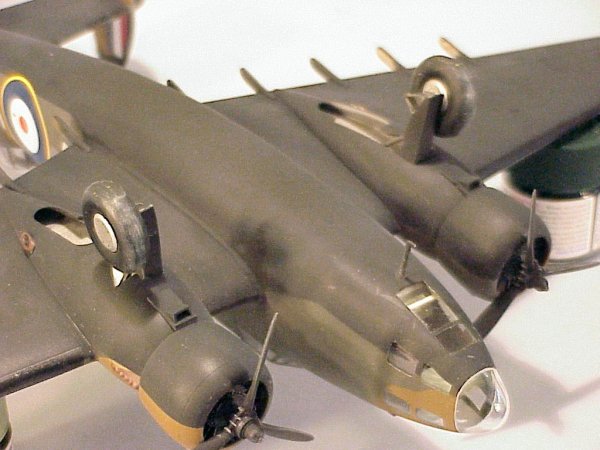
All of the preparations for the landing gear struts paid off handsomely. There is indeed no way to drill out and install the gear after the wing and engine nacelles are assembled. After I installed the oleos onto the main gear struts, I dry-fit them into the wheel wells and attempted to install parts 7 and 8. These two parts represent the early speed brakes that were mounted on the landing gear struts of some aircraft types to help slow the aircraft down and provide enough drag for the pilot to maintain some engine power on approach. These parts do not fit into the openings on the nacelles. I pulled my plastic nippers out and adjusted the openings to where parts 7 and 8 would slip ahead of the main gear struts when the gear was installed. I never did figure out how the triangular gear doors (parts 9 & 10) worked in this configuration so they were discarded.
 The rest of the remaining parts/subassemblies went into place without problem. Now it was time to mask & paint the aircraft! I used plain old Scotch transparent tape, cut into shape with a sharp X-Acto knife, to mask the windows on the cockpit, nose and the Boulton-Paul Turret. The side windows were masked with liquid latex.
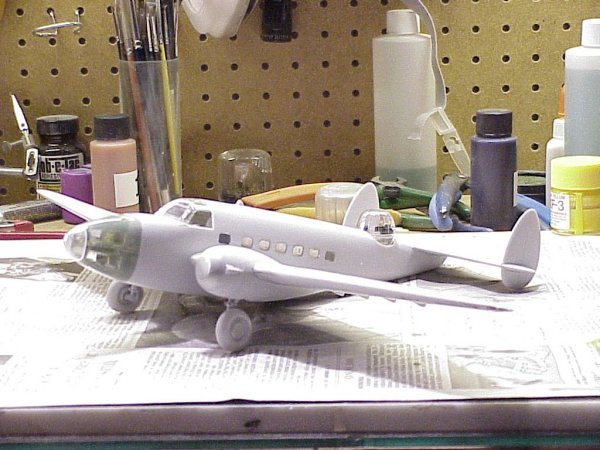
In order to provide a hint of wear and tear, I first painted black lines along all of the upper wing and fuselage panel lines. No point doing this to the underside since it will be all-black anyway. When this had dried, I gave the aircraft the once-over with Testors Model Master RAF Dark Earth. I was torn between two masking techniques that I wanted to try. One is to enlarge the color profiles to 1/48 and cut out masking templates. The other was one I had read on Hyperscale involving the use of liquid latex as a camouflage mask. I decided on the latter.
 My local hobby shop had a large bottle of liquid latex in stock, which I had already used on the windows. I applied the latex onto the upper surfaces of the aircraft and applied Testors Model Master RAF Dark Green. So far, so good.
I re-applied the latex to provide the demarcation lines between the upper and lower camouflage. One of the words of warning was not to use the liquid latex over acrylic paints, but since I had used enamels on the upper surfaces, no problems. Since I wouldn't be masking over the underside paint, I used Tamiya's acrylic NATO Black, which is a few shades lighter than normal black.
 Once all of the paint had adequately dried, I began the process of removing the latex masks. The instructions on the latex bottle suggested using warm water to soften up the masks so I took the model to the kitchen sink and worked a section at a time. The masking came off with no problems though I did wear the paint thin in a few areas.

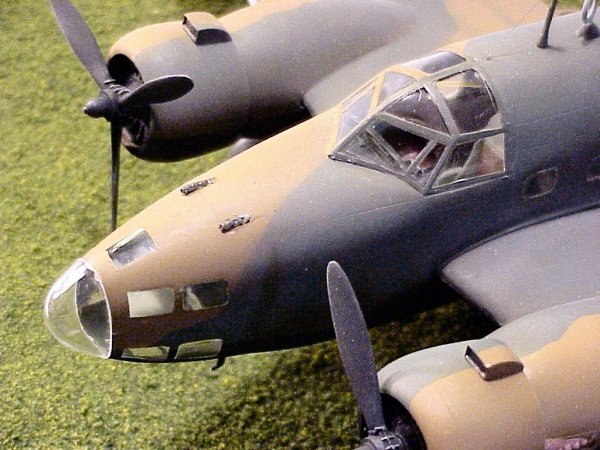
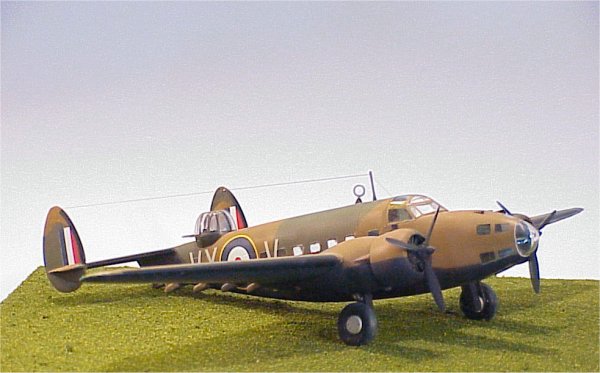
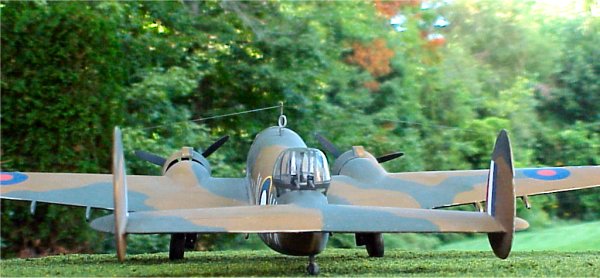
After the model had dried, I touched up the paint, masked the leading edges of the wings and tail with Tamiya masking tape and applied flat black for the de-icing boots. As predicted, the difference in color between the boots and the underside camouflage was negligible. The whole model was treated to a gloss clear coat using Future thinned 60-40 with Isopropyl Alcohol. This provides a solid base for the decals.
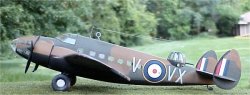 I chose to use the markings provided in the kit and they went on flawlessly. At first I didn't use any decal setting solutions as they settled down nicely and without silvering. They just didn't settle into the scribed details. I added a single coat of Solvaset and after all had dried, the decals had settled beautifully into the details.

 I applied one more gloss coat over the decals, then applied Tamiya masking tape over the de-icing boots. I then sprayed on a mixture of 33% Future, 33% Tamiya Flat Base and 34% Isopropyl Alcohol. The result is a beautiful dull finish. With the Tamiya masking tape removed, the de-icing boots now stand out against the rest of the aircraft.
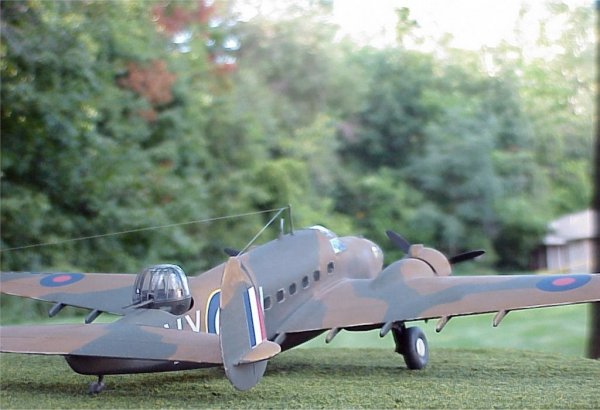
The turret was painted an overall RAF Dark Gray, as was the main landing gear struts.
Now it was time to apply the remaining detail parts and to prove the window maskings. I installed the HF antenna using a fine dark-tinted fishing line. The Hudson is finished!
Conclusion
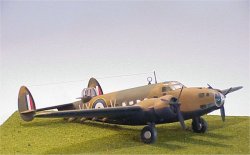
 While this project did span over two months, most of that time was spent working on computer problems and/or other non-modeling endeavors (honey-do's). The Hudson is the best and easiest Classic Airframes kit I have built to date. While there are a few minor glitches in the basic kit, this is extremely common with limited production kits and all were quickly conquered with basic modeling skills.
 I am looking forward to the later model releases of this kit from Classic Airframes as I want to apply the lessons I learned in this project as well as to apply additional details in the main cabin and wheel wells. With the additional decal options also available from Classic Airframes (reviewed last month), there are some very good reasons to pose the aircraft with the main cabin door open!
I highly recommend this kit to intermediate and advanced model builders with experience working with delicate resin detail parts. My sincere thanks to Classic Airframes for providing this review sample.


![]()


