Dayglo Dog: Monogram's 1/48 Early F-86DBy Will Riepl |  |
Overview
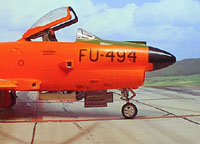
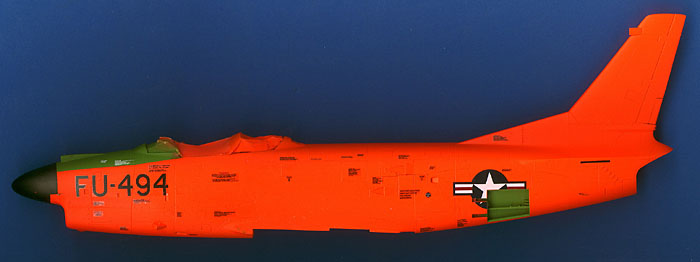
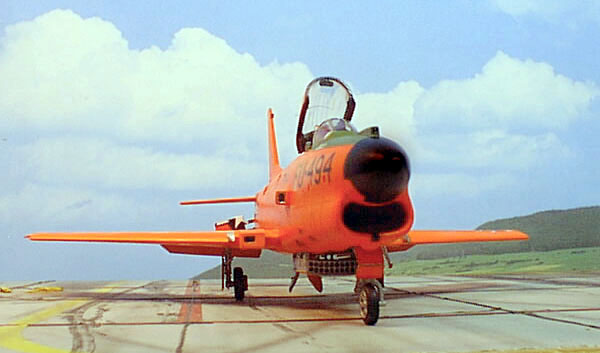
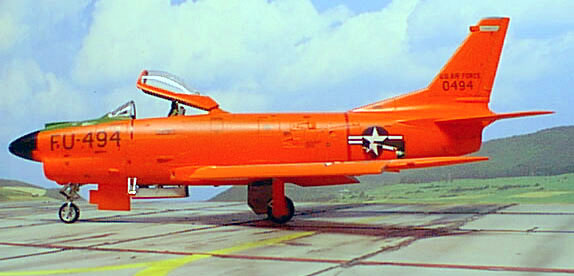
Two F-86Ds were used to test the E-4 fire-control system when it first came out, both planes being from the very first batch (D-1s). The first, FU-493, was mainly used as a chase aircraft for the main test plane, FU-494. Both were painted with bright dayglo orange, but only FU-494 received the overall dayglo scheme (FU-493 was dayglo from the canopy frame aft). Several cameras were fitted to both planes to provide detailed photographic evidence of the rocket launches. When the tests were finished, the dayglo paint was stripped off, the cameras removed, and the planes returned to regular service.
 The Kit
When I first heard that Monogram was going to do an F 86 D in 1/48 scale, all that I could say was Its about time. When I was in high school I would watch the F-86Ds flying over our house, as we were the home of the Geiger Tigers. Because of this close association with the plane I have made just about all the kits of the F-86Ds that are out there from the old Aurora kit to the Lindbergh kit. But the Marusan kit of the F-86D was about the best. It had it all slats, flaps and engine, 125 parts!
 Now we all know that Revell-Germany came out this year with a F86D-45 aircraft with the drag chute fairing (if you didnt know, you do now). The U.S.-released Pro-Modeler Monogram kit has no drag chute door because it represents the first version of the F86D (-1 to the -40). In 1954 the USAF instituted Project Pull-Out, a plan to upgrade all the F-86Ds to be at one standard level. All F-86Ds were sent back to North American to have the installation of the drag chutes and other modifications, basically bringing up all the -1 through -40s to the -45 level.
On to the kit. The only modification that you will have to do to the kit is change the trim tab. Monogram used the F-86D at Wright Patterson Air Force Museum. The aircraft they used for their measurements was serial number 50-477. This aircraft was used for stability studies and it was fitted with an increased trim tab, both in height and in chord. This modification was not on any of the operational Sabre Dogs, so youll have to fix that for an operational Sabre Dog. Luckily this is a simple thing to do. Just sand it flush and rescribe the top and bottom lines.
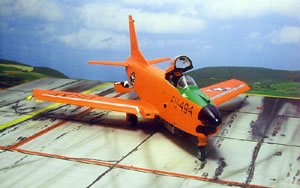
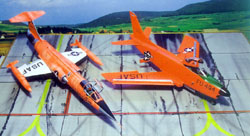 I wanted to do either an odd-looking or a very colorful F-86D. I had one all picked out, but it was a -50 with the brake chute (like most Sabre Dogs). So the next idea was to do it up in dayglo. Since I did a QF-104 in dayglo it would be a nice companion plane. I chose the F86D-1 serial number 50-494. This aircraft was all dayglo and used for testing the E-4 fire control system. This aircraft had seven cameras for recording the data.

The first step was the cockpit. Not too much to do here straight from the kit. I painted it a gray and did some drybrushing to bring out the detail and the instrument panel received similar treatment. Monogram did a good job with all the detail in the cockpit; just a little drybrush work and it will look good. The seat was next. I painted it black; the pictures of the early Ds were black, with a red headrest. I painted the seat frame zinc green, with a little silver dry brush.
 Next up was putting the air intake trunk together. Now you have two choices on these. One you can make an intake cover or two you can leave it open. To leave it open you will have to do some work on the seam, but it can be done. For the intake cover, just take the nose part and put it on some 10-thou plastic and trace around the intake opening. Cut it out and you will have a cover that will fit. At this point do not forget to add some weight to the nose before you glue the fuselage together. As for the nose, you will see two holes on either side of the radome. I could find no reference to those two holes, so I filled them in. Take some 20-thou rod and put in the hole, then cut it off and sand flush. This works better than putty.
Next is the wing. Not too much to do, just open up the holes for the drop tanks. Now you can join the wings to the fuselage. They have a good fit so you will not have to use any putty. On the mine I did not glue them on until it was all painted and decaled. The only tricky part to the wing is tip lights. You want to have a box under the wing when you try to put them on. It will not take too much for the part to go off in rug land.
 .
. .
.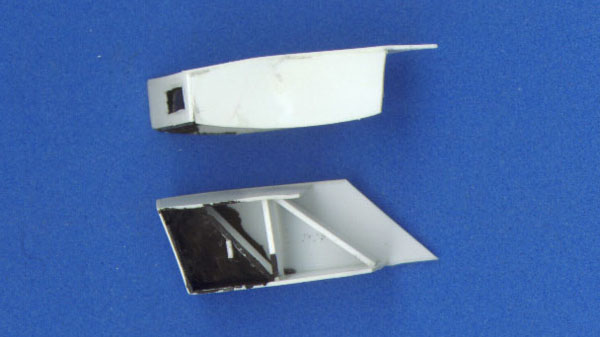
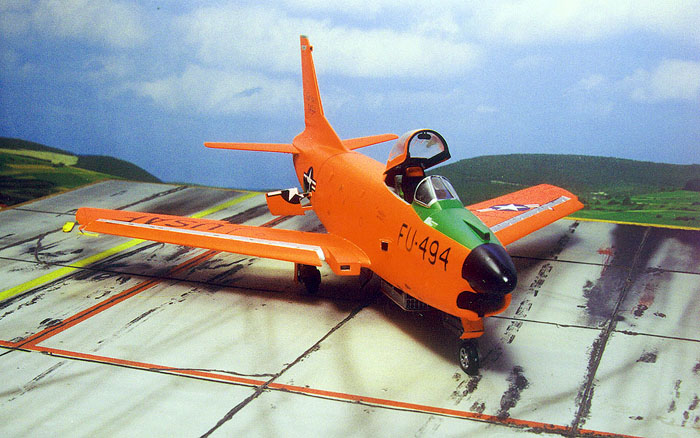
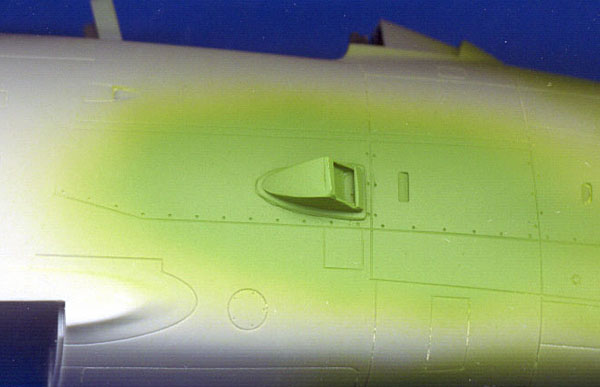
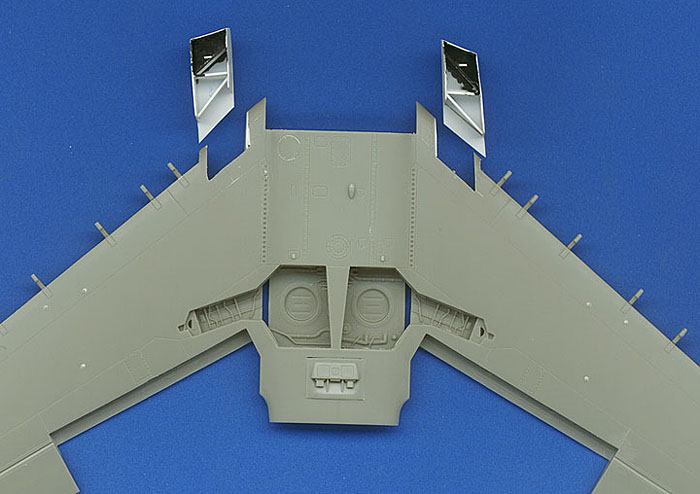
Since I was doing a test bird, I had to make all the cameras, a total of seven of them. The ones on the wing were going to be the challenging ones. The rest of them were not that hard to do. For the wing I made a box with the sides as shown in the picture, then made the front with the clear opening, the top and the bottom. On the inside I made some supports for the side and a back for the wing cut out. I made the top and bottom to overlap the wing, so it would slide over the wing and stay in place.
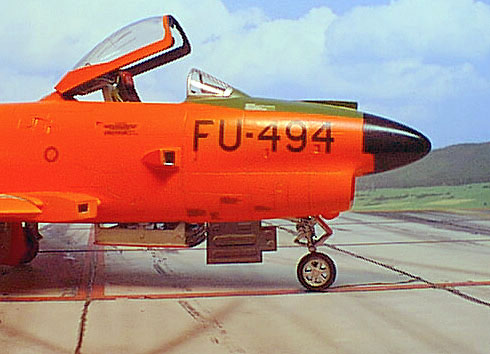
The camera on the right side sure looks like a Bf 109 E air intake. I think you could use one if you wanted to. I just made one out of some plastic. For the clear lens on the camera I used the clear part that was on the F 104 that went on the Sidewinder rail. It fit like it was supposed to go there. The left side camera was just a wedge shape. The tail camera and the top nose camera I made from some Evergreen plastic channel glued together to form a box. I used some super glue for the clear part. There is another camera on the under side of the nose. It looks like it replaced the landing light. I used a piece of round plastic about the size of the landing light.
 .
. .
.
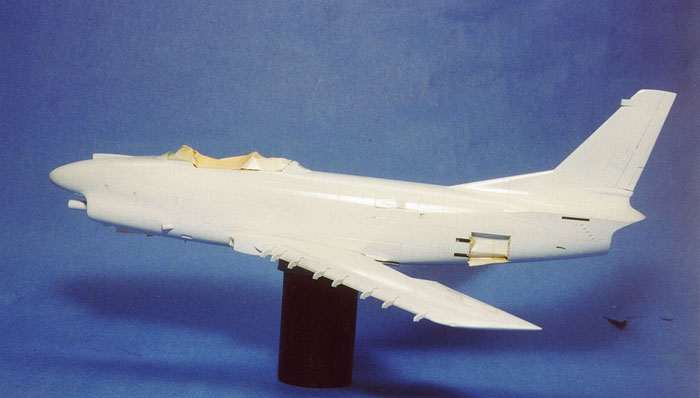
Now for the fun part: painting dayglo! I painted the aircraft all white first, then painted the dayglo. I did not have any of the old Pactra dayglo so I had to use the new Acryl dayglo. It is not as red as the Pactra, leaning more towards orange. But it still looks good.
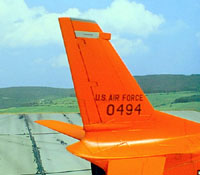
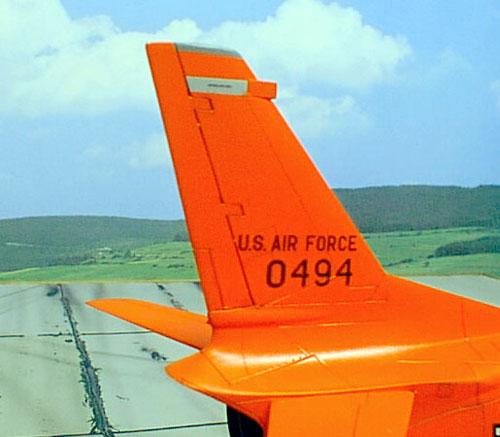
I then put a coat of Future Floor Wax on and let it dry for a day. Next up came the decals. When you start to put the decals on cut them in a row. This will help out when you start to put them on by keeping them in a line and numbered. One thing with these decals is you can read them, so make sure you do not have them upside down. Also you can look at the plans and you can read them also. Use a magnifying glass. I had Norm Filer make me the FU-494 and the US AIR FORCE & tail number on his Alps printer. That sure helped out. Thanks Norm.
 .
. .
.
With that done I then glued the wings, landing gear and dive brakes on, with the rocket pod and canopy following soon after. One nice touch that Monogram did was giving you a canopy rail to glue to the inside. I sure would like to see more of this; it makes the canopy look very good. I did paint the inside of the ADF dome; it was a tan color. I dropped tan paint inside the hole to give the appearance of the color of the  ADF antenna.
Conclusion
So after all these years we finally got a good F-86D, and two of them at that. The Revell Germany is a -45 and up so you can have your pick of what one you want to do. I have not seen any of the new decals for the D yet, but I am sure that there will be plenty of colorful markings out soon.
 Revell USA will have the F-86D with the drag chute next year (July) at $28. That will be nice for those having trouble getting the Revell-Germany kit stateside. As for the kit, I hope that Monogram and Revell will continue to come out with new kits. With the F-86D, the F-15E, and the Do 217 as well as the others in the last few years they have set some high standards for the other kit manufacturers to follow. And the best thing is you do not have to pay big bucks for these kits. So thanks Monogram and keep up the good work.


![]()


