• Menu
  • Home
  • Columns
    • Industry News
    • Editorials
    • Now and Then
  • Features
    • Armor
    • Automotive
    • Aviation
    • Figures
    • Ships
    • Space/Sci Fi
    • Special Reports
  • How To
    • Construction
    • Detailing
    • Painting
    • Finishing
  • First Looks
    • Armor
    • Automotive
    • Aviation
    • Figures
    • Ships
    • Space/Sci Fi
  • New Releases
    • Armor
    • Automotive
    • Aviation
    • Figures
    • Ships
    • Space/Sci Fi
    • Book Reviews
    • Tools
  • Gallery
    • Armor
    • Automotive
    • Aviation
    • Figures
    • Ships
    • Space & Sci Fi
    • Drawings
    • References
Internet Modeler : First Looks: Aviation RSS News Feed

Omega Models 1/48 resin Mosca Bystritski* MB bis

By Bob Pearson

Introduction

This is an aircraft type that I was unaware of until it arrived on my doorstep earlier this month. A quick look through the FMP tome "Imperial Russian Air Service' failed to enlighten me further, so all I know is what is in the kit instructions.

Omega Models present a new scale in our prodution – 1/48. We present Russian fighter monoplane. The plane was the construction by Italian Mosca and Byrstritski. In the east front was by 1916 year.

The MB bis was one unsynchronized machine gun. IN mostly of view was Lewis firing sideward up. total production was about 90 planes. MB bis used Iperial Russian AF and late Red Peasant and Worker Red Army and the some 'white army'."

I could have rewritten the above, but you get the idea, and it is charming (and better than I could do in Czech).
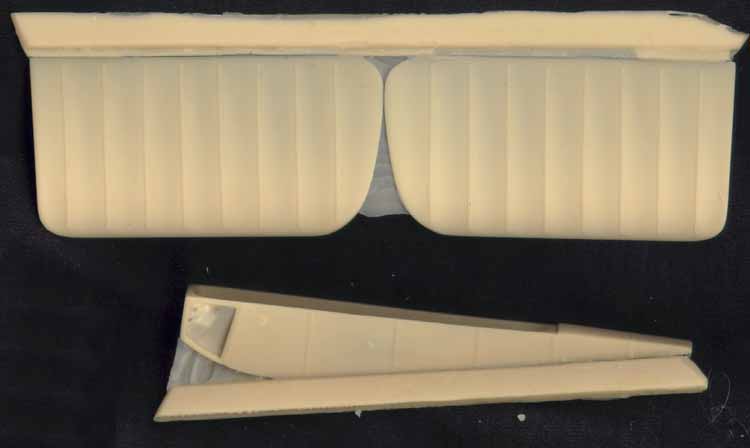
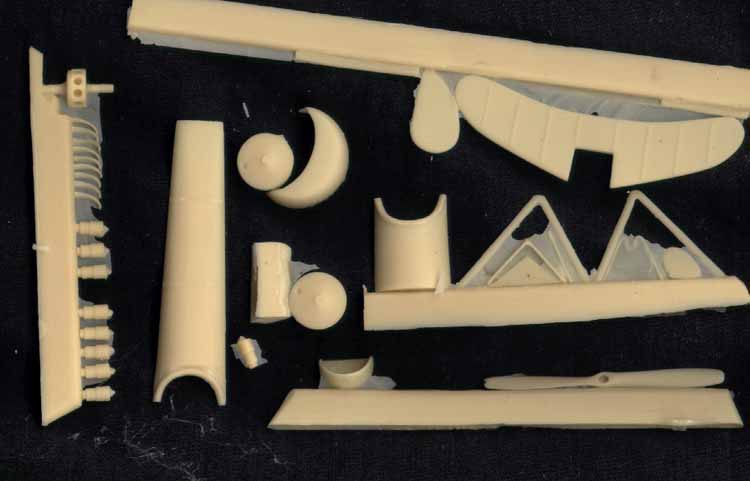
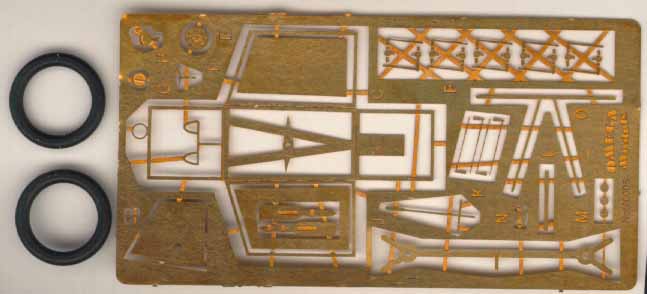
The Kit


The kit consists of 37 or so resin parts cast in light tan resin, two rubber rings for the tyres, photoetch and a decal sheet.

Starting with the fuselage. It has a large opening for the interior which is to be covered by two upper deck fairings, one in front and one behind the pilot. There is external framing, which might benefit by being lightly sanded down. Dry fitting of the fairings show there will be some putty and filler work required. An interesting touch is an open access panel behind the engine. This is to be covered with a pe panel.

The interior is mainly made up of photoetched framing. Speaking of the photoetched sheet, there are numerous wide attachment points on all the pieces on the sheet. Some of the finer details will need to be carefully removed as they may be damaged otherwise. Study the PE parts diagram included with the kit, as some of the items on the sheet aren't actual pieces, but rather are the attachment points. The PE sheet itself contains the interior framework, connecting rods for the cylinders, prop boss, seatbelts, throttle, and some others I haven't figured out yet.

The wings have a very distinct section, and have a thin trailing edge and nice rib detail on the upper surfaces, which may or may not represent the typical bamboo battens in use at the time. Tail surfaces are thick and are probably best replaced with sheet styrene. It is recommended that small holes be drilled into the wings and a pin inserted to join them to the fuselage. Otherwise it is just a butt joint to the fuselage

The engine is in all separate parts consisting of cylinders, hub and intake pipes. Added to this are the PE connecting rods. Have fun putting this together. The wheels have separate resin hubs and rubber O-rings for tyres. A Lewis gun is provided for its offensive power.

Decals are provided for use on all surfaces .. wings, rudder and flying tail. The instructions are on two pages and have a three view drawings, six exploded view drawings showing the various steps in construction and also another one showing all the parts laid out and identified.

Conclusion

At first I had some misgivings about this kit, but further looks show it to be not bad at all. These were based on a quick look at the tail surfaces and the thought that the thickness was indicative of the rest of the kit – not so, the rest is nice, with the wings having a nice section. Close attention will need to be paid to the instructions to figure out where some of the parts go, but other than that it looks to be a fairly easy build with relatively few parts and rigging as compared to other WWI types.

My thanks to Lubos Vinar of HOBBYSHOP.CZ for the review sample

* The second name is given as Berezinski, Bytritski or Bistricki at various times in the kit