
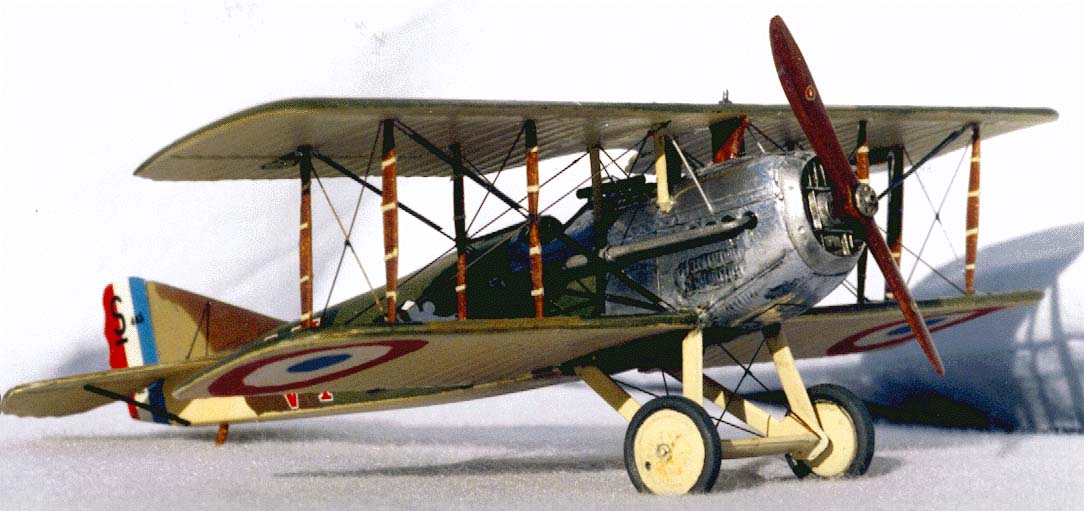
Building a 1/72 Spad 12 by combining the Pegasus and Revell kits.
By Neil Crawford
 |
History
The SPAD XII was developed from the SPAD VII which was only armed with one machine-gun, the SPAD XII was a radical way of improving matters. Mounted between the Vee of the motor block was a 37mm Hotchkiss cannon. A Vickers .303 machine gun was fitted, but was often removed so as to improve balance. The engine was the latest version of the geared Hispano-Suiza V8, power increasing to 220hp eventually. Wings were slightly bigger, and the higher thrust line of the geared engine together with low mounted exhaust pipes gave the Spad XII a distinctive slim-line appearance.
Problems with the SPAD XII were the usual Spad problems due to overheating of the engine, also fumes from the cannon, de Turenne complained that firing the cannon threw the engine out of order. The SPAD XII went into service with selected pilots of the French Air Force and their allies. Many of the French aces tried the Spad 12, but it was tricky to fly due to being nose-heavy; aiming the cannon was difficult, and so was reloading. But victories were scored using the cannon, one pilot got behind a German bomber, let fly, and the plane disappeared.
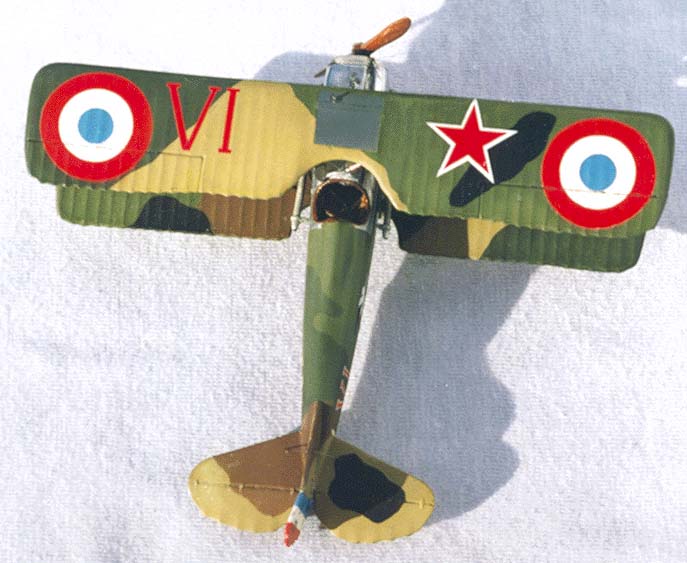
The highest scoring French ace was René Fonck – some experts think that his score was likely higher than von Richthofen's – he was a master of the SPAD XII, shooting down eleven enemy aircraft flying it, more than anyone else. After seeing a profile of his aircraft I knew that was the one I wanted to do, not too flashy like Madon's plane, or too discreet like Guynemer's, just 5-colour French camouflage with a flash of red.
Kit
I ordered the kit as soon as it was announced. For those who don't know, I must admit to being completely bonkers about Spads. After a long wait it finally arrived, but I'm afraid I had mixed feelings when I looked it over. Pegasus have done a wonderful job on the fuselage, as good or better than Hasegawa/Tamiya, the white-metal parts are beautiful, with the exception of the exhaust pipes which unfortunately look like copies of the incorrect Revell parts, I wish he had copied the Airfix exhausts – they are much better. Decals are very good, but unfortunately only for Madon's red machine, I would have preferred decals for Guynemer's or Fonck's machine which are more typical and better documented.
For me it is the wings that were a disappointment, I've been brought up on Revell Spad 13 wings, and anything less just doesn't satisfy me. Compared to photos of the real thing, the gently done "mountains and valleys" representation of the ribs on the Revell kit is perfect. The Pegasus kit just has raised lines to represent the rib tapes, I'm sure you could make a good job of them, but for myself, I just don't like them.
There are a couple of minor faults on the lower wing, the strut attachment reinforcements beneath the wings don't match up with the strut holes on top, they are on the wrong rib. This made me smile, just shows that even professional mould-makers are human! The lower wing is also a rib short compared to the plans in Windsock, but to be honest, after looking at some photos instead of the plans, Pegasus could just as well be right as Windsock.
There are a couple of difficult joints, the top rear fuselage is tricky to sand without losing all the beautiful stringer details, but on the other hand putting the joint on the fuselage side is not much better which Pegasus did on the nose. I imagine Pegasus do as well as they can within their production capabilities, they have certainly captured the racy lines of the Spad 12 extremely well.
Interior
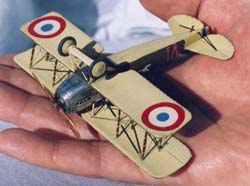
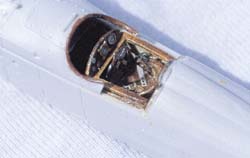 The interior of my model is a combination of Pegasus parts and photo-etched odds and ends. I did go to the effort of making a butt for the cannon, but it was a complete waste of time, you can't see a thing. The Spad 12 is unusual because it uses the Deperdussin system of control, which is a steering wheel for aileron control mounted on a U-shaped piece of tubing connected to the elevators. I did the steering wheel by making a ring of fine brass wire and gluing a cross made of plasticard strip in the middle.

Modifications
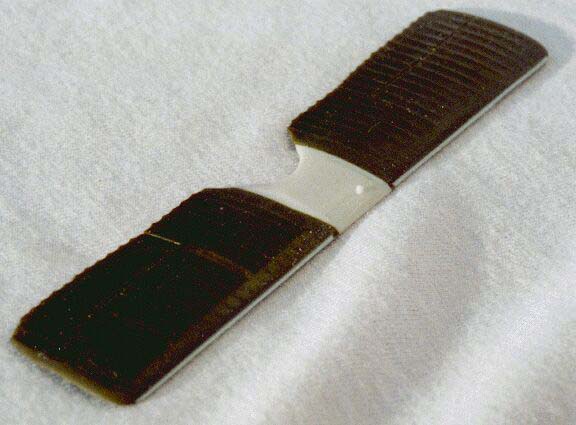
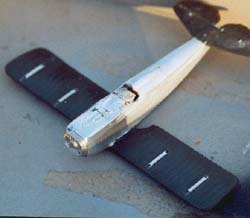
 After a lot of looking at the Pegasus wings and comparison to Revell Spad 13 wings, I realised that the Revell wings had the same distance between ribs, and also importantly the same distance between the strut attachments, so ribs could be safely removed at the tips and next to the centre section. The chord was too large but mostly on the leading edge. So I took a Revell top wing and sawed off the centre section plus about 3mm extra on each side, then sawed off a rib from the tips, 2mm was also sawn off the leading edge. I thought the Pegasus centre-section looked better than the Revell, so I prepared to glue my Revell wing panels to that. First the Pegasus wing-panels were cut off, then small holes were drilled where the joint would be, I cut small stumps of 1mm piano wire that go in these holes and the corresponding holes in the Revell wing panels. It is vital that all holes and wing panels match up exactly, luckily they did, and I could glue the whole conglomeration together. A new leading edge was added from strue, that I just puttied smooth with the rest. The trailing edge matched rather well for some reason, so all I needed to do was a little work with some sandpaper.
The lower wing was easier because it was just a matter of shortening by about 3mm nearest to the fuselage, and about one rib at the tip. It's important to shorten top wings and bottom wings by the same amount so that the struts retain the correct angle. I used the Pegasus fuel tank and lower centre-section, for no particular reason, and did the same metal-pin reinforcements as for the top wing. A disadvantage of using Revell wings is the engraved ditches for the struts which have to be filled and sanded. I read in the Windsock review of the kit that Doug Carrick is doing new Spad 12 drawings, something about the wing-tips should be more rounded, I looked at some photos and rounded off my tips a little more, but I felt I couldn't do much more, you can spend your life waiting for references, at some stage you have to put knife to plastic.
 Changing the wings, means the tail plane also has to be changed otherwise the style of ribbing doesn't match. The Revell parts are a fraction big, but again mostly on the leading edge so easy to sand down to size. I also used the Revell tail, this needed some careful planning, I managed to preserve the trailing edge and cut it down along the joint between tail and rudder.

The turtleback was re-skinned with thin plasticard, the large amount of putty necessary to blend the new turtleback into the fuselage sides is a problem. I also scored too lightly so the stringer detail is mostly obscured by the camouflage paint. At least it completely solved the usual problem with a seam in the middle of the fuselage. While I was at it I made a new headrest fairing in the same way.
Painting
During my constant perusals of Squadron/Signal Spad fighters in action, one of the better ones in this series, I discovered something curious, the nose of Fonck's Spad 12 no.445 is natural-metal. I asked a bunch of experts what they thought, and after much discussion and soul-searching I decided to go for an aluminium foil covered nose. I did the metal nose panels before painting because when I apply kitchen foil, I make a mess, and I often have to remove foil and start again, clean up with alcohol etc. This usually messes up paintwork, so I do it the other way around. If I happen to get some paint on the foil it's easy to clean off. I applied kitchen-foil that I have prepared with Micro Bare Metal Foil Adhesive (I spray it on, but I think it might be better to brush on to the foil quite wetly, the idea is to get rid of brush marks because they show through, when the foil is applied to the model). After applying the foil, the excess is cut off with a (very) sharp knife, do panel by panel, then polish with metal polish. The very nice white-metal radiator from the kit can also be polished and fitted, it matches the foil quite well. Masking of the nose was done with Parafilm
I looked up my paint references, they were Windsock no.3 and 4 -88 (volume 4) and Windsock 1-99 (vol.15). The first are paint samples , and the second is an article by Alberto Casirati about the Ni28, he gives Molak paint numbers. I read both articles then did it my own way, I actually based my colours on the FMP book French aircraft of WW1 (Davilla/Soltan).
Here's my version:
Methuen acc. to Windsock |
My paint mix |
Light Green 3E4, 2E4 |
Humbrol 86. I added a spot of light yellow this time) |
Chestnut Brown 5E3, 5E4 , 6F5 |
1X Revell383 (RAL8015) (merely because I have a tin) 1X Humbrol 142 |
Dark Green 29F4, 2F4 |
Humbrol 86 + black |
Beige 4C5,5D5 (I don't believe this) |
3X Humbrol 62, 2X Humbrol 28, 1X Humbrol 86, Black |
I don't usually write up my mixes, I did it this time to correct the faults in Windsock, I think their beige is much too light. I'm not at all scientific or dogmatic about this, I just mix till I think it looks right.
A little trick I do when using oil-based paints (which is nearly always) is to place my airbrush cup in 5mm of boiling water before spraying, this makes the paint flow much better.
I traced camouflage patterns on to Tamiya tape, then cut out with a sharp knife, these masks were applied in the right places, and patched together, then one by one the colours are sprayed on. Starting with light green, then beige, chestnut brown, dark green and black. It might be a better idea to brush paint.
Tankage
 I read in an old copy of WW1 Aero(107) that Spad tankage was made of 22 gauge sheet metal pre-coated with alloy of 25% tin 75% lead. Often called Terne-plate or roofing tin, it was joined with copper rivets and soldered. You can see on the Fonck photo that it was unpainted on 445, so I painted the header tank and fuel tank grey, then rubbed with silver foil to metallize the paint.

Spads have an ingenious fuel dump system consisting of a fabric patch in the bottom of the fuel-tank, just pull a lanyard and dump. I missed this, but will add a triangular piece of olive decal to simulate this.
Roundel and decals
I'm lucky enough to be a friend of Anders Bruun who has an ALPS printer and the skill to use it. I sent him some scans of the Fonck markings, and he manipulated them into the most beautiful decals I've seen. He also noticed a couple of mistakes in the FMP book "French Aeroplanes of WW1" which had the profiles that inspired me to do the Fonck machine. The star is drawn too big in the FMP profile, and there should be no white outline on the wing numerals. I also discovered that one of the storks legs is missing, it should have two!
When it came to the roundels, I realized that they must be the same colour as the other decals, so I applied the numerals on the rear fuselage to check the shade they would turn out. It was still quite bright red, which was what Anders and I had decided on, I don't believe Fonck was the kind of guy who would fly with "toned down" markings. Unfortunately the French roundels in the kit, and the other Blue Rider decals I have are very brown in tone, so I decided to do my own.
However you do "scratch-built roundels" the problem is cutting perfect circles. I use a compass of the free-swivelling kind, i.e.. it is basically just a needle with a pen-holder swivelling around it. I think this kind is still available in art-shops. Instead of a pencil-lead I insert a small knife-blade, I got this knife-blade years ago in a graphics/art kind of shop, it looks just like a small spear, the knife end can be sharpened on a stone.
 On the Spad 12 I first cut a big circle in tin-foil, and applied it wet to the model (tin-foil is so thin, that it sticks by surface-tension), then sprayed white, next I did a circle the size of the white roundel part, in the middle of that I cut a smaller circle. By doing both the inner circles in the same mask it is easier to make sure the inner circle is properly centred. I cut a circle slightly bigger than the inner circle to use as a cover for that during spraying of red. So I applied the next circle, with a cover over the middle hole, and sprayed red. Then removed the cover, and sprayed blue in the middle. In a perfect world, that would be it, but usually there is some leaking and over spray, I remove as much as I can by gentle scraping with a razor blade. Preferably to touching up with paint I use decal, when I sprayed the red and blue, I also sprayed on to some scrap decal, on this I cut circles only 0.5 mm thick, the same diameter as my painted circles, this I used to patch the edges. Of course you could cheat and cut the circles from decal film, but why do something easily when you can do it complicated!?
The other decals were a doddle to apply. This is the part of modelling I like best, suddenly the model begins to get life, it's not just a dead green bit of plastic. After the decals were on I sprayed over a coat of Revell clear varnish, the mix was about 10%, matte, 20% gloss, 30% white spirit and 30% cellulose thinner. Heated before spraying.
Assembly and rigging
 Assembly was the usual hassle, I try and get the centre-section struts in place on Spads, once they are on you can just snap the other struts in, if they are the right length, which they never are. I finally found myself lengthening some of the struts with the tiny bits I had cut off the ones that were too long! I suppose if I'd used the kits struts it would have been easier, but I prefer to make my own from wood. I used epoxy and CA, usually I positioned struts with CA, then added epoxy for strength. The undercarriage was straight from the box.

I must admit that despite my 14 previous Spads, I've never rigged a single-seater properly, I've always regarded them as easy, and they are, if you stick to single flying wires. It looks complicated but all the wires are short (easy to keep straight) and the long wires can be stuck to the centre of the mid-wing auxiliary struts. I use stainless steel wire, that I pass through a candle to straighten, rigging is then just a matter of measuring with dividers and gluing wires in place with white glue. Always start rigging with the centre-section, that's a little fiddly on a Spad, then work outwards.
Only the seriously crazy need read the next section.
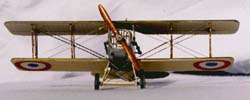 This time I wanted to do double flying wires, and the streamlining spacer pieces between the wires, this makes it rather more difficult. I started by turning the model upside down, this means the landing wires will be tensioned when the model sits on it's undercarriage, the landing wires go from top centre-section to bottom outer wing strut, they also have to run between the double flying wires where they meet, BUT they meet in the middle of the auxiliary strut, and there is no way I'm going to drill through there. I finally worked out that I had to install all wires in half-lengths, and they all had to meet in the middle. So after the landing wires are on, turn the model right side up for the flying wires, these go from the top outer wing strut to the bottom of the fuselage under the centre section. I found it easiest to install these as packages, first half-length wire, then a streamliner, finally another wire, all glued together with thinned white glue. The streamliners were made by heating 1/32 scale contrail struts and pulling to a thin section. Getting the packages in place was nerve-racking because they had to be exactly the right length, usually a little gentle cheating is possible, but not in this case, or you would see a difference in angle where they met in the middle.
Final detailing
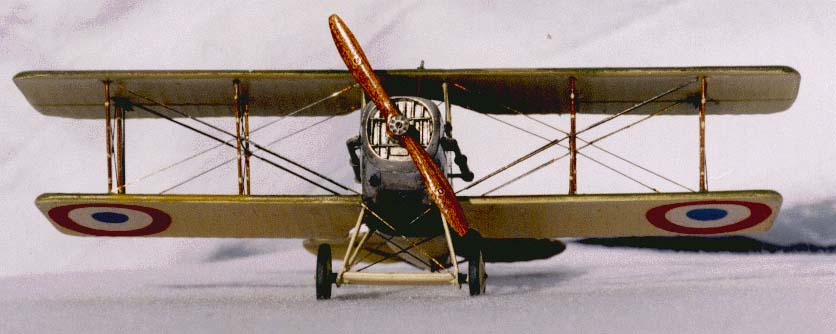
The propeller is made by laminating thin wood, I use cyano-acrylate super glue for gluing the laminations, then just carve and sand till I think the blades are thin enough, and then a bit more. I carved this prop at the same time as I did one for my Schneider, and the Spad boss comes from the plastic propeller that was left over from the Eduard Schneider kit. There is a never-ending supply of small details on a Spad, things like tail struts, tail-skid, Aldis sight, and of course those horrible link-arms down at the bottom of the rear outer strut, and no, I don't know a better way of making them, than fiddling around with bits of stretched sprue till they look OK. The strut bindings are also rather tiresome, these are the light coloured tapes often seen on French aircrafts struts. I make them from strips of decal that I have painted clear doped linen colour (i.e.. cream).
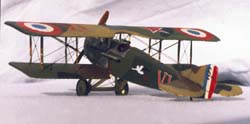
When all the detailing finally came to an end, I took a deep breath and looked at the model, I reckon it looks pretty much like a Spad 12 and I hope you all do too!
Thanks to my wife Ragnhild for lending her camera, and taking some of the pictures, and to Anders Bruun for making the decals, also to many members of the WW1-mailing list for advice and encouragement.
References:
-
Windsock vol.4 3-88.
-
Squadron-Signal Spad fighters in Action
-
FMP French aircraft of WW1 - Davilla/Soltan