The Triple Seven - Boeing's Big Twin: Building Minicraft's New 777By Tim Bradley |
 |
The Kit
 The
long awaited Minicraft 777 kit is finally here. This is the second injection-molded
1/144 kit along with a 1/200 version - the others being the pricey Doyusha
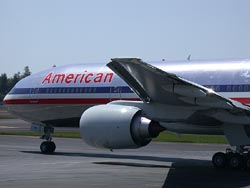
and the smaller Hasegawa. Minicraft's first of three versions of the 777
is the Rolls Royce powered American Airlines. General Electric and P&W
engines will be out later this year.
The
long awaited Minicraft 777 kit is finally here. This is the second injection-molded
1/144 kit along with a 1/200 version - the others being the pricey Doyusha
and the smaller Hasegawa. Minicraft's first of three versions of the 777
is the Rolls Royce powered American Airlines. General Electric and P&W
engines will be out later this year.

Minicraft's last airline kit, the MD-80, was a kit with wonderful scribing and paper thin trailing edges. I was very anxious to see this new standard brought forth on this kit. Unfortunately, Minicraft took a step backwards and used the same people who tooled the Boeing 757 kit. From this evaluation it was determined that I would build this kit "Out of the Box".
The Build
Fuselage
With all airline kits, the nose weight was installed first. The instructions
call for 3/4 oz. of weight, but wanting to make sure there would be a
 positive
forward center of gravity, I added at least one full ounce of lead. The
fuselage goes together well with only a few sink marks to putty up - one
main one at the base of the tail. After the body was glued up and sanded,
I had a hard time deciding to either putty up or re-scribe the heavy panel
lines. I elected to re-scribe them, knowing this looks better in a metal
finish.
positive
forward center of gravity, I added at least one full ounce of lead. The
fuselage goes together well with only a few sink marks to putty up - one
main one at the base of the tail. After the body was glued up and sanded,
I had a hard time deciding to either putty up or re-scribe the heavy panel
lines. I elected to re-scribe them, knowing this looks better in a metal
finish.

The clear windshield piece is a separate larger part as in the MD-80 kit. They also include a windshield decal. The window panels are recessed in, a scale six inches, making puttying them a priority. I can't figure what the logic was for this.
Wings
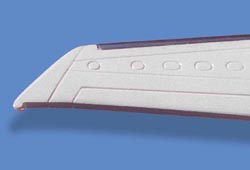 The
wings are one of the kits biggest concerns. The trailing edges are about
a scale one foot thick. When the top and bottom halves are glued together
they look like vacuum formed models wings that haven't been sanded yet.
Thinning the edges as you do in a vac kit won't work here, as the wing
has a "gull" wing design. This was the main reason why this
kit was built as "Out of the Box". This design flaw will kick
you out of competition at any contest. The bottom of the wing has the
flap jack housings molded on the wing. This makes the application of
the corroguard a pain. My kit had large and deep sink marks on all six
of the tops of these housings. The wings have the usual Minicraft mounting
tabs for interlocking the two wings together. This makes the alignment
a snap. The wing to fuselage gap was a little wider than I liked, and
so the wings were glued and puttied. I like to build and paint/detail
the wings as sub-assemblies.
The
wings are one of the kits biggest concerns. The trailing edges are about
a scale one foot thick. When the top and bottom halves are glued together
they look like vacuum formed models wings that haven't been sanded yet.
Thinning the edges as you do in a vac kit won't work here, as the wing
has a "gull" wing design. This was the main reason why this
kit was built as "Out of the Box". This design flaw will kick
you out of competition at any contest. The bottom of the wing has the
flap jack housings molded on the wing. This makes the application of
the corroguard a pain. My kit had large and deep sink marks on all six
of the tops of these housings. The wings have the usual Minicraft mounting
tabs for interlocking the two wings together. This makes the alignment
a snap. The wing to fuselage gap was a little wider than I liked, and
so the wings were glued and puttied. I like to build and paint/detail
the wings as sub-assemblies.

I decided to build this kit with the gear up as I'm a little limited on "ramp space".
What also prompted this was that there is no detail in the main gear wells and the poor fit of the parts. The mounting stud on the gear leg is too long and doesn't fit well in the receiver. It is angled off about ten degrees. The gear leg and the six wheel axle looks like a copy of the Doyusha 777, but softer in detail.
 Another
problem reared it's head when I started to glue on the gear doors to be
shown "in flight". The main gear doors look like they are from
a completely different kit. You can see in the one photo that this part
is way off. I will have to make a set of doors from sheet plastic.
I was a little disappointed in the "grouping" of details on
the gear. The Triple Seven has two very significant areas of attention,
the main gear, with its twelve wheels, shocks, exposed brake lines and
the two massive engines.
Another
problem reared it's head when I started to glue on the gear doors to be
shown "in flight". The main gear doors look like they are from
a completely different kit. You can see in the one photo that this part
is way off. I will have to make a set of doors from sheet plastic.
I was a little disappointed in the "grouping" of details on
the gear. The Triple Seven has two very significant areas of attention,
the main gear, with its twelve wheels, shocks, exposed brake lines and
the two massive engines.

Engines
 .
. .
.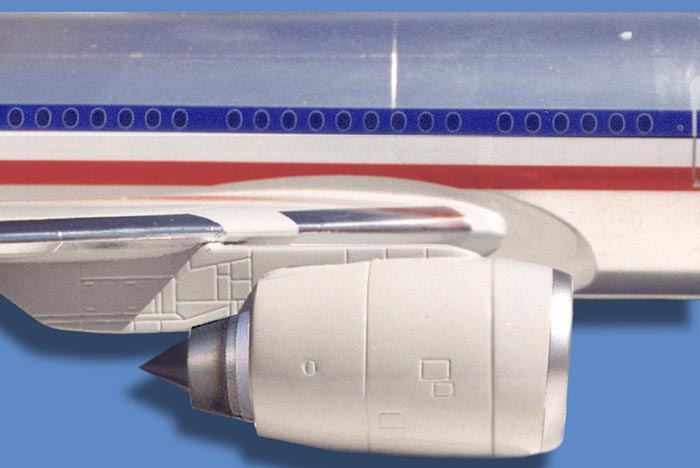
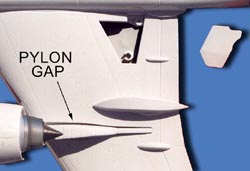
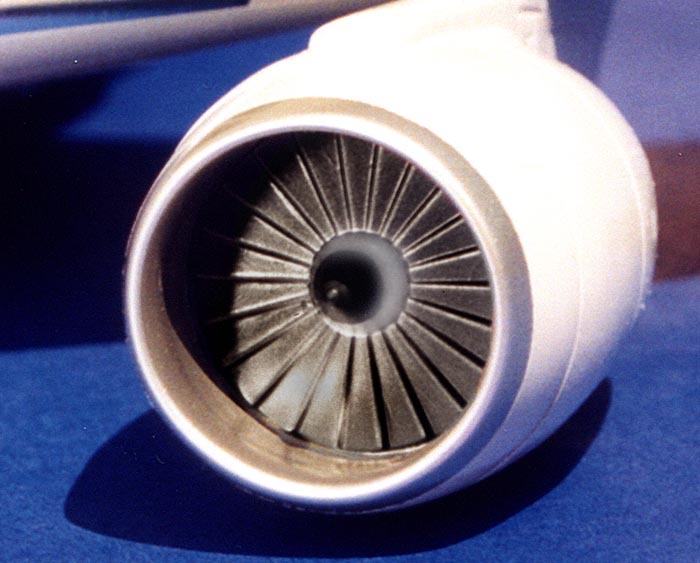
The two RR engines consist of seven parts each. The assembly is quick and simple. As in the MD-80 kit, the front inlet ring and nacelle is one piece. Thank you for listening, Minicraft! This is the best thing since paint in spray cans. I used my Dremel tool to thin down the thick cold section cowlings. A major disappointment with the pylon assembly was noted when placing the pylon into the wing slot. The gap is oversized and not the same shape as the pylon. This results in a gap of almost 1/16th of an inch. Additionally, the rear of the pylon falls below the surface of the wing. This results in the engine nacelle tilting downward. To alleviate this error, I had to shim the pylon in the rear to make the nacelle parallel with the fuselage. The fan and the front ring were painted and set aside until the model was completed. The mounting gap was filled with white glue and brush painted when dry. With engines the size of a 737, the inlets will be the center of attention. Minicraft didn't research the fans of the Rolls Royce Trents. These engines use 26 very curved blades. They almost look like the screws on a sub. The kits' fans turn in the wrong direction, but when built and painted they do look good.
 Finishing
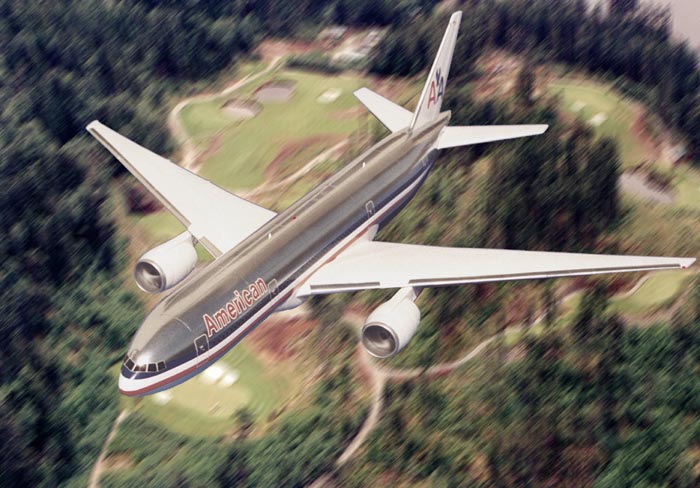
I shot the entire aircraft in Boeing Gray. The paint on the body was sanded with 2000 grit and then polished to a high gloss. With the wings and tail taped off, I applied two coats of Alclad 2 Chrome. This produced a "whiter" and less mirrored finished chrome. The kit decal went on very well and it was a nice change not having to add windows, doors, and placards separately. This is my first time using the Minicraft decals and look forward to "kit" decals again.
Summary
On a one to ten scale, I will give the 777 a six.
The overall dimensions are within a couple of scale feet. The completed model will look very nice, but will require more building time than the average assembly.
As I mentioned before, I was disappointed in the step backwards in the quality of this kit. The soft molding, poorly researched details, and parts that don't fit, make me wonder if this kit was designed around economics rather than a pride of craftsmanship. I have seen Minicraft's best work with their 1/144 PBY Catalina kit, with its super fine scribing, and lots of very, very small detailed parts. That kit is as good or better than any Tamiya model. I hope Minicraft will strive to better itself on each new kit that comes our way.

![]()


