Building Hasegawa's 1/72nd Scale A6M2-N 'Rufe' Type 2 Fighter Seaplane.by Michael Kendix |
 |
Background
 Manufactured
by Nakajima, the Rufe's design was based upon the early A6M2 Zero series,
although some significant changes were made to accommodate the floatplane's
requirements. An excellent review of the Rufe's history by Paul D. Alexander
can be found online.
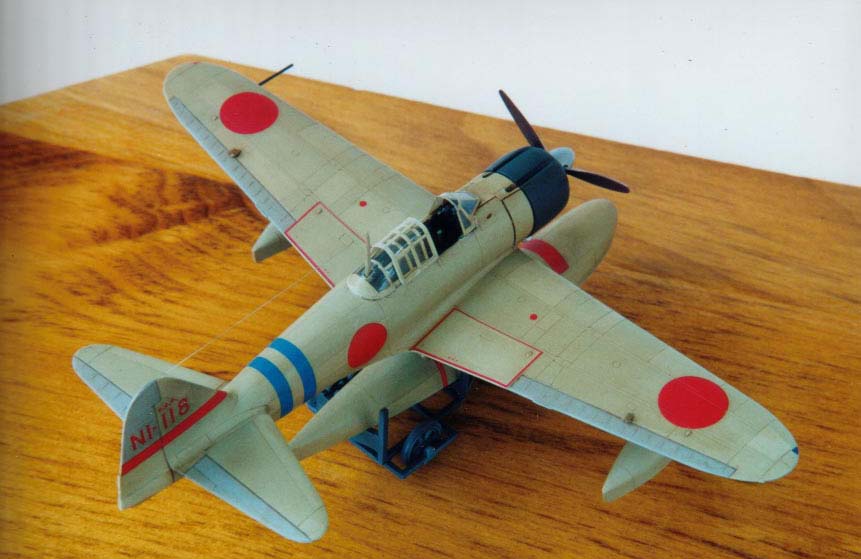
The wing is similar to the Zero A6M2 Type 21 though not identical: for
example, it lacks the folding wing tips. The modifications to the fuselage
included a different shaped tail rudder and a stability fin below the
horizontal tail surfaces on the fuselage's underside. In addition, the
oil cooler was moved to a hole in the front of the main central float's
pylon: the pylon also contained a fuel tank.
Manufactured
by Nakajima, the Rufe's design was based upon the early A6M2 Zero series,
although some significant changes were made to accommodate the floatplane's
requirements. An excellent review of the Rufe's history by Paul D. Alexander
can be found online.
The wing is similar to the Zero A6M2 Type 21 though not identical: for
example, it lacks the folding wing tips. The modifications to the fuselage
included a different shaped tail rudder and a stability fin below the
horizontal tail surfaces on the fuselage's underside. In addition, the
oil cooler was moved to a hole in the front of the main central float's
pylon: the pylon also contained a fuel tank.

As I surfed the web looking for build-ups of the 1/72nd scale Hasegawa Rufe, I found few examples. Thus, I was forced to forge ahead alone – not a comfortable position for someone like myself who knows relatively little about Japanese World War Two aeroplanes. I received a lot of help with questions from various people and utilized some fine web sources.
The Kit
 The
kit's contents are typical of recent Hasegawa products. All the parts
are well molded and the exterior components contain finely engraved panel
lines. There are four main sprues and a sprue containing the canopy. The
canopy is the same, although a little thick if you are considering incorporating
extra cockpit detail. I planned to use the Hawkeye resin interior, which
is really designed for an A6M5, however, I reasoned that in 1/72nd scale,
few people will notice the difference; they would have to be extremely
knowledgeable about Japanese World War Two aeroplanes and have wonderful
close vision eyesight. In any event, this model won't be entering any
major competitions, so it's only built to suit myself. I also used a Falcon
vacuform canopy. The early Zero canopy is the same as the Rufe, so that
was helpful.
The
kit's contents are typical of recent Hasegawa products. All the parts
are well molded and the exterior components contain finely engraved panel
lines. There are four main sprues and a sprue containing the canopy. The
canopy is the same, although a little thick if you are considering incorporating
extra cockpit detail. I planned to use the Hawkeye resin interior, which
is really designed for an A6M5, however, I reasoned that in 1/72nd scale,
few people will notice the difference; they would have to be extremely
knowledgeable about Japanese World War Two aeroplanes and have wonderful
close vision eyesight. In any event, this model won't be entering any
major competitions, so it's only built to suit myself. I also used a Falcon
vacuform canopy. The early Zero canopy is the same as the Rufe, so that
was helpful.
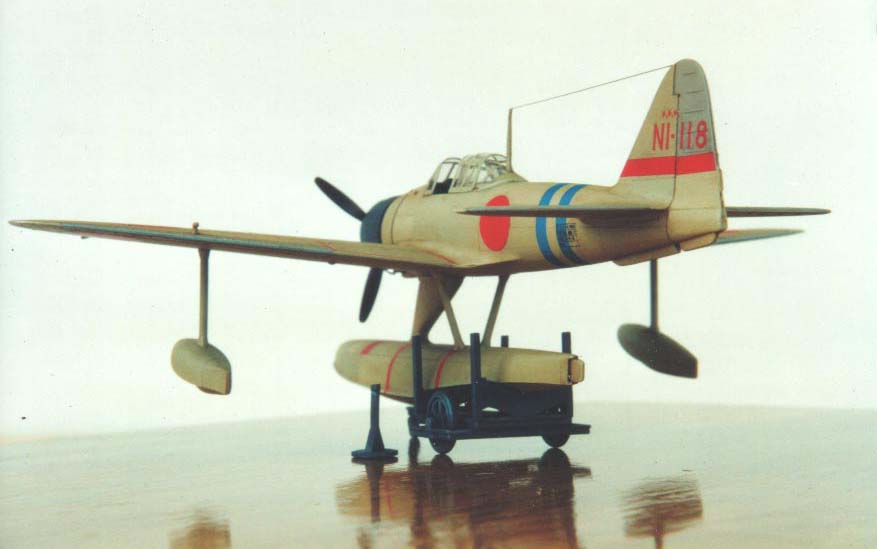
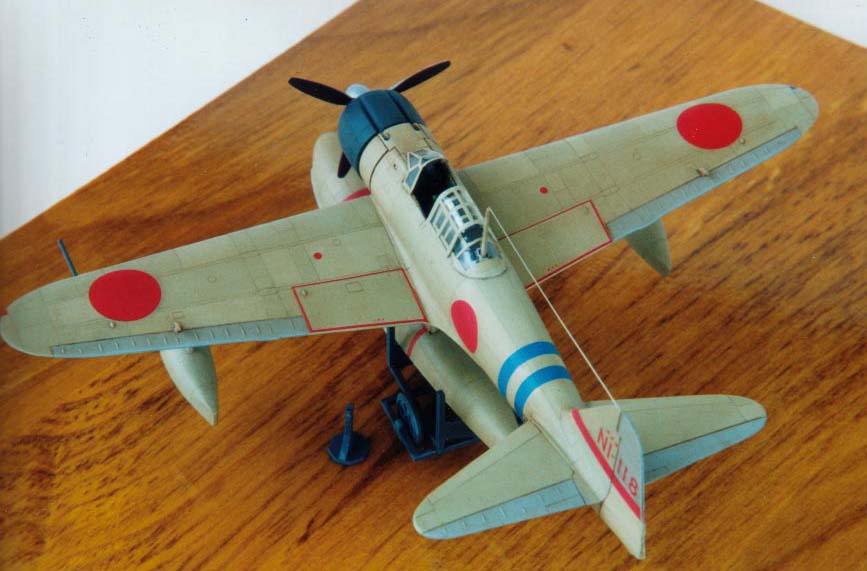
The kit contains decals for two aeroplanes. The first is an overall 'grey' (perhaps not really grey but see below for a more detailed discussion of that issue) – Keizo Yamazaki's 'NI-II8', which also appears on the box art and in the colour profiles' section of the Osprey publication 'Imperial Japanese Navy Aces 1937-45.' The second is a 'Green over grey' scheme for the 802nd Flying Group 'NI-II9'. I selected the former because I have yet to build an overall-grey model. As far as I can tell, the overall grey of these Rufe's was not really grey but rather a greyish-green that sometimes weathered to attain a bronzed hue, known as 'Hairyokushoku.' Using the j-aircraft.com web site and with help from Francois Weill, I finally formed an idea of what the colour should look like. Whether this turned out to be correct is another matter. Regardless, any errors are my own responsibility.
The Cockpit Interior
 The
kit's cockpit interior is decent. If you have a closed canopy, all you
really need is a set of seatbelts and the rest cannot really be seen through
the rather thick kit canopy. As I mentioned, I used the Hawkeye resin
interior. It is not accurate for this model but as I could not find a
picture or diagram of a Rufe's interior, I left it alone. I began by thinning
the fuselage walls: using sandpaper and the wonderful Dremel Minimite.
Every so often, I held the fuselage piece up to a lamp to test the translucence
of the surface. When it looked fairly uniform in this respect, I stopped
sanding and glued on the resin sidewalls. The detail in the Hawkeye set
is first rate: the only extra detail added was some photoetch seatbelts.
I sprayed the interior with Testors Light Green, and added a few instrument
and other details with a tiny brush. When that was dry, I gave it a burnt
umber oil wash - oil paint mixed with Turpenoid to push the colour towards
my guess at Nakajima green. Finally, I dry-brushed the entire sub-assembly
with some Pale Green.
The
kit's cockpit interior is decent. If you have a closed canopy, all you
really need is a set of seatbelts and the rest cannot really be seen through
the rather thick kit canopy. As I mentioned, I used the Hawkeye resin
interior. It is not accurate for this model but as I could not find a
picture or diagram of a Rufe's interior, I left it alone. I began by thinning
the fuselage walls: using sandpaper and the wonderful Dremel Minimite.
Every so often, I held the fuselage piece up to a lamp to test the translucence
of the surface. When it looked fairly uniform in this respect, I stopped
sanding and glued on the resin sidewalls. The detail in the Hawkeye set
is first rate: the only extra detail added was some photoetch seatbelts.
I sprayed the interior with Testors Light Green, and added a few instrument
and other details with a tiny brush. When that was dry, I gave it a burnt
umber oil wash - oil paint mixed with Turpenoid to push the colour towards
my guess at Nakajima green. Finally, I dry-brushed the entire sub-assembly
with some Pale Green.
Fuselage and Flying Surfaces
 I
closed the fuselage without gluing on the seat component, which was added
later. The fuselage needed no putty. I glued it together with Pro-Weld
and sanded it with #30503 fine sanding stick until the seams disappeared.
I glued on the instrument panel and the seat, putting them in place through
the hole in the underside of the fuselage sub-assembly. I glued on the
wings: first the single, large underside piece and then the top port and
starboard pieces. Next, I glued on the horizontal tailpieces, ensuring
that everything was straight and in alignment. Again, the fine sanding
stick took care of almost all the seams. I filled the remaining hair-like
seams with White Out correction fluid.
I
closed the fuselage without gluing on the seat component, which was added
later. The fuselage needed no putty. I glued it together with Pro-Weld
and sanded it with #30503 fine sanding stick until the seams disappeared.
I glued on the instrument panel and the seat, putting them in place through
the hole in the underside of the fuselage sub-assembly. I glued on the
wings: first the single, large underside piece and then the top port and
starboard pieces. Next, I glued on the horizontal tailpieces, ensuring
that everything was straight and in alignment. Again, the fine sanding
stick took care of almost all the seams. I filled the remaining hair-like
seams with White Out correction fluid.
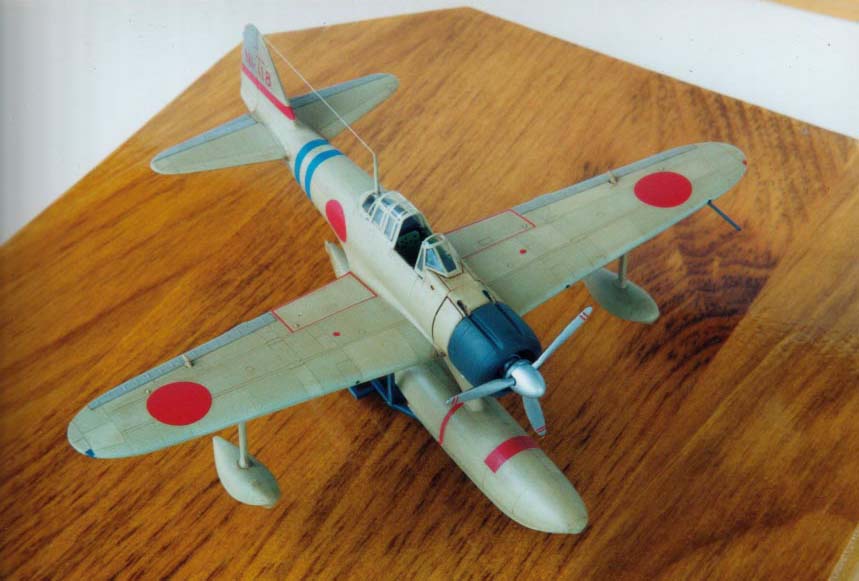
Floats
 I
found assembling and attaching the floats to be the trickiest part of
this kit. As suggested in the instructions, I filled the front of the
central float with tiny metal part ball weights, to prevent the model
from sitting on its tail, and cemented the weights into the float by pouring
'Super Thin' CA glue onto them. The float halves did not fit as well and
I had to do a fair amount of sanding, which removed some of the panel
lines. Re-scribing was the order of the day: a task for which I have little
talent and even less inclination. Nevertheless, I did my best. I found
assembling the small side floats more straightforward and I only needed
the fine sanding stick and some White Out. I decided to attach the central
float prior to painting. If I had chosen the green over grey scheme, I
would have left the float off until the main part of the model was painted.
I
found assembling and attaching the floats to be the trickiest part of
this kit. As suggested in the instructions, I filled the front of the
central float with tiny metal part ball weights, to prevent the model
from sitting on its tail, and cemented the weights into the float by pouring
'Super Thin' CA glue onto them. The float halves did not fit as well and
I had to do a fair amount of sanding, which removed some of the panel
lines. Re-scribing was the order of the day: a task for which I have little
talent and even less inclination. Nevertheless, I did my best. I found
assembling the small side floats more straightforward and I only needed
the fine sanding stick and some White Out. I decided to attach the central
float prior to painting. If I had chosen the green over grey scheme, I
would have left the float off until the main part of the model was painted.
Painting
 First,
I sprayed the control surfaces with a medium blue-end grey. I mixed a
mid-grey with some mid-green to create the Hairyokushoku colour. I masked
off the flying surfaces and sprayed on the grey-green color, then I hand
brushed a few panels with a slightly lightened shade of the base colour.
I left it to dry for a day or so before spraying a clear coat of Testors
Flat. Again, another day for drying and then I used a burnt umber oil
wash over the entire kit. I did several of these oil washes, each time
darkening the colour and giving the surface a bronze hue: the wash also
soaked into the panel lines.
First,
I sprayed the control surfaces with a medium blue-end grey. I mixed a
mid-grey with some mid-green to create the Hairyokushoku colour. I masked
off the flying surfaces and sprayed on the grey-green color, then I hand
brushed a few panels with a slightly lightened shade of the base colour.
I left it to dry for a day or so before spraying a clear coat of Testors
Flat. Again, another day for drying and then I used a burnt umber oil
wash over the entire kit. I did several of these oil washes, each time
darkening the colour and giving the surface a bronze hue: the wash also
soaked into the panel lines.
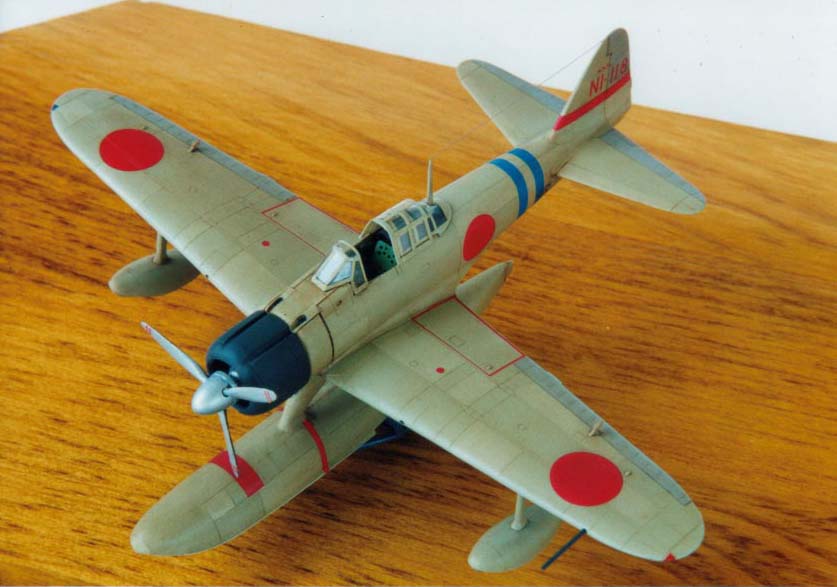
I painted the cowl 'Scale Black', the spinner silver, and the front and rear of the propeller blades, silver and brown, respectively.
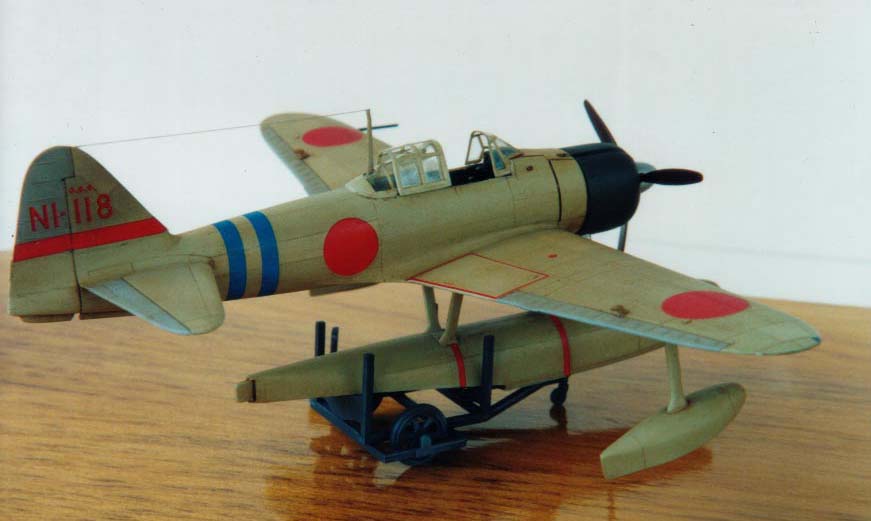
Other stuff
 I
ruined one of the Falcon canopies but eventually managed to cut the other
one from its plastic backing. I used decal paper sprayed with the base
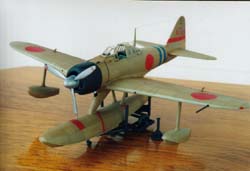
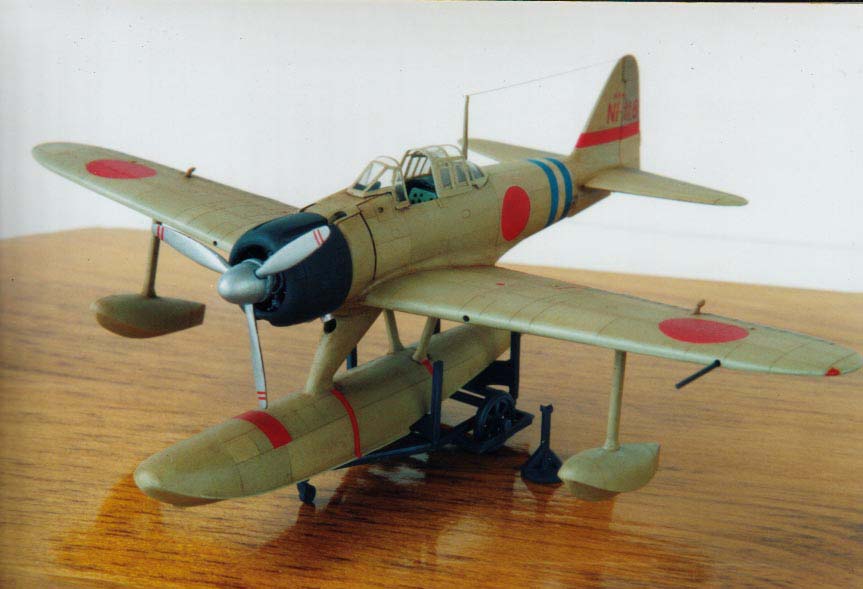
colour and the oil wash for the canopy framing. The dolly was easy to
assemble. I sprayed it with Scale Black and highlighted it with a medium
grey. When everything was dry, I added the side floats, and painted the
red and blue lights on the wing tips. I added the wing gun, which I made
from plastic rod because the kit part was misshaped and I could not file
away its molding seam. I had some difficulty with decal silvering because
I had not laid down a sufficient amount of Future floor polish. However,
I managed to eliminate most of the silvering with a pin and some Solvaset.
Finally, I added the control wire using 0.005-inch straight wire from
Small Parts.
I
ruined one of the Falcon canopies but eventually managed to cut the other
one from its plastic backing. I used decal paper sprayed with the base
colour and the oil wash for the canopy framing. The dolly was easy to
assemble. I sprayed it with Scale Black and highlighted it with a medium
grey. When everything was dry, I added the side floats, and painted the
red and blue lights on the wing tips. I added the wing gun, which I made
from plastic rod because the kit part was misshaped and I could not file
away its molding seam. I had some difficulty with decal silvering because
I had not laid down a sufficient amount of Future floor polish. However,
I managed to eliminate most of the silvering with a pin and some Solvaset.
Finally, I added the control wire using 0.005-inch straight wire from
Small Parts.
Conclusion
This is a great kit that builds into a really excellent model. Perhaps it is not for a complete beginner because of the floats but it is certainly not a difficult kit. Highly recommended.
Acknowledgements
Francois Weill was most helpful with information about the Rufe's origin and colours. Folks on the j-aircraft.com web board were helpful in answering my questions. All remaining mistakes are my own: hopefully I didn't make too many glaring errors. Greg Springer also helped with information about the cockpit interior, although I was unable to make any of the changes.
References
-
Shigeru Nohara and Don Greer. 'A6M Zero In Action: Aircraft Number 59.' Squadron/Signal Publications, Carrolton, Texas. 1983.
-
Henry Sakhaida. 'Imperial Japanese Navy Aces 1937-45: Osprey Aircraft of the Aces 22.' Osprey Publishing, London, UK

![]()


