Pavlas 1/72 Miles Master I/IaBy Chris Banyai-Riepl |
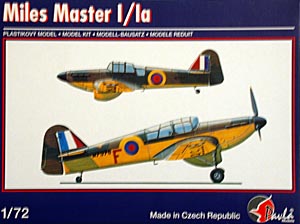 |
History
The Miles Master was a direct follow-on of the Miles Kestrel, a low-wing high-speed trainer that was unique in the fact that it had a top speed nearly as fast as that of the Hurricane and Spitfire. This incredible performance was only slightly degraded in the production version of the Master I, fitted with a Kestrel Mk. XXX engine. The great speed and excellent maneuverability was in excess of any other trainer and prompted suggestions for a fighter version. The end of the Battle of Britain took the pressure off of the fighter force and the necessity of the Miles Master fighter wasnt as pressing, with the result that the fighter version wasnt produced. The trainer version did find widespread service, however, with just about every operational squadron having at least one Master on strength.
The Kit
 To
date the number of Miles Master I kits are under five, with only the Pegasus
and Magna Models ones being available in any kind of quantities. Pavlas
latest release is probably the best Master I kit on the market now, with
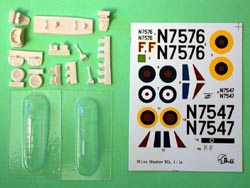
a combination of injection plastic and resin detail parts. Two vacuformed
canopies are included, but one isnt a spare as there are two styles of
framing for the different versions. A small decal sheet provides markings
for two Masters, one Mk. I and one
To
date the number of Miles Master I kits are under five, with only the Pegasus
and Magna Models ones being available in any kind of quantities. Pavlas
latest release is probably the best Master I kit on the market now, with
a combination of injection plastic and resin detail parts. Two vacuformed
canopies are included, but one isnt a spare as there are two styles of
framing for the different versions. A small decal sheet provides markings
for two Masters, one Mk. I and one Mk.
Ia.

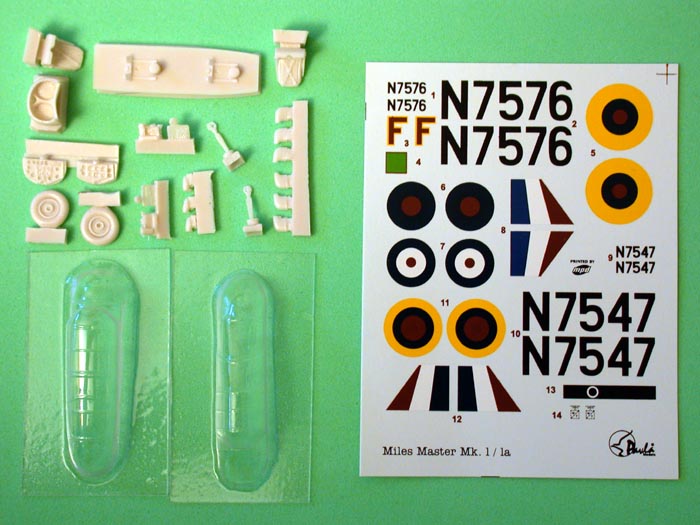
Taking a look at the interior, the kit uses resin to good advantage here, with the instrument panels, control sticks, sidewall detailing and seats all being made up from this medium. The seats have belts molded in place, while the instrument panels have raised detailing with recesses for the instrument faces. The cockpit floor is plastic and has rudder pedals molded in place. Rounding out the insides is a rear bulkhead, resulting in an interior that will look very good under that large clear canopy. Speaking of which, this is the first area requiring modification depending on the version you want to model. If youre going to do a Master Mk. Ia youll need to trim part of the fuselage sides at the rear of the cockpit.
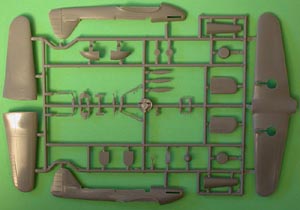
Once the fuselage is together, construction is pretty straightforward. The main wing is split into a one-piece lower section and separate right and left upper halves. The landing light isnt cut out in the wing, but the instructions point out what you need to do to make a proper light. The wheel wells are separate frying pan-shaped pieces that fit onto the lower wing. The horizontal tailplanes are molded right and left as one piece. No locating tabs are present so you might want to drill holes and pin these parts in place. An information view shows the arrangement of the tailplanes & wing to the fuselage.
 The
undercarriage is fairly basic as would be expected on a trainer. Theres
the main strut, molded as one piece, with a separate bracing strut and
gear doors to add strength. The main wheels are resin, while the tailwheel
assembly is all plastic with a separate strut and wheel. The propeller
is made up from three blades and a two-part hub. Nothing but dimples
are provided for locating the propeller blades so dig out your jig to
get things in alignment here.
The
undercarriage is fairly basic as would be expected on a trainer. Theres
the main strut, molded as one piece, with a separate bracing strut and
gear doors to add strength. The main wheels are resin, while the tailwheel
assembly is all plastic with a separate strut and wheel. The propeller
is made up from three blades and a two-part hub. Nothing but dimples
are provided for locating the propeller blades so dig out your jig to
get things in alignment here.
The decals offer a couple of options, both finished in dark green and
dark earth over trainer yellow. The first choice is a Master Mk. I, N7576,
from No. 8 Flying Training
School
Conclusion
If you want to build a Miles Master Mk. I this is the kit to get. Its a fairly simple model with a basic paint scheme but its use of trainer yellow will definitely make it stand out on your shelves. Alternatively, sticking one of these in the corner of your massive Hurricane Airfield diorama would be just the thing to add that bit of visual flavor (and if you are doing a massive Hurricane Airfield diorama, I want to hear about it!).

![]()


