Bra.Z 1/144 757 Conversions & Corrections
By Chris Banyai-Riepl
One of the more problematic kits in the Minicraft lineup is their 757-200
kit. Engines pointing in the wrong direction, a fuselage thats too long
and a tail thats too broad are just some of the areas that need fixing.
Luckily weve got a great little resin maker out of Italy
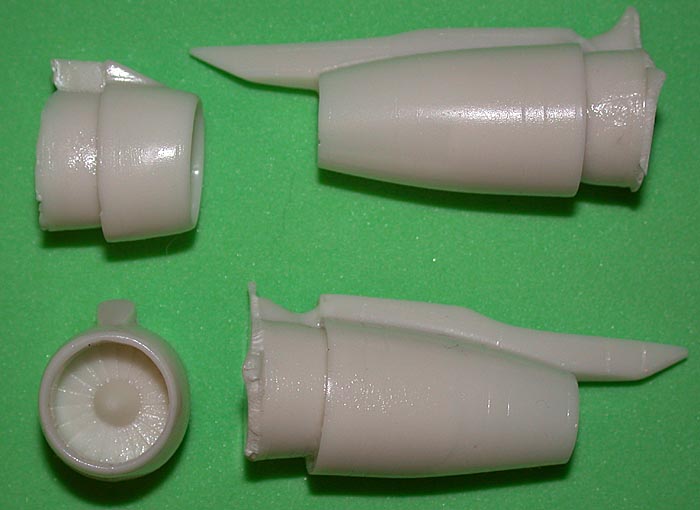
 757-200/300
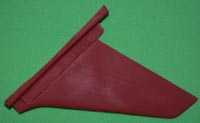
Tail Correction
757-200/300
Tail Correction

This is a very simple correction that makes a noticeable difference, especially on those liveries that have complex tail markings. This is cast as one piece in a reddish resin and is designed to replace the entire kit fin. Youll have to cut off the kit fin at the base, but thats about it for surgery. There is no locating assistance here, though, so you will want to think about how to support the resin replacement as well as keep the alignment vertical.
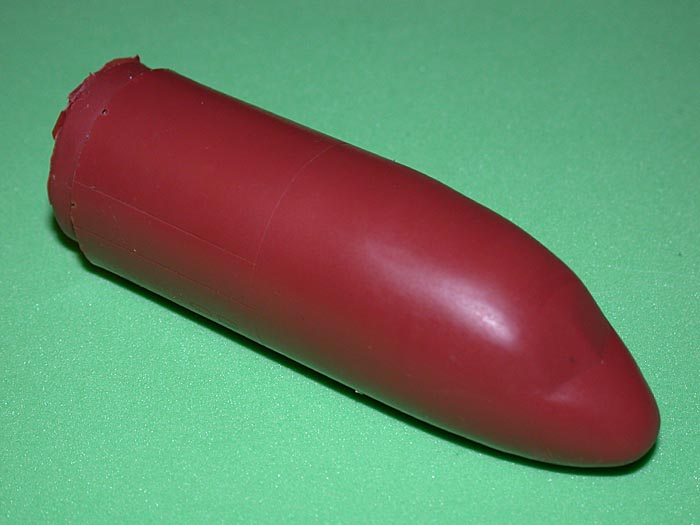
757-300 Conversion
 ..........
 ..........
This is a rather simple conversion, especially the way that Bra.Z engineered it. Basically all you have to do is cut the fuselage along a panel line and add the nose section and rear fuselage plug and youre done with the stretching. By the way, if you just want a correct nose for a 757-200, you can use this one and just make your cut further back on the fuselage. In addition to the fuselage plugs there is a replacement tailcone that has the correct shape and deflector plate on the bottom. With some interesting stretched 757s out there this is a quick and easy way to have something a bit different than your standard 757-200.
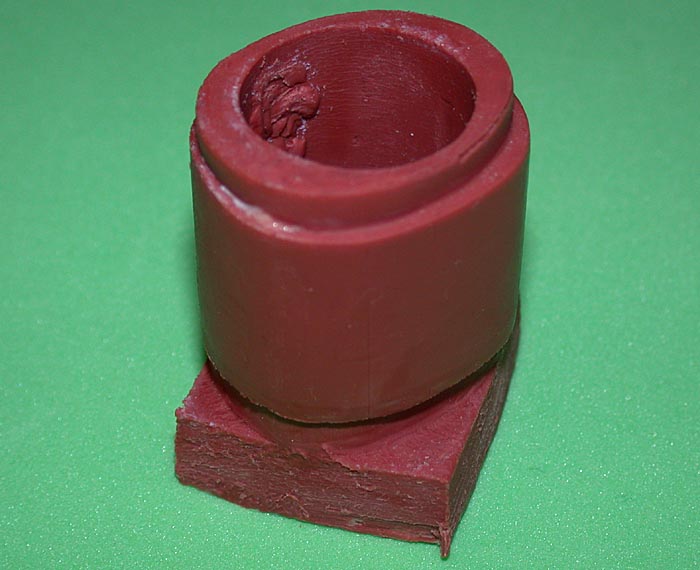
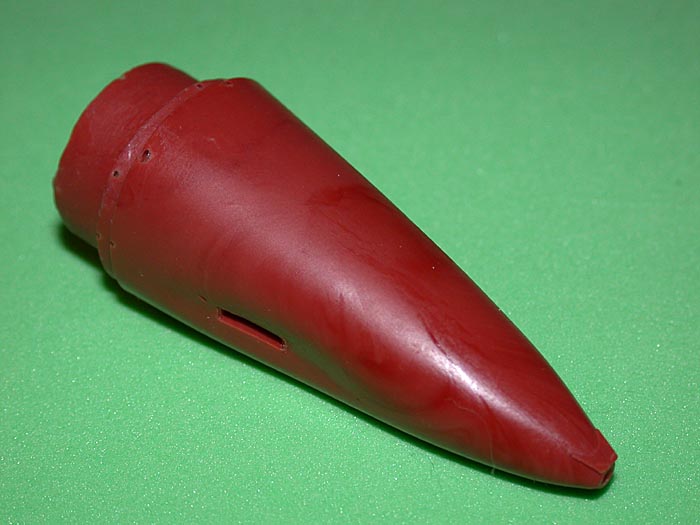
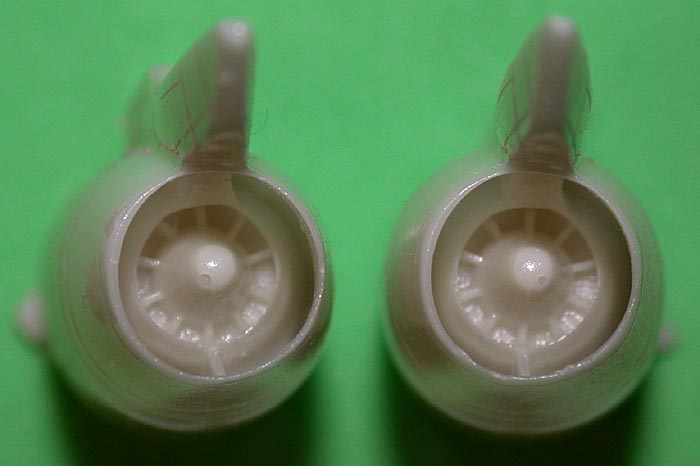
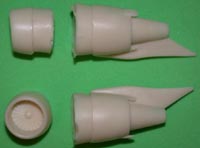 757
Replacement Engines
757
Replacement Engines

While the castings of the above parts are nice, these engines are truly
amazing. There is no way that the kit engines can even come close to
these gems, no matter who is doing the tooling. There are sets for both
the Rolls Royce and the Pratt & Whitney engines found on the 757,
so you can pick up whatever Minicraft release you want and not worry about
getting the right 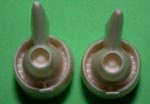 engine.
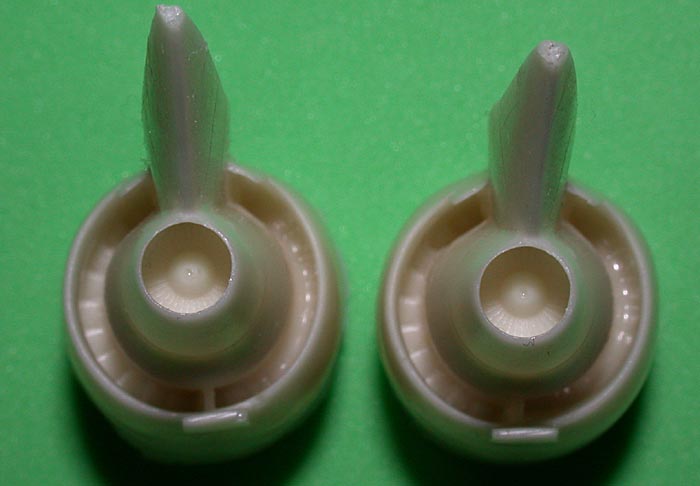
Looking at these engine sets my immediate reaction was how did he DO
this? Both sets are engineered the same, with the only differences being
that of the real thing. The engine is split into two pieces, a front
fan and intake ring piece and a rear hot section. The front fan piece
is pretty straightforward as far as resin casting goes, but the level
of detail is far above that found in the plastic kit. There are panel
lines on 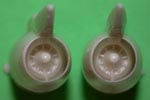 the
inside of the intake and the intake walls are appropriately thin. The
forward section of the engine pylon is molded on top of the Rolls Royce
engines, while the pylon for the Pratts stops before extending onto the
front piece. The rear section is what really is amazing, though, as it
has a paper thin nacelle body with a complete engine hot section trapped
inside. The level of detail in the hot section is outstanding, with the
Rolls edging out over the Pratts just a bit. Either way you go, these
engines will go a great distance to improving the look of
the
inside of the intake and the intake walls are appropriately thin. The
forward section of the engine pylon is molded on top of the Rolls Royce
engines, while the pylon for the Pratts stops before extending onto the
front piece. The rear section is what really is amazing, though, as it
has a paper thin nacelle body with a complete engine hot section trapped
inside. The level of detail in the hot section is outstanding, with the
Rolls edging out over the Pratts just a bit. Either way you go, these
engines will go a great distance to improving the look of 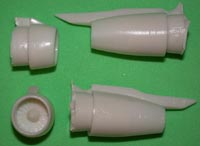 your
757, especially since they fit onto the wing without the odd upward angle
seen with the kit parts.
your
757, especially since they fit onto the wing without the odd upward angle
seen with the kit parts.
In conclusion, these resin accessories are almost a necessity for the Minicraft kit, increasing the level of detail and correcting shape errors. Stay tuned for an upcoming build of these details and the Minicraft kit as I stretch one into a 757-300.

![]()


