Hasegawa 1/48 Arado Ar 234
By Will Riepl |  | Introduction 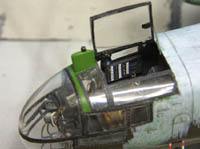 Last month we had a first look at the new Kit of the Ar 234 by Hasagawa. This month I will go into what I did to the kit to make it look just a little better. First I would like to say this kit can be built right out the box and be a very nice model of the Arado 234. I think, however, with all that clear glass on the nose you would want to see all the wires and interior stuff that you would see on the real aircraft. This is where I made my "improvements". I did not use any after market parts. There are some available now for the Ar 234 so you can use them if you want. Last month we had a first look at the new Kit of the Ar 234 by Hasagawa. This month I will go into what I did to the kit to make it look just a little better. First I would like to say this kit can be built right out the box and be a very nice model of the Arado 234. I think, however, with all that clear glass on the nose you would want to see all the wires and interior stuff that you would see on the real aircraft. This is where I made my "improvements". I did not use any after market parts. There are some available now for the Ar 234 so you can use them if you want.
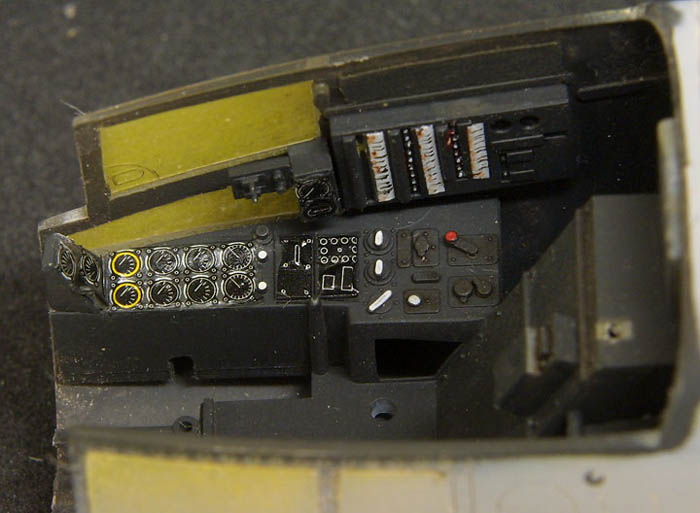
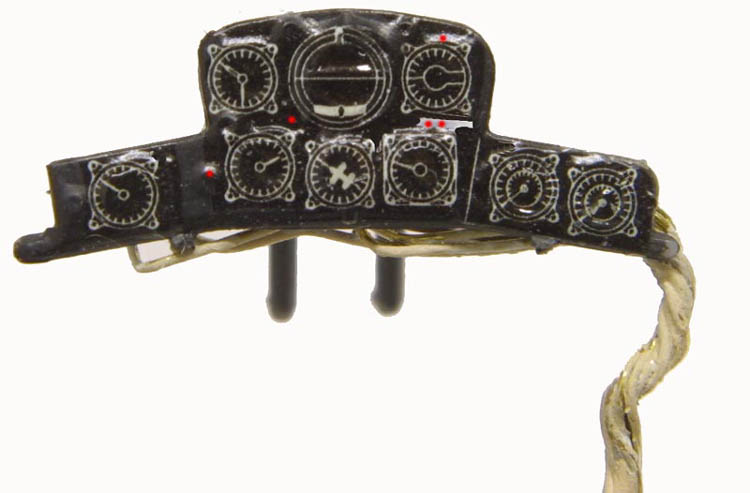
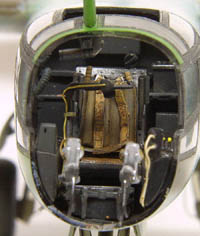
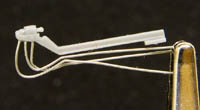  I started on the instrument board. As you can see from the pictures, all I used was some wire. First I drilled some holes in the back of each instrument. Then I cut some 34 gauge wire (available at most craft stores). When you cut the wires make sure you cut them long enough to work with. I glued them in, bent them over to the right side of the board. Then I twisted them into a bundle and bent them back down. I then glued them to the back of the instruments. I started on the instrument board. As you can see from the pictures, all I used was some wire. First I drilled some holes in the back of each instrument. Then I cut some 34 gauge wire (available at most craft stores). When you cut the wires make sure you cut them long enough to work with. I glued them in, bent them over to the right side of the board. Then I twisted them into a bundle and bent them back down. I then glued them to the back of the instruments.
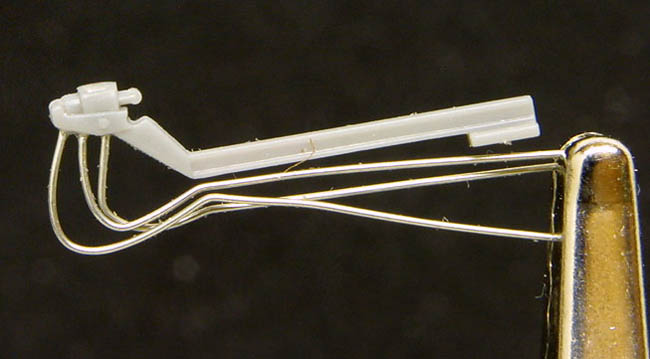
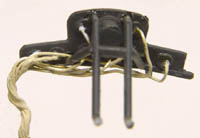
  The rudder and brakes were next. I drilled some holes in the bottom of the brake cylinder. I used some 28 gauge wire for the brake lines. Again, cut the wires longer than you think you need. You want to get the bend in the front part of the line. Bend it back under the parts. Do not glue this in just yet; if you do you will break it off when you are working on the fuselage. The rudder and brakes were next. I drilled some holes in the bottom of the brake cylinder. I used some 28 gauge wire for the brake lines. Again, cut the wires longer than you think you need. You want to get the bend in the front part of the line. Bend it back under the parts. Do not glue this in just yet; if you do you will break it off when you are working on the fuselage.
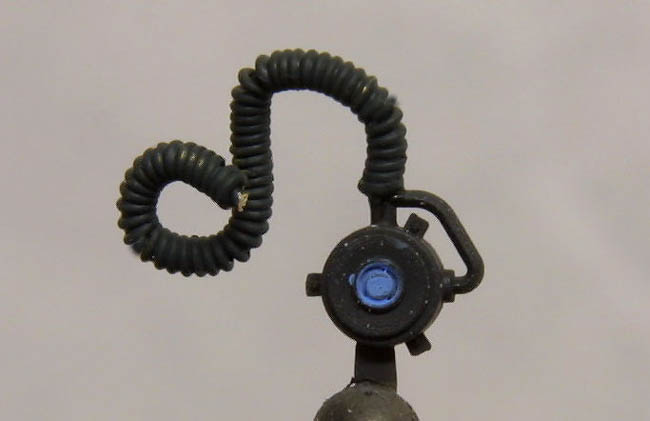
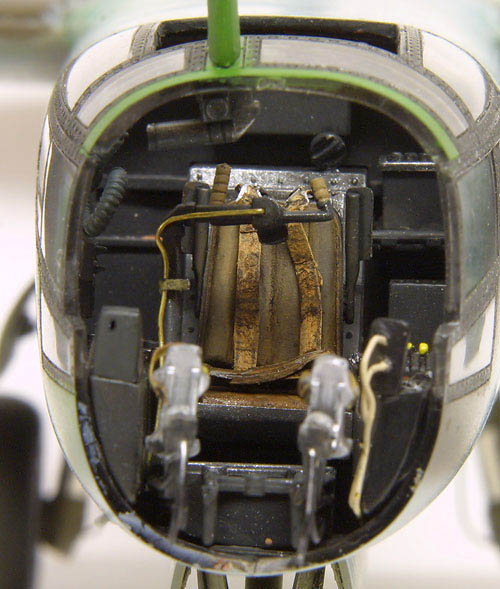
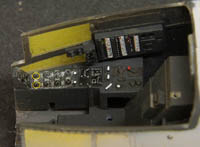
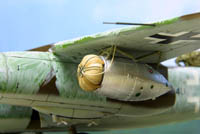
 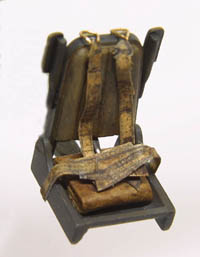 I finished the rest of the interior as per the instructions. The only other thing I did is to add some seat belts and a cushion for the seat. The belts were made out of paper. I did add the oxygen hose. I used some of the 34 gauge wire and wrapped it around a straight pin. Remove the pin and insert another piece of 34 gauge wire into the coils. Bend into the appropriate shape and hand paint the part. This will fill in the areas around the coils for a realistic looking hose. Then I glued it to the oxygen regulator. I finished the rest of the interior as per the instructions. The only other thing I did is to add some seat belts and a cushion for the seat. The belts were made out of paper. I did add the oxygen hose. I used some of the 34 gauge wire and wrapped it around a straight pin. Remove the pin and insert another piece of 34 gauge wire into the coils. Bend into the appropriate shape and hand paint the part. This will fill in the areas around the coils for a realistic looking hose. Then I glued it to the oxygen regulator.
 I used the decals that came with the kit for the instruments. I cut just the instrument dials from the sheet. I used the decal setting solution to get the decals to snug down around the dials. I taped off the windows inside and out to avoid scratching them. I painted the inside of the clear parts RLM 66. After detailing the circuit board and other instruments, I glued them in place. I used the decals that came with the kit for the instruments. I cut just the instrument dials from the sheet. I used the decal setting solution to get the decals to snug down around the dials. I taped off the windows inside and out to avoid scratching them. I painted the inside of the clear parts RLM 66. After detailing the circuit board and other instruments, I glued them in place.
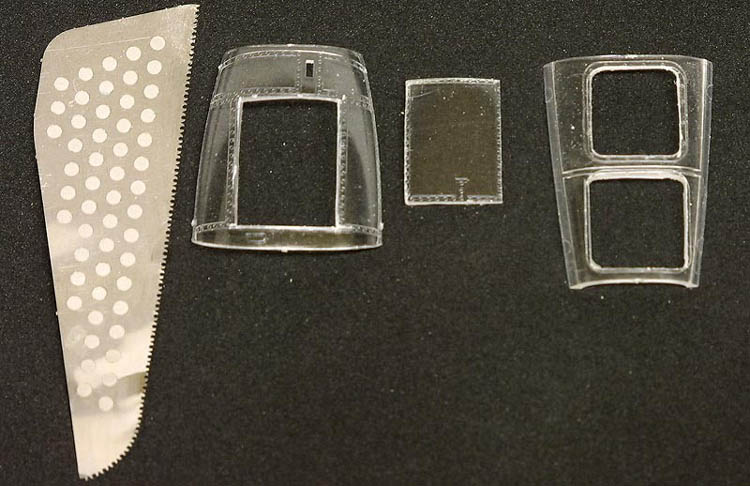
 I don't like the way the instructions have you putting the clear parts together first and then adding them to the fuselage. I glued the clear parts to the back half of the fuselage. That way I have two fuselage halves to work with instead of four pieces. This avoids some of the problems of joining the nose to the fuselage. If you dry fit the bulkhead to the fuselage, make sure it fits on the inside of the fuselage. I don't like the way the instructions have you putting the clear parts together first and then adding them to the fuselage. I glued the clear parts to the back half of the fuselage. That way I have two fuselage halves to work with instead of four pieces. This avoids some of the problems of joining the nose to the fuselage. If you dry fit the bulkhead to the fuselage, make sure it fits on the inside of the fuselage.
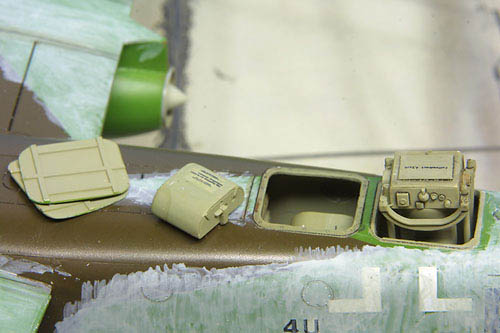
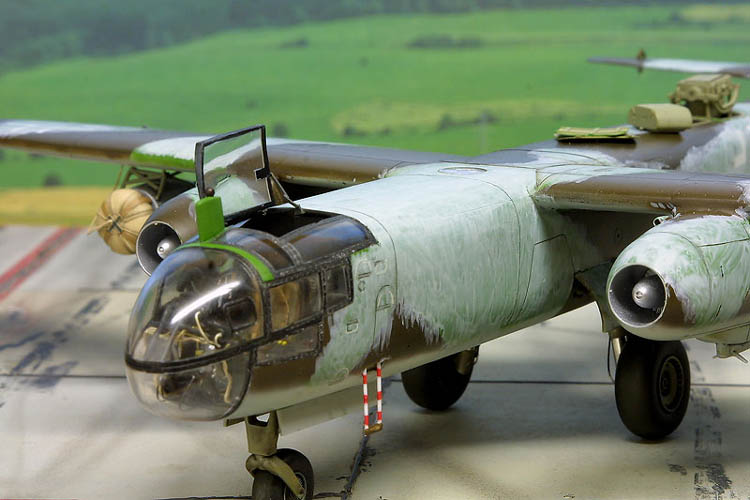
There is a high seam ridge running around the fuselage where the two parts come together. This is not on the real aircraft, so I filed and sanded it down. If you check photos of the actual aircraft, you see no ridge. 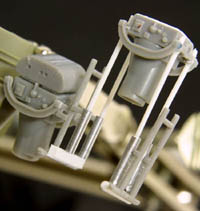 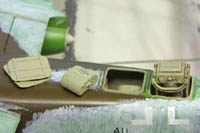 Now is when you should choose to do either the bomber or the recon aircraft. I did the recon version so cut the camera hatches out of the top of the fuselage and the canopy. I put the cameras in place and went on to the main gear assembly. Now is when you should choose to do either the bomber or the recon aircraft. I did the recon version so cut the camera hatches out of the top of the fuselage and the canopy. I put the cameras in place and went on to the main gear assembly.
I did not glue the cockpit interior in when I put the fuselage together. I wanted it to be free floating until I finished painting and decaling. Then I pushed the part forward through the wheel well and glued it in place. This way you don't break any parts off while taping and painting.
 You want to do some dry fitting on the wings. You might have to cut the locator pins off so they will line up on the wing tips and fuselage. You want to do some dry fitting on the wings. You might have to cut the locator pins off so they will line up on the wing tips and fuselage.
During the engine assembly, I didn't glue the small air intake on the nacelle. Dry fit it to the wing, make sure it fits, and then glue it to the wing. Fill if you need to, and then add the small air intake.
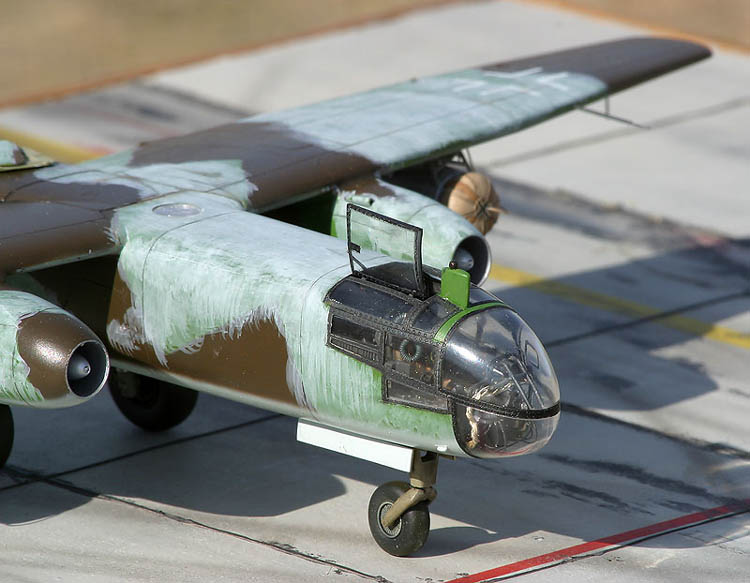
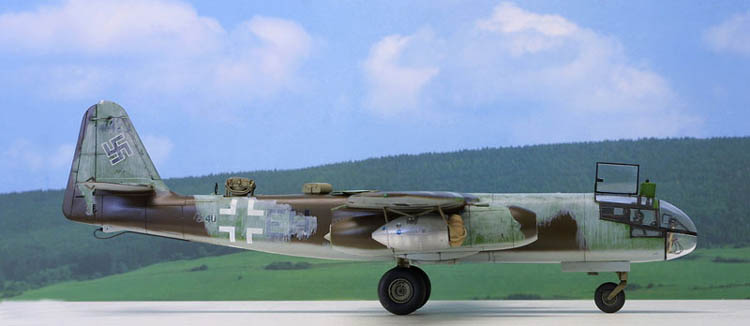
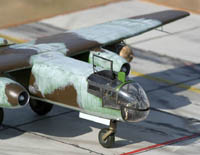
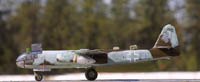
 There are two color schemes to choose from. One is RLM 81/82/76. The other is RLM 70/71/76. I chose the first one for my model. This recon aircraft operated out of 1. (F)/123. The code is 4U+EH. There are two color schemes to choose from. One is RLM 81/82/76. The other is RLM 70/71/76. I chose the first one for my model. This recon aircraft operated out of 1. (F)/123. The code is 4U+EH.
There are a number of shades of 81 out there. I used Poly Scale paints. It is more brown than rust. At that time of the war I would say that just about any shade would be OK to use.
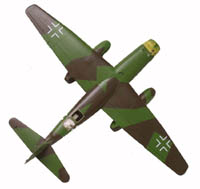 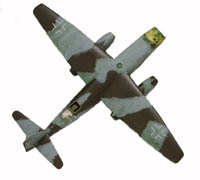 I applied a coat of Future floor wax over the paint and then added the decals. I used AeroMaster and the kit decals. When that was done I put a semi gloss finish over the model. Now for the fun part. I added a wash similar to the Hs 129 that I did awhile back. I used a ¼" flat brush and thinned 76 paint to paint over the 82 green. I tried to make it look like it was done with a large mop or brush. I would suggest trying it out on an old kit first to get the hang of it. I then did a wash of black and burnt umber oils to bring out some lines and to make it look a little dirty. I applied a coat of Future floor wax over the paint and then added the decals. I used AeroMaster and the kit decals. When that was done I put a semi gloss finish over the model. Now for the fun part. I added a wash similar to the Hs 129 that I did awhile back. I used a ¼" flat brush and thinned 76 paint to paint over the 82 green. I tried to make it look like it was done with a large mop or brush. I would suggest trying it out on an old kit first to get the hang of it. I then did a wash of black and burnt umber oils to bring out some lines and to make it look a little dirty.
  With that all done it is time to get back to the canopy. I now have all the tape off the windows inside and out, the seat in and the rest of the interior parts in place. You can glue the cockpit interior into position through the nose wheel opening. I glued the top part of the canopy on now. Next I put the instrument board into the nose piece and the brake and rudder pedals in. I added the control stick and the periscope part. I glued the nose one and with a little luck everything fit. I got the wheels on and the air speed indicator in place. With that all done it is time to get back to the canopy. I now have all the tape off the windows inside and out, the seat in and the rest of the interior parts in place. You can glue the cockpit interior into position through the nose wheel opening. I glued the top part of the canopy on now. Next I put the instrument board into the nose piece and the brake and rudder pedals in. I added the control stick and the periscope part. I glued the nose one and with a little luck everything fit. I got the wheels on and the air speed indicator in place. Conclusion 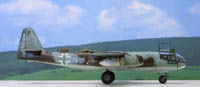 The Ar 234 is done after five years of having the Hobbycraft version sitting unfinished. The Ar 234 is done after five years of having the Hobbycraft version sitting unfinished. I want to thank Hasagawa for producing a beautiful kit. Bring on the Crusader! | 


|