Panda Models 1/48 Lockheed-Martin F-35A & F-35B JSF | 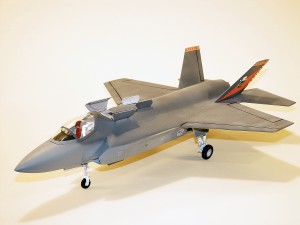 | Background In mid-1990s, the Department of Defense consolidated several fighter programs into the Joint Strike Fighter (JSF), which could meet the requirements of the US Air Force, US Navy and the US Marine Corps (fortunately, not all in the same version!). These unique (and usually conflicting) requirements include: -
USAF – an advanced lightweight tactical fighter (to replace the F-16 and A-10, as well as complement the F-22) that can carry a wide range of weapons internally and maintain its stealth. -
USMC – an advanced supersonic VSTOL fighter to replace the AV-8B Super Harrier -
USN – an advanced lightweight tactical fighter that is carrier capable (catapult/arresting gear), twice the internal fuel as the FA-18C and better low-speed handling. The British Ministry of Defence also joined the project to obtain an advanced fighter to replace their fleet of Harriers and operate aboard their next generation aircraft carrier, the CV(F). The decision is still out on whether they want the USMC VSTOL or the USN CTOL version of the aircraft. Two teams emerged to tackle this project – Boeing with the X-32 series and Lockheed-Martin with the X-35. Both teams put forth a terrific effort and developed successful designs, though Lockheed-Martin’s X-35 design was designated the winner. The X-35A successfully demonstrated the Air Force’s requirements whilst the X-35B met the USMC’s supersonic VSTOL requirements. In an unusual move, the X was replaced with an F and the resulting JSF aircraft will be designated as F-35. The Kit I happened into my local hobby establishment a few weeks ago and was shown two new kits that had been released without much fanfare – the Panda Models 1/48 F-35A and F-35B kits. I was stunned as most new kit subjects appear in 1/72 before any other scale and I'd never even heard of Panda Models of China before. Nevertheless, here were two very interesting kits. On opening the large boxes, I was struck by the simplicity of each kit, but at around $18.00 USD MSRP, these kits were a bargain! Each kit is molded in light gray styrene and comes on four parts trees. One whole tree is the upper fuselage, one tree is the lower fuselage, and the third tree contains 52 parts that make up the cockpit, engine nozzle, landing gear, and vertical and horizontal stabilizer components. The last tree, molded in clear styrene, contains the canopy and HUD transparencies. The fuselage features scribed details (though the scribing is a bit heavy) and the surface of the wings and fuselage have a unique texture on them. Despite this, the kits looked like fun and who could resist a quarter-scale JSF! Of course I took both kits home. Parts-wise, the only difference between the F-35A and F-35B kits is in the exhaust duct. The F-35A kit has the normal (straight) exhaust duct, while the F-35B’s exhaust duct is posed in hover position. The normal duct is not provided in the F-35B kit and (since you don't need it) the hover duct is not included in the F-35A kit. Construction 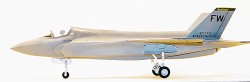 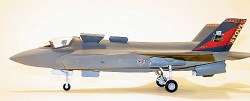
I knew there just had to be some problems with a new kit from an apparently new company, so out come the sprue cutters to see where this adventure takes us. I quickly disposed of two trees by removing the upper and lower fuselage halves. Much to my pleasant surprise, the dry-fit test was perfect. If the rest of the kit goes together like the fuselage halves fit, then this was going to be an easy build. 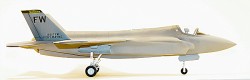 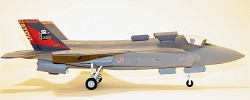
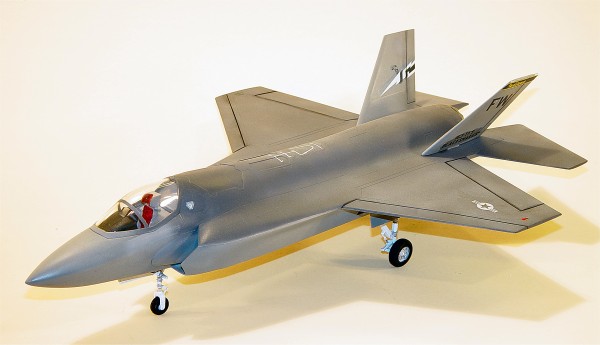
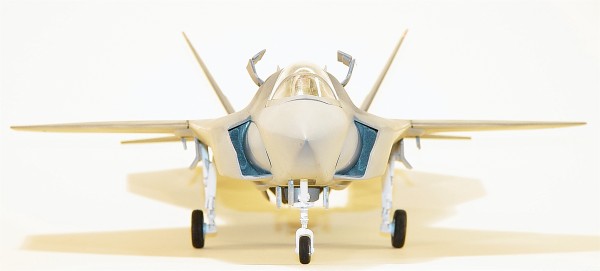
As with most kits, the first stop in construction is the cockpit. Here was one minor weakness in the kit - any resemblance that this cockpit has to the real aircraft is strictly coincidental. This isn't surprising as there hasn’t been much information on the JSF's cockpit layout. Nevertheless, the kit provides a reasonable facsimile of the Stencil ejection seat, throttle and side stick, and a cockpit tub with side consoles. The instrument panel detail as well as the detail on the side consoles is strictly representative and will benefit from a replacement cockpit from someone like Black Box.  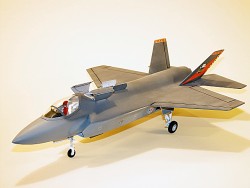
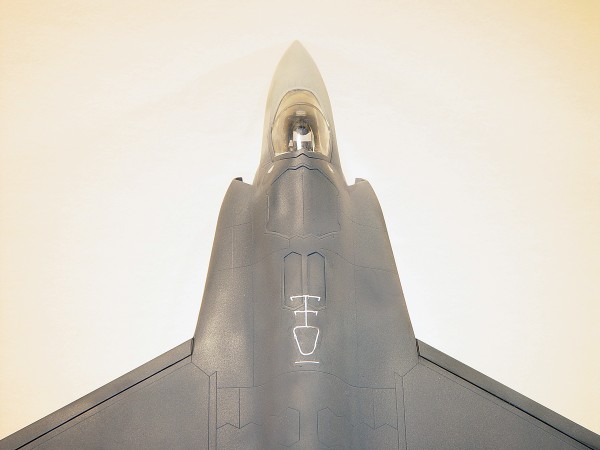
At this point, I made the decision to build both aircraft straight out of the box, so I built up the cockpits as provided and didn't install seatbelts/harnesses either. One other limitation to consider is that the canopy is molded as one piece so there is no way to pose the canopy open. The assembled cockpit tub installs into the inside of the upper fuselage half. Though there were slight gaps between the cockpit tub walls and the canopy sill, the gaps are not visible with the canopy installed. 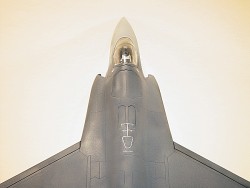 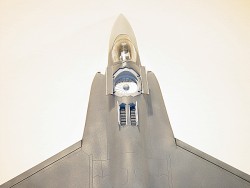
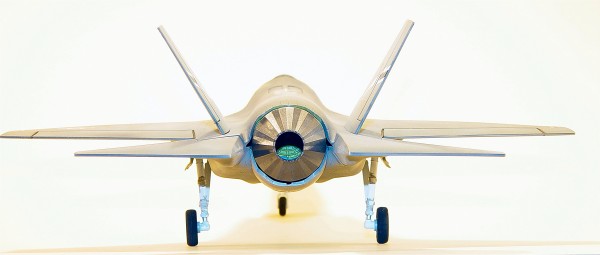
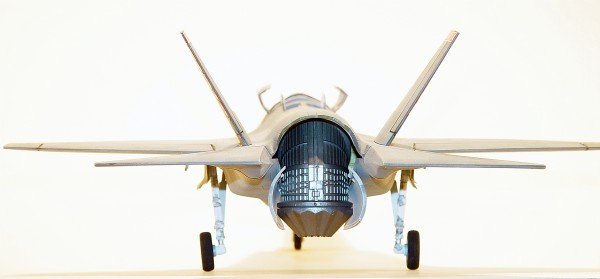
Assembly of the F-35A was very smooth. My concerns of having fit problems with posing the vertical fan duct doors closed were pleasantly unwarranted. After looking over photos of the X-35A, it was clear that the opening for the hover fan was faired over on that prototype and Panda Models represented that in this kit as well. Likewise, posing the hover fan doors open on the F-35B was also trouble-free. 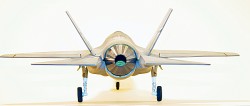 
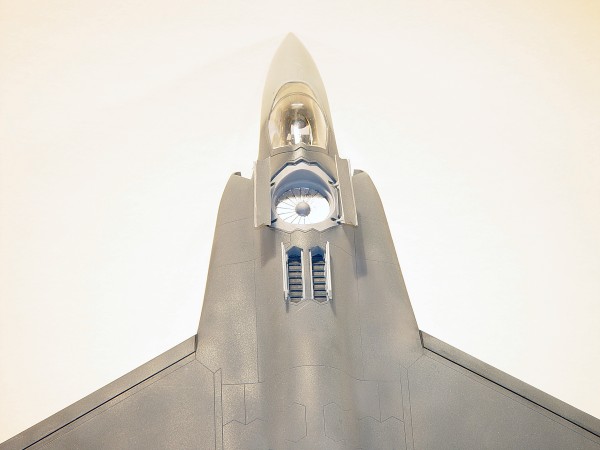
Given the limited number of parts in reach of these kits, assembly was fast and surprisingly pleasant. There were no fit problems anywhere in these models. The one challenge (in my mind) was going to be the three-part main landing gear doors. I honestly don't understand why the actual aircraft has three doors for the same landing gear well, all hinged adjacent to one another. Given that, however, it occurred to me that it would be simpler to glue the three doors together (since they're posed that way) and install them as one part. The trick worked flawlessly. 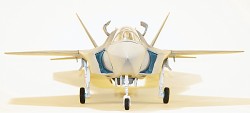 Only a few seams had extremely minor areas to be filled, and these were dealt with using Mr. Surfacer 500. Squadron Green Stuff dissolved in Testors Liquid Cement will do the same thing. There was only one last issue to resolve - the canopy. Luckily, before I installed the canopy, I happened to notice that the X-35 has a fixed windscreen and a side-opening canopy. The Panda kit portrays the canopy as a one-piece affair a la F-22. Since the model was going to be posed canopy-closed anyway, the simple solution was to paint a canopy bow in the right spot. I used Chart-Pak tape to represent the canopy bow on the canopy transparency. I then used Scotch Magic Tape to mask the canopy and a new X-Acto blade to remove the Scotch tape from the canopy frame and the canopy bow. With the canopy bow cut from the mask, I removed the Chart Pak tape and all of the canopy framing was ready for paint. Only a few seams had extremely minor areas to be filled, and these were dealt with using Mr. Surfacer 500. Squadron Green Stuff dissolved in Testors Liquid Cement will do the same thing. There was only one last issue to resolve - the canopy. Luckily, before I installed the canopy, I happened to notice that the X-35 has a fixed windscreen and a side-opening canopy. The Panda kit portrays the canopy as a one-piece affair a la F-22. Since the model was going to be posed canopy-closed anyway, the simple solution was to paint a canopy bow in the right spot. I used Chart-Pak tape to represent the canopy bow on the canopy transparency. I then used Scotch Magic Tape to mask the canopy and a new X-Acto blade to remove the Scotch tape from the canopy frame and the canopy bow. With the canopy bow cut from the mask, I removed the Chart Pak tape and all of the canopy framing was ready for paint.
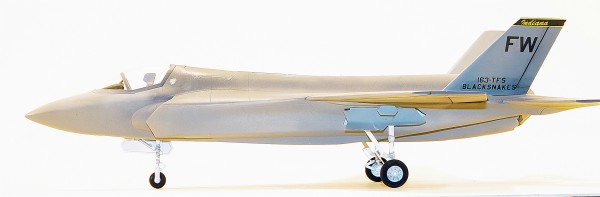
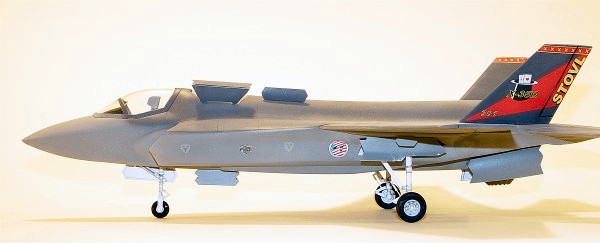
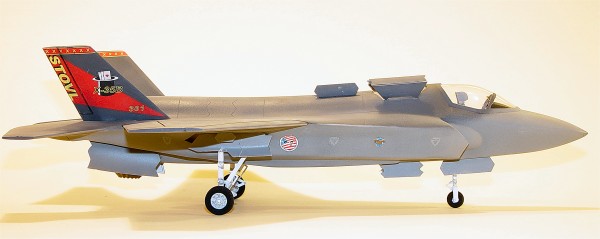
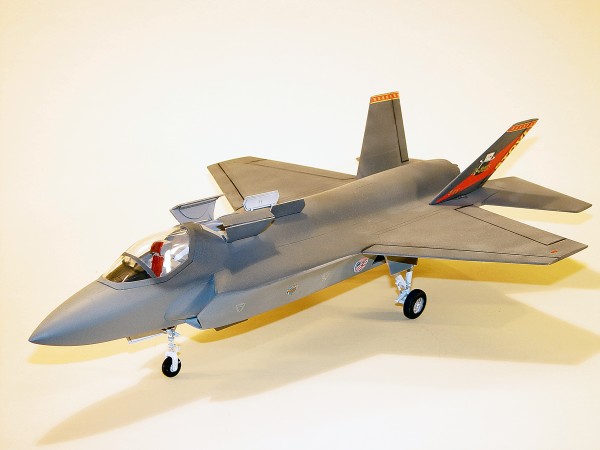
Painting and Marking The F-35A kit comes with markings for the X-35A prototype and a notional Misawa AB scheme. The F-35B kit comes with the cooler X-35B prototype markings and a notional USMC F-35B scheme. 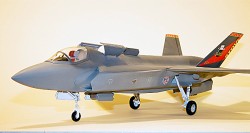 I painted the airframe and canopy with Neutral gray. This was followed by a coat of Gunship Gray on the upper surfaces, similar to the new F-16 two-color paint scheme. Both X-35s had the darker gray on their vertical stabilizers. Since I wanted to use the distinctive X-35B markings on my hover bird, I painted the vertical stabs according to instructions. The Air Force X/F-35 markings were rather dull, so I opted for a little poetic license and chose markings from my decal stash for the 122 FW of the Indiana ANG. This required the F-35A vertical stabs to be painted the lighter gray, just like the F-16. I painted the airframe and canopy with Neutral gray. This was followed by a coat of Gunship Gray on the upper surfaces, similar to the new F-16 two-color paint scheme. Both X-35s had the darker gray on their vertical stabilizers. Since I wanted to use the distinctive X-35B markings on my hover bird, I painted the vertical stabs according to instructions. The Air Force X/F-35 markings were rather dull, so I opted for a little poetic license and chose markings from my decal stash for the 122 FW of the Indiana ANG. This required the F-35A vertical stabs to be painted the lighter gray, just like the F-16.
Here was where I had the one and only problem with the Panda kits. The kit-supplied decals are hard and brittle. It took copious amounts of Solvaset to get their attention, but the decals are very brittle and would snap for just about any reason. Unless you're also wanting to use the distinctive X-35B markings, my suggestion is to dispose of the kit decals and use markings from an aftermarket set. Conclusion This was a really fun project. Assembly was easy and almost gap-free. If someone releases an aftermarket cockpit and weapons bay for this kit, it will build into a stunning addition to the modern flightline. Even so, as you can see from the photos, the kit builds beautifully straight from the box. Given the limited complexity of the kit and the outstanding retail price, I recommend this kit to anyone! Oh yes, if you're wondering why I didn't provide any in-progress shots of these models, I was having so much fun with them that it didn't even occur to me to photograph the construction until it was almost done.
| 


|