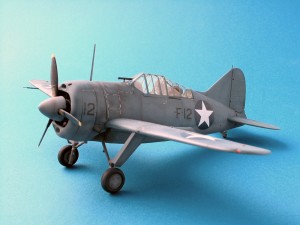
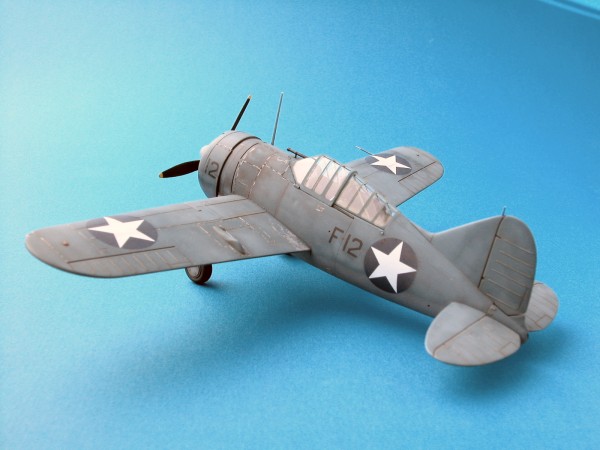
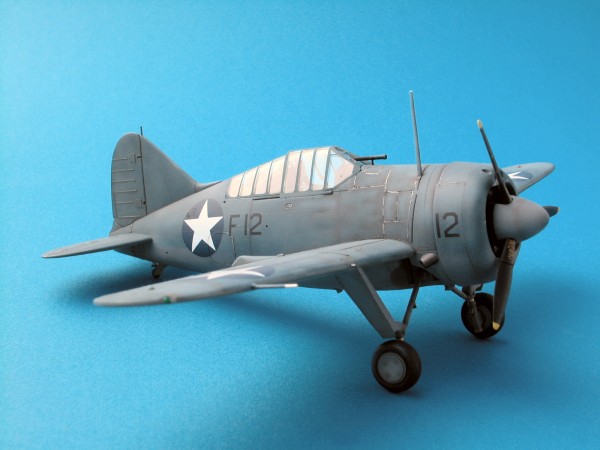
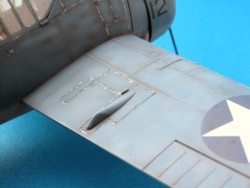
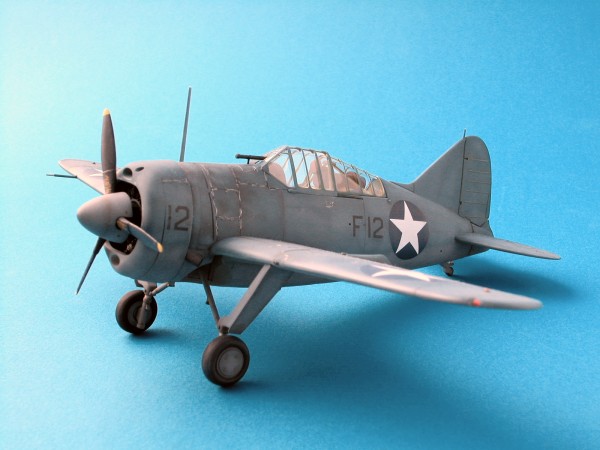
Tamiya 1/48 Brewster F2A-2 BuffaloBy Dave Manter |
 |
History
 Designed
in 1936, the Buffalo was the US Navy’s first monoplane carrier fighter.
Delivery to the Navy started in June of 1939. VF-3 aboard the USS Saratoga
became the first Navy squadron to be equipped with monoplanes. Shortly
after that Brewster began to equip the Buffalo with a more powerful engine
(F2A-2). Many countries used the Buffalo early in the war and the fighter
was able to give a good accounting of its self in the hands of a capable
pilot. British, Australian, Dutch and Finnish all produced Aces with the
Buffalo. The Japanese pilots that encountered the Buffalo referred to
it as the “Flying Beer- Barrel” due to its short and stubby
airframe. The US Marines put several Buffalos in the air at the famous
battle of Midway and while most of them where shot down they were fighting
against overwhelming odds.
Designed
in 1936, the Buffalo was the US Navy’s first monoplane carrier fighter.
Delivery to the Navy started in June of 1939. VF-3 aboard the USS Saratoga
became the first Navy squadron to be equipped with monoplanes. Shortly
after that Brewster began to equip the Buffalo with a more powerful engine
(F2A-2). Many countries used the Buffalo early in the war and the fighter
was able to give a good accounting of its self in the hands of a capable
pilot. British, Australian, Dutch and Finnish all produced Aces with the
Buffalo. The Japanese pilots that encountered the Buffalo referred to
it as the “Flying Beer- Barrel” due to its short and stubby
airframe. The US Marines put several Buffalos in the air at the famous
battle of Midway and while most of them where shot down they were fighting
against overwhelming odds.
Construction
 Before
I began construction of this kit I had decided to build it “out
of the box” for a nice change of pace. I wanted to do a “quick
build” without worrying about photo etch or resin detail sets! If
you find yourself in a modeling rut try this out! It really works! This
kit dates back to the early 1970’s and features both raised details
and recessed panel lines. I had wanted to try out my current painting
methods on a kit with raised panel lines for some time anyway. Assembly
began with the cockpit and I found the fit very good. I painted as I went
along.
Before
I began construction of this kit I had decided to build it “out
of the box” for a nice change of pace. I wanted to do a “quick
build” without worrying about photo etch or resin detail sets! If
you find yourself in a modeling rut try this out! It really works! This
kit dates back to the early 1970’s and features both raised details
and recessed panel lines. I had wanted to try out my current painting
methods on a kit with raised panel lines for some time anyway. Assembly
began with the cockpit and I found the fit very good. I painted as I went
along.
 Once
the cockpit was painted and assembled I glued the fuselage halves together
and set them aside. The next step was the assembly of the wings and again
I found the fit quite nice. The landing gear was next, but I left these
off until the main painting was finished. The wings and the tail feathers
were assembled to the fuselage next and the wing joints were pretty good,
requiring only a small amount of filler. Once all of the joints were sanded,
I masked off the canopy with Eduards Express Mask and attached it with
white glue to the fuselage. The main airframe was now ready for painting.
Once
the cockpit was painted and assembled I glued the fuselage halves together
and set them aside. The next step was the assembly of the wings and again
I found the fit quite nice. The landing gear was next, but I left these
off until the main painting was finished. The wings and the tail feathers
were assembled to the fuselage next and the wing joints were pretty good,
requiring only a small amount of filler. Once all of the joints were sanded,
I masked off the canopy with Eduards Express Mask and attached it with
white glue to the fuselage. The main airframe was now ready for painting.

Painting
 I
first painted the bottom of the aircraft with Tamiya Neutral Gray. The
landing gear struts and the propeller hub were also painting at this time.
The top of the airframe was then painted Tamiya Intermediate Blue. The
top color was then lightened with white and sprayed over the center of
all the panels for a faded look. The same technique was also used on the
bottom of the aircraft. While this was drying I mixed up a small amount
of black and sprayed the prop and the wheels. The next step was to apply
a very this wash of black to the entire airframe. This helps blend the
paint out so it does not have too much contrast between the base coat
and the fade coat. Once this had dried, I applied a “pin wash”
of Van Dyke Brown to the entire aircraft. This adds a nice dirty look
to the aircraft. I then mixed up a thin mixture of Tamiya German Gray
and sprayed it around all of the engine access panels.
I
first painted the bottom of the aircraft with Tamiya Neutral Gray. The
landing gear struts and the propeller hub were also painting at this time.
The top of the airframe was then painted Tamiya Intermediate Blue. The
top color was then lightened with white and sprayed over the center of
all the panels for a faded look. The same technique was also used on the
bottom of the aircraft. While this was drying I mixed up a small amount
of black and sprayed the prop and the wheels. The next step was to apply
a very this wash of black to the entire airframe. This helps blend the
paint out so it does not have too much contrast between the base coat
and the fade coat. Once this had dried, I applied a “pin wash”
of Van Dyke Brown to the entire aircraft. This adds a nice dirty look
to the aircraft. I then mixed up a thin mixture of Tamiya German Gray
and sprayed it around all of the engine access panels.

 The
Wright Cyclone engines were notorious for throwing oil everywhere and
I wanted to convey this. After allowing all of this to dry over night,
I dry brushed a light blue over the upper surfaces to add a highlight
to the raised areas. The final step was to use an artist silver pencil
to apply some paint chips around access panels and such. The landing gear
and the prop where added next and weathered accordingly. Several coats
of Future were sprayed in the areas where the decals were to be applied.
After drying over night the decals were applied and several coats of Micro
Sol were used to snuggle the decals around the surface details. After
drying the decals were weathered to blend them into the aircraft. A final
flat coat was applied to even out the overall finish.
The
Wright Cyclone engines were notorious for throwing oil everywhere and
I wanted to convey this. After allowing all of this to dry over night,
I dry brushed a light blue over the upper surfaces to add a highlight
to the raised areas. The final step was to use an artist silver pencil
to apply some paint chips around access panels and such. The landing gear
and the prop where added next and weathered accordingly. Several coats
of Future were sprayed in the areas where the decals were to be applied.
After drying over night the decals were applied and several coats of Micro
Sol were used to snuggle the decals around the surface details. After
drying the decals were weathered to blend them into the aircraft. A final
flat coat was applied to even out the overall finish.
Conclusion
If you find yourself struggling to finish a project because of the
complexity of some of the recent kits, not to mention super detailing,
resin conversions, etc., etc., try doing a “quick build”.
Grab an older kit, the Tamiya stuff is great, and put it together. Don’t
worry if the fuselage is a scale inch to long, don’t worry if you
can’t find the exact shade of gray, just build and paint it. Enjoy
it, finish it! I had a great time with this one!

![]()


