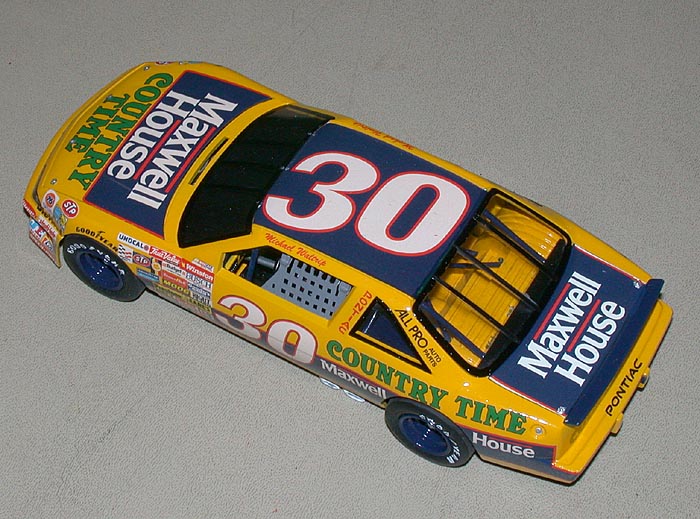
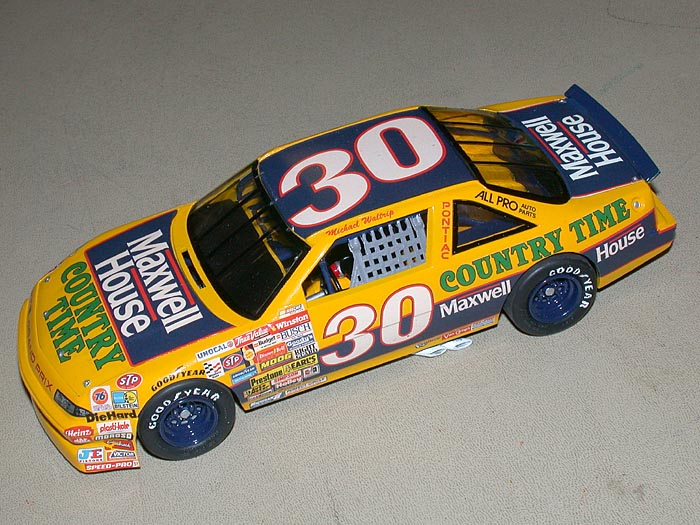
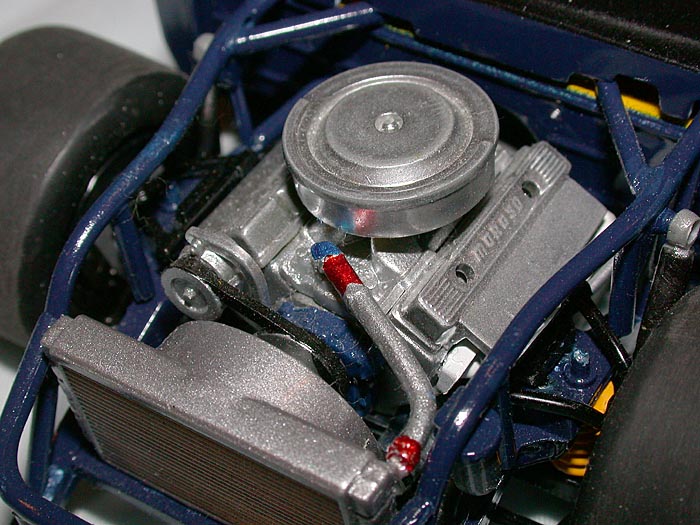
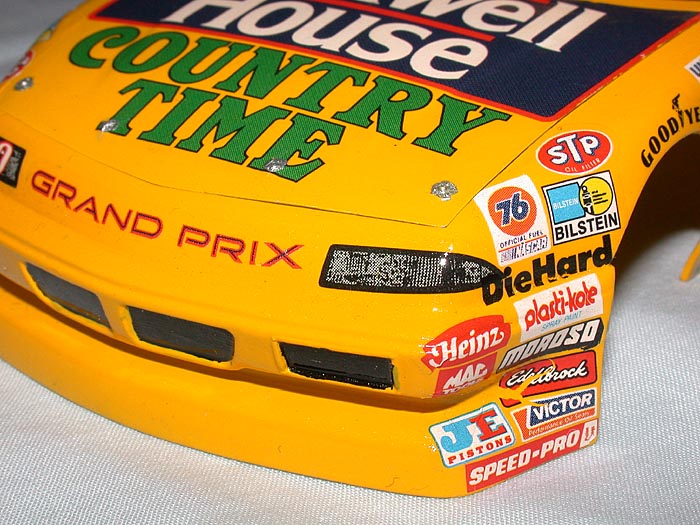
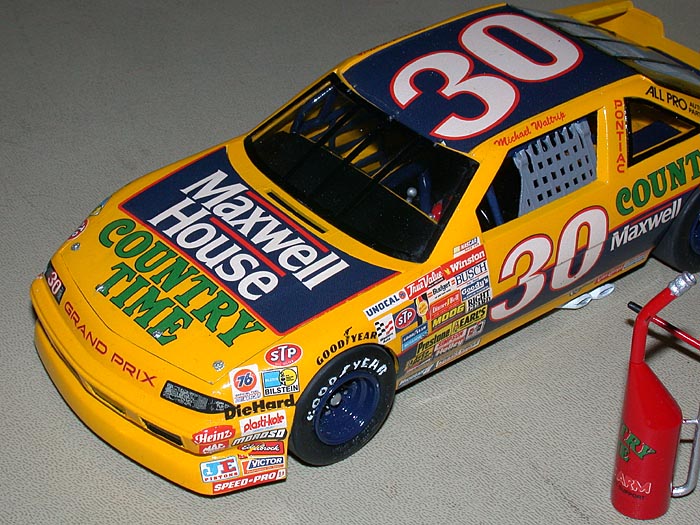
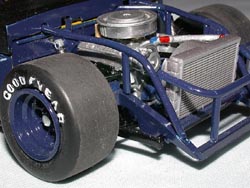
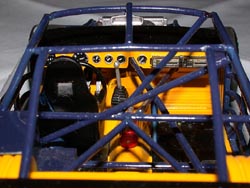
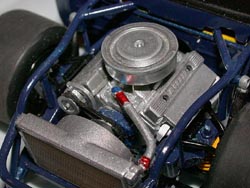
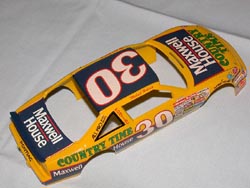
Country Time-Maxwell House Pontiac | 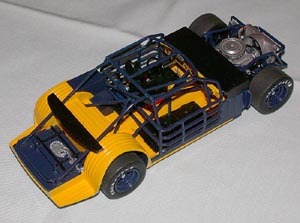 | Overview The Country Time-Maxwell House Pontiac Grand Prix was owned by the Bahari Racing Team and driven by Michael Waltrip during the 1990 NASCAR racing season. It was powered by a 358 cu. small-block V-8 with a single four-barrel carburetor. I built this kit for a model building class that I taught last spring at Sylvester Middle School in Burien, Washington. I normally build 1/72nd and 1/48th scale World War II planes but my students preferred building car models. We agreed that I would build a car to demonstrate some model-building techniques that I have learned from master modelers such as the late Ted Holowchuk, who gave me this kit specifically for the class. The Kit The kit is composed of sixty-four well-molded parts. Twelve of these, including the wheels, are chrome and six parts are clear. The rest are medium gray in color. Included are a jack and gas can, which are thoughtful touches. The instructions are clearly printed and divided into 11 stages. The decal sheet contains 27 decals. Accuracy I build planes 99.9% of the time; this was the first car kit that Ive ever built. It had an engine, four wheels, steering wheel, seat and body. It looks like a car to me! Builders who want to verify the kits accuracy can doubtless find information on this car on the Internet. Construction I began by stripping the chrome from the chrome parts using oven cleaner, a trick that I learned from my sixteen year-old son Miles, who knows a lot more about building car models than me. The chrome pieces did not look realistic and some of them, such as the wheels, were supposed to be painted. Ive learned the hard way that paint doesnt adhere very well to chrome. I followed the instructions exactly and began building the engine, which although simple to build did not fit especially well. This was a constant theme throughout the models construction: the parts just didnt fit that well, certainly not as well as some of the newer car kits that Miles and I have built together. Eagleeyed readers will notice the oil breathers missing from the port side valve cover (oops, thats airplane nomenclature creeping in-I mean the drivers side); those disappeared early in construction and were presumably devoured by the carpet. After the engine was assembled it was installed in the chassis, which had been pre-painted gloss yellow, gloss blue and flat black as per the instructions. I used Tamiya and Gunze Sangyo acrylic paints throughout the project with the exception of Testors Chrome Silver enamel on the air cleaner and valve covers. I have yet to find an acrylic chrome paint that looks as good. Most airplane kit instructions have Federal Standard paint numbers on them to check against ones stock of paint so it was a bit of a shock to realize that I would have to custom mix blue paint for the chassis and wheels to match the decals. I mixed Tamiyas X-4 Blue and X-7 Red at an approximately 4:1 ratio. After installing the engine construction was very rapid and was only slowed down by the poor fit of parts such as the radiator, steering column and roll cage. The cockpit (oops, there I go again-interior) although somewhat simplified looked pretty good. Miles told me that the definitive method of building roll cages is to assemble them separately from the chassis and then attach the cage but I did not learn this until after Id painstakingly attached one roll cage piece to the chassis at a time. Next I installed the front and rear suspensions and then the wheels and tires. I felt that the instructions were rather vague on the installation of these subassemblies and that their location and subsequent alignment were far from exact. After the chassis was completed I turned my attention to the body which I primed with Gunzes Mr. Surfacer 1000. I filled the seams between the front spoiler and body with Mr. Surfacer 500. These primers of two different viscosities can be hard to find and should be thinned with acrylic lacquer thinners such as Gunzes own Mr. Color Thinner or PPG Duracryl 876 which is available at auto paint stores. I use these products on my plane models and they worked well on the car body. The Mr.Surfacer 1000 is used as a primer and the 500 is used as a brush-on seam filler which I use instead of putty. After seam cleanups I gave the body one coat of Tamiya XF-2 Flat White and then 3 coats of X-8 Lemon Yellow which I allowed to dry approximately one week. I thin Tamiya flat paints with 99% isopropyl alcohol and their gloss paints with Tamiya thinner. These paints spray extremely well through my Paasche H airbrush at about 35 psi, which may be a higher pressure than some modelers use but works well for me. Next I applied the decals. These went on easily, with the exception of the decal that fits between the rear bumper bars and the one that was supposed to fit over the front spoiler. I say supposed to, because I lost this decal when it tore into many small and unsalvageable pieces. In retrospect I should have cut it into several easy to manage parts and applied each separately and then I could have touched up any gaps with paint. I undercoated the trunk lid with white paint as an experiment because I had reservations about the opacity of the white areas of the decals. My fears were confirmed when I compared the trunk lid with the roof and hood: the decals were pink rather than white. Live and learn! I used Microscales Microset and Microsol decal setting solutions, which helped the decals snuggle over the sides of the body and around the spoiler. After the decals had dried overnight I wiped them with a q-tip moistened with water, let them air dry and gloss coated the body with Tamiya X-22 clear gloss. Miles pointed out that sponsors stickers are applied after the body has been painted and that their sheen contrasts with that of the body (I found my sons input helpful through the project; modelers who have such experts resident in their homes should count their blessings) so I only gave the body 2 thin clear coats rather than burying the decals under multiple coats which was my gut instinct. After the body had dried overnight I installed the fuel filler and vent tube in the trunk and then the side, front and rear windows. I first tried painting the window frames by hand but excess caffeine intake ruined my best attempts. I discussed my painting woes with fellow IMPS/Seattle member Carl Kitske, who recommended that I mask the windows with Tamiya tape (thanks, Carl) which worked pretty well. I installed the windows with Testors Clear Parts Cement. After the windows were installed my first car model was complete. | 


 Ted Holowchuck's Inspection Ted Holowchuck's Inspection

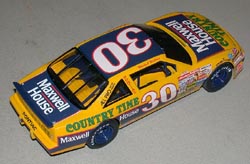
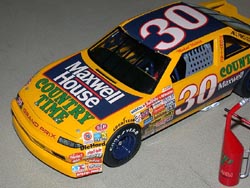
| Conclusion The AMT/Ertl Country Time-Maxwell House Grand Prix kit is quite an attractive car that is let down only by less than stellar fit and translucent decals. I now understand the appeal of the very colorful NASCAR racers among car builders, and I already have another racer in mind. It was a new experience to build a car kit and I was very surprised at how long the thing took to paint, let alone build. Using gloss paints was a welcome departure from the flat paints I normally use-although I now see why some modelers dread them! I enjoyed the experience enough to buy several more car kits (a mere drop in the proverbial bucket compared to how many airplane kits I have of course) and I look forward to building them-and writing about the experience here at Internet Modeler. | 


|