Revell '67 Plymouth GTXJerry Sims |  |
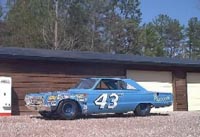
King Richard's Battle Chariot
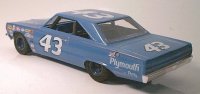 Way back in the "old days" of 1967 there was none of this stuff about who was the greatest like there is today. Even we diehard Ford fans had to face facts. Twenty-seven wins in the season, with ten of them in a row, didn't leave much room for argument as far as royalty was concerned. For everybody but a Petty fan that was the bad news for the '67 season. Now for some good news - if you want to build a model stock car racer from that time period or earlier it's not as hard as you thought it would be.
DEBUNKING THE "MONOGRAM STOCK CAR MYTH"
 One of the worst things, in my opinion, that Monogram did to modelers without a vintage racing background that wanted to build the older race cars was to release the street version of the Monte Carlo SS. Based on some of the questions I see in the magazines and the ones I am asked personally, it has led most of the "rookie" builders to think that the older cars were as completely different from their street counterparts as this Monte Carlo is from its oval track counterpart. Not only do the newer cars not share chassis components, but also have completely different body shells as well. The good news for the builder of the older race cars is that prior to the late 60s and even early seventies it just wasn't that way. To drive home that point, I have a few parts off a mid-sixties Grand National (now Winston Cup) racing Galaxie on my real '64 Galaxie street car that bolted in the same holes as the old parts I took off. Fact is, about the only things you need to add on your models are wheels, tires and roll bars as most everything else that was changed were in the engine and other internal parts and won't show. The real changes are of the "throw everything that doesn't look like a race car away and start building from there" kind.
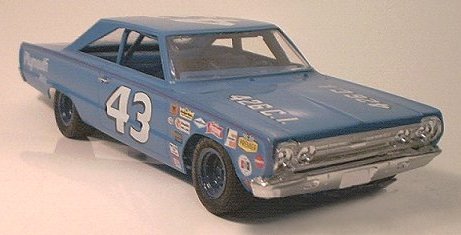
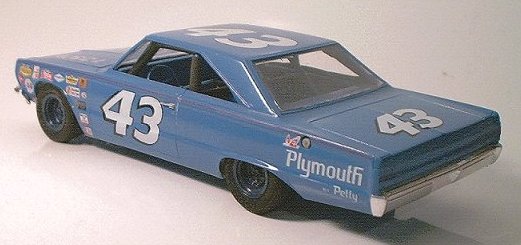
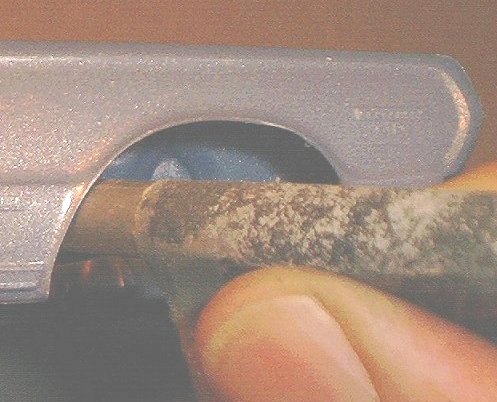
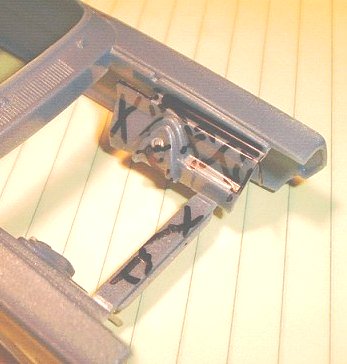
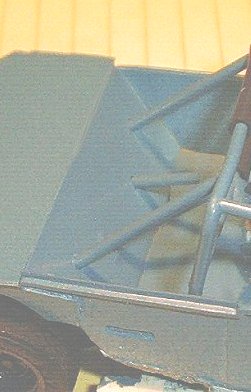
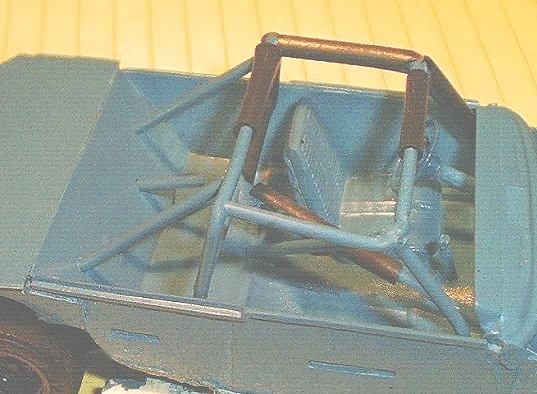
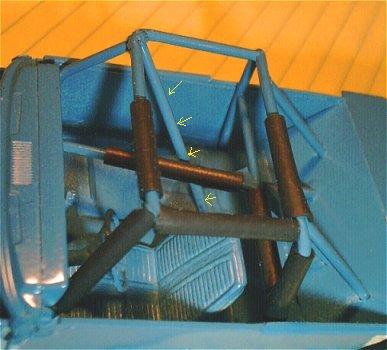
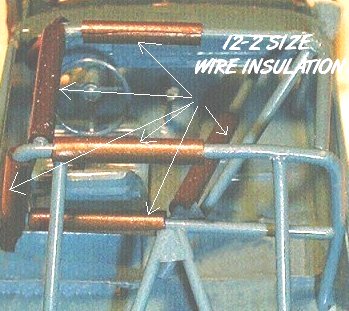
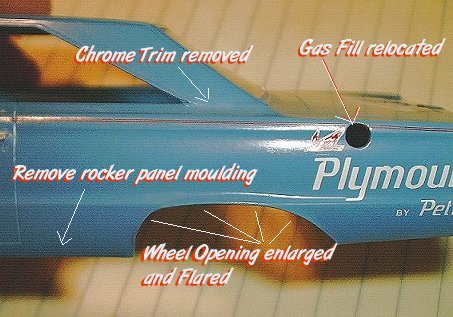
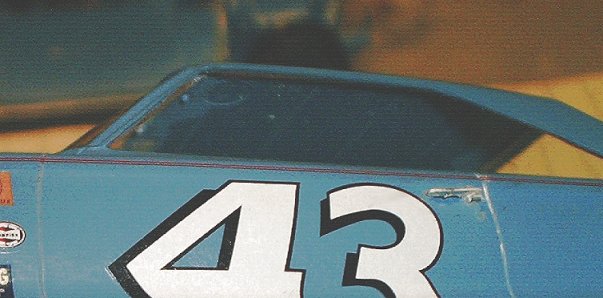
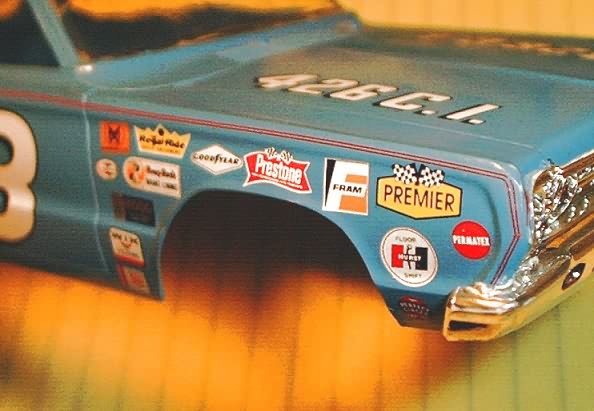
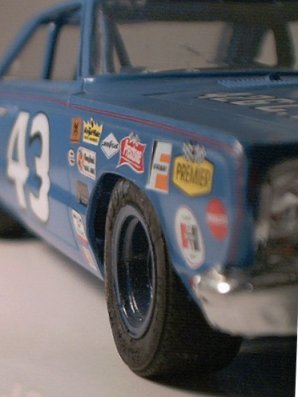
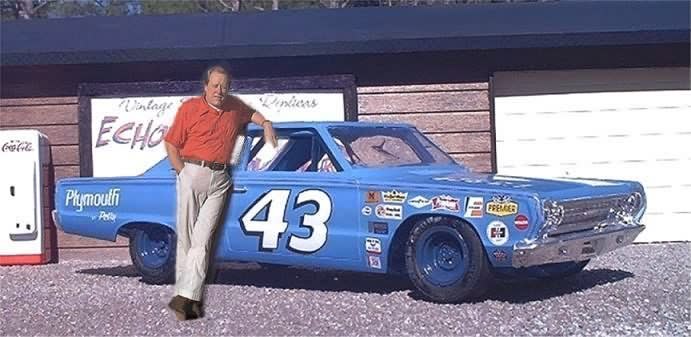
"HOW TO BUILD A VINTAGE STOCK CAR 101"Let me begin by saying I am not an expert nor historian. I am a FAN, although a VERY long time one, and as such will make changes from time to time in the cars for the following reasons.1. Sometimes I get lazy and just don't want to add all the details that don't show precisely because they don't show. I use my models as photo props a lot and would rather have them sturdier than what a true scale chassis would be.2. I don't get all caught up in replicating what a picture shows because it probably was different the very next time the car raced. They were mostly hand lettered in those days and the sign man may not have remembered exactly what he did the last time. Also the cars were sometimes only lettered with the driver's name and numbers leaving the fenders blank. This was done because some of the teams picked up local one-race-only sponsors to help with the bills. I have pics of even the mighty Dodge Daytonas done this way with local Dodge dealers names added on a one-race deal.3. The most noticeable change is that sometimes I will make changes in the lettering or numbers that are different from the postcards or available decals. Usually it is just a preference for an obscure lettering style that maybe only ran one race. I guess my most blatant one is my Junior Johnson '64 Ford that is "almost" lettered like the movie car from "Redline 7000" because I hadn't seen the movie in a while when I did the car. Also, I hated the actual car's number style. And it's still one of my favorites - go figure.FIRE UP THE TORCHESAbout half the cost of building a stock car used to be welding rods and paying the guys who used them. You won't have to go back and re-weld all the factory seams and full length weld all the spot welds like they did in '67 but it's still as much trouble to sand off all the body trim that they could just pop off with a screwdriver so you're about even on that.Carefully sand off all the molded on factory emblems and rocker panel trim, being careful not to change the contour of the body. Remove the wheel lip moldings by sanding from the inner edges so that removal will enlarge the wheel openings, (Photo 1).Moving to the rear quarter panels, continue the removal of the rocker panel trim and use the same technique for the wheel lip trim as on the front, (Photo 2). The more advanced modelers (along with the "Smokey Yunicks" and "Ralph Moodys" among us) may want to trim the wheel openings a little more and relocate the wheel openings just a teensy bit toward the front of the car. Just a little handling improvement that some of the "sharper readers of the rule book" would try for better handling.A tip for the more advanced builders is to wrap a #1 X-Acto handle with coarse sandpaper and sand the body thin at the wheel openings from the inside, (Photo 3). Next, remove the sandpaper and take the bare handle and slide it back and forth in the opening at about a 45-70 degree angle to the side of the body while pulling outward. As the plastic heats up from the friction it will soften and start to flare the fender opening. Trim and flair until you get the fit you want by comparing frequently with the tire you are using. This has a plus side in that it uses no putty to shrink or crack later on and is exactly the way the "big boys" did it so it looks right.I never use opening hoods because they are too easy for me to lose. Besides, it took a hefty protest fee to raise a hood even in those days. But if you are doing a full detail build, the inner fenders were starting to be removed along about this time. I think the fact that the Galaxie front snout didn't match the Ford intermediate's inner fenders made them one of, if not, the first to be done this way. Cut away the parts marked with X's and add a "front loop" and shock mounts like on the newer Cup cars, (Photo 4). The Polar Lights Torino/Cyclone chassis is a good reference but remember the Mopars ran torsion bar and not coil spring front ends. I haven't seen one yet, but the new PL Charger chassis should be very close to a drop-in with a little tweaking of the roll bars to fit the Plymouth's roofline.If you decide to model the Petty car completely from the Revell kit then one of the hardest parts will be to remove the rear seat and "sheet metal" the area, (Photo 5). First cut off the rear seat and package tray at the base of the rear seat at the ledge on the lower floor. Install the dash and side door panels to use as a guide for the rear firewall, package shelf and floor replacement. Cover the door panels in thin sheet plastic to replicate the sheet metal covers and use thicker plastic sheet to close in the rear of the passenger compartment.I usually build my own cages so they fit the body better than the "generic" ones. Here is my secret to painless roll cage construction, (Photos 6 through 8). First drill a hole in the floor pan at the dash and the rear of the door opening area on outer edge of each side. Bend an overly long length of tubing for the main bar that fits the inside of the roof area. Insert it in the holes in the center of the floor pan and put the pan in place in the body. Slide the bar up against the roof and glue it to the floor pan. Mark on the inside of the roof where the main bar is located and bend another "U" shaped bar that goes from the mark on the driver's side around the inside of the windshield area and back to the mark on the other side of the roof. Trim and glue this to the main bar already in place. Put the interior pan with bars back in the body and insert a piece of tubing with a gentle bend about an inch from the end into each hole in the dash area and glue to the bends in the roof loop. VIOLA! A perfect fit main cage that you can attach all the other bars to and fits like it was grown in there. The roll cage from the late '60's wasn't quite what the current cars run but was beginning to resemble them. One of the main differences here was that the doors still had to be operating units or at least removable with the hinges intact. Because of this, and the retention of roll-up windows, the door bars are straight and outside the door panel between the seat and door. This makes them visible between the seat - four on the driver's side and three on the passenger side.A very noticeable difference in a Petty roll cage of this era is the bar that comes from the top right of the windshield loop to the driver's seat area. On most other cars, it came back to the cross bar at the driver's shoulder height to meet with the bar that extended to the right front chassis area. On the Petty cars, it was longer and came down at a different angle and joined the floor level cross bar just behind the driver.The finishing touch to any roll cage, full size or model, is the padding. Make friends with someone who does electrical wiring and you will never have to buy any roll bar padding. Cut the insulation lengthwise from a piece of wire that matches your roll bar stock (usually 12-2) and pull it off. All you need to do is cut whatever length you need and open it up and place it on your bar. The plastic will close back up and you've got a padded roll cage just like the big boys.Now on to my favorite part of the building..."makeup and wardrobe"! Here's what the rear fender looks like after we've done all the modifications described in the earlier part of the build, (Photo 9). The rocker molding removal can be used to hide a little extra "roll under" on the body's rocker panels that contributes to a smaller frontal area, not that any stock car body man would do such a thing.The removal of the "weather-stripping" and trimaround the window opening on the side changes the whole "look" of the roof area, (Photo 10).Moving up to the front of the car with the enlarged wheel opening and flaring of the fender shown to good advantage, (Photo 13 & 14). It also shows how the big boys help pay the bills with all those small fender decals grouped around the wheel opening. Even in the late '60's it was getting pretty crowded there but every one represented money at the end of the race. Another of the "little things that make a difference" that I like to add is the negative camber on the right front wheel. This helps the tire get a better "bite" and makes the car turn better at the high speeds.Well, we've just about got to the point where we'd usually roll it out in the sun; take the pictures with the crew and family. Then we'd chain this monster down on the trailer and take it to a track to sic it on the nearest Ford. But to match the shots of the street car I tried something a little different for me. These are the first "studio shots" that I have taken of any of my cars so they aren't the best but I hope you enjoy them.I much prefer shooting my models in their "natural habitat" so to speak. Let me share these with you in closing and say that it has been a pleasure sharing my little corner of the modeling world with you.And in the words of a character in one on my all-time favorite movies, "Thunder Road", I'll leave you with this sincere invitation, "Come ag'in, come right frequent".Echoes of Thunder |
Photo 1
Photo 2
Photo 3
Photo 4
Photo 5
Photo 6
Photo 7
Photo 8
Photo 9
Photo 10
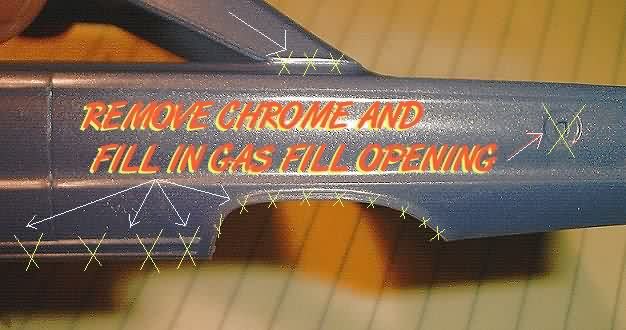
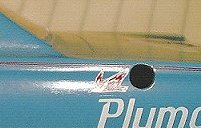
Photo 11: Here's a close-up of the relocation & reshaping of the gas filler opening.
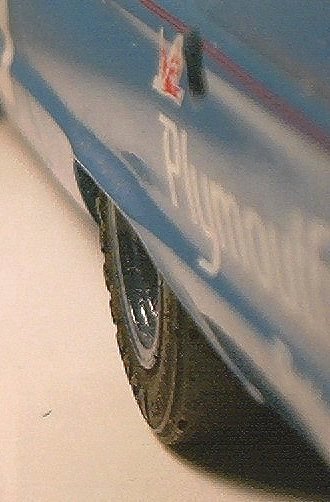
Photo 12: This shot of the reworked fender opening and the jacked out fender shows the difference between a stock CAR and a STOCK CAR.
Photo 13
Photo 14
Photo 15
Photo 16 |


![]()


