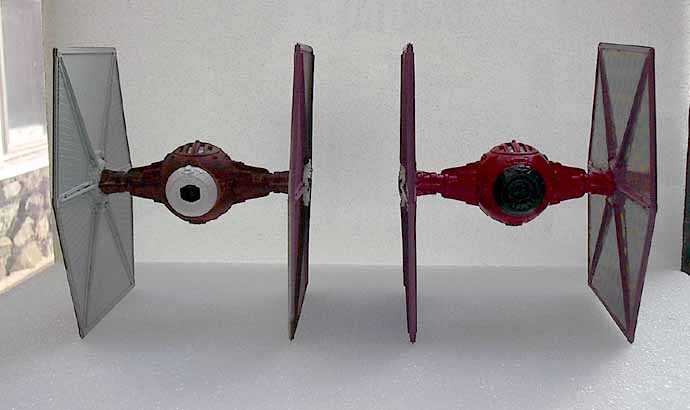
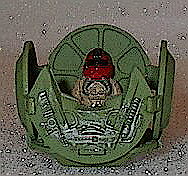
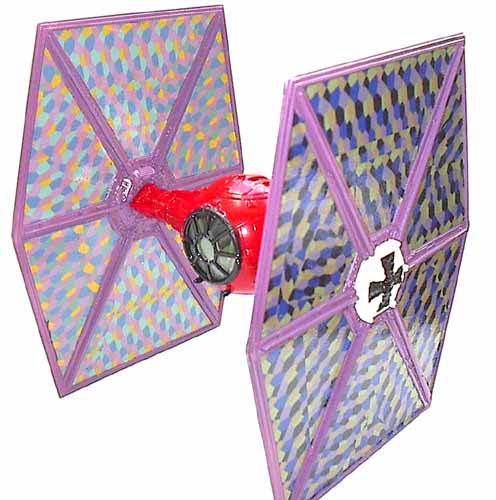
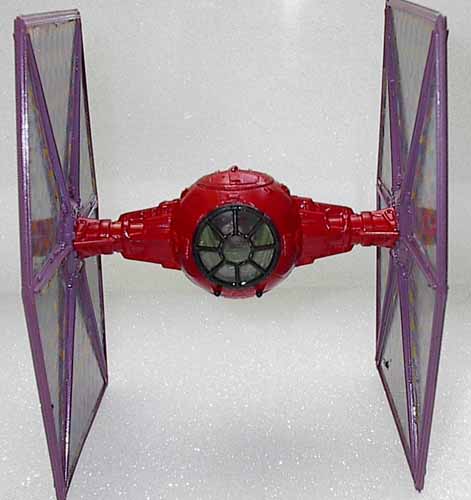
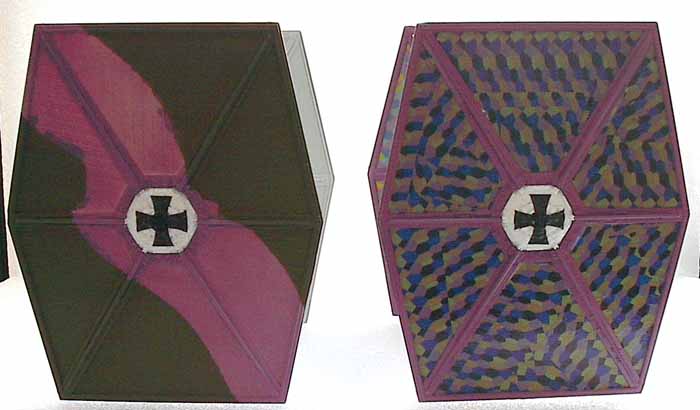
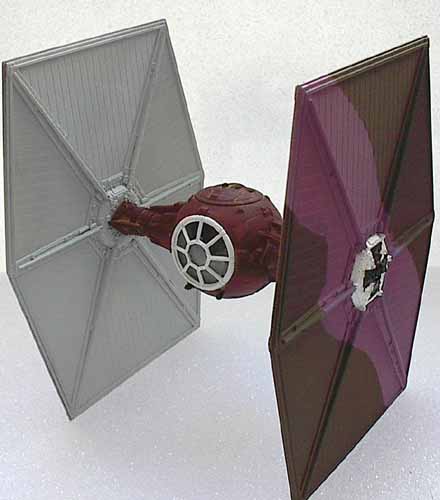
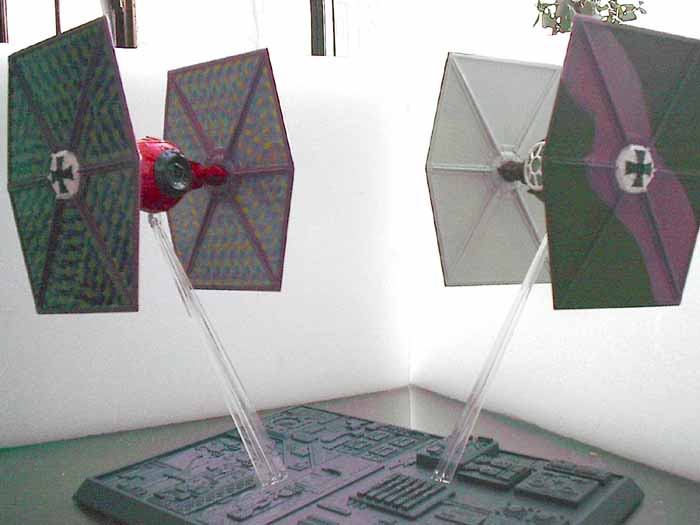
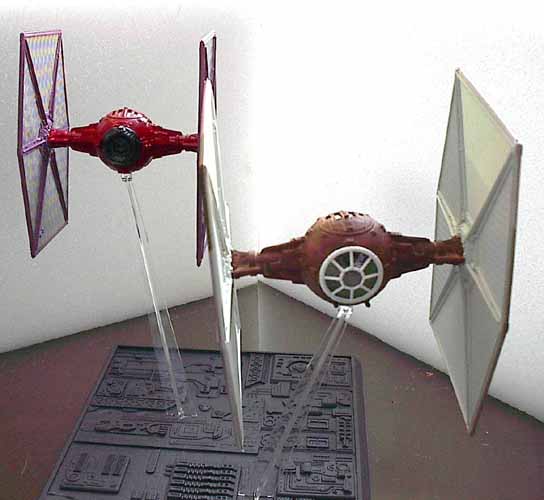
Building AMT-ERTL'S Imperial TIE Fighters | 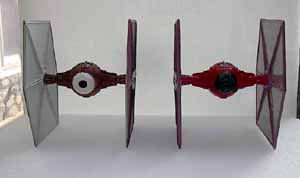 | INTRODUCTION Every once in awhile, you need a real break. Whether all you model is WW II aircraft, modern armor or high performance cars, there comes a point where you need to do something a little different. That's the mindset I was in when I looked at all the Star Wars kits my girlfriend has been working on. Apart from an occasional F4F Wildcat, all I model are WWI airplanes. The Dark Side's TIE Fighters seemed like an easy change - after all, they have two wings, even if they are vertical instead of horizontal. THE KIT: 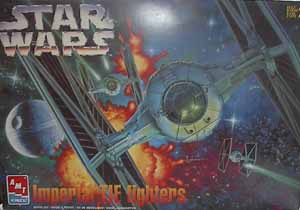 AMT-ERTL has a couple of kits with the Tie Fighters. I chose Kit # 8438, Imperial TIE Fighters. The kit came out in 1997 and comes with parts for two TIE Fighters and clear plastic to attach them to a Death Star base. The kit is molded in light gray plastic and has separately bagged clear plastic parts for the cockpit top hatch and front window. There are no decals provided in the kit. The parts are numbered. The instructions break things down into easily understandable sub-assemblies. Painting instructions are given in three ways. Small squares indicate the color, small triangles indicate flat or gloss finish, and small circles indicate light or dark shade. All of the color suggestions were irrelevant to me, based upon how I decided to do my TIE fighters. AMT-ERTL has a couple of kits with the Tie Fighters. I chose Kit # 8438, Imperial TIE Fighters. The kit came out in 1997 and comes with parts for two TIE Fighters and clear plastic to attach them to a Death Star base. The kit is molded in light gray plastic and has separately bagged clear plastic parts for the cockpit top hatch and front window. There are no decals provided in the kit. The parts are numbered. The instructions break things down into easily understandable sub-assemblies. Painting instructions are given in three ways. Small squares indicate the color, small triangles indicate flat or gloss finish, and small circles indicate light or dark shade. All of the color suggestions were irrelevant to me, based upon how I decided to do my TIE fighters. CONSTRUCTION: I hadn't built an AMT kit since I was a youngster. If this kit is any example of the fit for other AMT kits, they are real beauties. The parts all fit together without any problems. No filler was needed and I didn't have to sand any seams. The only problem I ran into was when I cut the pods from the sprues. The pods connect to the wings by way of a semicircle male/female join and a square plastic extension that slides into a corresponding hole. I cut away the square plastic extensions for one TIE fighter before I realized my mistake. Using both the square and semi-circle make for an easy alignment of the wings. Even after cutting off the squares on one TIE, the alignment still was pretty simple. Once the pod is attached to the wings, the connection point is nicely covered over by a solid plastic hatch cover. It covers any mistakes or sloppy gluing. Since these two TIEs were in German colors, I decided to paint the hatches all white and apply some German Crosses from the spares box. There are so many ridges and bumps on the hatch that a lot of Future was needed to get the decals to snuggle down. When they did, some gaps appeared. These were easily filled in with Model Master's Classic Black paint. The clear plastic parts for the front cockpit window on my kits both had a rather large scratch. I'm not sure if this is a design flaw or if I just got unlucky. Anyway, it turns out the scratch is hidden by the window framing, so no problem. I covered the clear plastic parts with Future prior to gluing them to their frames. I used a jeweler's glue called G-S Hypo Cement that won't fog the clear plastic. Remember to paint the interior and exterior of the window and hatch frames before gluing the clear parts. The cockpit interior is easy to put together. There is a fair amount of generic detail engraved on the side panels. The only real problem is that just about all of the detail is hidden once the cockpit hatch is down. Even when the hatch is left up very little detail is visible. The interior hatch connection is the only tricky fit in the kit. Use a slow setting glue so that you can be sure the hatch will open and close. The photos show the cockpits before the are covered up with the other half of the pod. It shouldn't be any major problem to light up the interior with a small light to show off the detailing. As far as accuracy goes "Hey, it's Sci-Fi!" Matthew Usher in 'A Galaxy Far Away' after way too many viewings of the movie, believes that there is a hexagonal window behind the pilot's head. The rear bulkhead has two engine exhausts where the window should be. I left it as is, but it should be a simple matter to add the rear window if you are afflicted with AMS. PAINTING & DECALS: OK, here's where I obviously went a little crazy. I decided not to go with the 'accurate' colors, but to paint the TIE fighters as if they were WWI fighters. Well, that is except for the cockpit. There I airbrushed Model Master's U.S. Interior Green. I decided to do one TIE with a red middle pod with lozenge wings and the other with a wood pod with mauve/green wings. I was able to paint the two pod halves on the Red TIE with Model Master's Guards Red prior to gluing them together; that's how good the fit is. For the Wood TIE, I glued the pod halves together first and then made certain to air brush the pod prior to adding the top hatch and front window.. The wood finish I was hoping to duplicate from my WWI models didn't turn out the way I wanted, so I opted for a mottled brown instead. The interior of the wings on the Wood TIE was air brushed using Model Master's Duck Egg Blue, The exterior of the wings was airbrushed using POLLY Scale German Mauve and Fokker Dark Green. For the Red TIE I decided to go with lozenge wings, after all that's what the Red Baron did with one of his Red Albatros fighters! I had previously collected lots of German Lozenge Five Color Day Scheme, upper and lower, that were put out by Super Scale. I have since switched to either Americal or Eagle Strike. That left me with a lot of unused lozenge. It takes about four strips to cover one side of one wing. That meant eight strips of upper lozenge for the outside of the wings and eight strips for the inside of the wings. I didn't use rib tapes, but the framework for the hexagonal wings, when painted Mauve, looks just fine. I painted the entire wing mauve, applied a coat of Future and then applied the lozenge decals. I made no effort to get the lozenge to go in any particular pattern, but the overall effect looks realistic enough. The last step is attaching the two TIEs to the Death Star base. I painted it Panzer Gray. There are two clear plastic shafts that are glued into the base. Test fit these first to get them going in the direction you want the TIE fighters located. The shafts shouldn't be glued to the TIEs to allow you to change directions, etc. if you get bored with the setup. CONCLUSION: I had a lot of fun with this project. It gave me a chance to relax and not worry about accuracy, sanding, putty, rigging, etc. On the World War I Modeling List we have a saying: Dicta Ira. It is shorthand for "Just have fun." I am certain that Yoda would agree it ranks right up there with "May the Force be with you." | 


|